What is a Vendor Account
Manatal's Vendor Account is a feature specifically designed for companies working with Recruitment, Employment or Staffing Agencies (Vendors) to collaborate with them on Manatal.
- Create multiple Vendors and provide them with limited access to your Vendor Portal.
- Share a specific jobs with each of your vendors.
- Vendors can submit candidates to shared jobs.
- Collaborate with your Vendors (file sharing & event scheduling).
- Track your Vendors' performance.
To use vendor management system, please activate the feature by following these instructions.
How to Create a Vendor Account
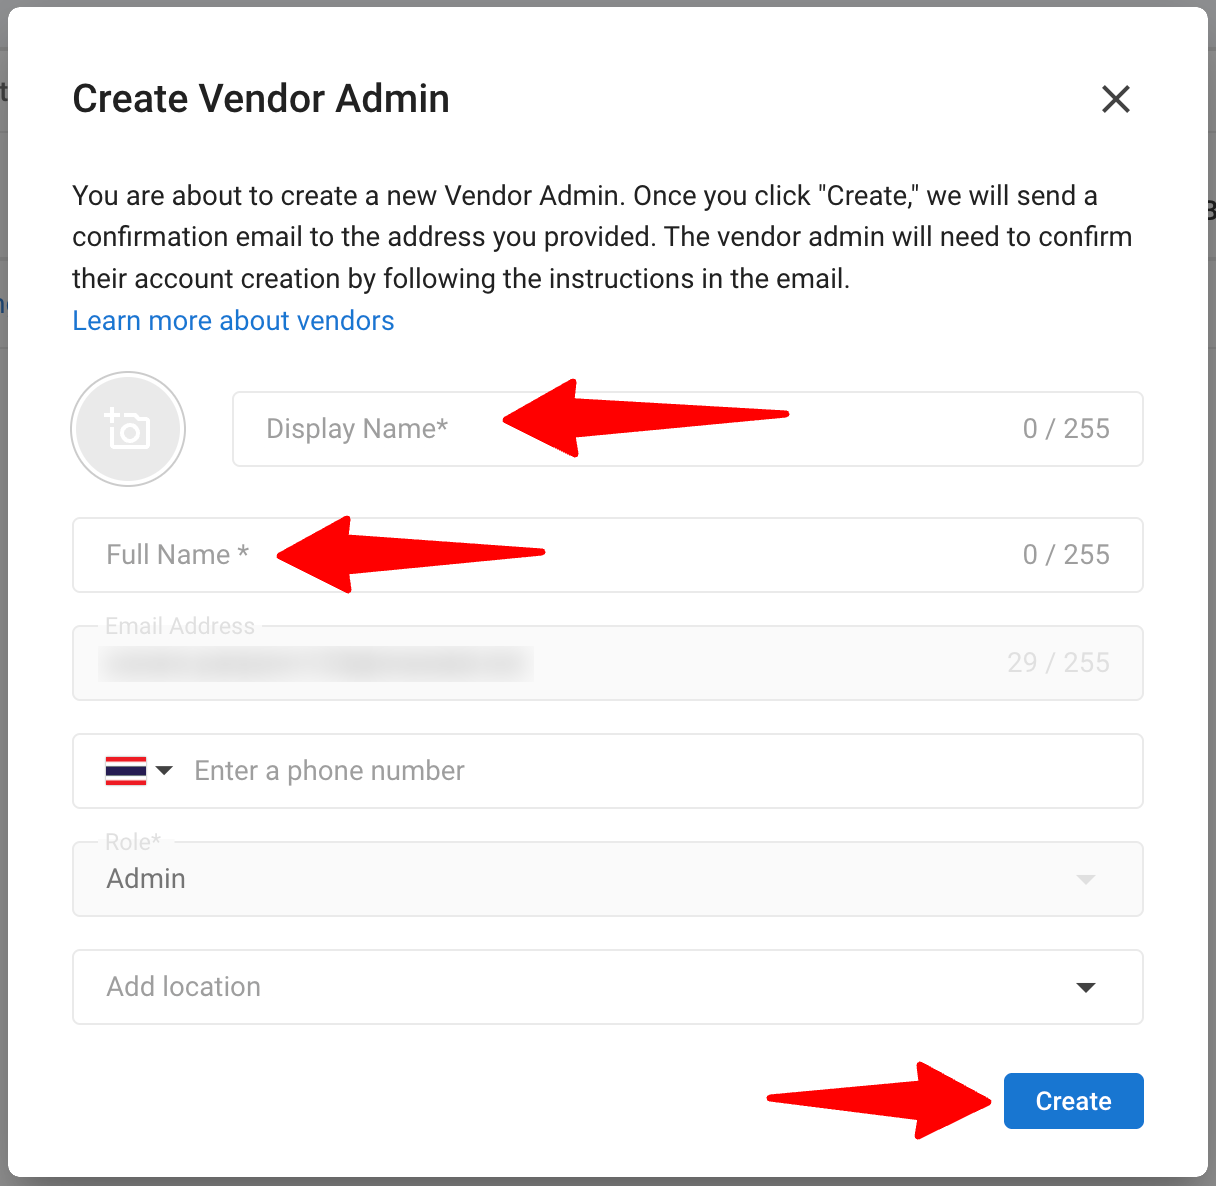
Upon the completion of creating a vendor account, you will be able to immediately add the designated vendor admin user associated with that account.
Each vendor account can have only one vendor admin.
Here are the steps to create a Vendor Account:
-
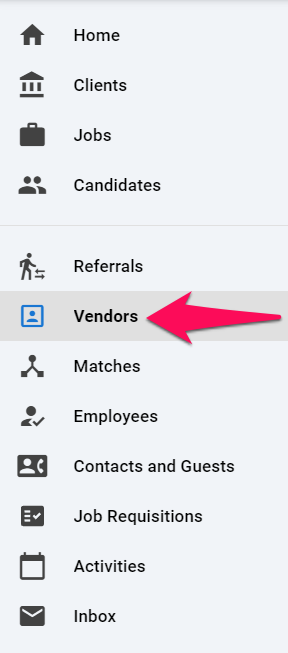
Click on the "Vendors" icon on the side menu.
-
Click on the "+".

-
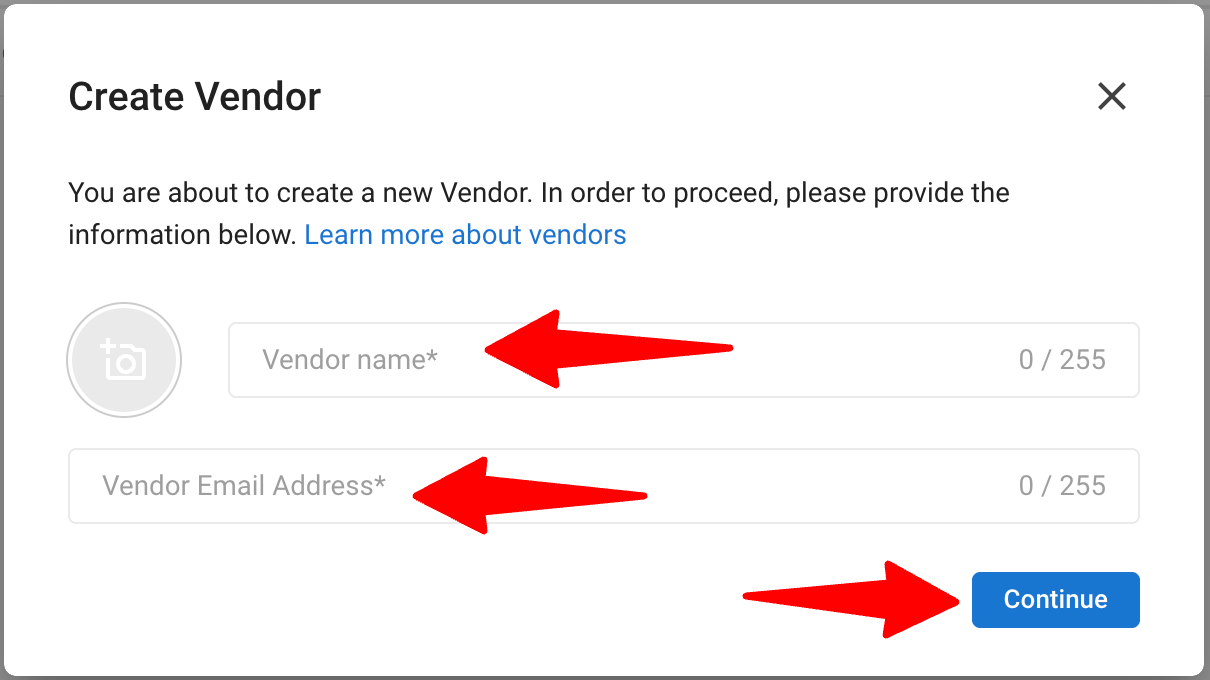
Fill in the fields, add a logo if desired and click "Continue".
-
Fill in the fields and click "Create" to create and invite your vendor admin user to join Manatal. An invitation email will be automatically sent to your vendor.
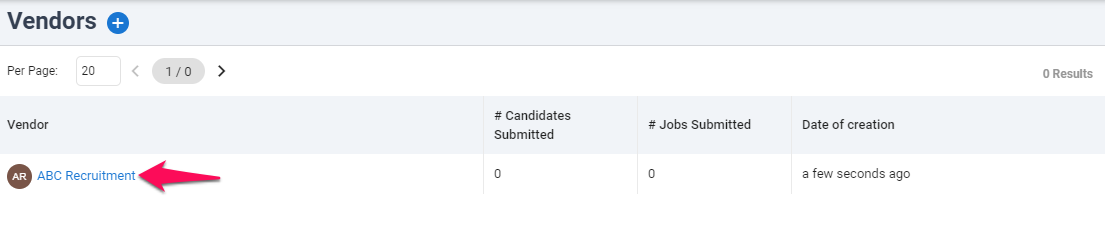
Once your vendor has been invited, they will be able to access the Vendor Portal, set up their account, invite other users from their company and work on the jobs you assign them. You can share this article with your vendor. It contains everything your vendors need to know to collaborate with you on Manatal.
LEGACY: If a vendor account was created without an assigned vendor admin, you can add one later. Each vendor account can have only one vendor admin user.
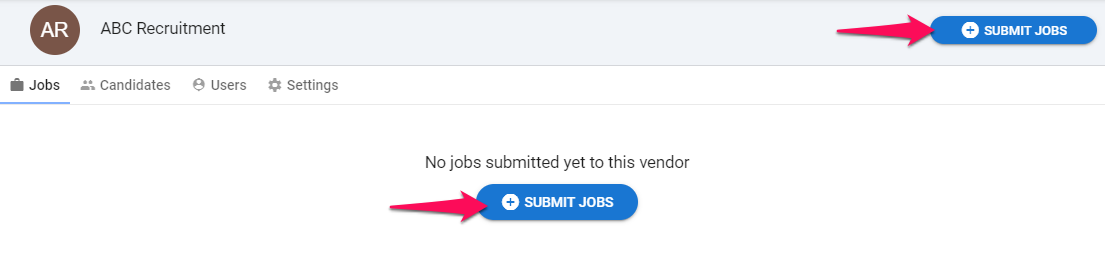
Invite your Vendor to work on a specific job
-
Click on the "Vendors" icon on the side menu.

-
Select the vendor with whom you want to share a job.
-
Click on "Submit Jobs".
-
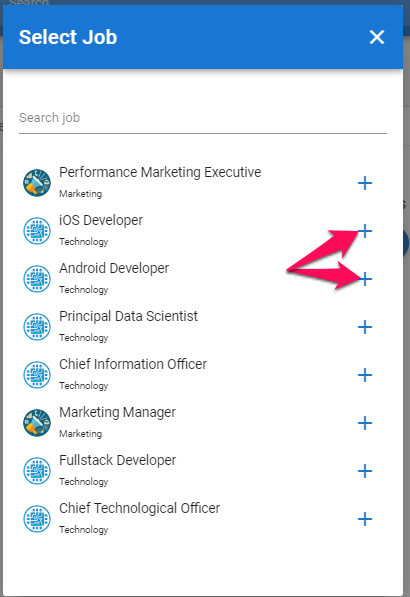
Click on "+" next to all the jobs you wish to share with your vendor.
Vendor Settings Page
For each vendor account you have the option to customize which information the vendor has access to.
-
Click on the "Vendors" icon on the side menu.

-
Select the vendor whose settings you want to change.
-
Click on the "Settings" tab.

-
On this tab, you can tweak the options as explained below:
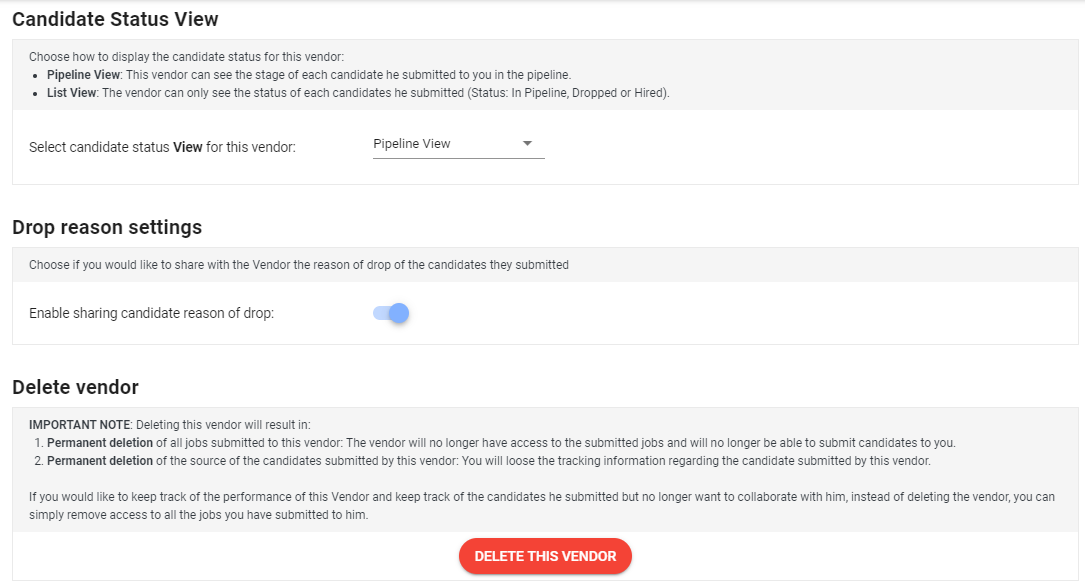
Candidate Status View: Choose how to display the candidate status for this vendor:
- Pipeline View: This vendor can see the stage that each candidate he submitted has reached in the pipeline.
- List View: The vendor can only see the status of each candidate he submitted (Status: In Pipeline, Dropped or Hired).

Drop reason settings: Choose whether or not to share the reason why a candidate was dropped with the vendor that submitted them.
Delete vendor: Deleting this vendor will result in:
- Permanent deletion of all jobs submitted to this vendor: The vendor will no longer have access to the submitted jobs and will no longer be able to submit candidates to you.
- Permanent deletion of the source of the candidates submitted by this vendor: You will lose the tracking information regarding the candidates submitted by this vendor.