This can only be done by an Admin.
What are Custom Categories and Fields
- "Custom Categories" are categories that can be added in the "Summary" tab of a job in addition to the default categories, and which can hold "Custom Fields".
- "Custom Fields" are fields that can be added in the "Summary" tab of a job. They have to be added either to a default or a custom category.
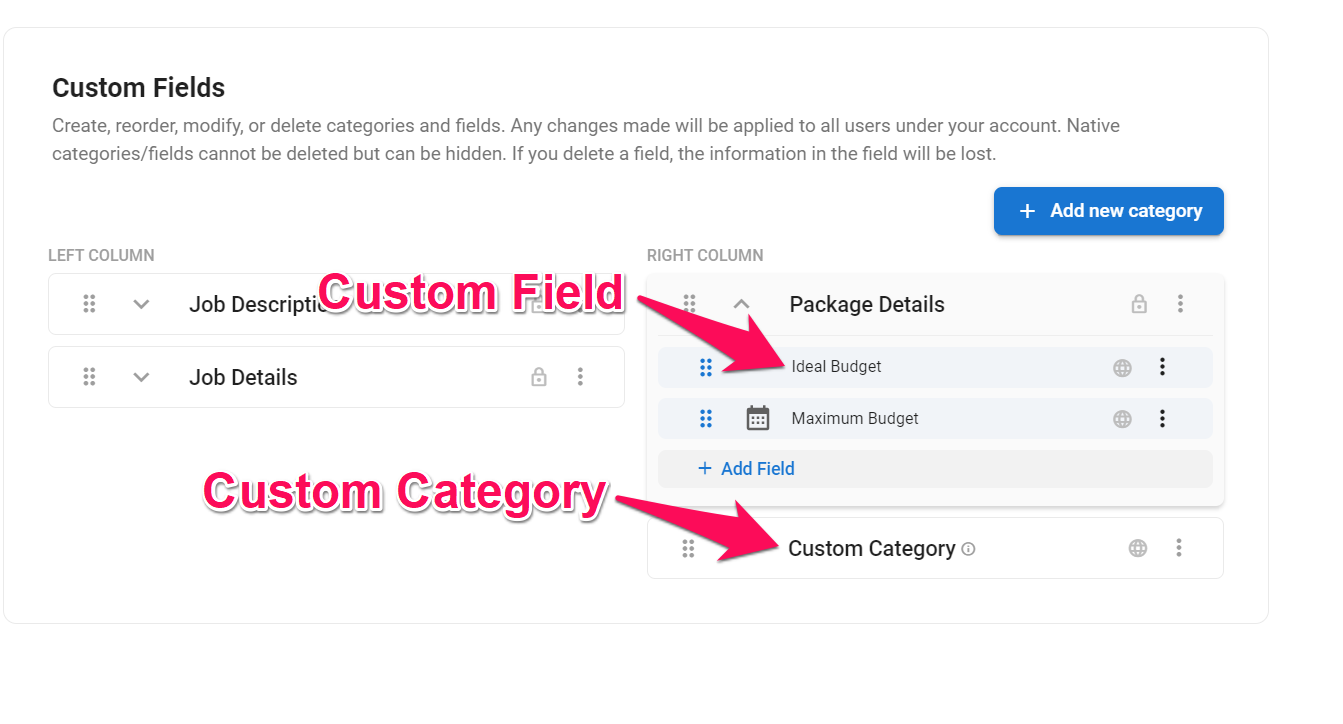
Any changes will be applied to all users under your company account.
Creating a Custom Category
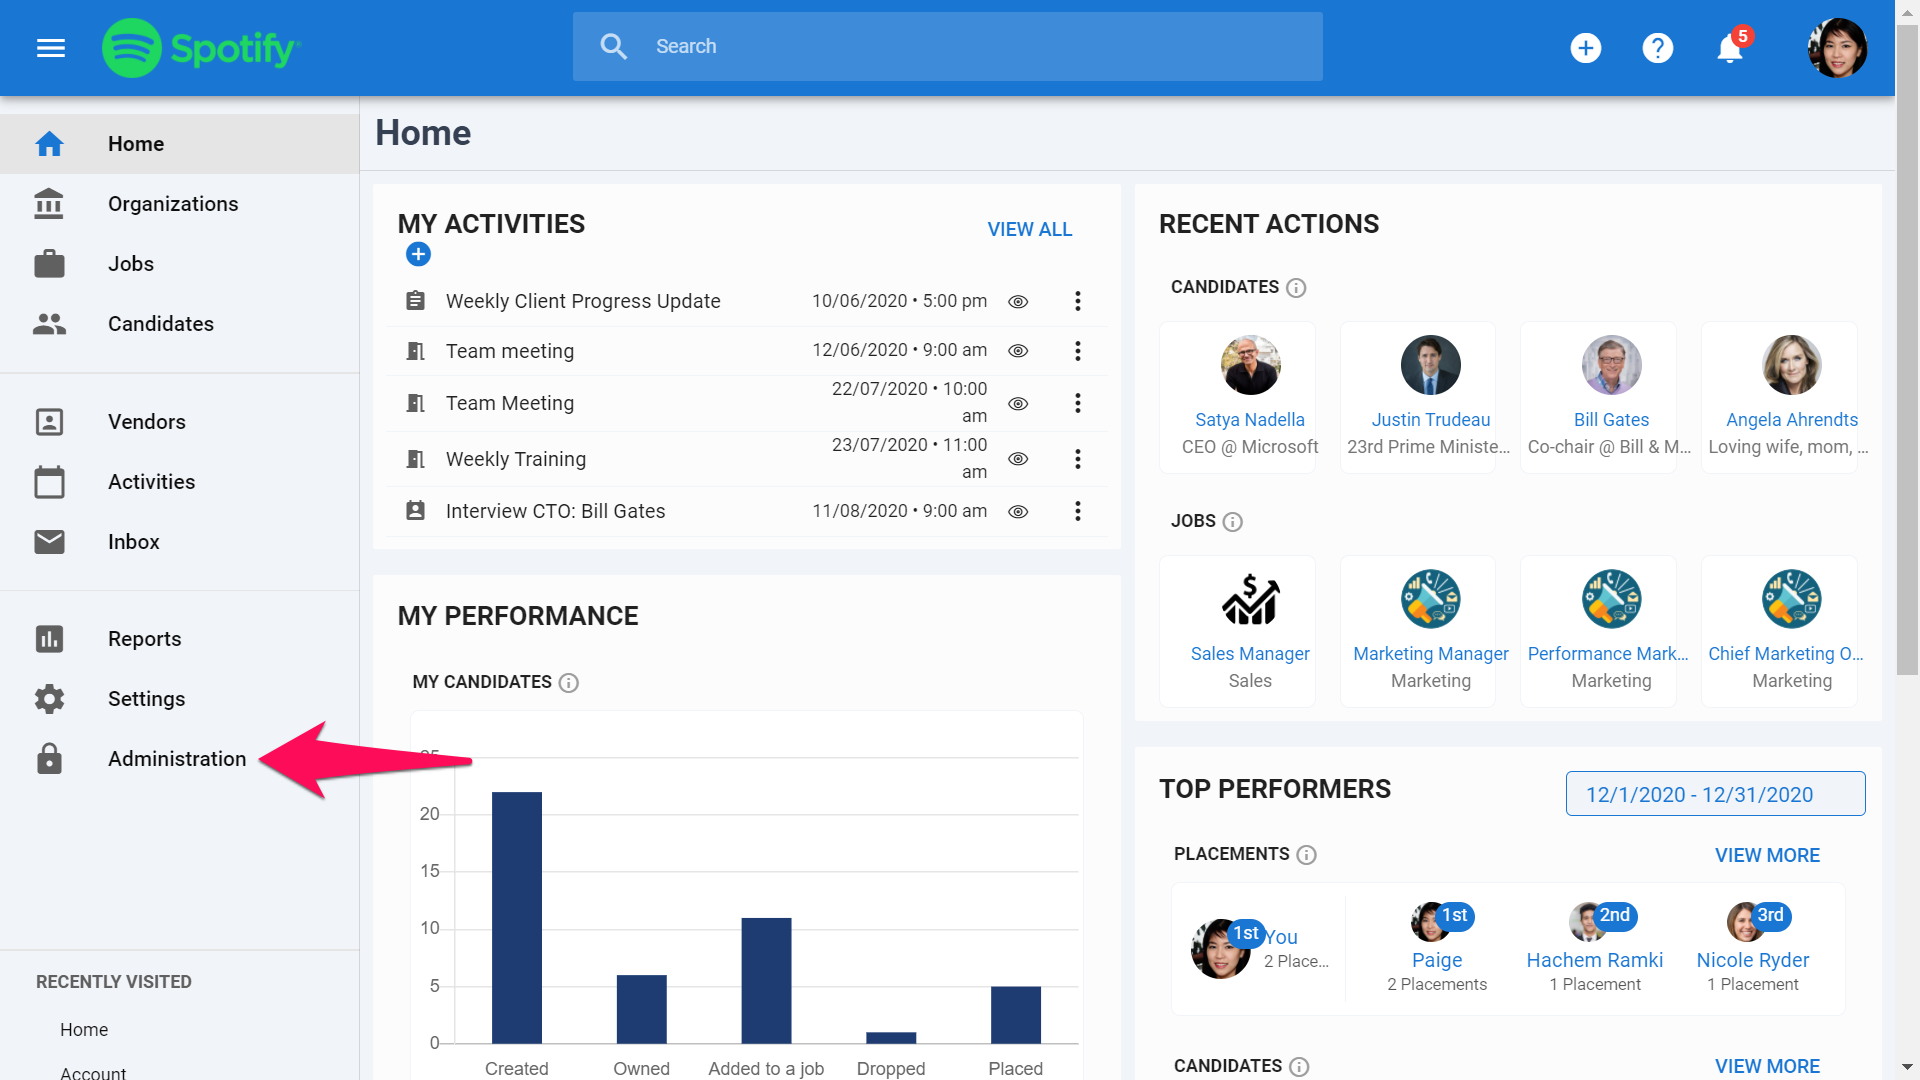
- Head to the following page. Alternatively, click on "Administration" from your side menu, open the "Customization" category and then the "Jobs" category then click on "Customize job fields".
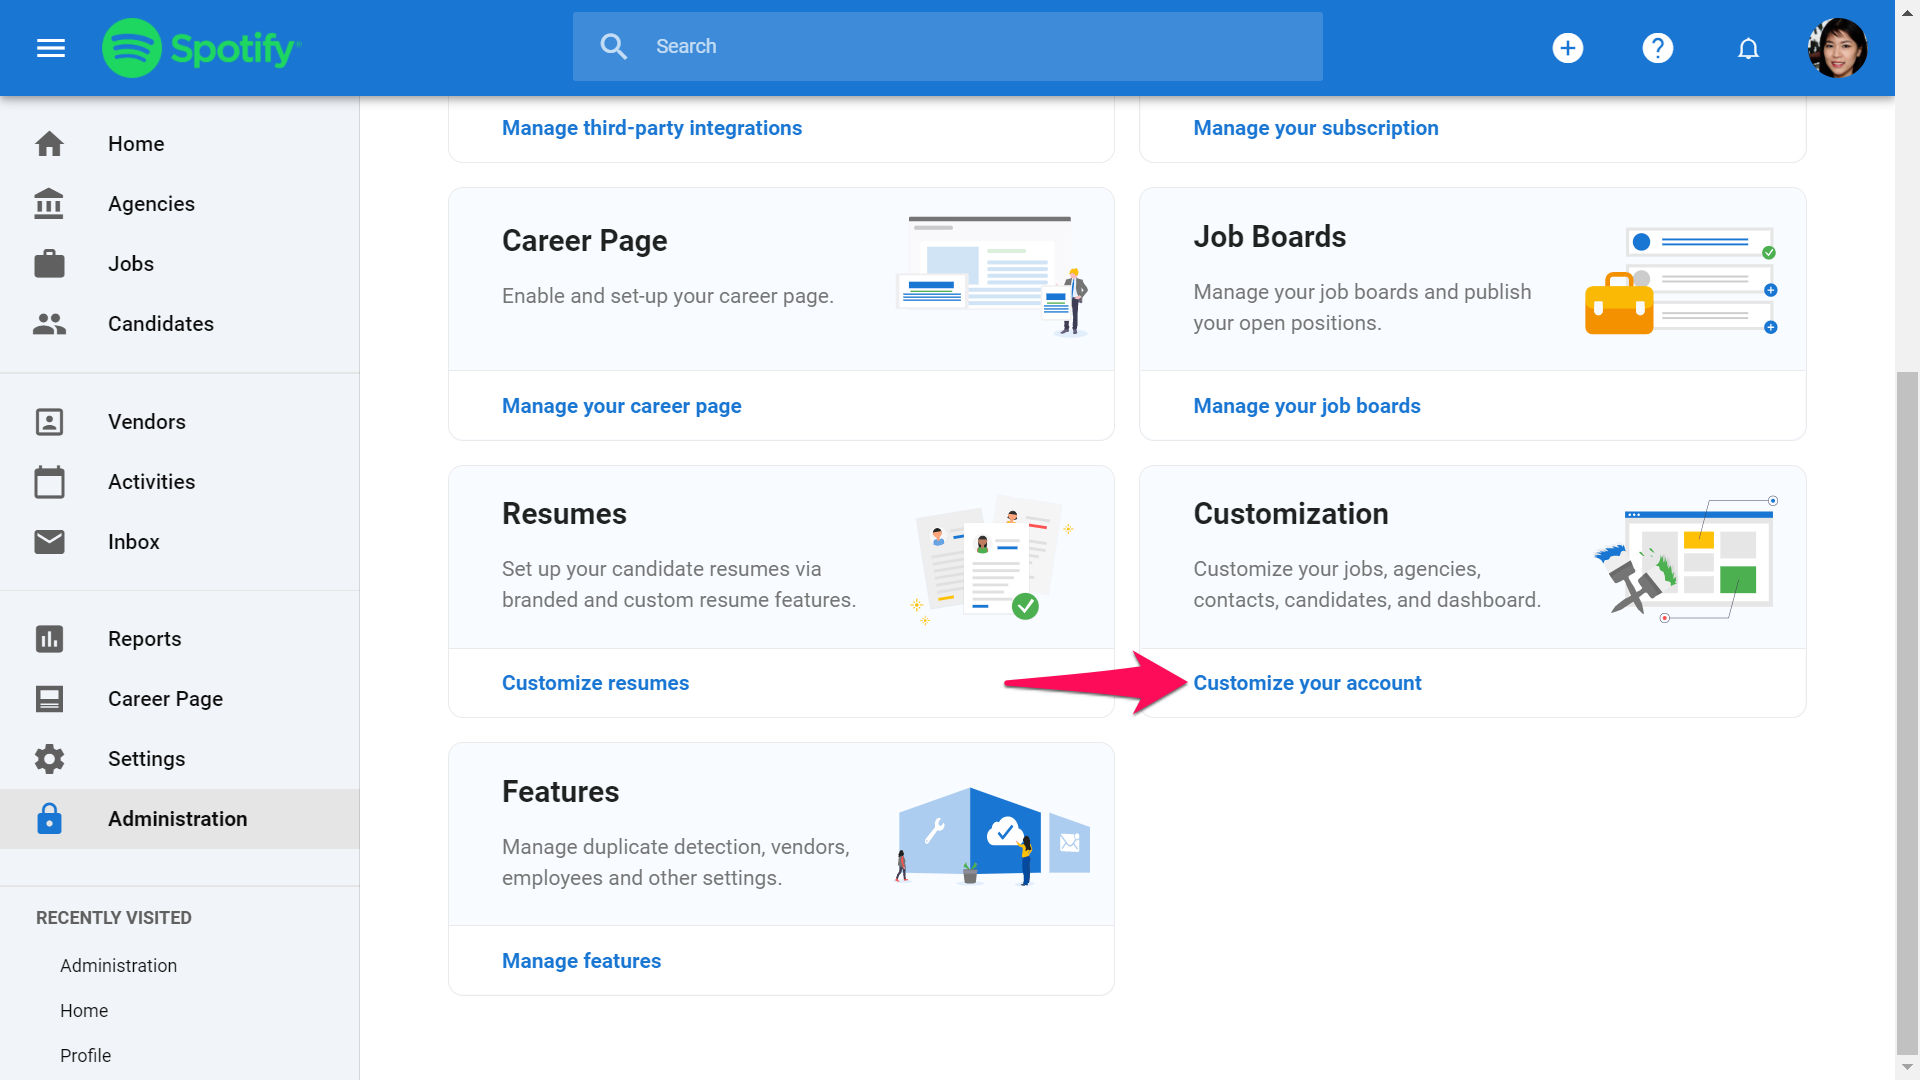
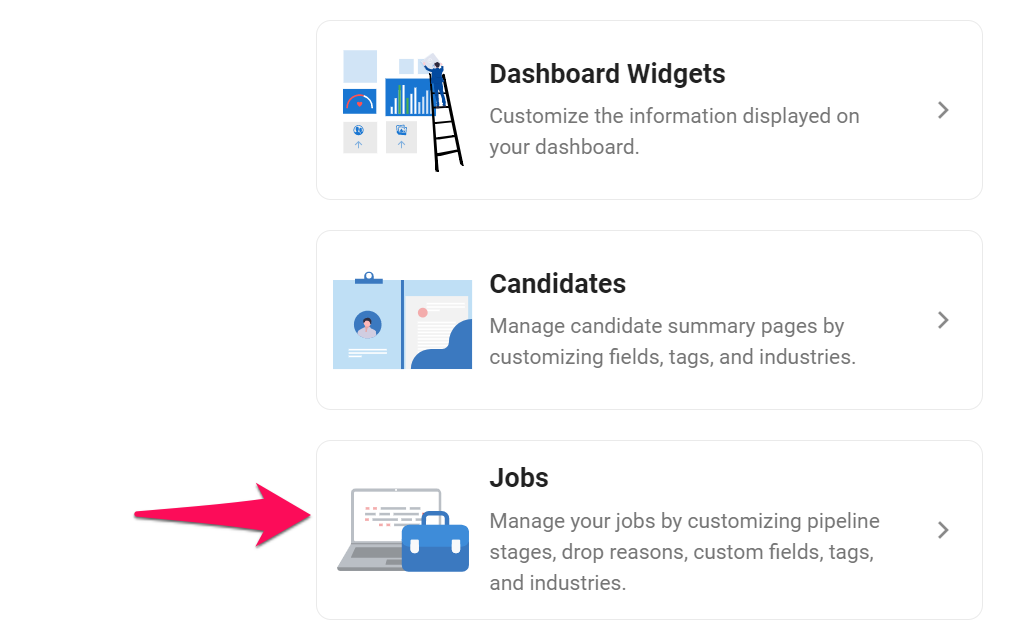
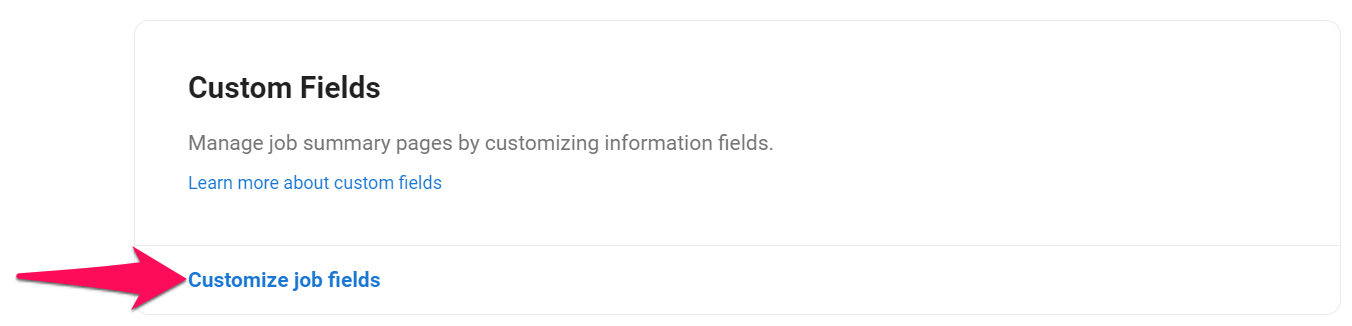
-
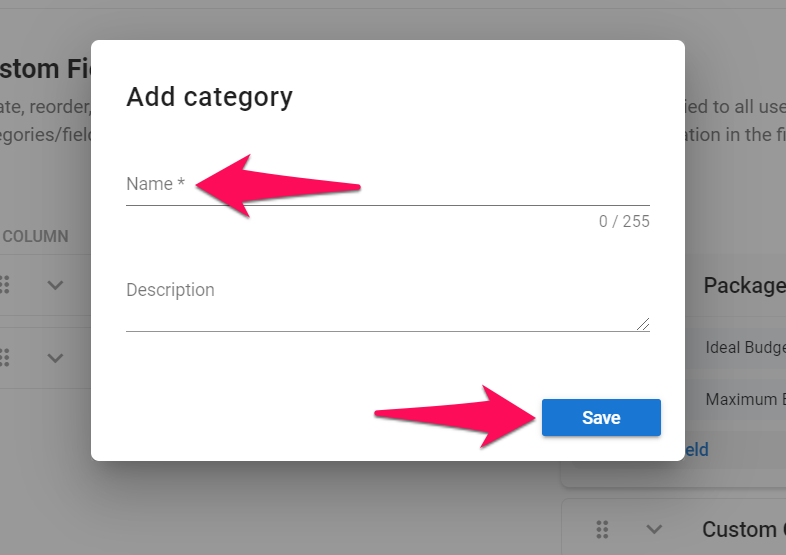
Click on "Add new category".
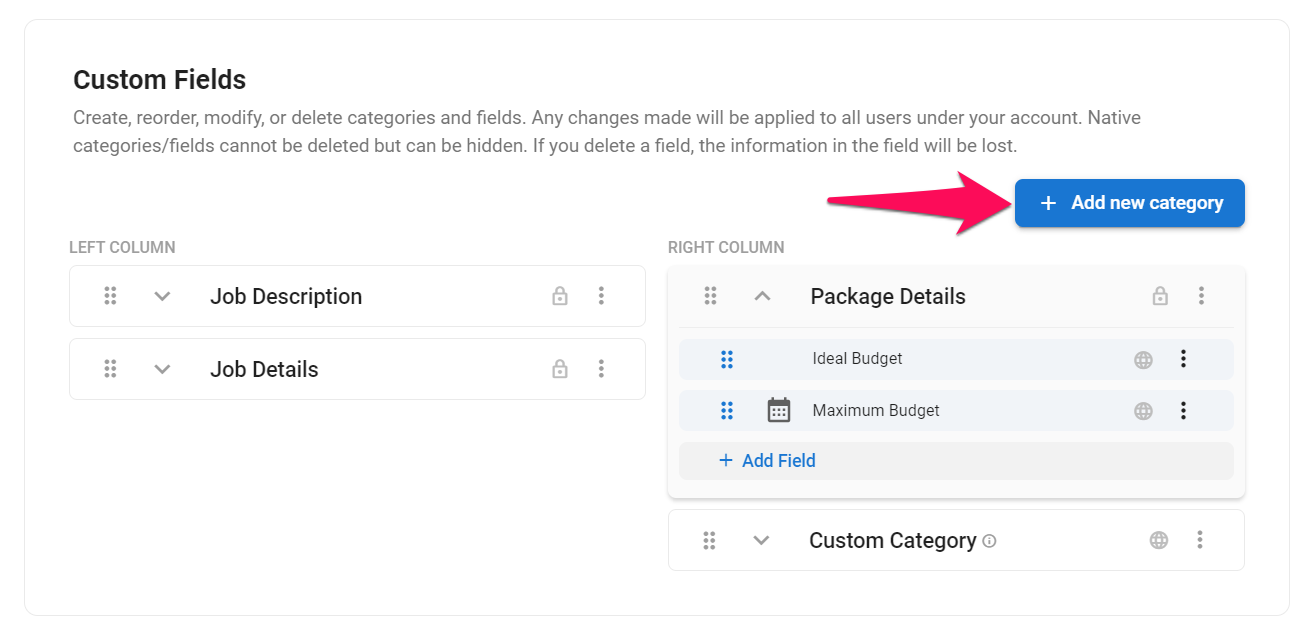
-
Fill out the fields and click "Save".
Creating a Custom Field
- Head to the following page. Alternatively, click on "Administration" from your side menu, open the "Customization" category and then the "Jobs" category then click on "Customize job fields".
-
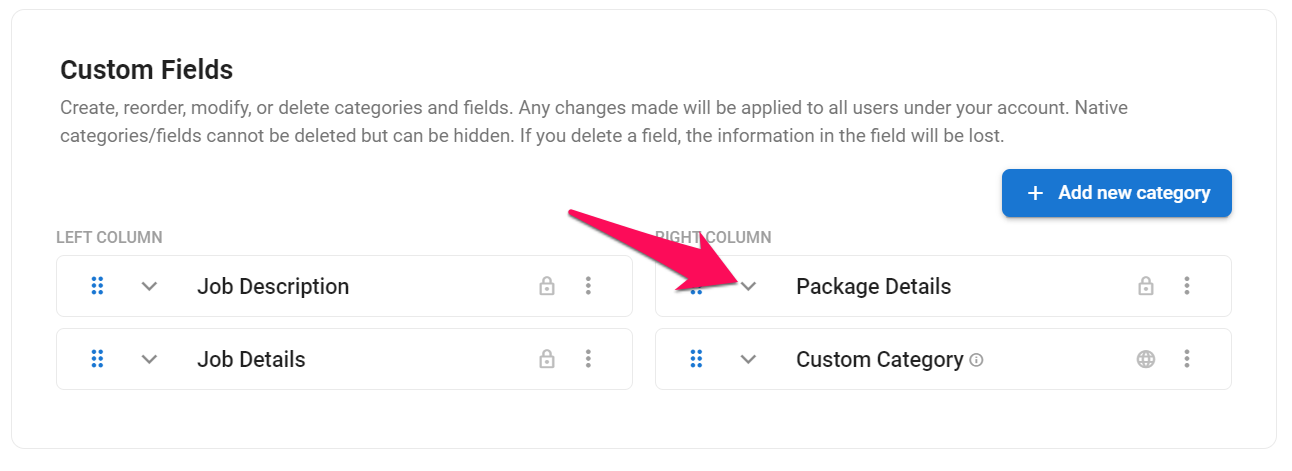
Open the category under which the custom field will be added. It can be a default or custom category.
-
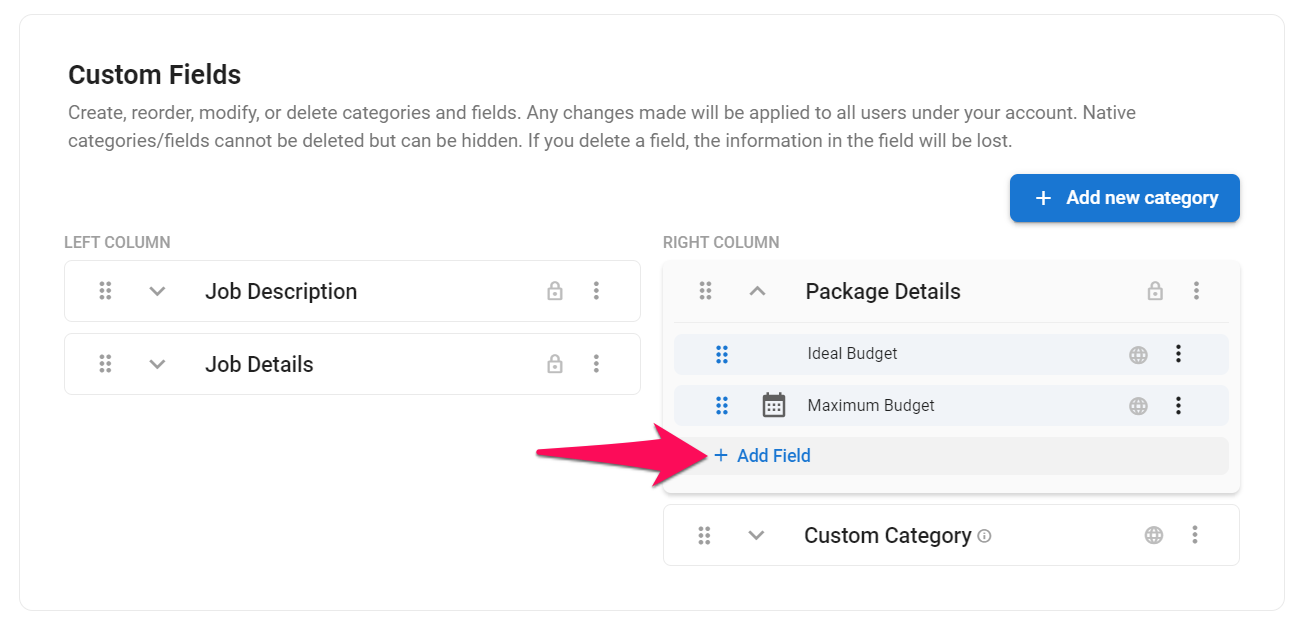
Click on "Add Field".
-
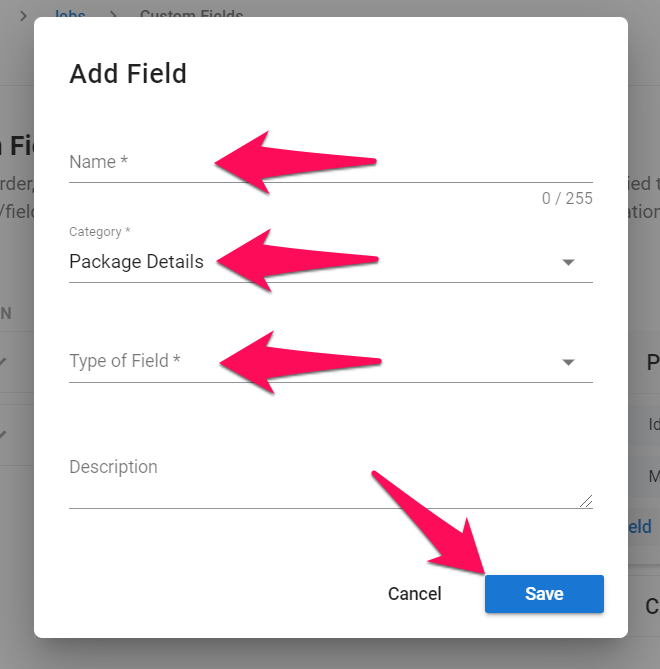
Fill out the name of the new field and select the desired type of field. Click "Save".
Learn more about Manatal's type of fields in this article.
Creating a Custom ID Field
- The Custom ID field feature is available upon request to Enterprise Plus plans only. Please reach out to your Manatal contact or Support to enable Custom ID fields for your account.
A Custom ID field gives every job a simple, sequential number (its job number) in a format you set, such as JOB-0001.
- The Job Number is added alongside the existing Job Reference, and does not replace it.
- You can create more than one Custom ID field (for example, JOB and REQ). Each field has its own sequence.
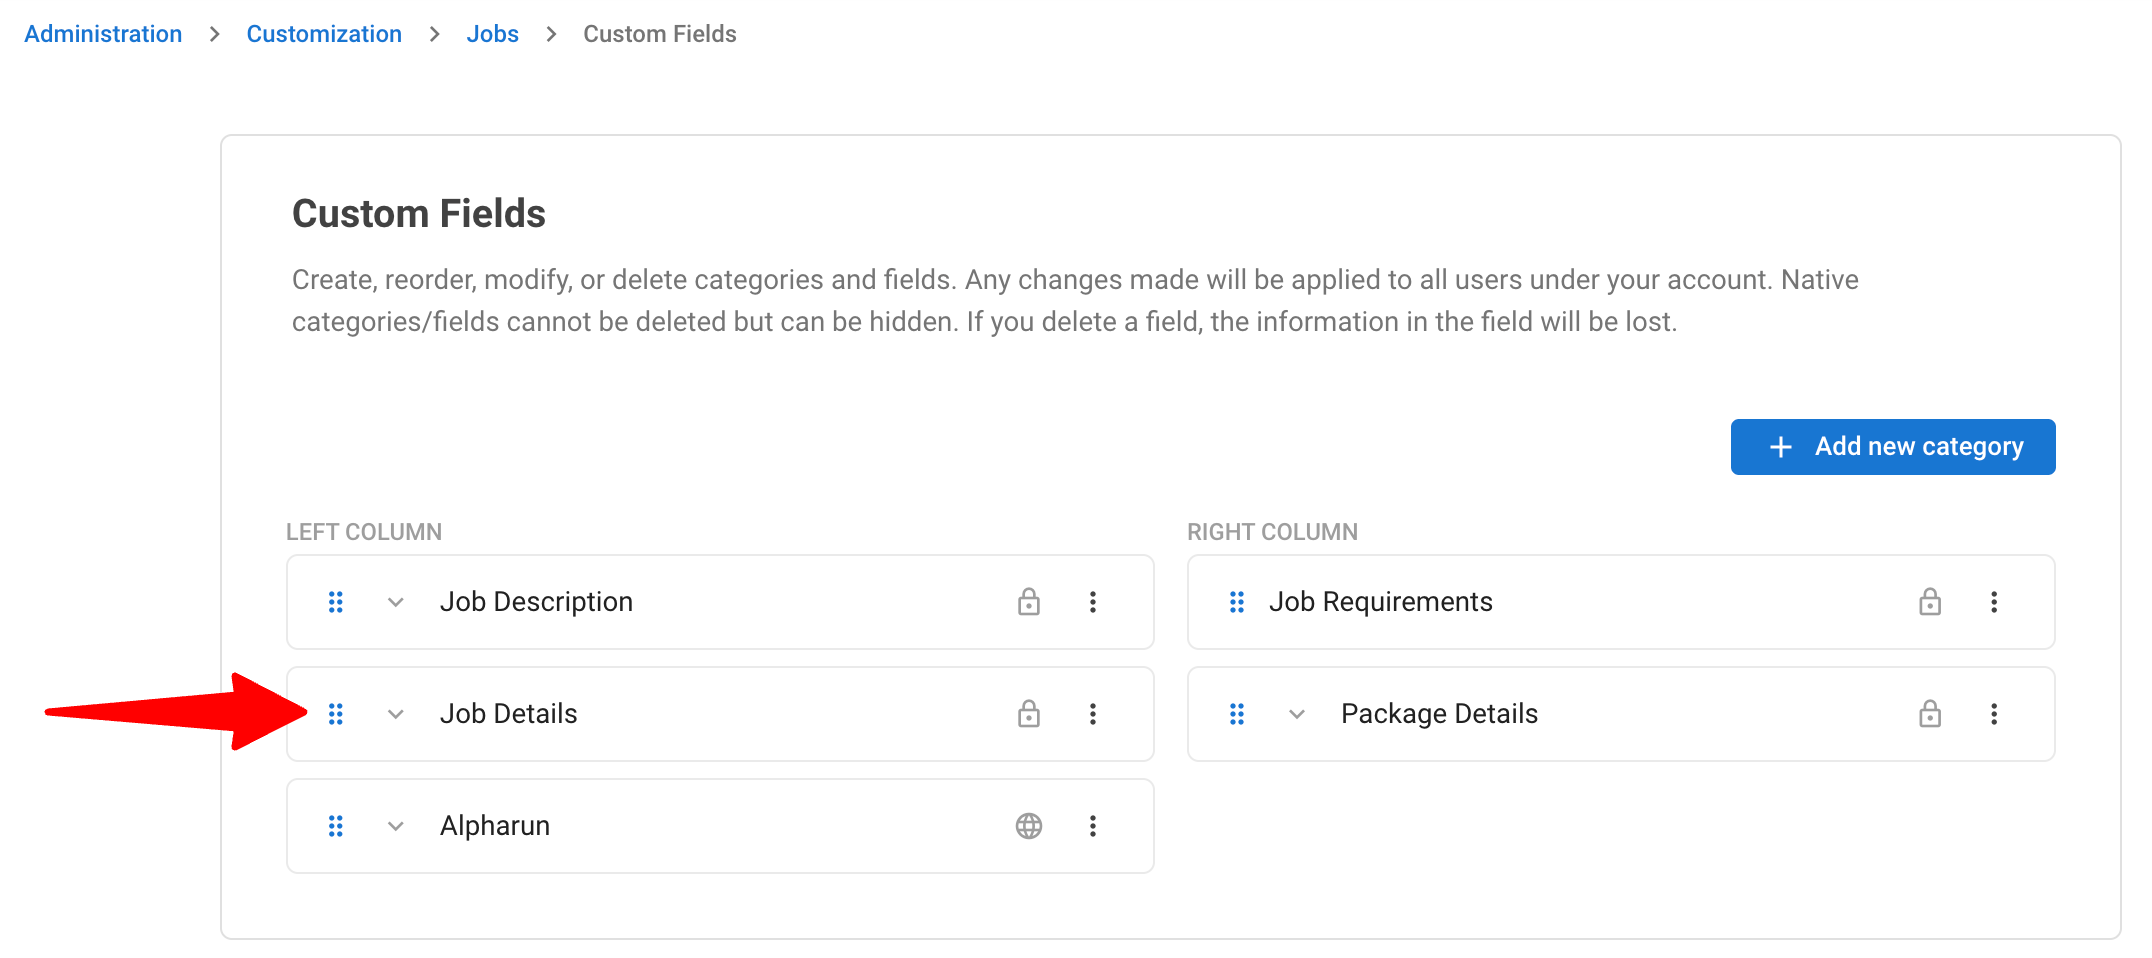
- Head to the following page. Alternatively, click on "Administration" from your side menu, open the "Customization" category and then the "Jobs" category, then click on "Customize job fields".
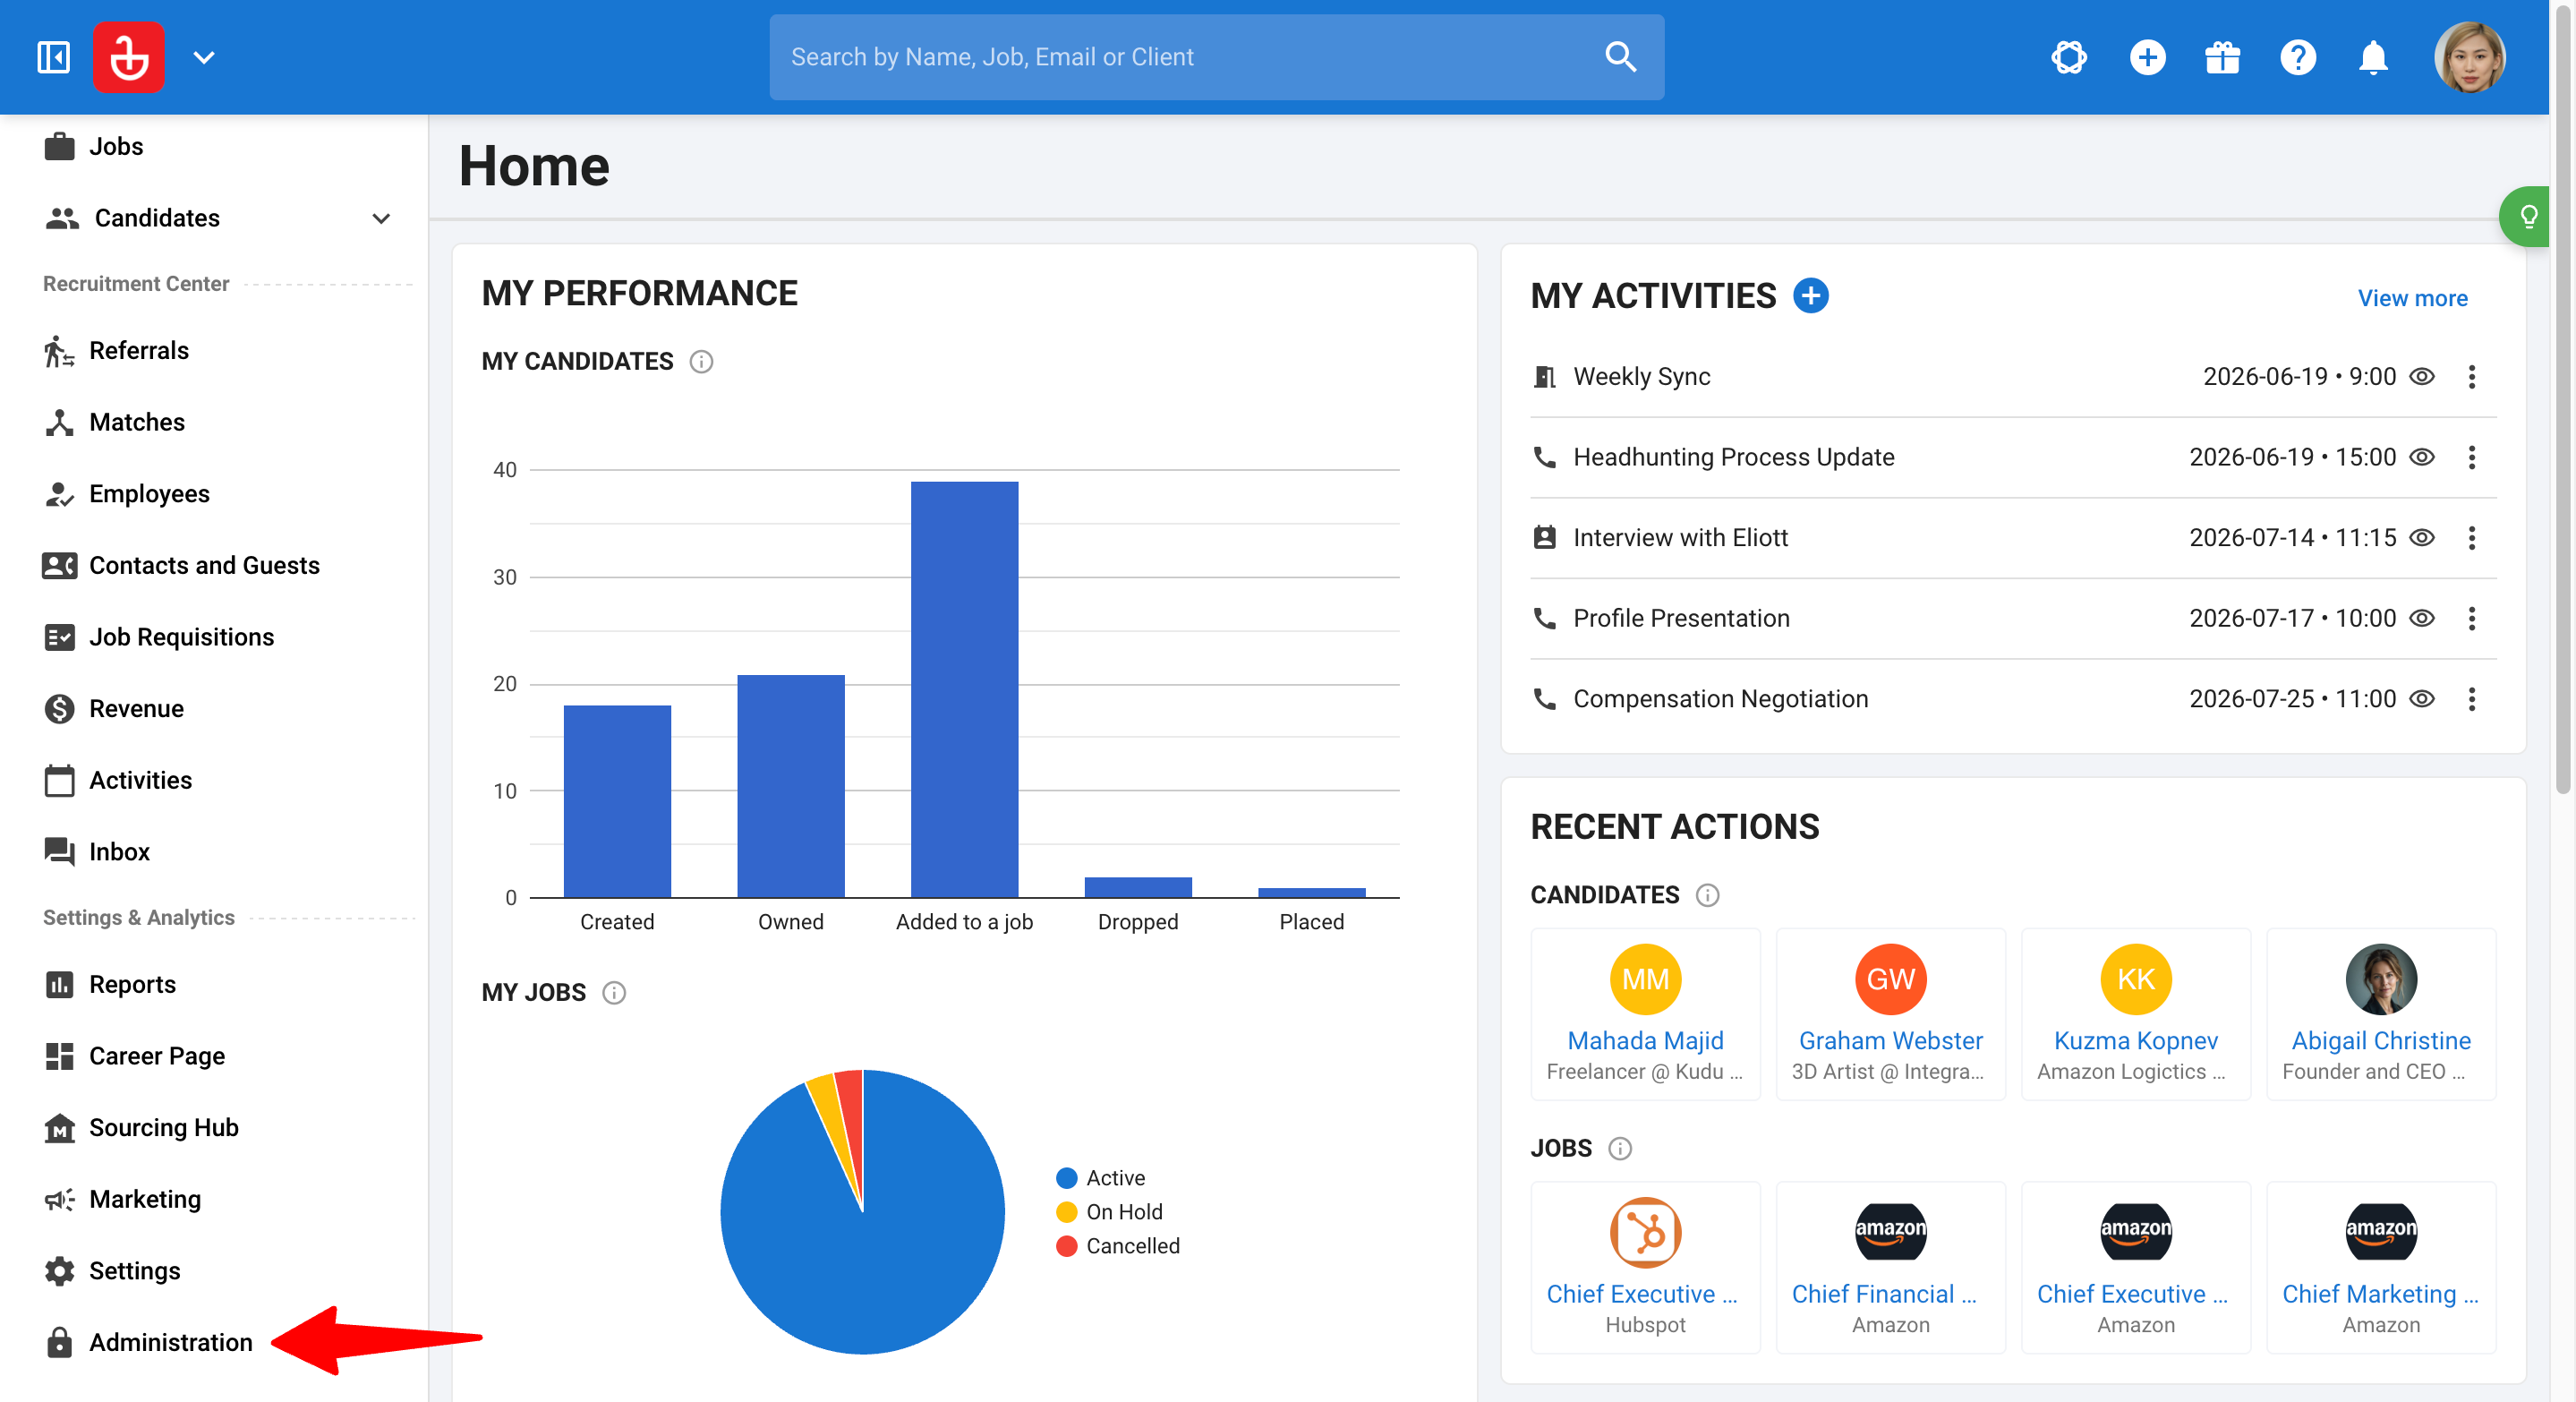
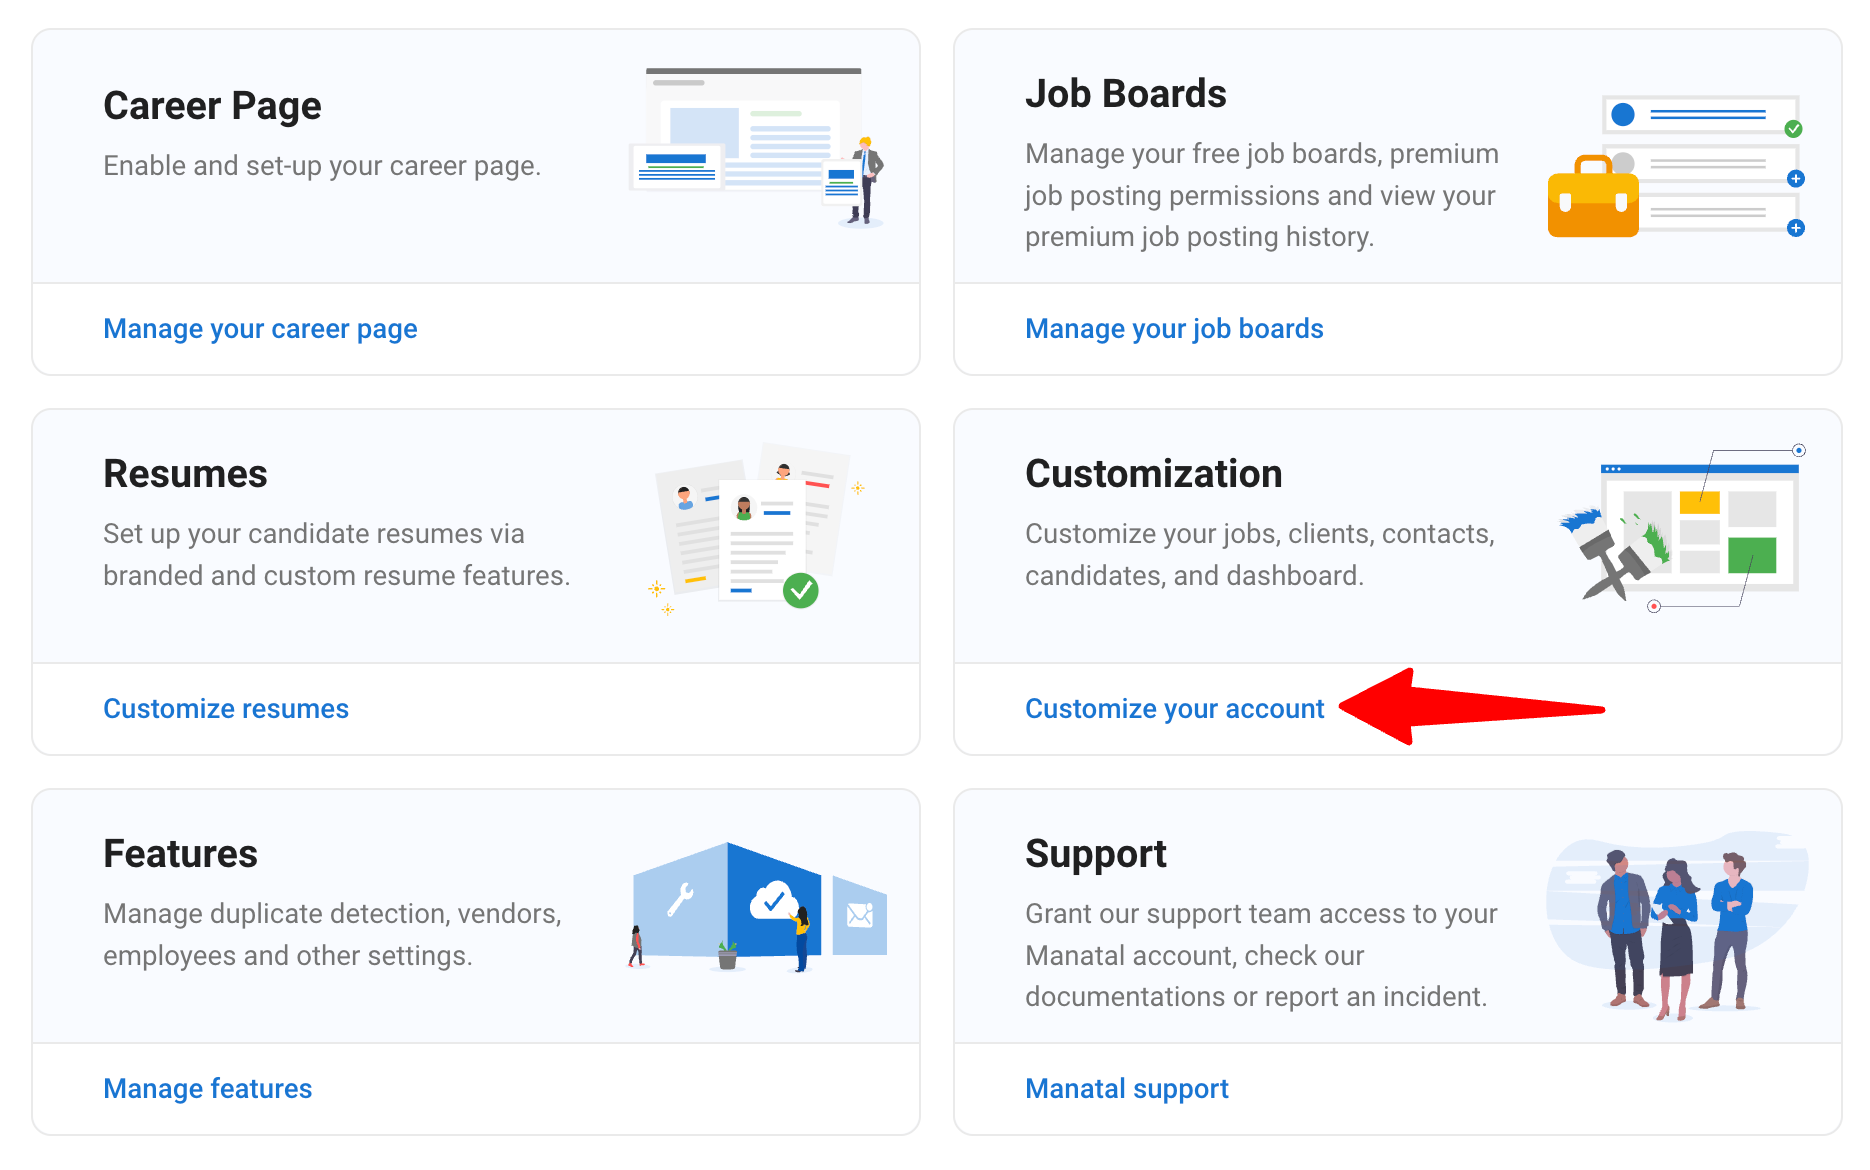
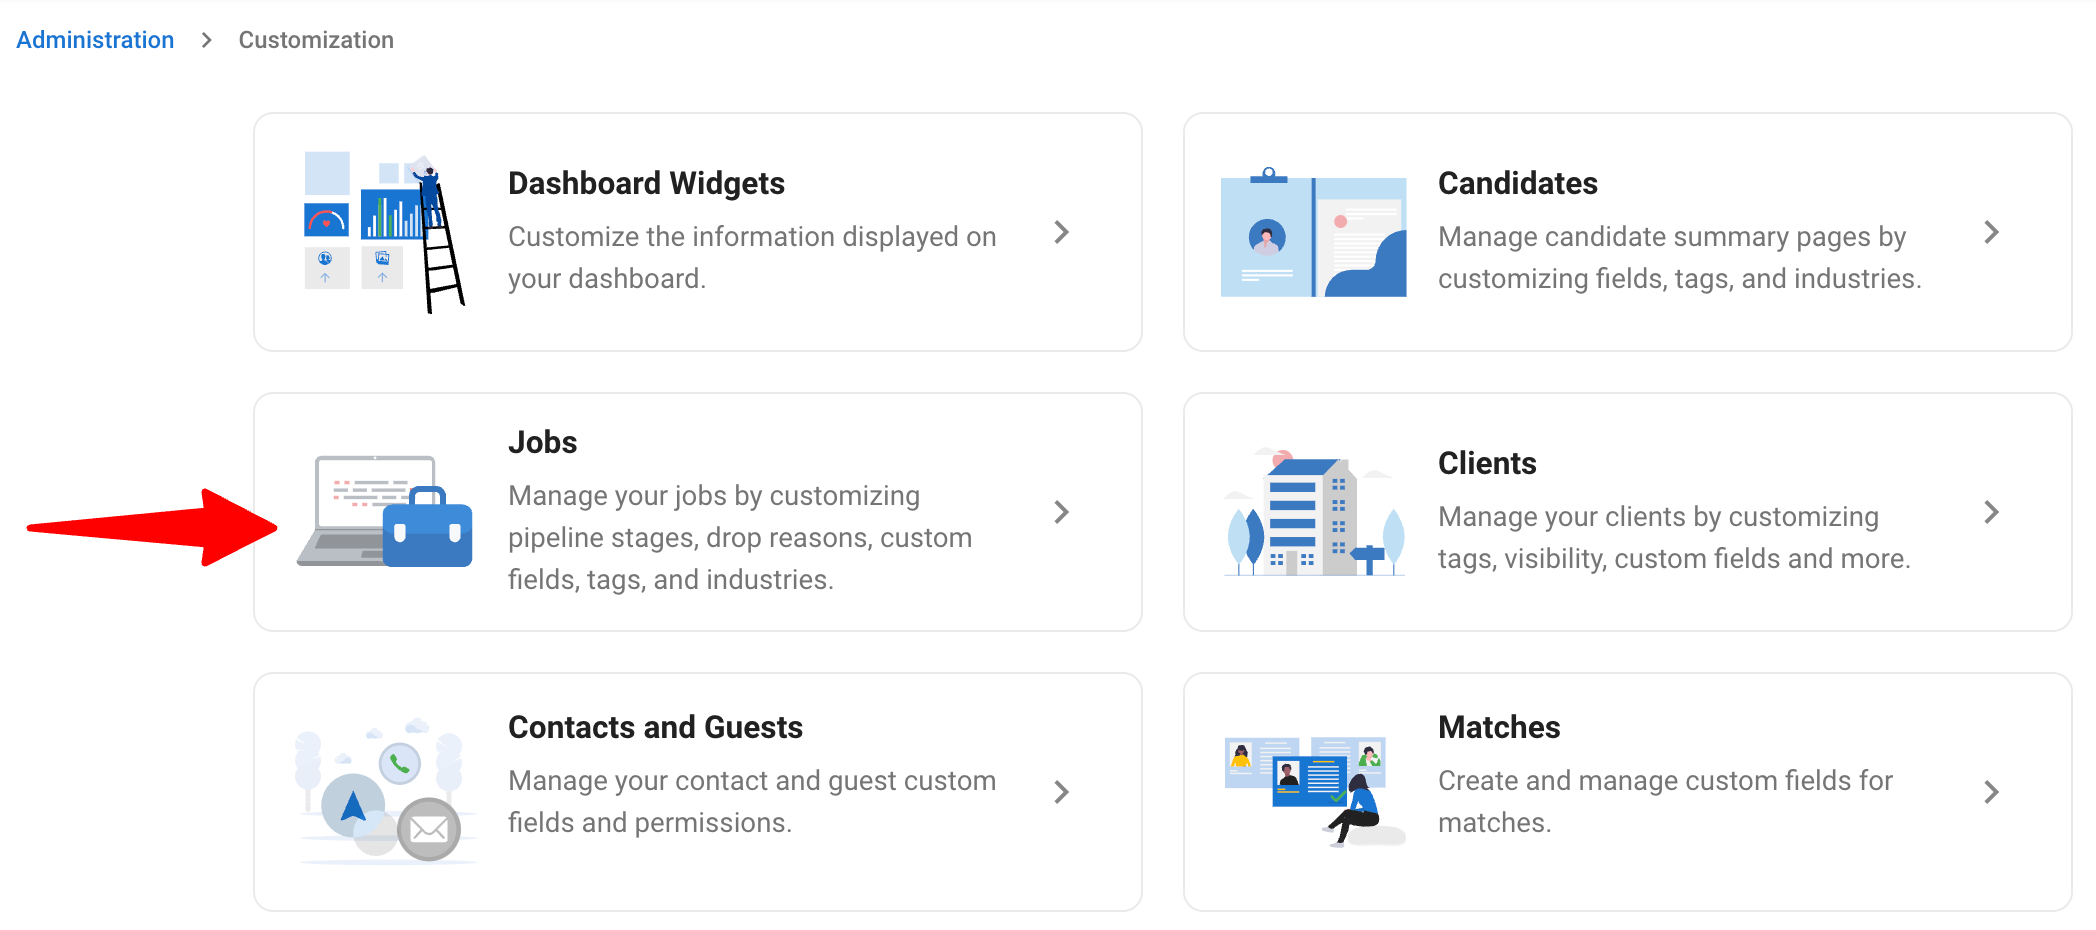
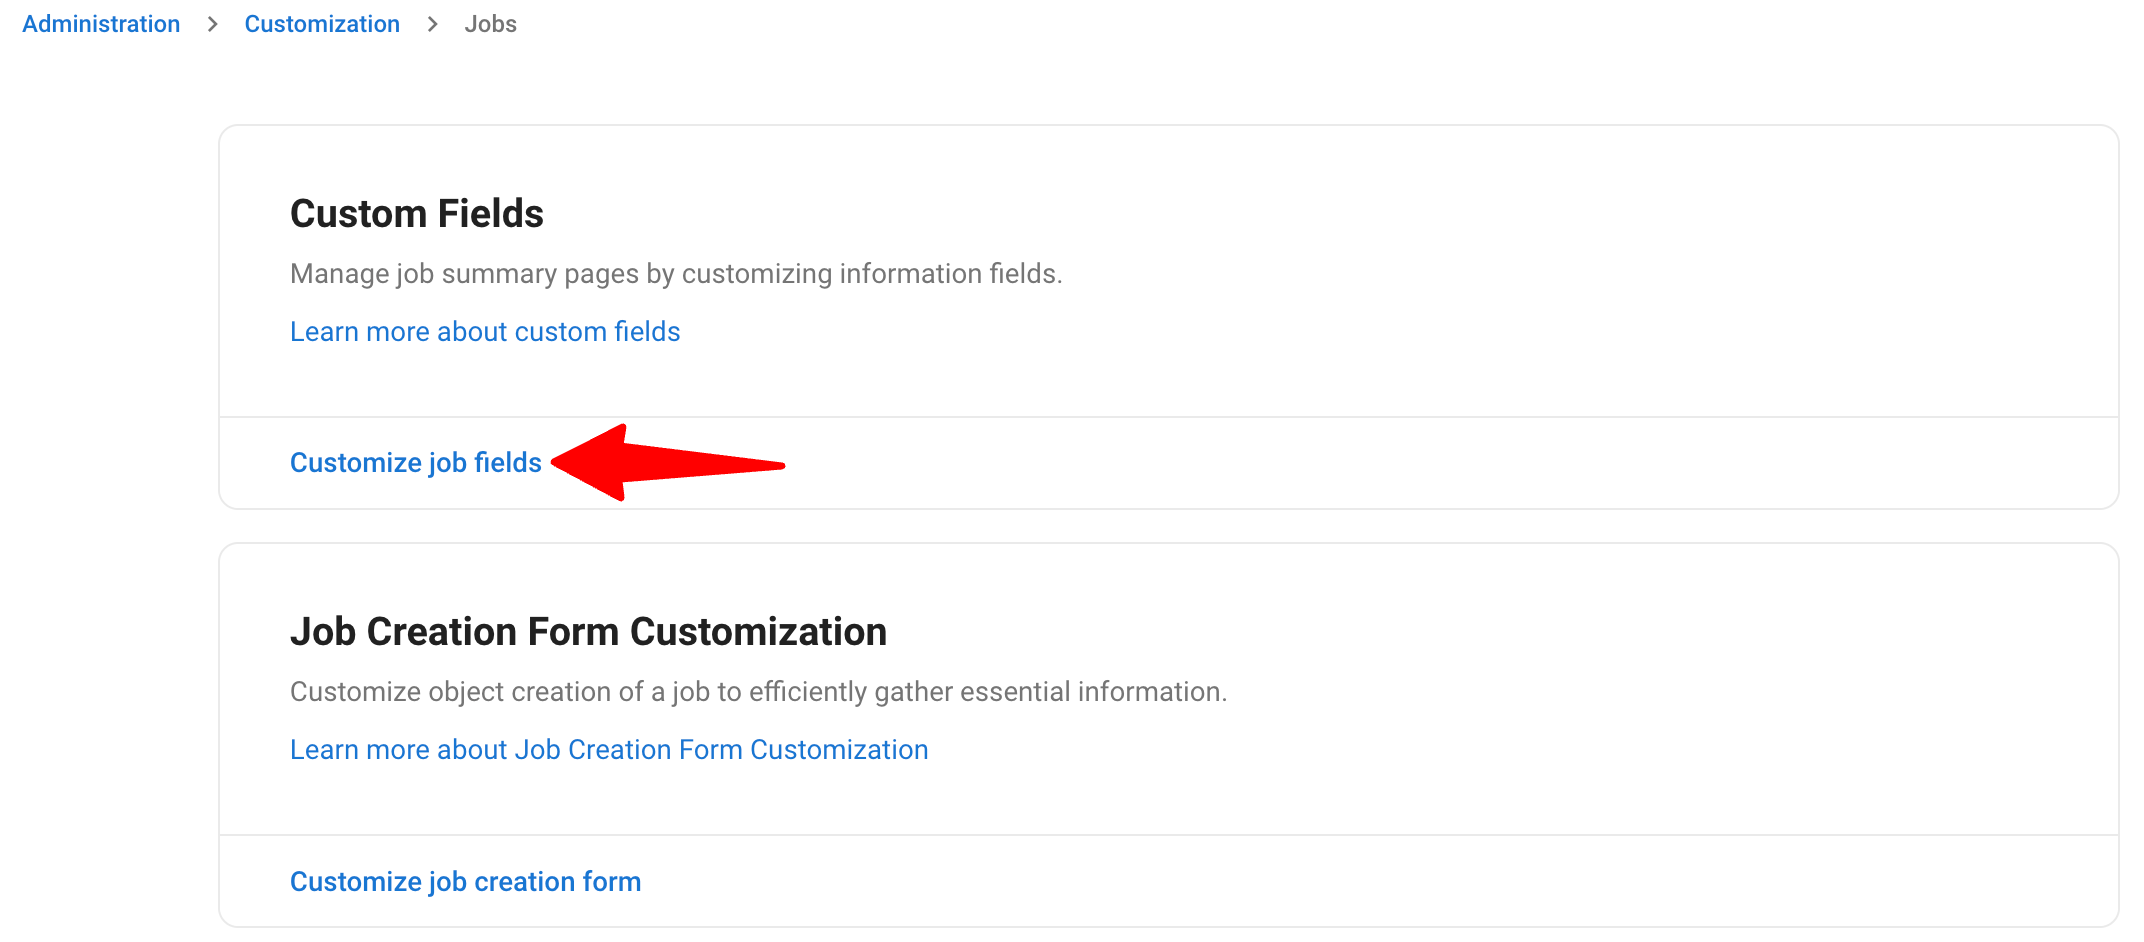
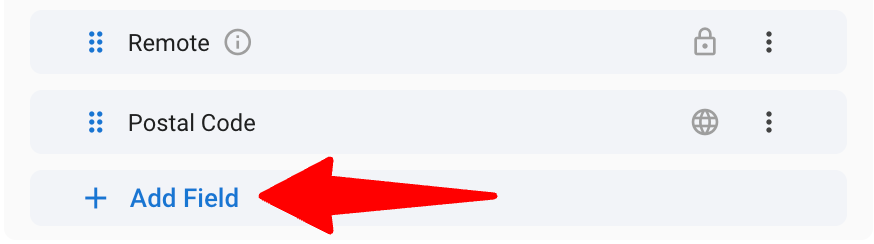
- Open the category where the field will be added and click on "Add Field".
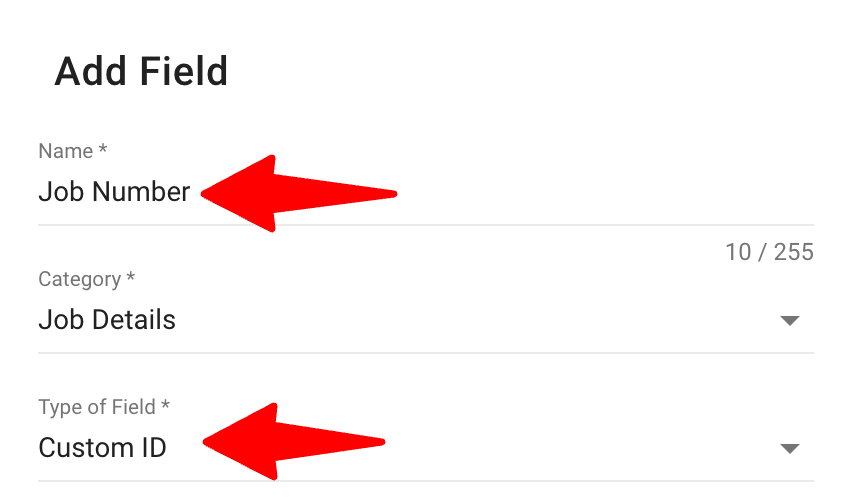
- Enter a name for the field and select 'Custom ID' as the type of field.
- Set up the format:
Setting What it does Options Prefix Text shown before the number (optional) Up to 5 letters or numbers (A-Z, a-z, 0-9) Separator Symbol between the prefix and the number Dash -, Underscore_, Slash/, or No separatorMinimum Digits Minimum length of the number, filled with zeros 1 to 8 digits 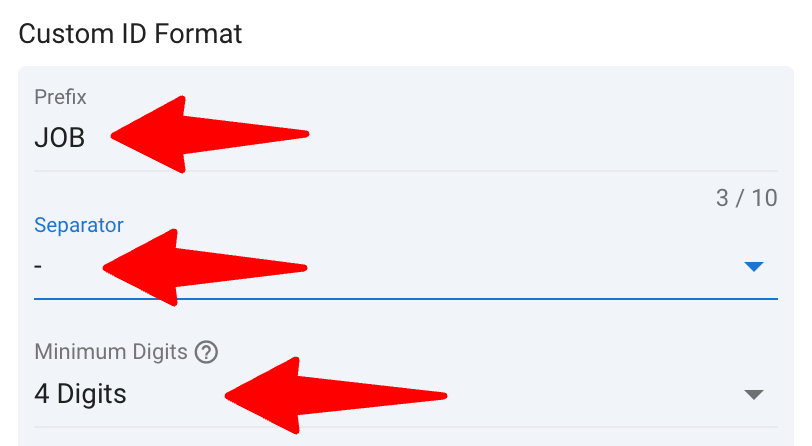
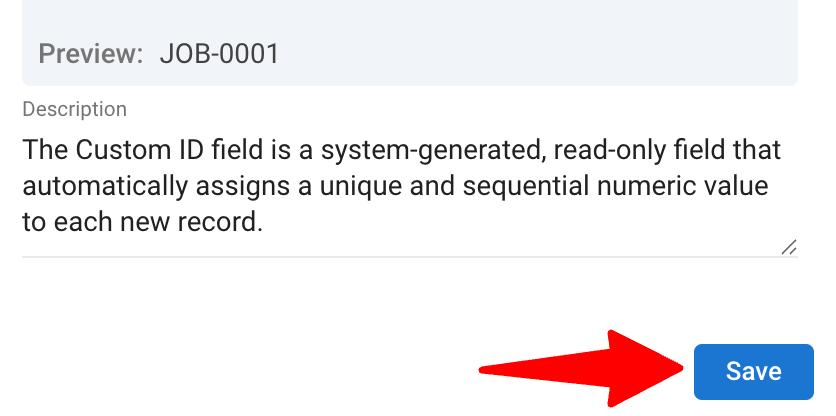
- Check the preview to see how the number will look, then click "Save".
Note
- The default format is JOB-0001.
- If no prefix is added, the separator is not used (for example, 0001).
- Numbers can go beyond the minimum digits. For example, with 2 digits, JOB-99 is followed by JOB-100.
How job numbers are assigned
- Existing jobs are numbered in the order they were created, including archived jobs.
- New jobs automatically take the next number in the sequence.
- Deleted jobs keep their numbers reserved. Other jobs are not renumbered.
- Job numbers are read-only. They cannot be edited manually, imported, or set as mandatory.
Where job numbers appear
Users will only see jobs they have access to. Confidential jobs will not appear in search results, filters, or sorting for users without access.
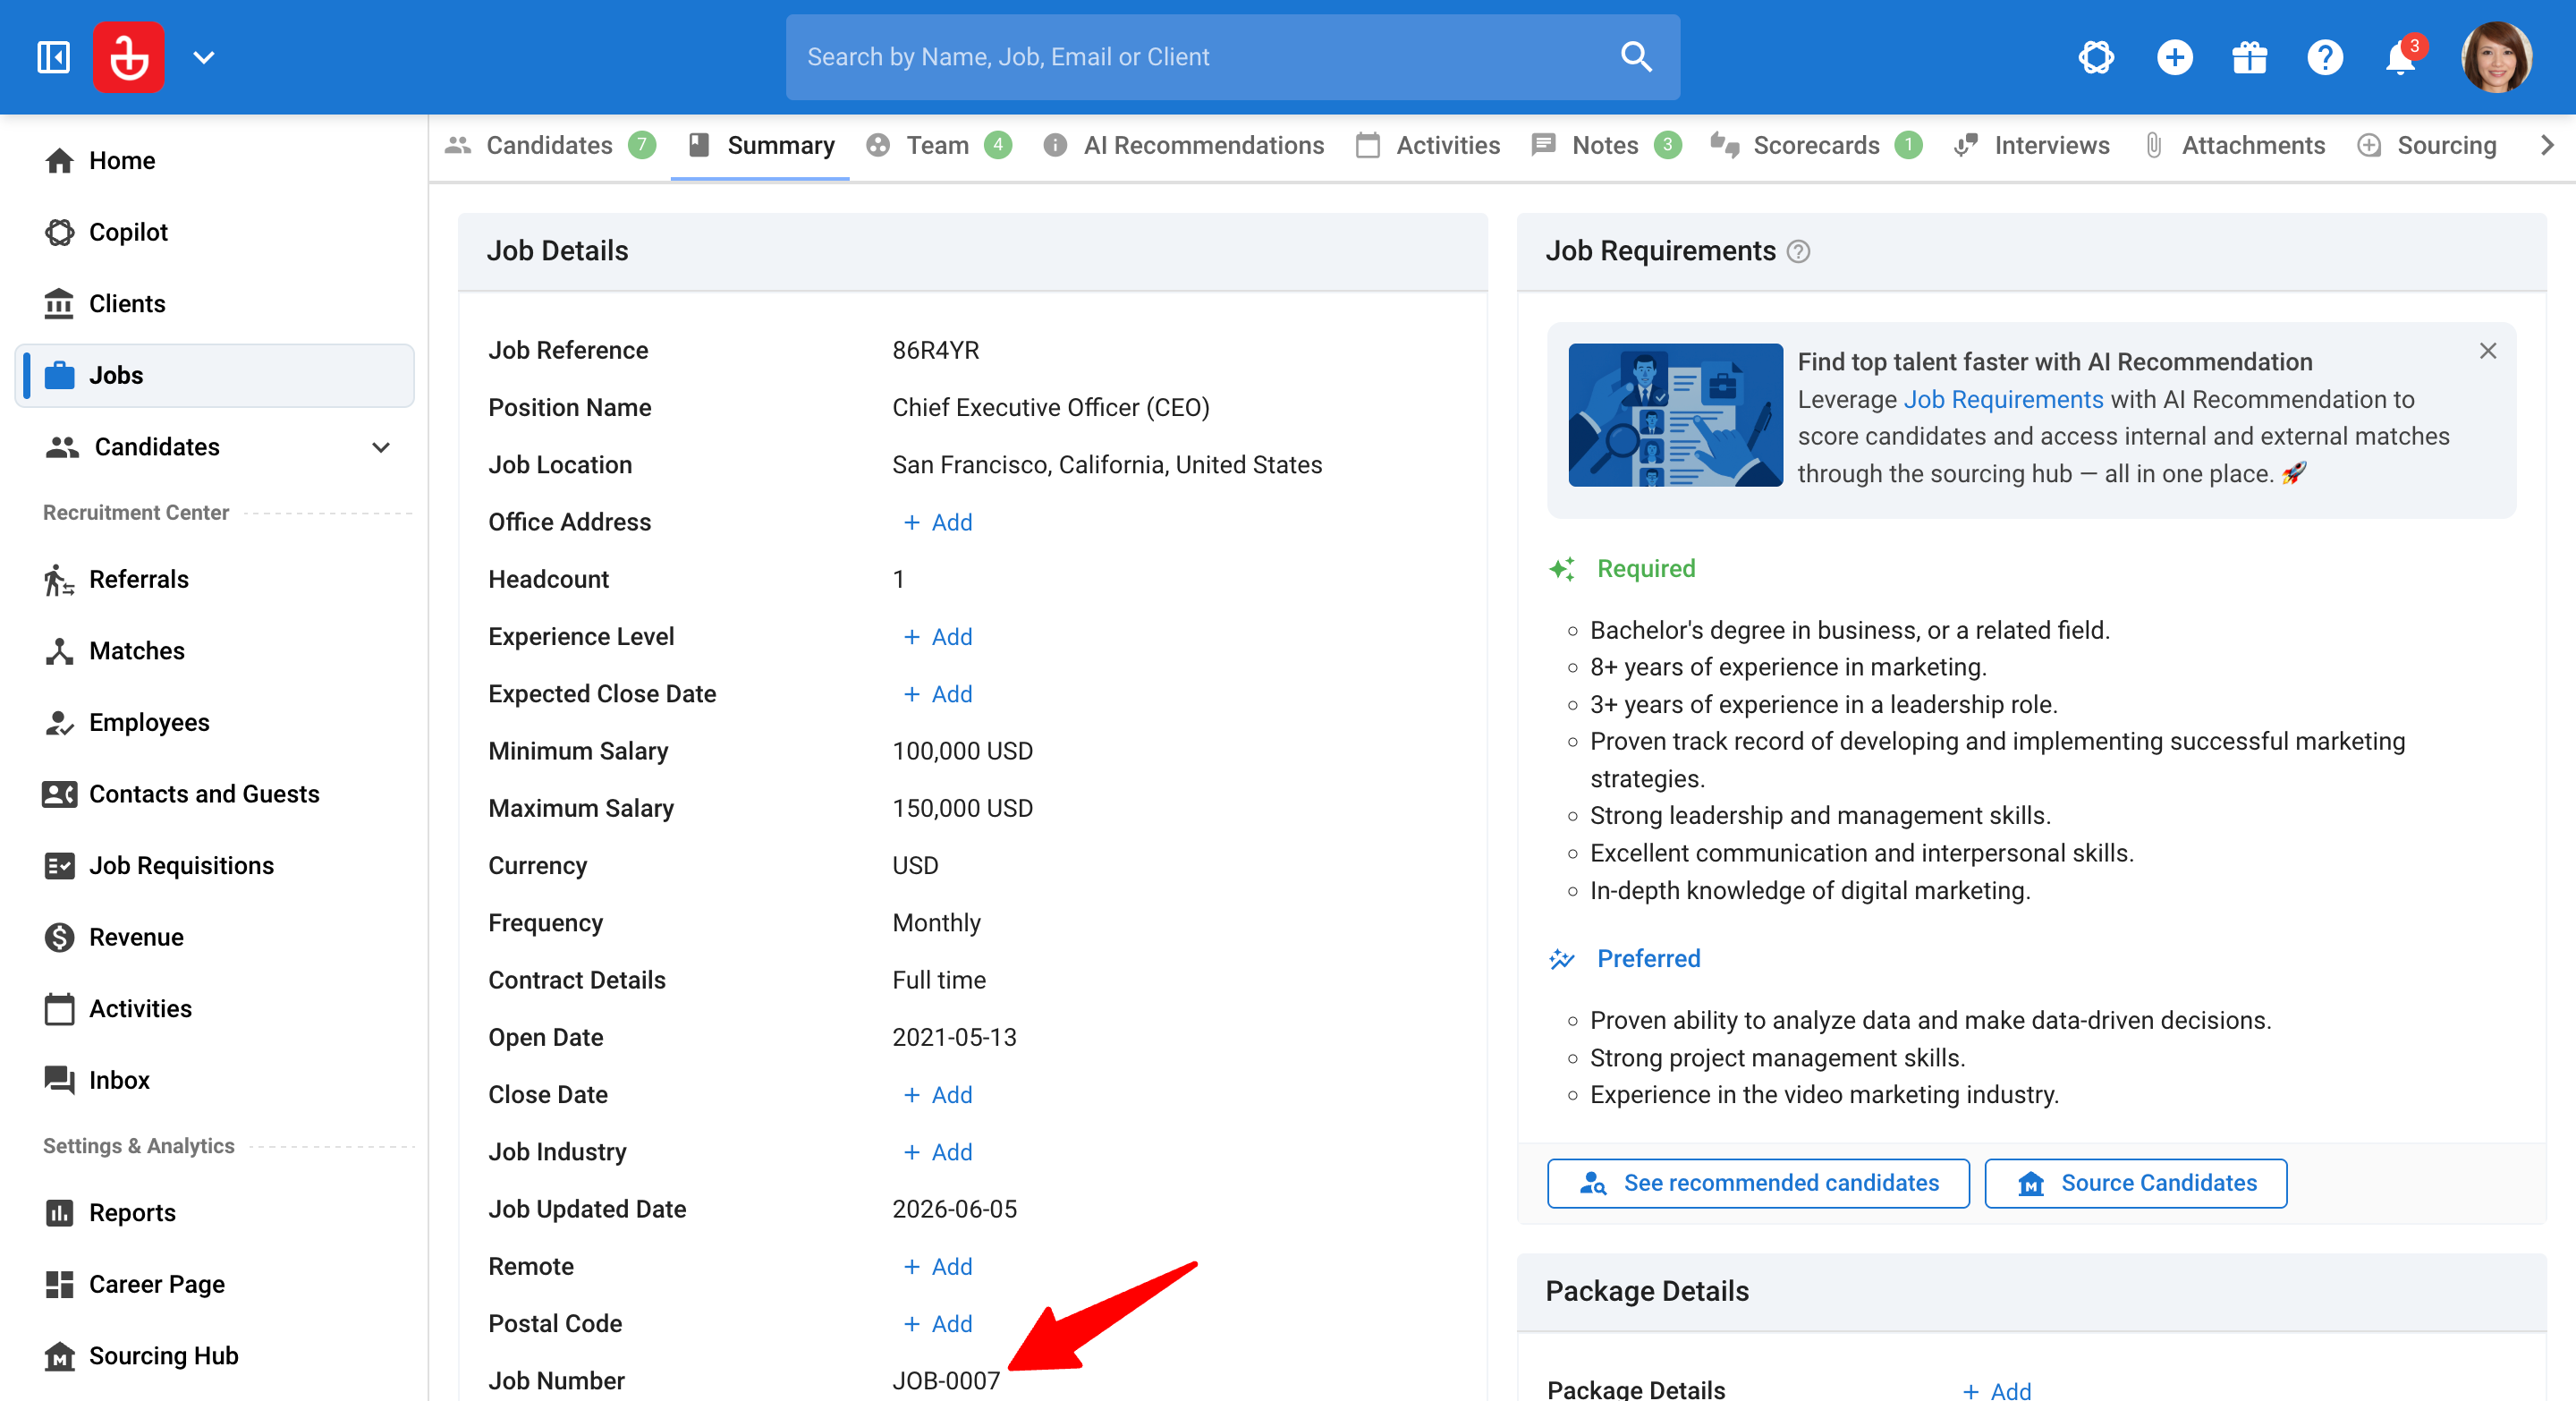
- Job Summary: The job number is shown in the job's Summary tab.
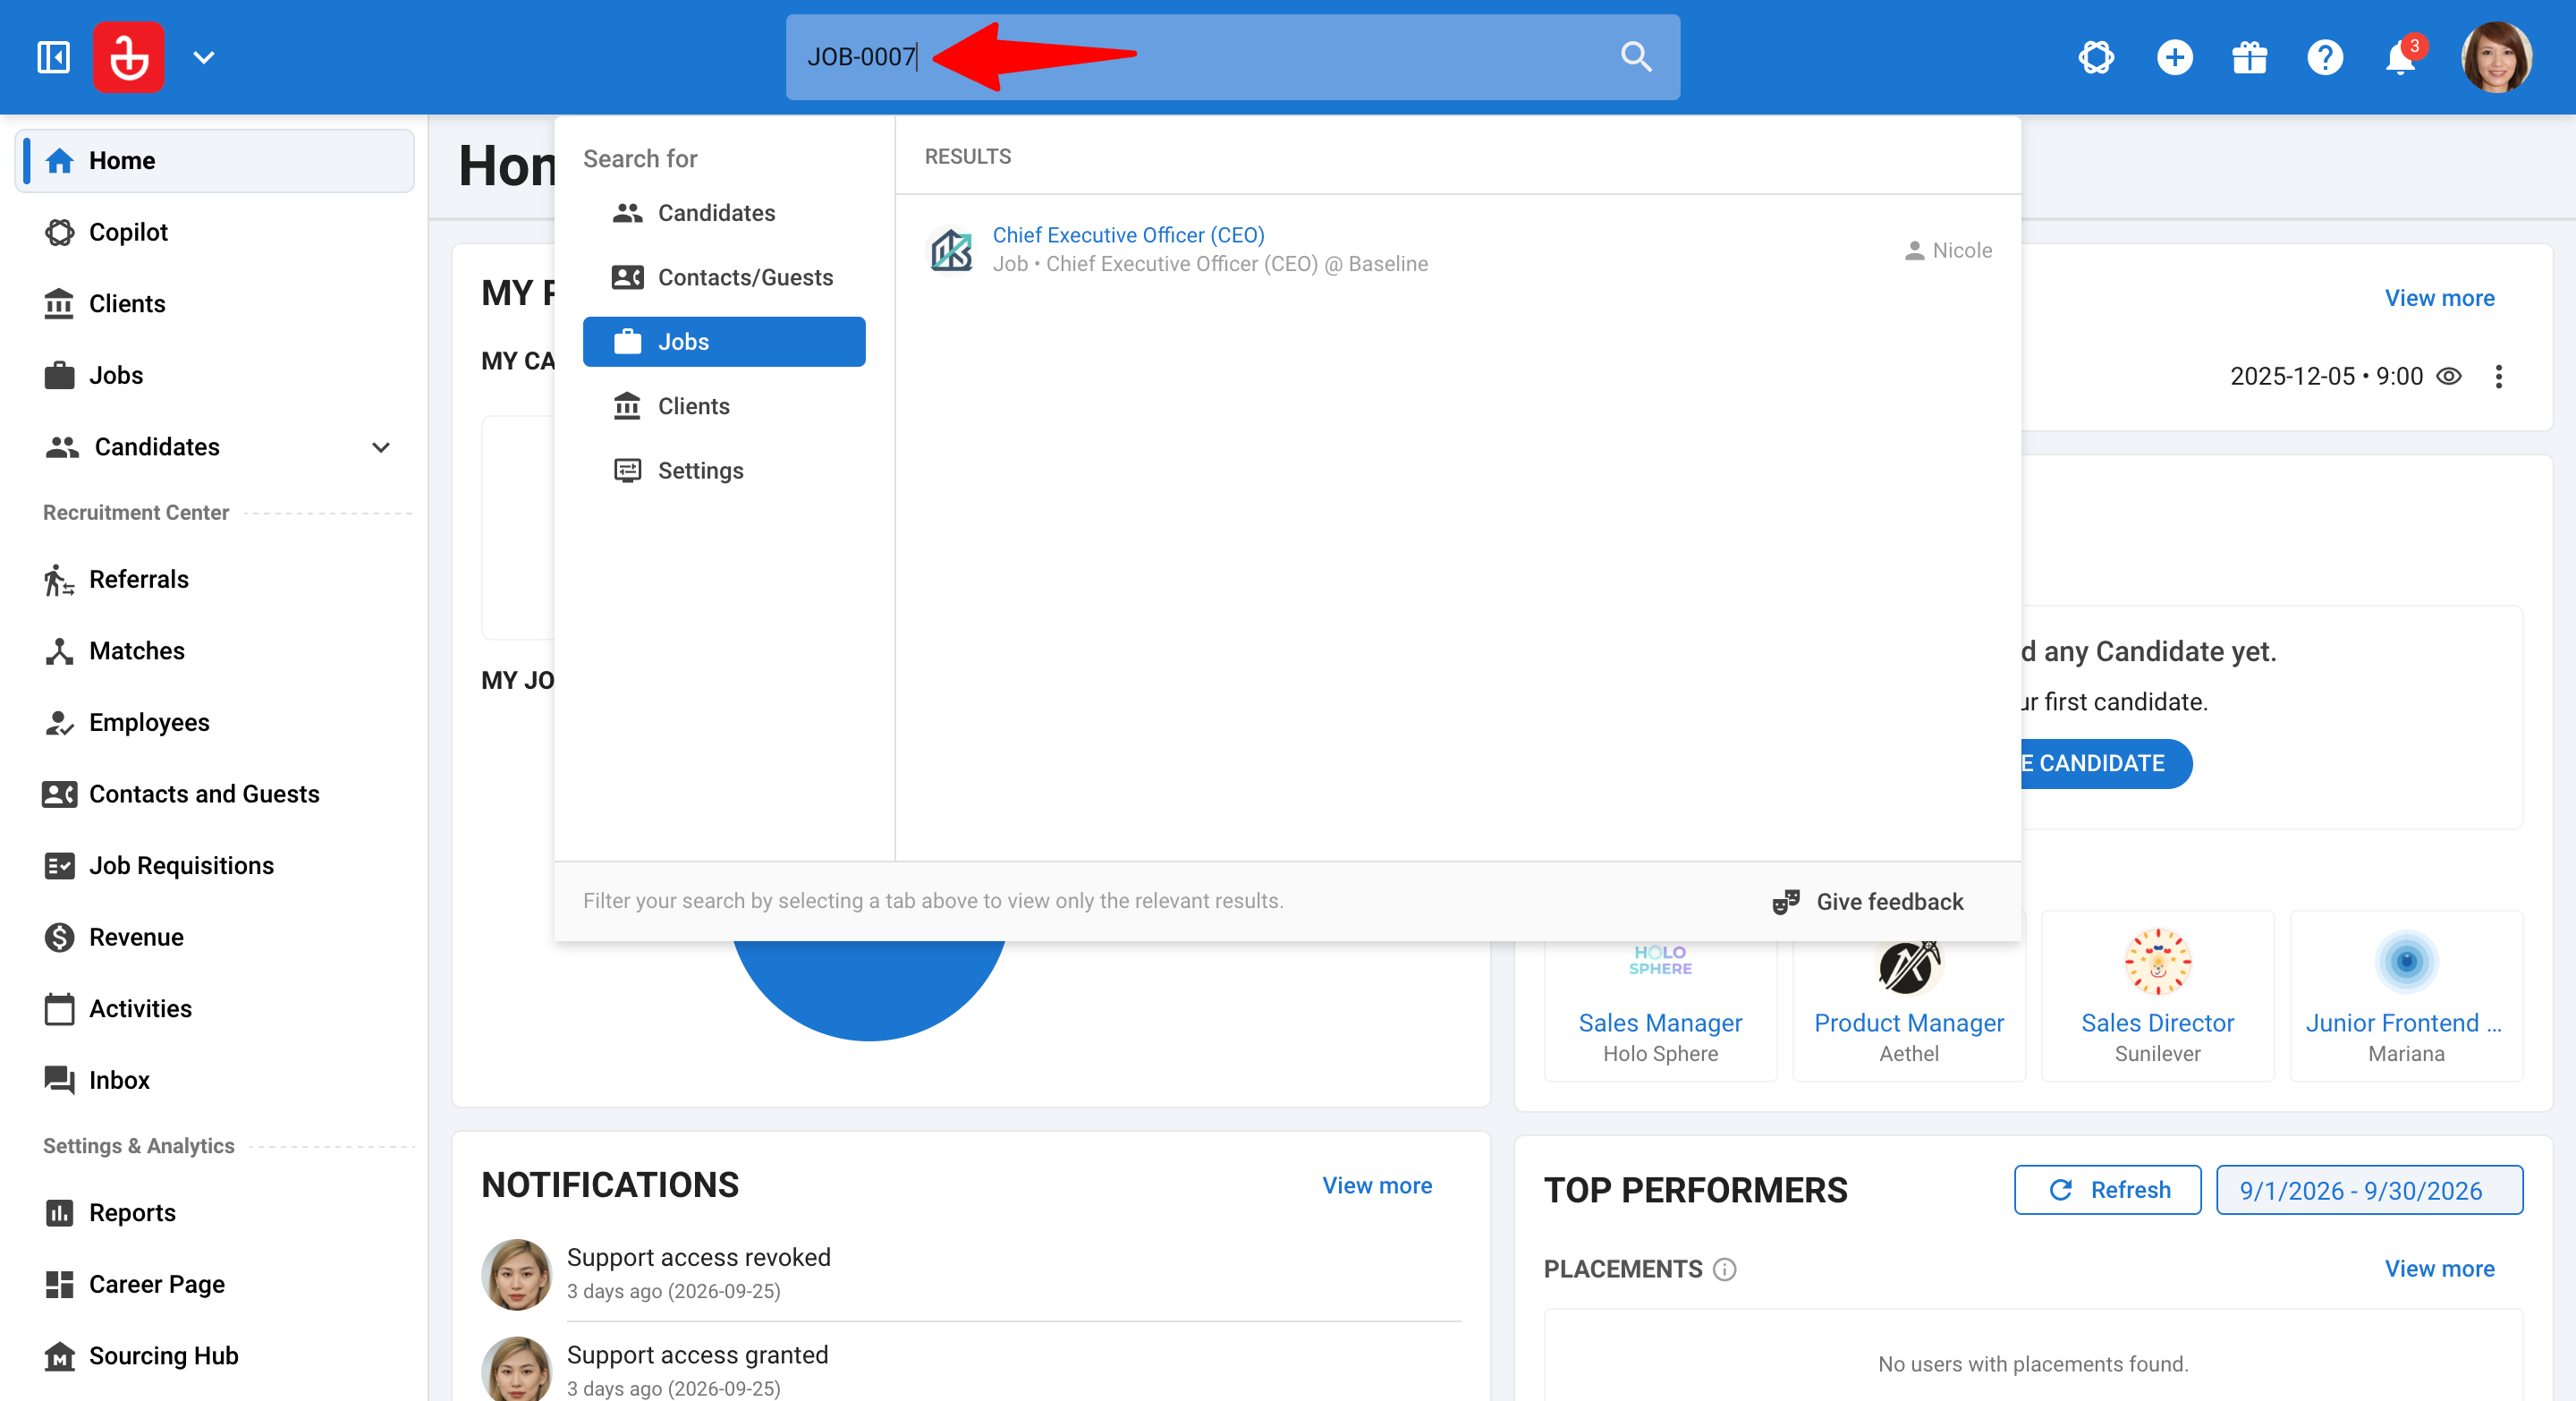
- Quick Search: Enter the job number to find the job. You can search with or without the prefix and zeros (for example, JOB-0042, 0042, or 42).
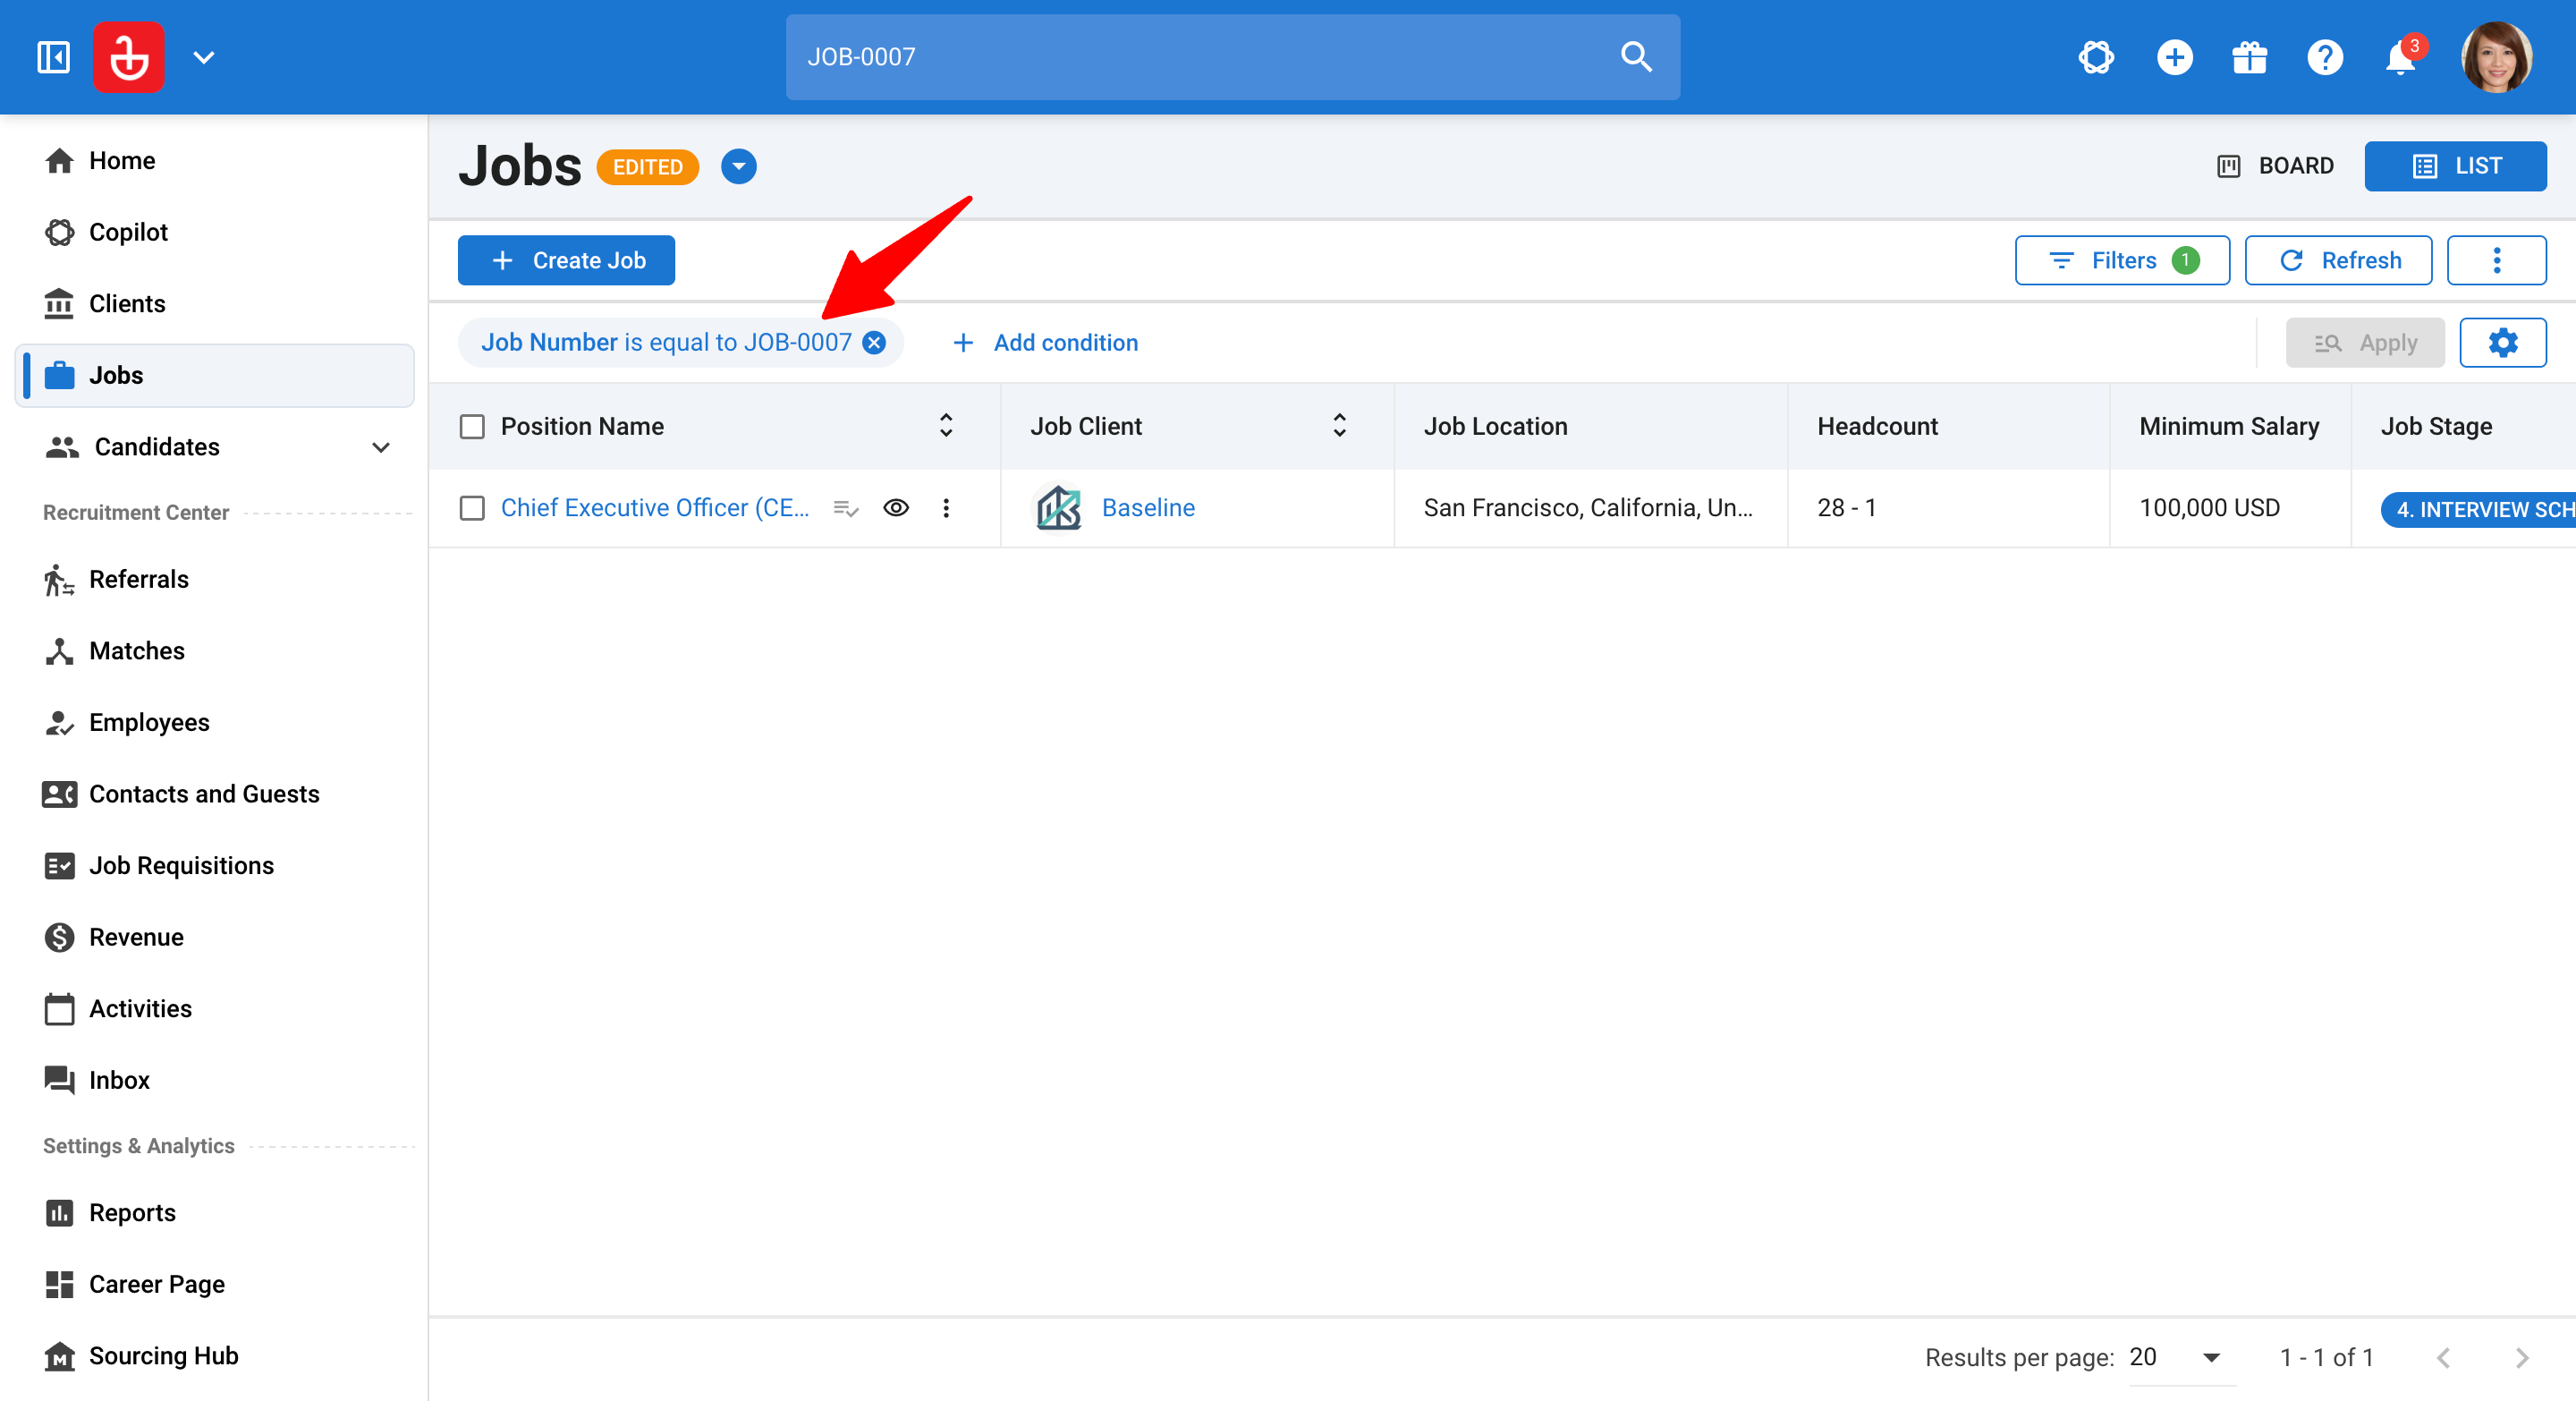
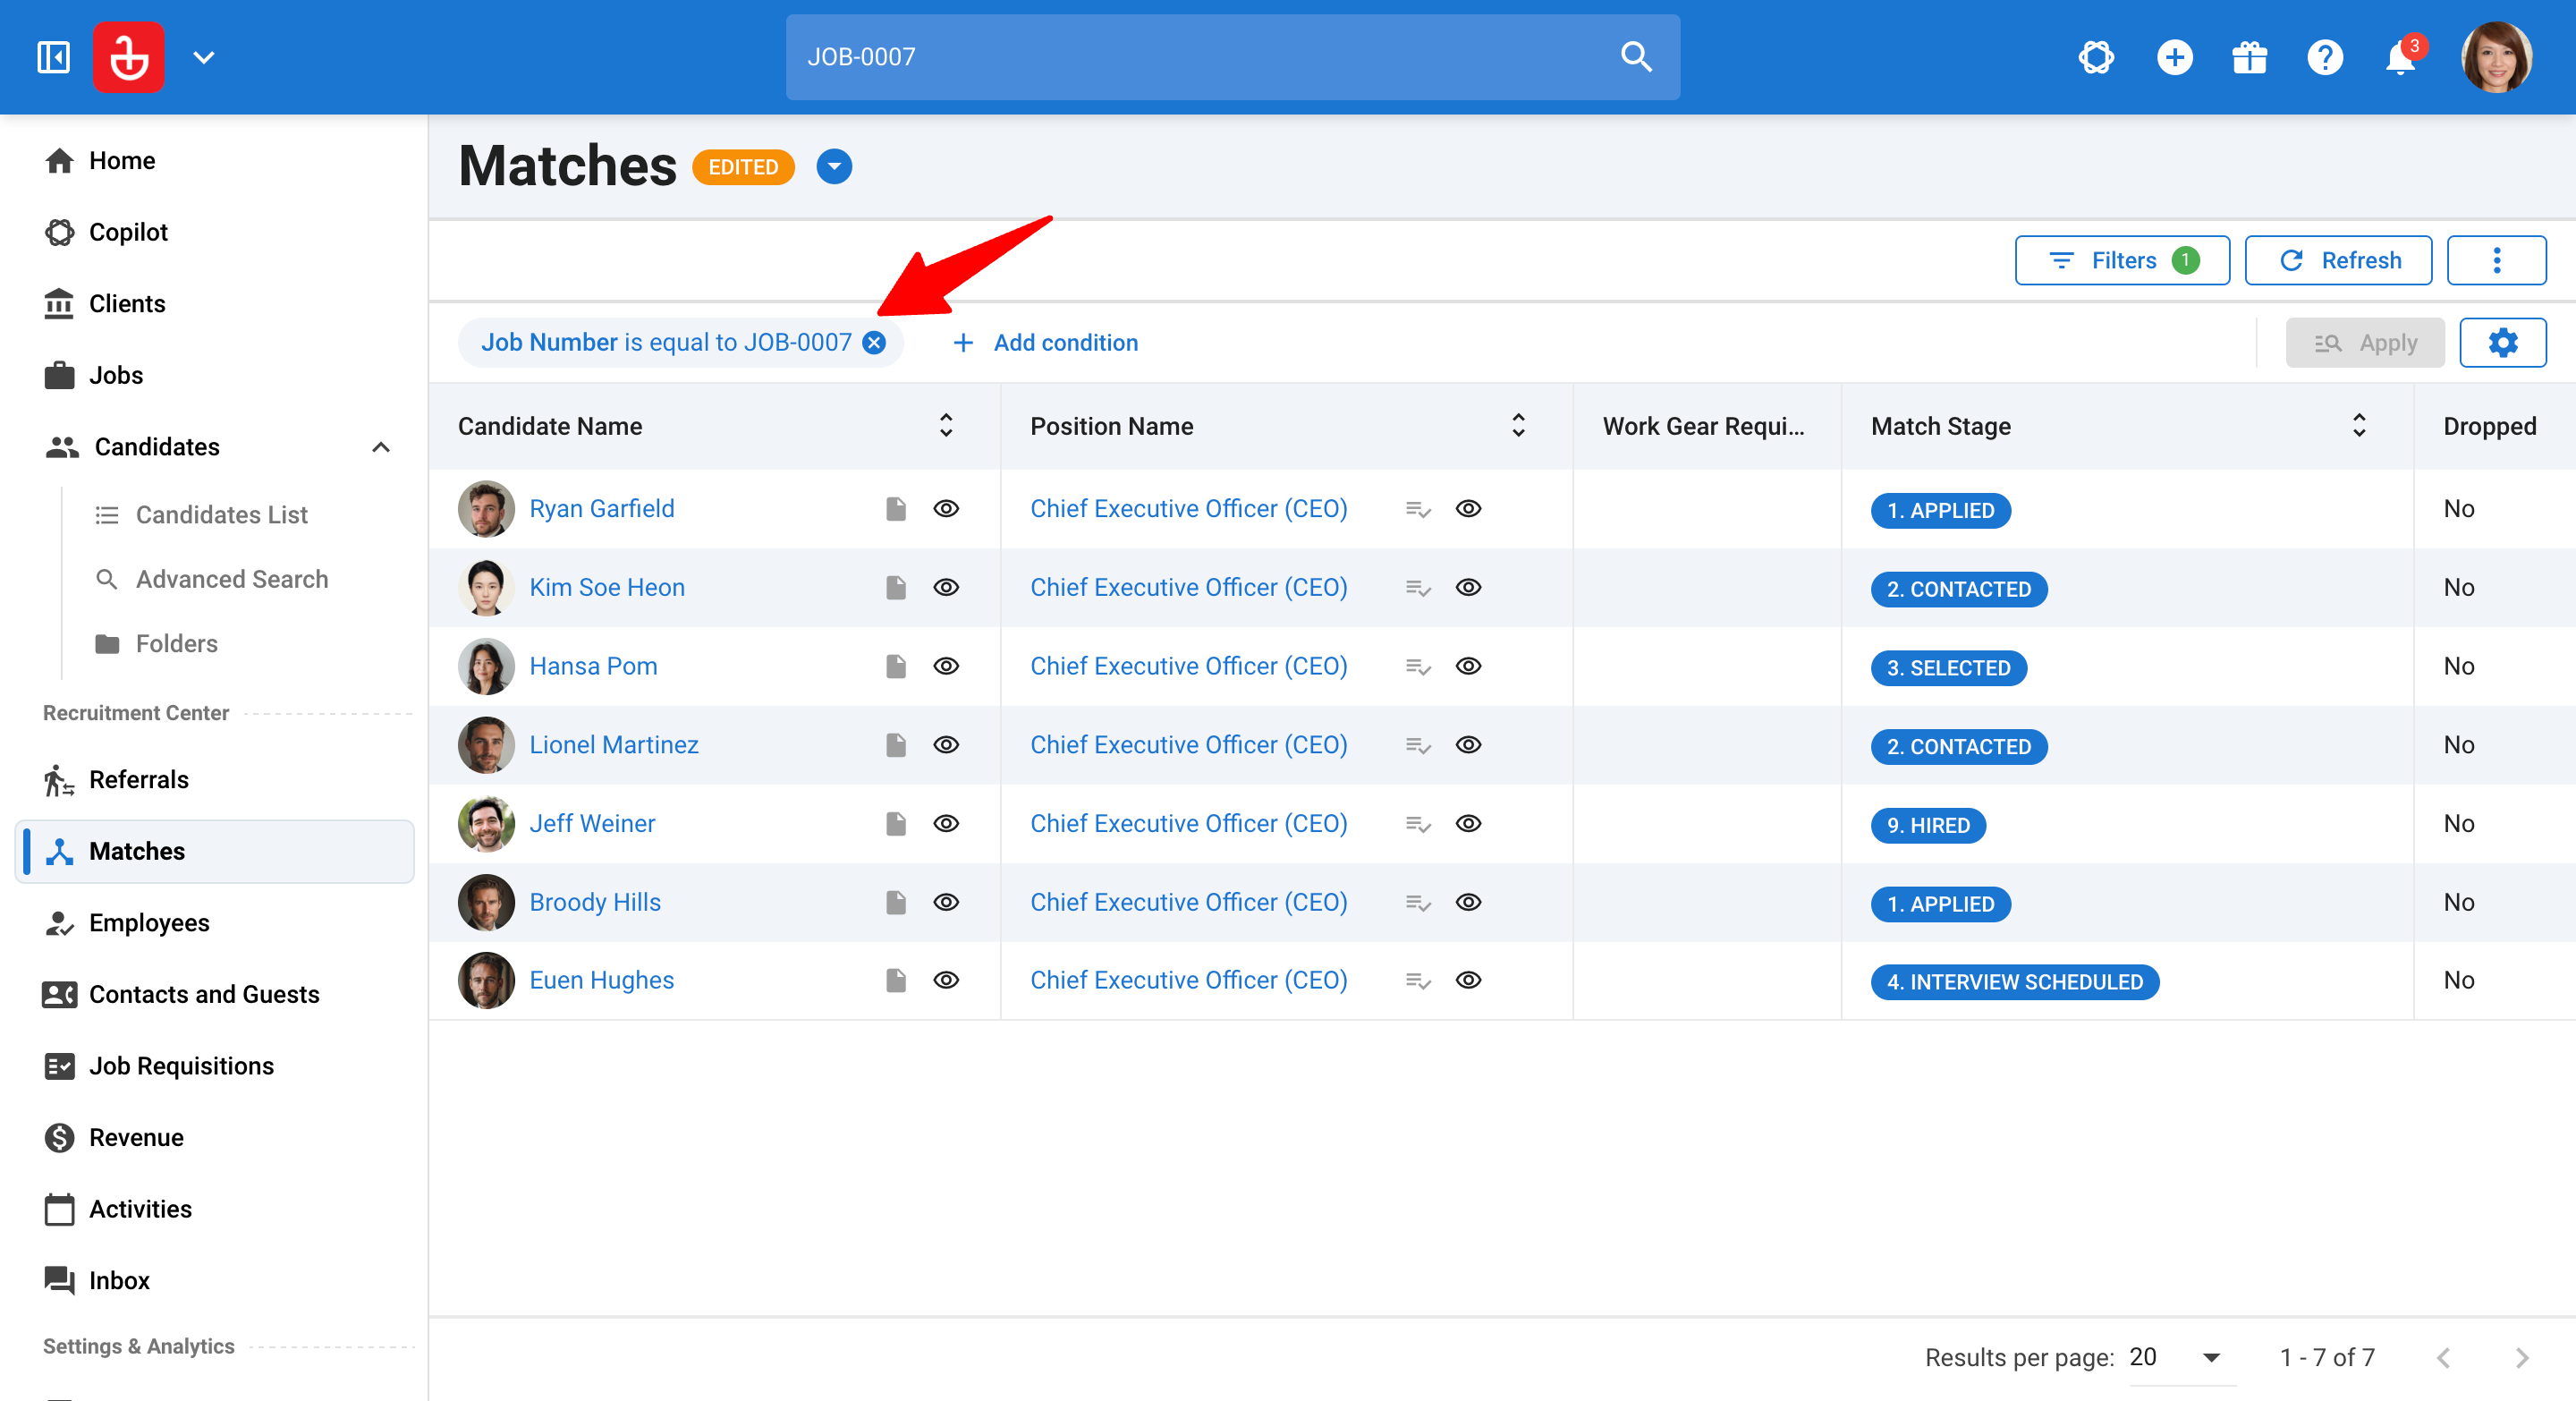
- Job and Match tables: Display, sort, and filter by job number.
- Exports: The job number is included when you export a table.
Editing a Custom Category or Field
-
Head to the following page. Alternatively, click on "Administration" from your side menu, open the "Customization" category and then the "Jobs" category then click on "Customize job fields".
-
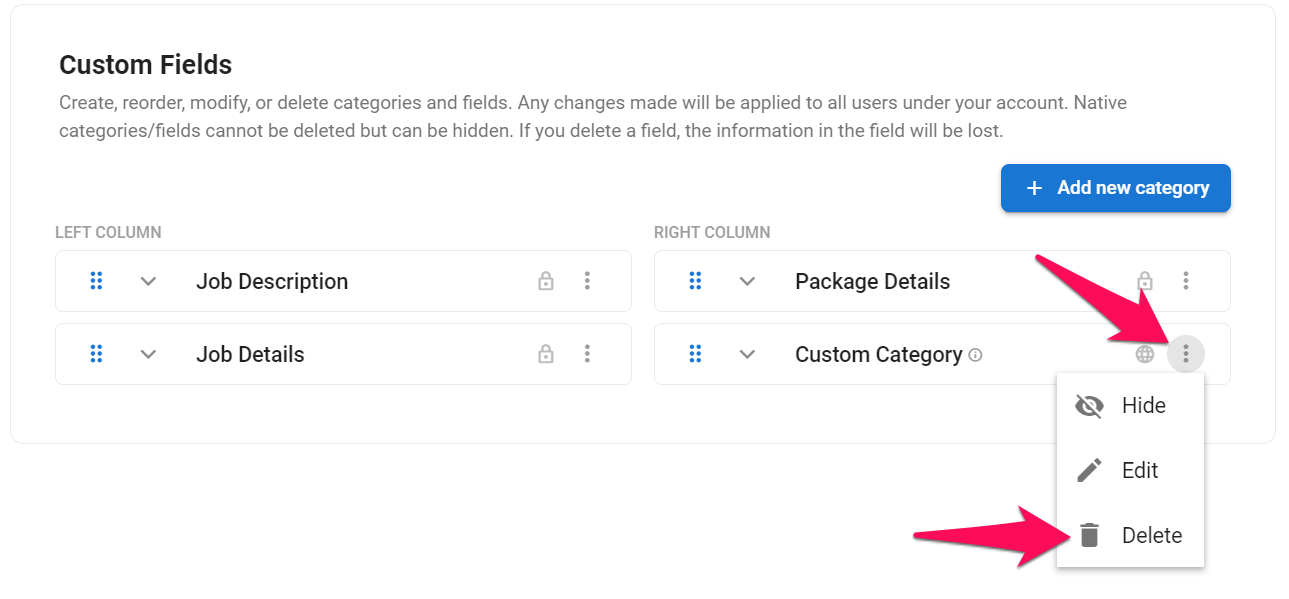
Click on the 3-dots next to a custom category or custom field and click on "Edit" from the dropdown menu.
-
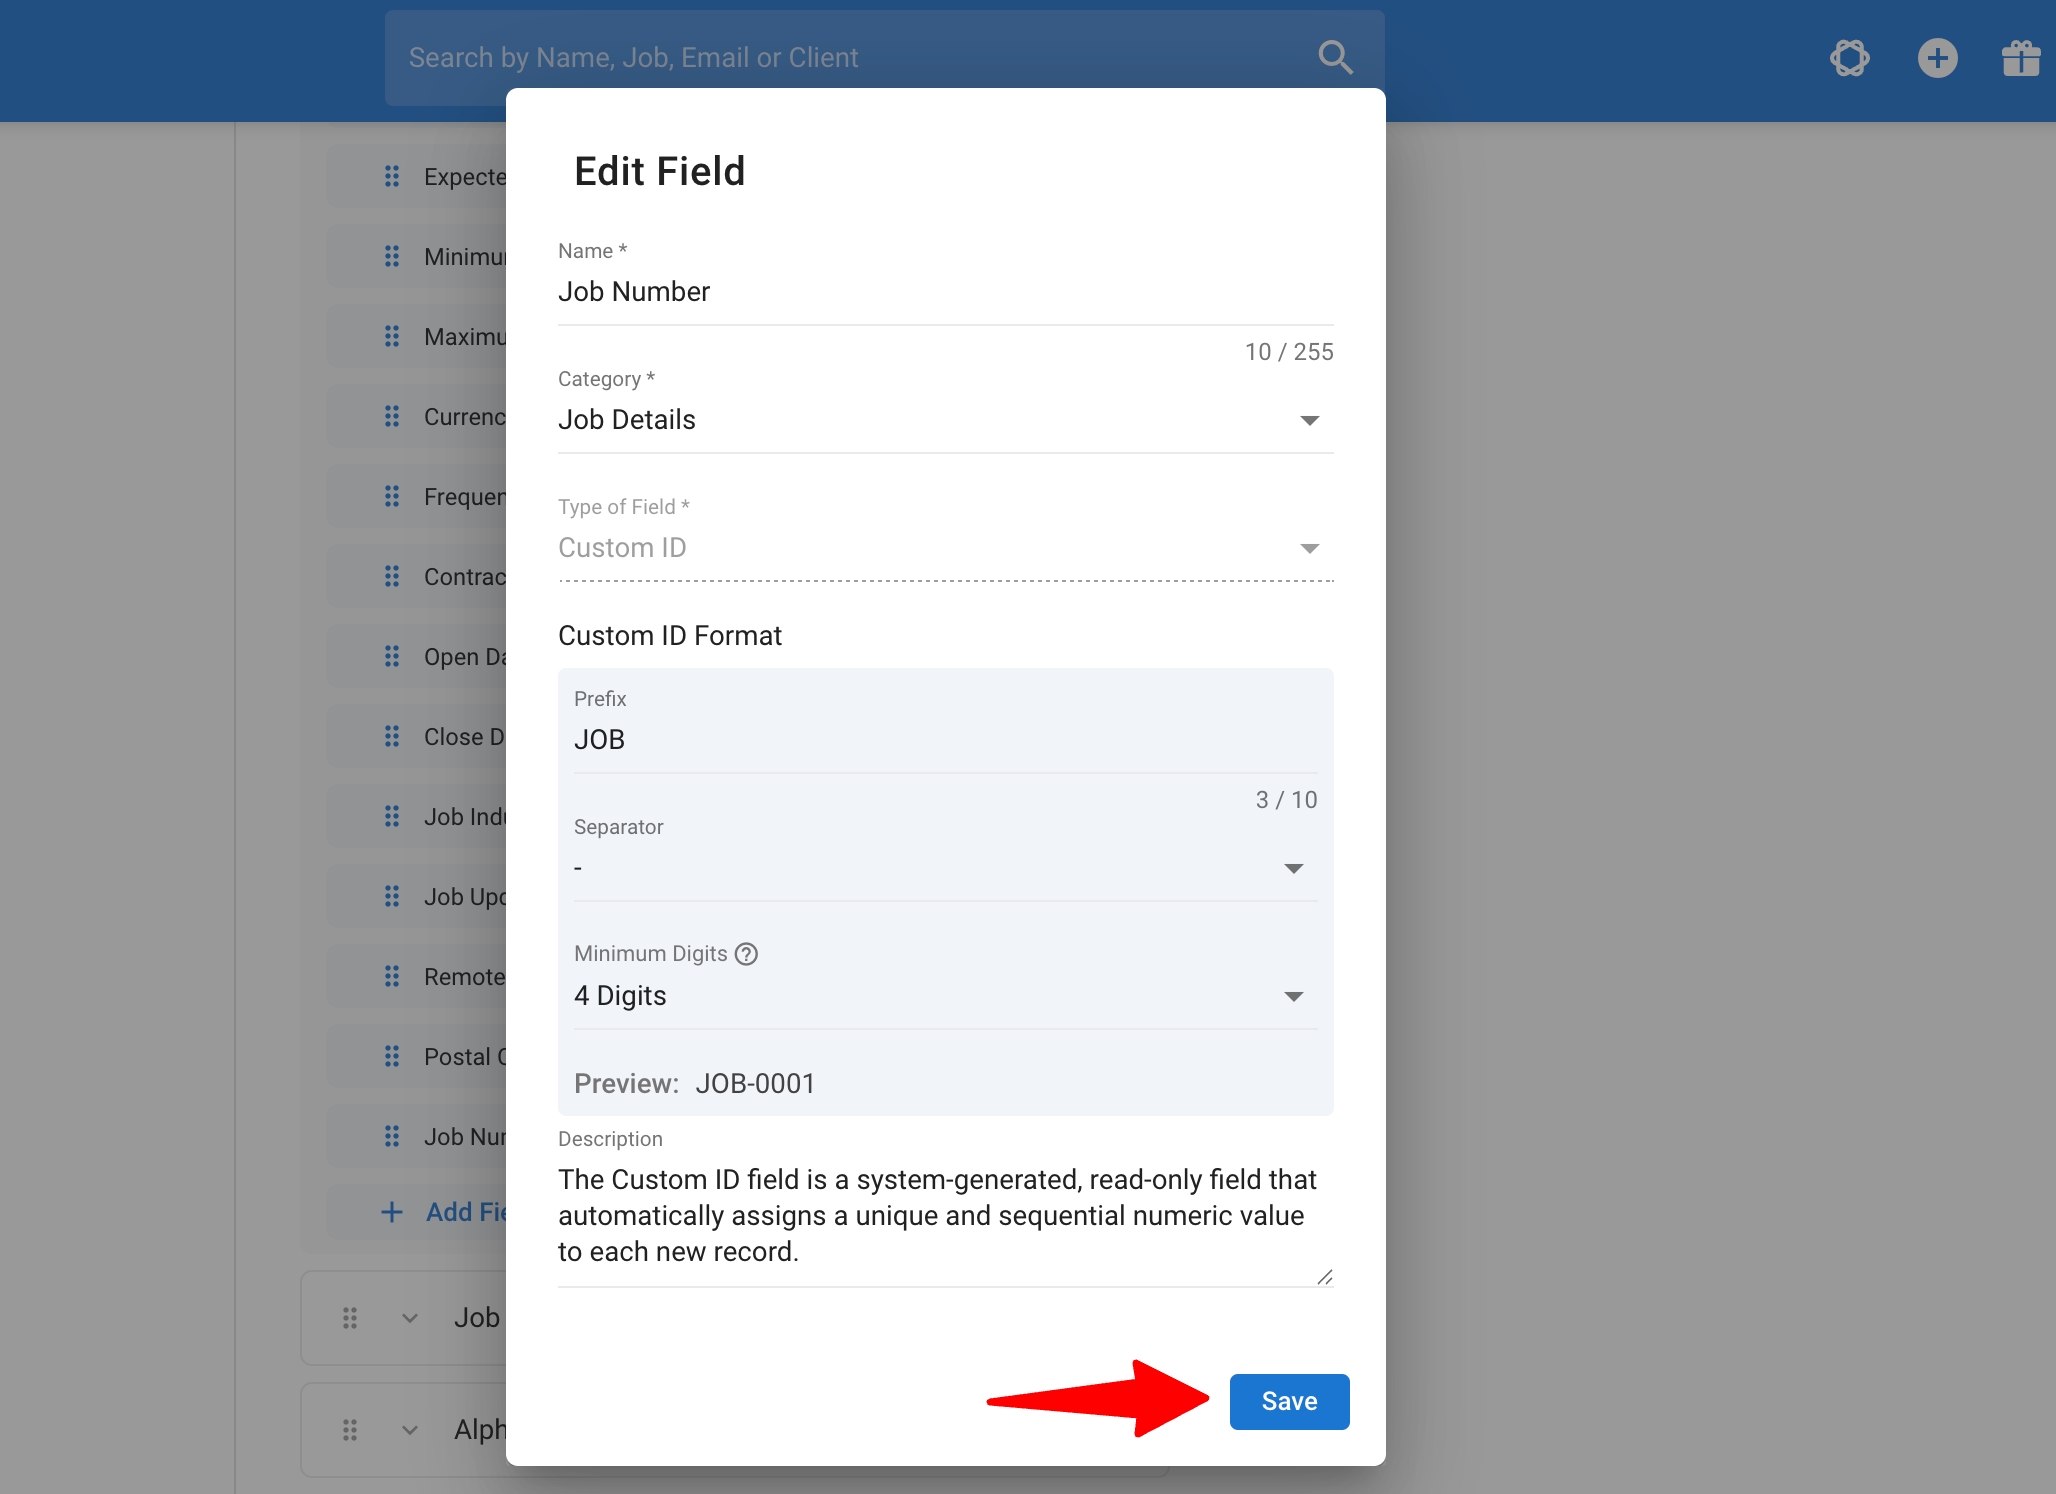
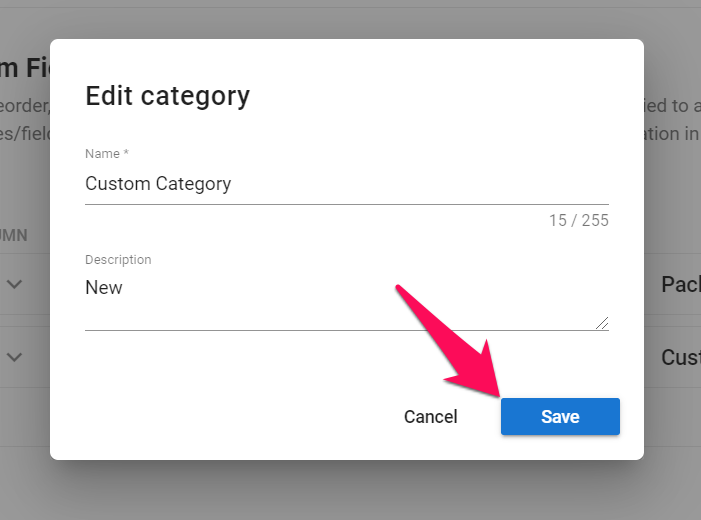
Edit the fields and click "Save".
NoteChanging the prefix or separator of a Custom ID field updates the job number shown on all jobs. The number itself stays the same (for example, JOB-0042 becomes REQ-0042).
Deleting a Custom Category or Field
Default categories and fields cannot be deleted.
- Head to the following page. Alternatively, click on "Administration" from your side menu, open the "Customization" category and then the "Jobs" category then click on "Customize job fields".
-
Click on the 3-dots next to a custom category or custom field and click on "Delete" from the dropdown menu.
-
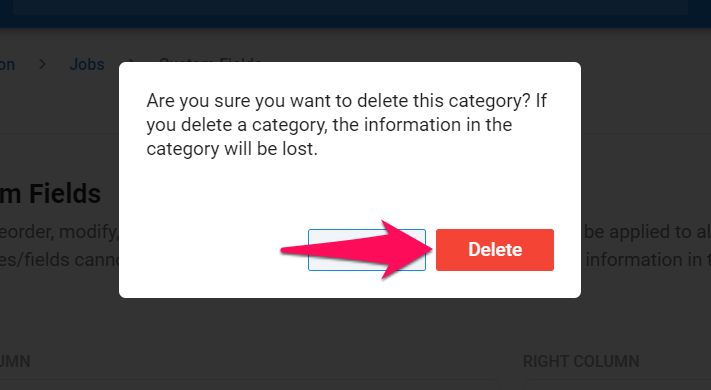
Confirm the deletion by clicking on "Delete".
NoteDeleting a Custom ID field permanently removes the job numbers from all jobs. This cannot be undone.
Re-ordering Categories and Fields
- Head to the following page. Alternatively, click on "Administration" from your side menu, open the "Customization" category and then the "Jobs" category then click on "Customize job fields".
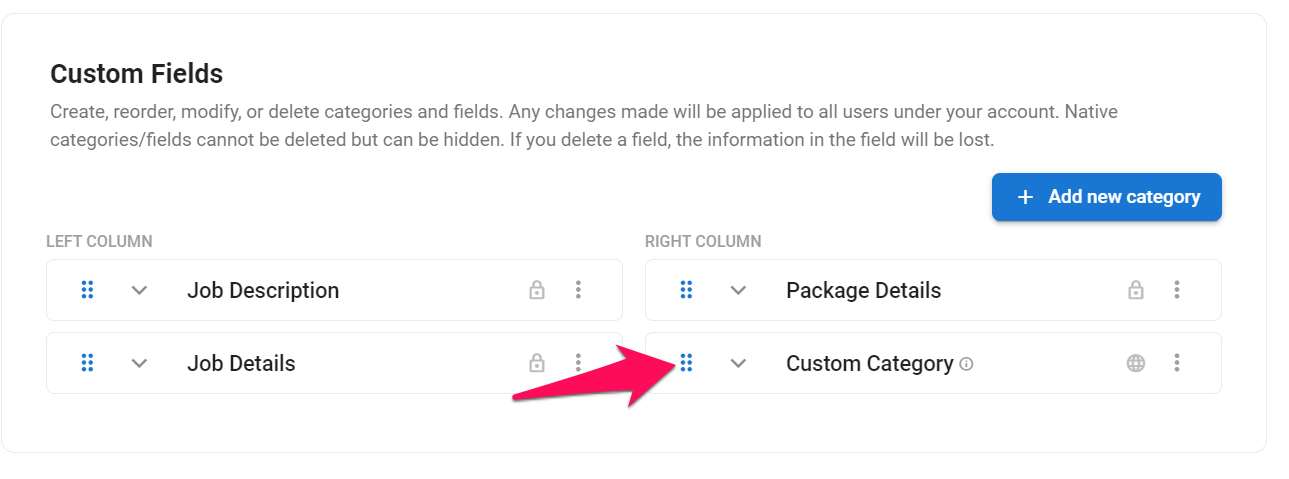
- Click to drag and drop to re-order fields.
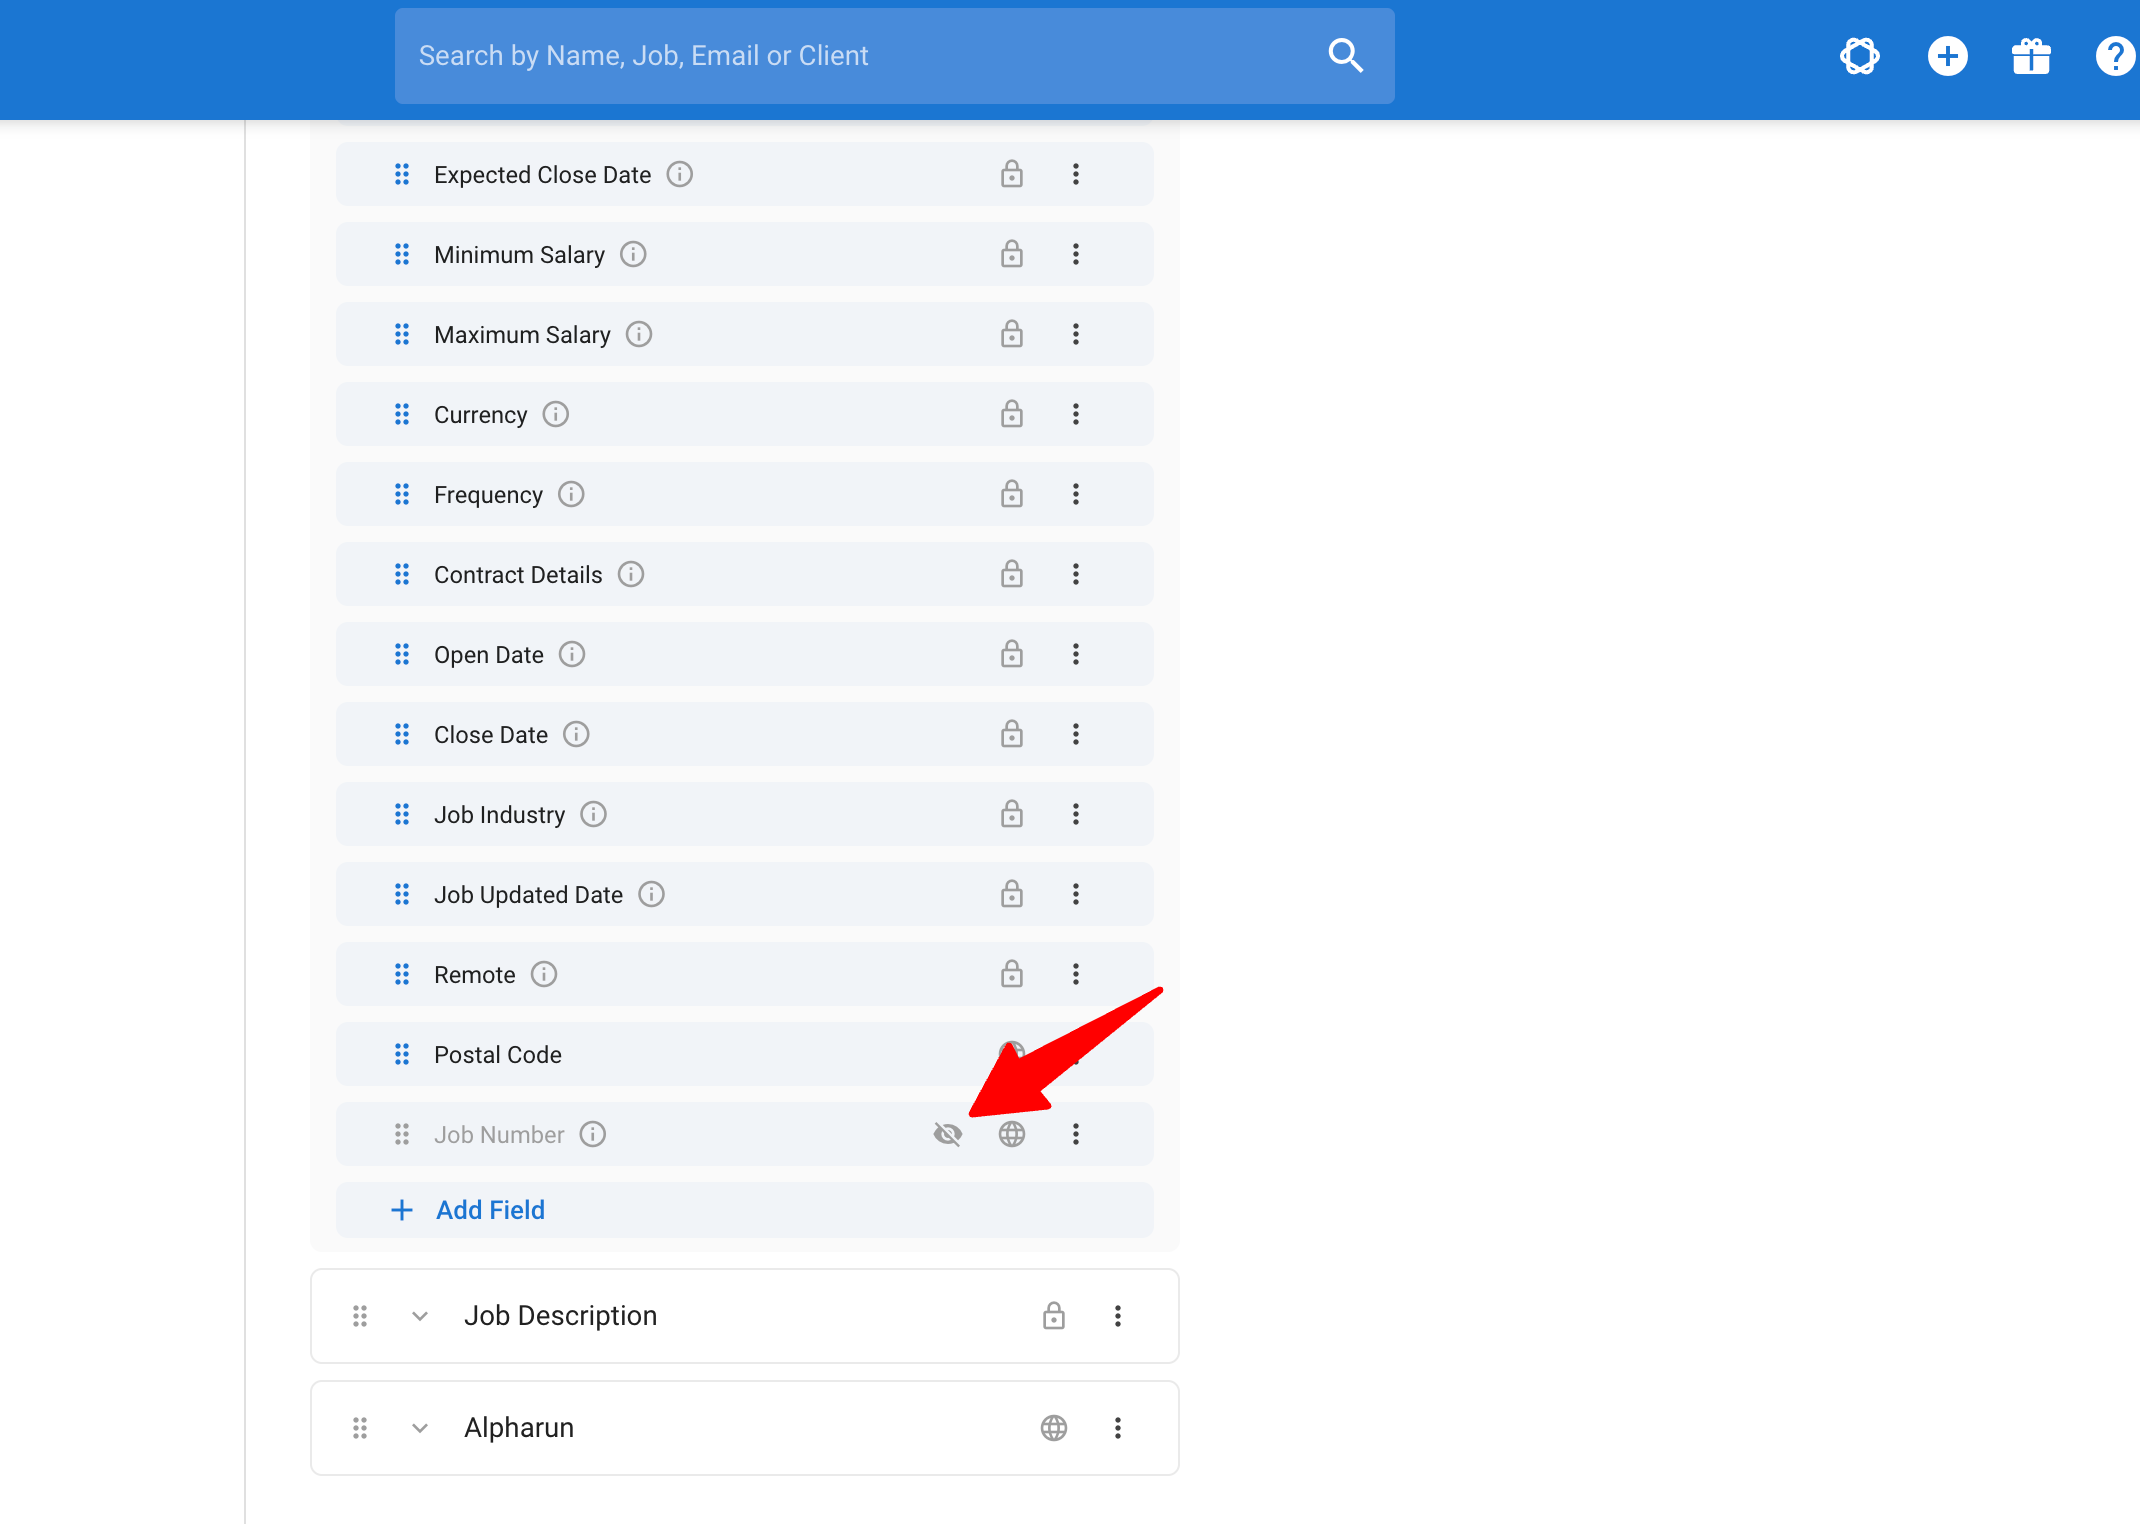
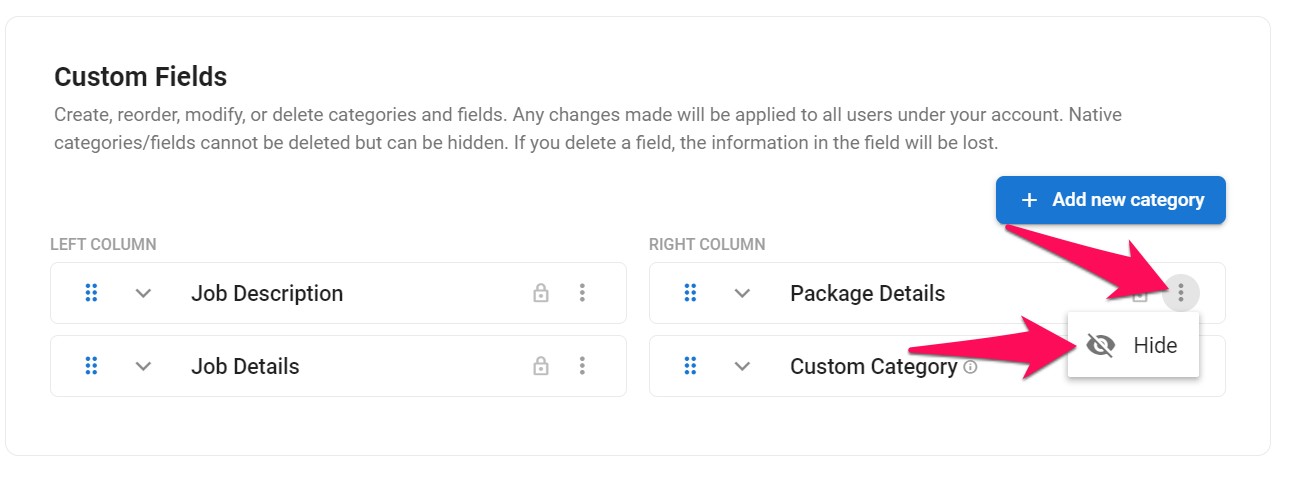
Displaying/hiding Categories and Fields
-
Head to the following page. Alternatively, click on "Administration" from your side menu, open the "Customization" category and then the "Jobs" category then click on "Customize job fields".
-
Click on the 3-dots next to a category or field and select hide/show from the dropdown menu.
NoteHiding a Custom ID field removes it from view, but job numbers are kept. They will reappear when the field is shown again.