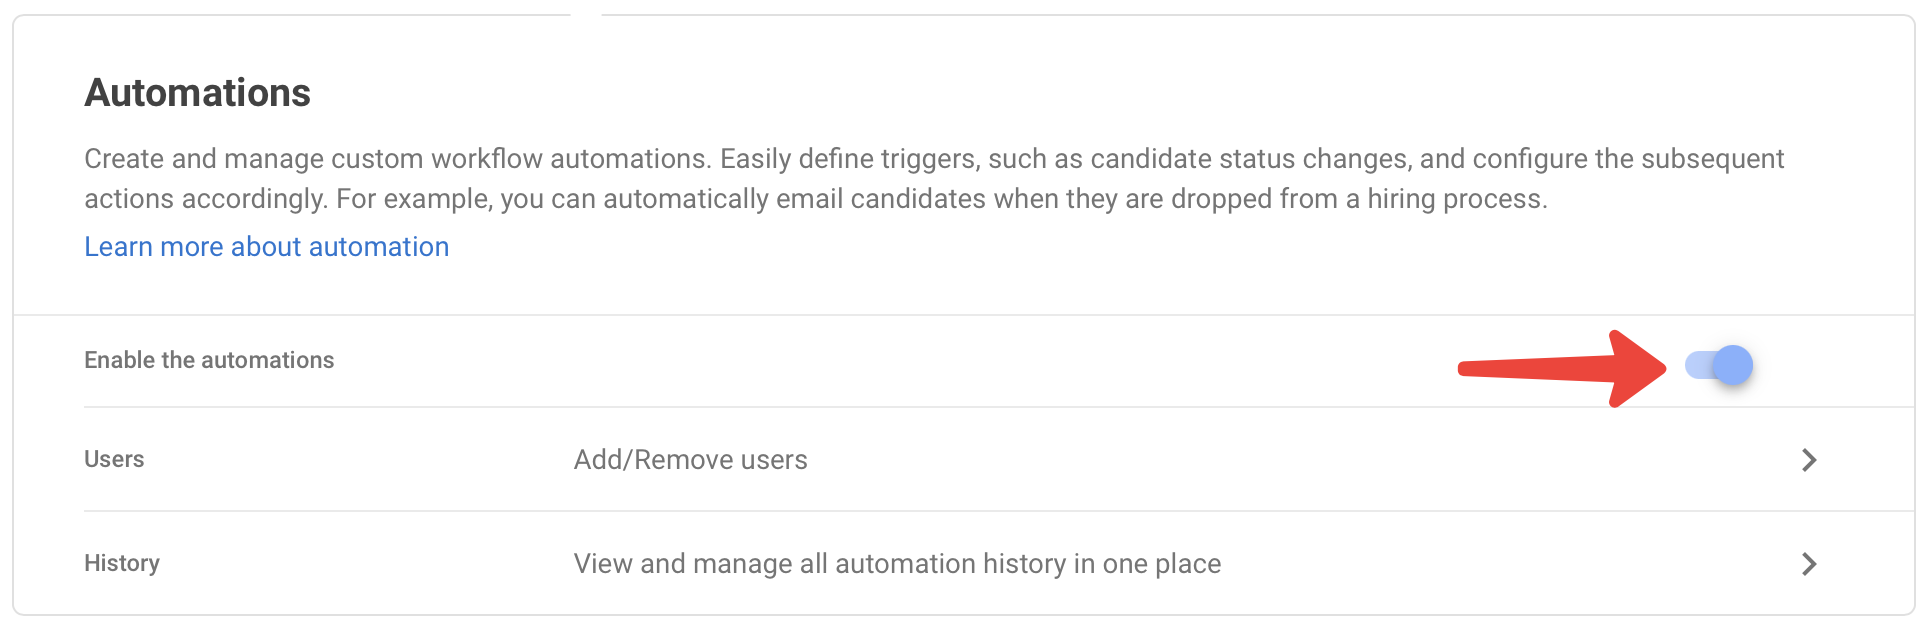
Automations empower users to create and manage custom automated actions triggered by specific events in Manatal.
The Workflow Automation feature is only available in the Enterprise and Enterprise Plus plans.
i. Each Global automation and Job automation counts as one automation towards the limit.
ii. Limits are set based on a fair usage policy.
iii. The number of automations created reflects the current active automations in your account and does not reset over time.
Facilitate Document Gathering: Trigger an email at a specific stage to request documents or information (e.g., driving license).
Automate Interview Scheduling: Send an email with a link to book a calendar slot (e.g., Calendly) when a candidate reaches the interview stage.
Automate Assessment Sending: Select a stage where candidates receive an email with an assessment link, such as a coding test.
Automate Stage Acknowledgement: Automatically send a congratulations email when a candidate passes a stage.
Automate Rejection: Send an automated email when a candidate is dropped from the process.
To ensure the best experience for all customers, Manatal applies a fair usage cap on certain tools and features. If you have reached these limits due to your specific needs, please contact our support team to discuss increasing your usage allowance.
Types of automations
- Global Automations: Automations which exist on a Pipeline level and are applied to all jobs which incorporate that pipeline
- Job Automations: Automations which exist on a Job level and are executed only for one specific job
List of actions and triggers
Triggers:
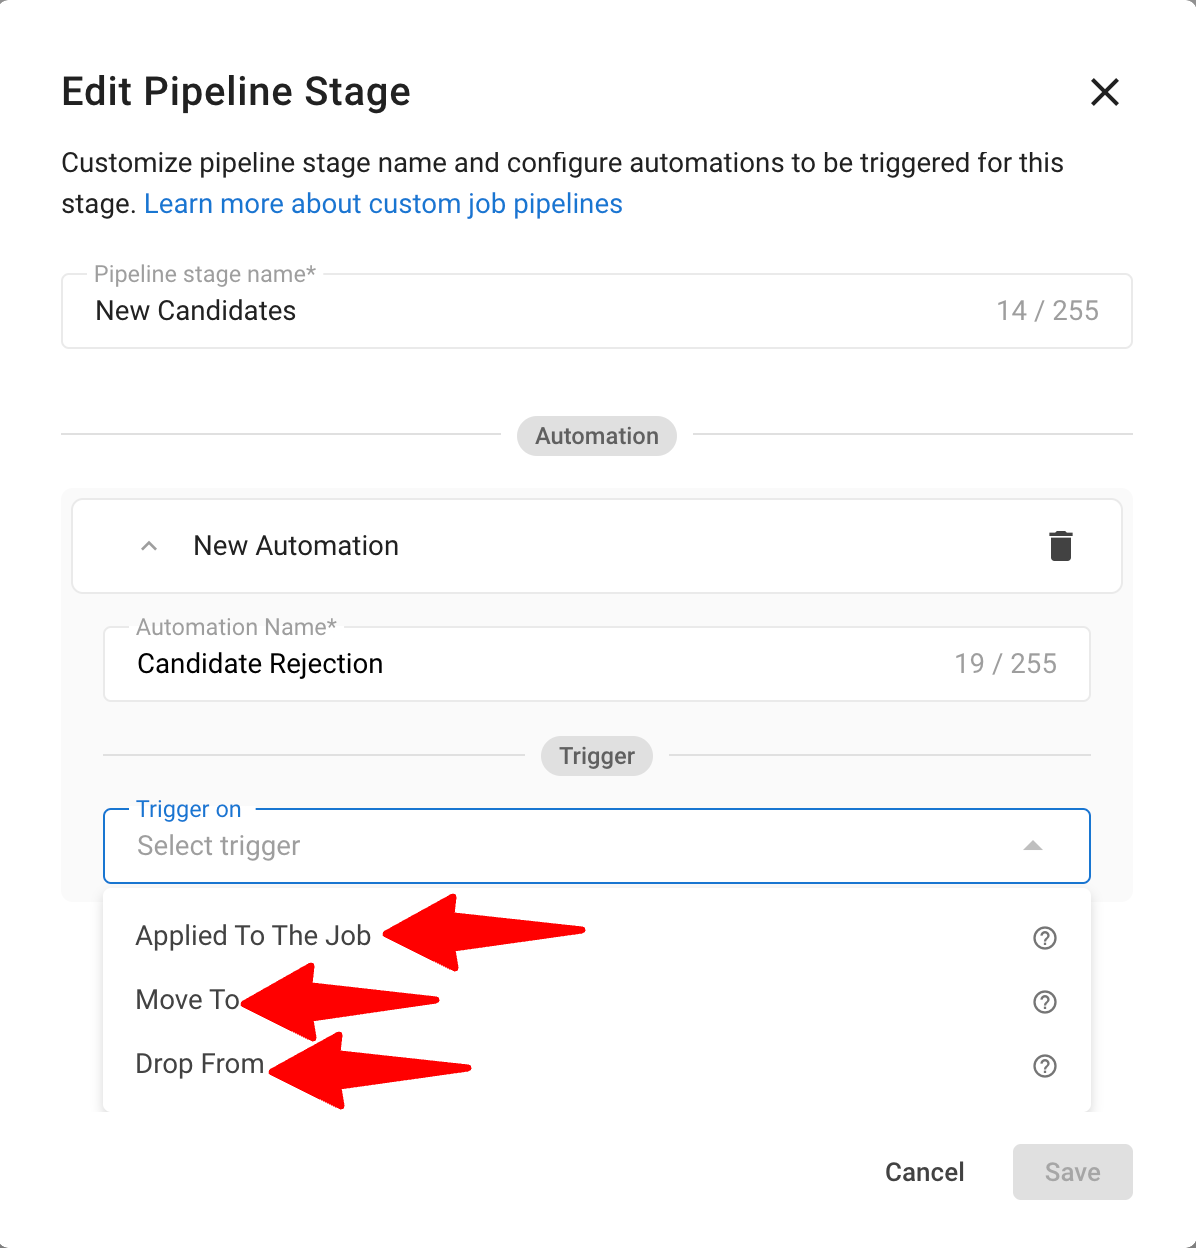
- Applied To The Job: Activated when a candidate applies to a job through your Career Page or Job Boards and enters the first pipeline stage.Note
The 'Applied To The Job' trigger can only be set for the first stage in a job pipeline.
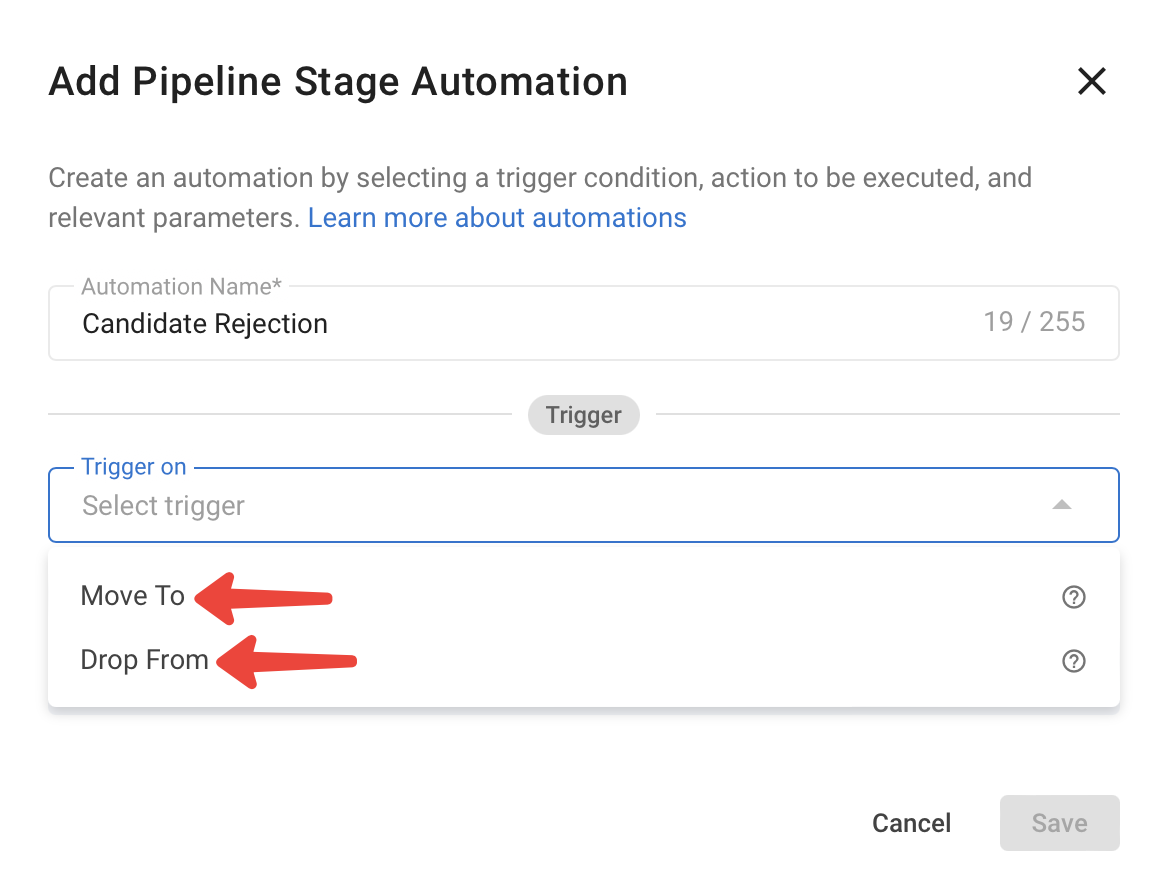
- Move To: Activated upon moving a candidate to a specific stage.
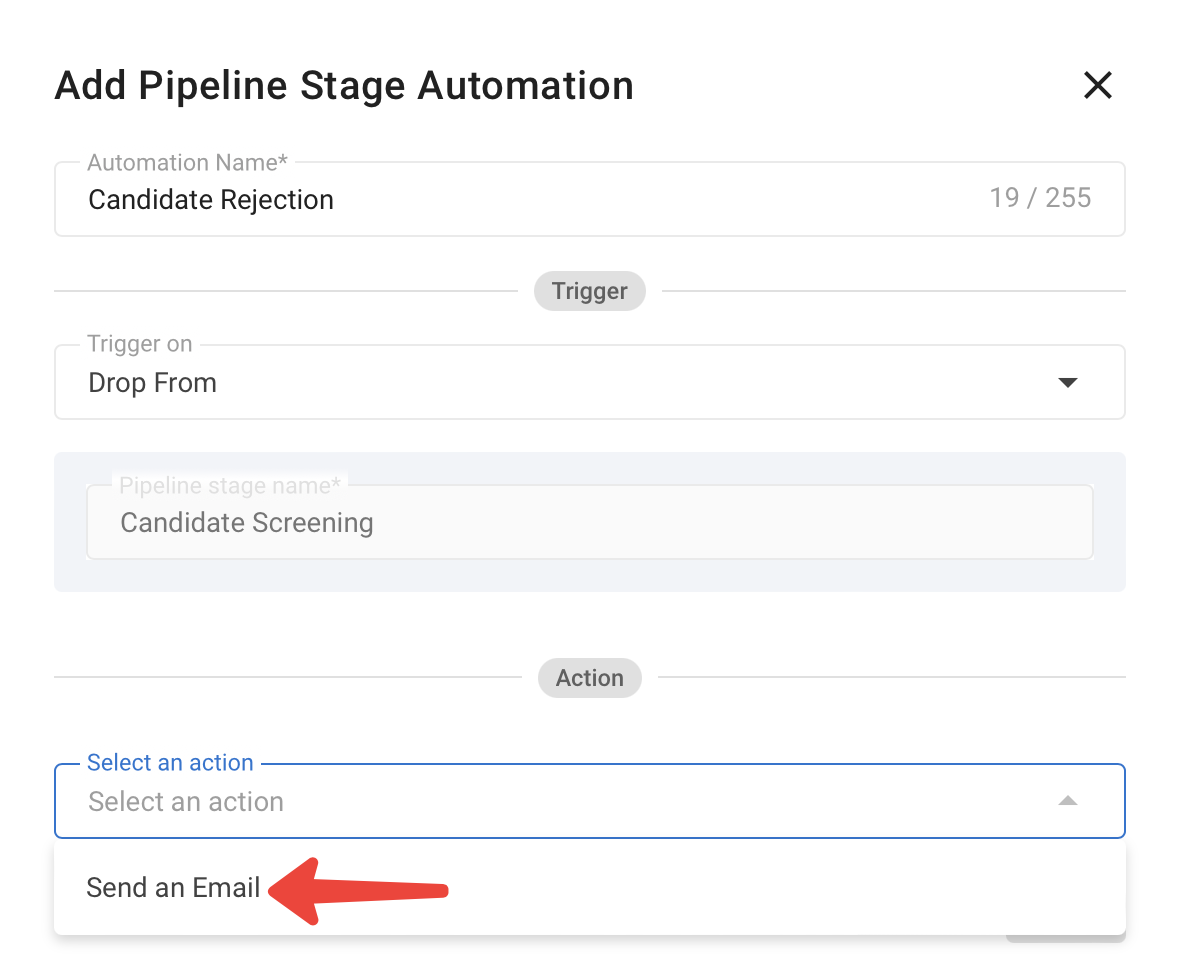
- Drop From: Activated when dropping a candidate from a certain stage.
Actions:
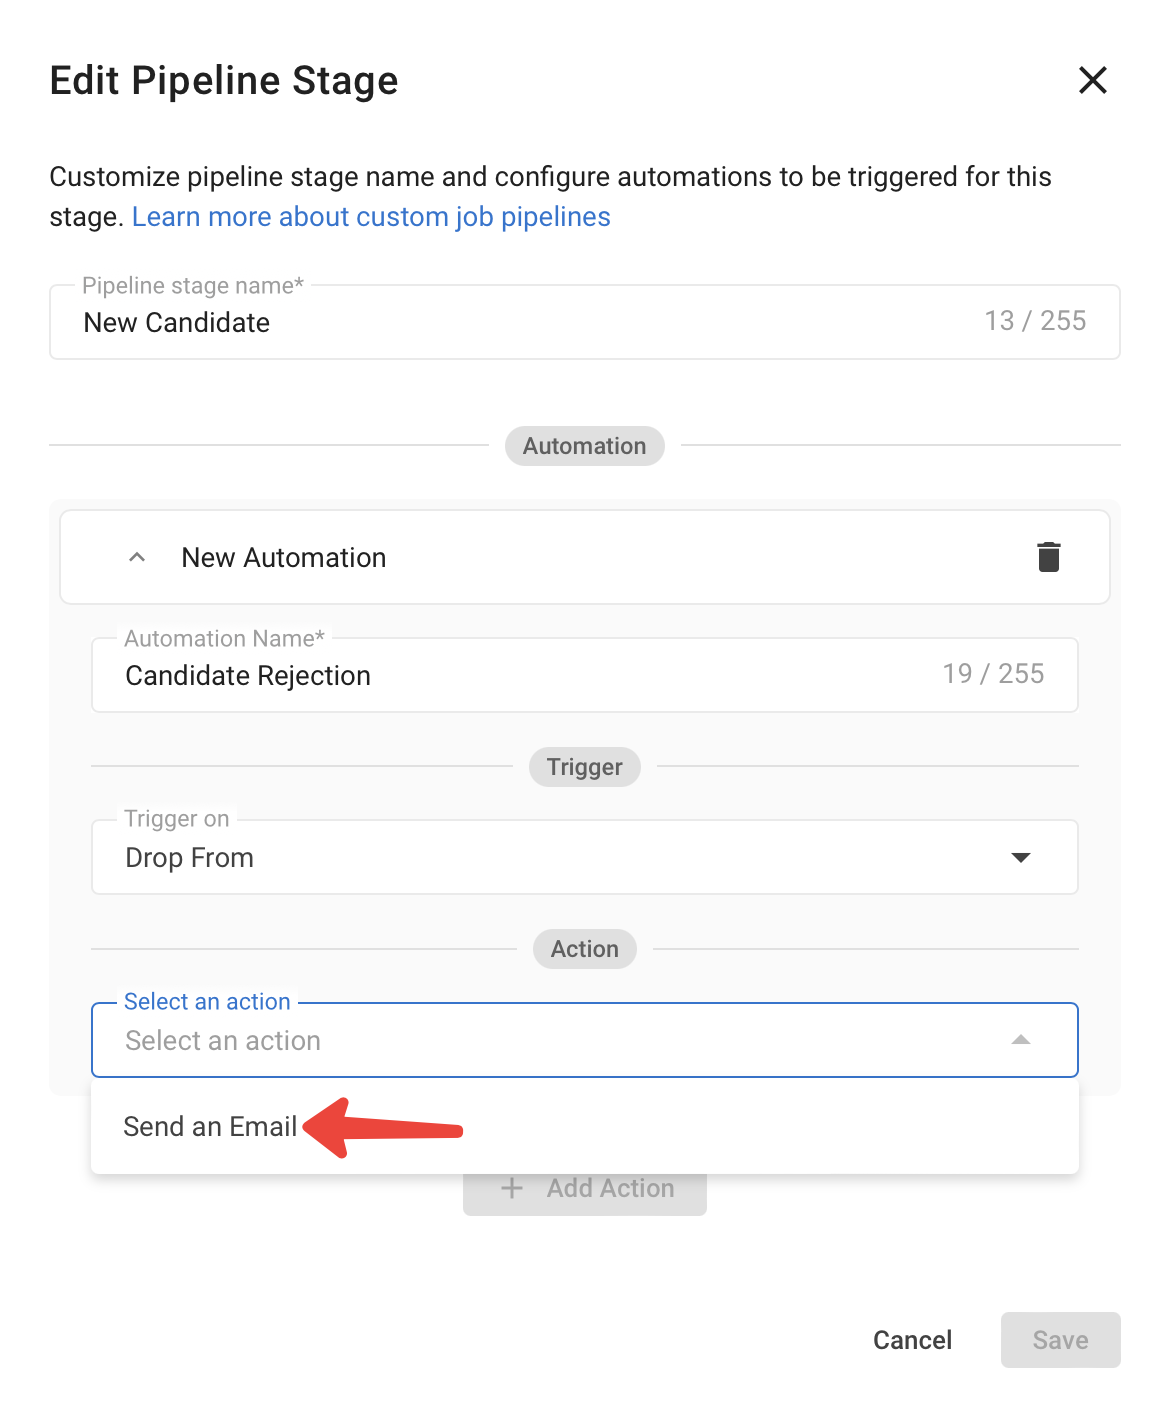
- Sending an email
Sending emails using automation requires:
- Integration of your Gmail or Outlook.
- Prepared email templates.
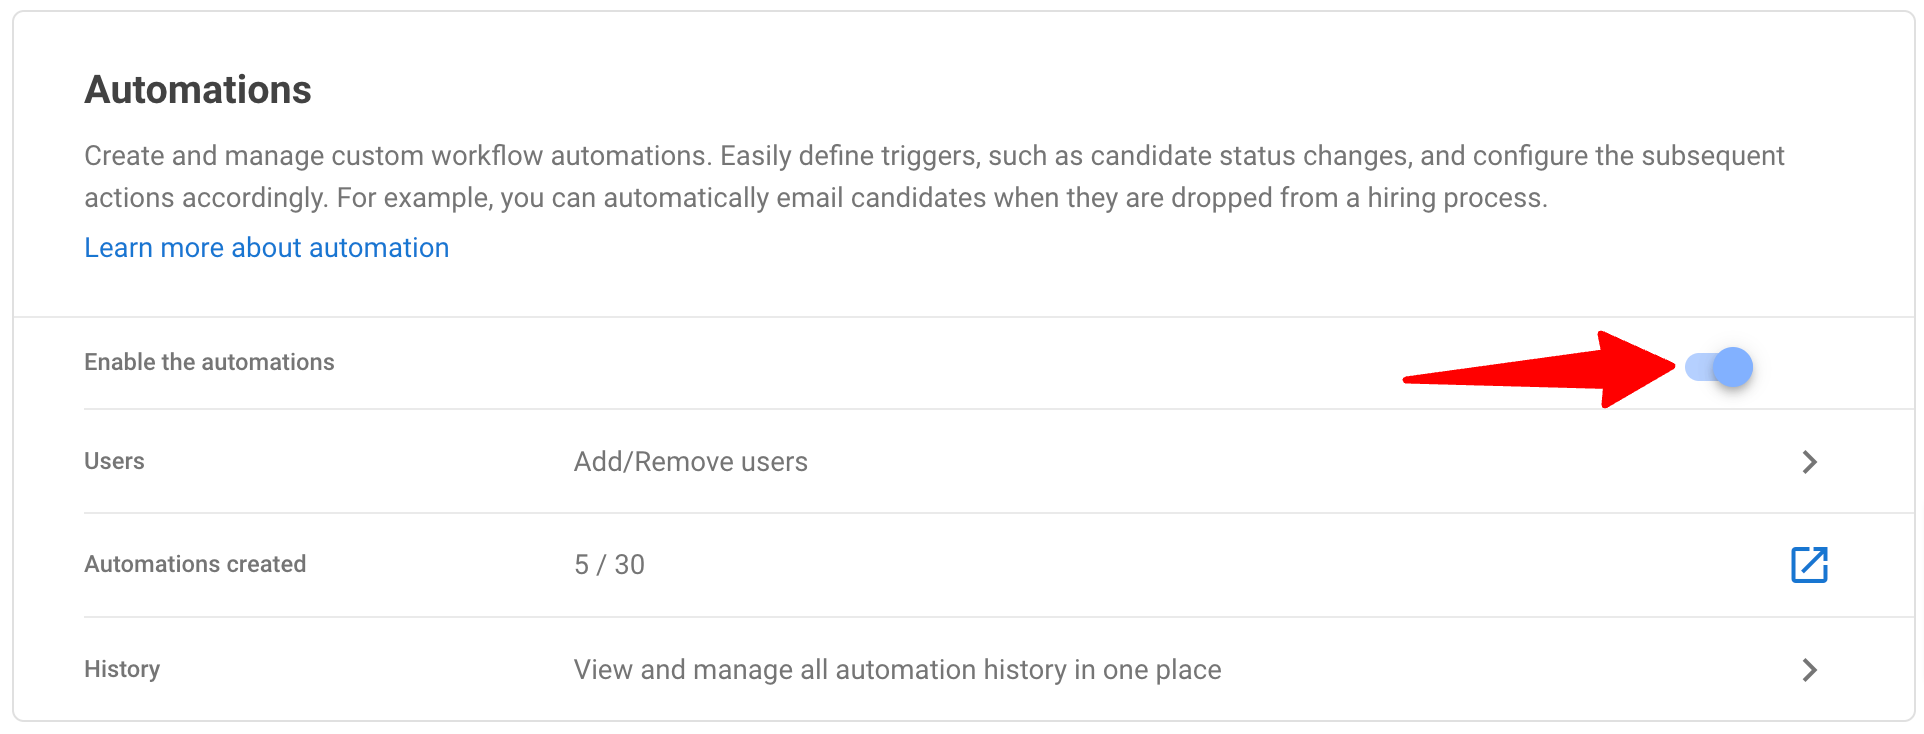
Enabling Workflow Automation
This action can only be performed by an admin user.
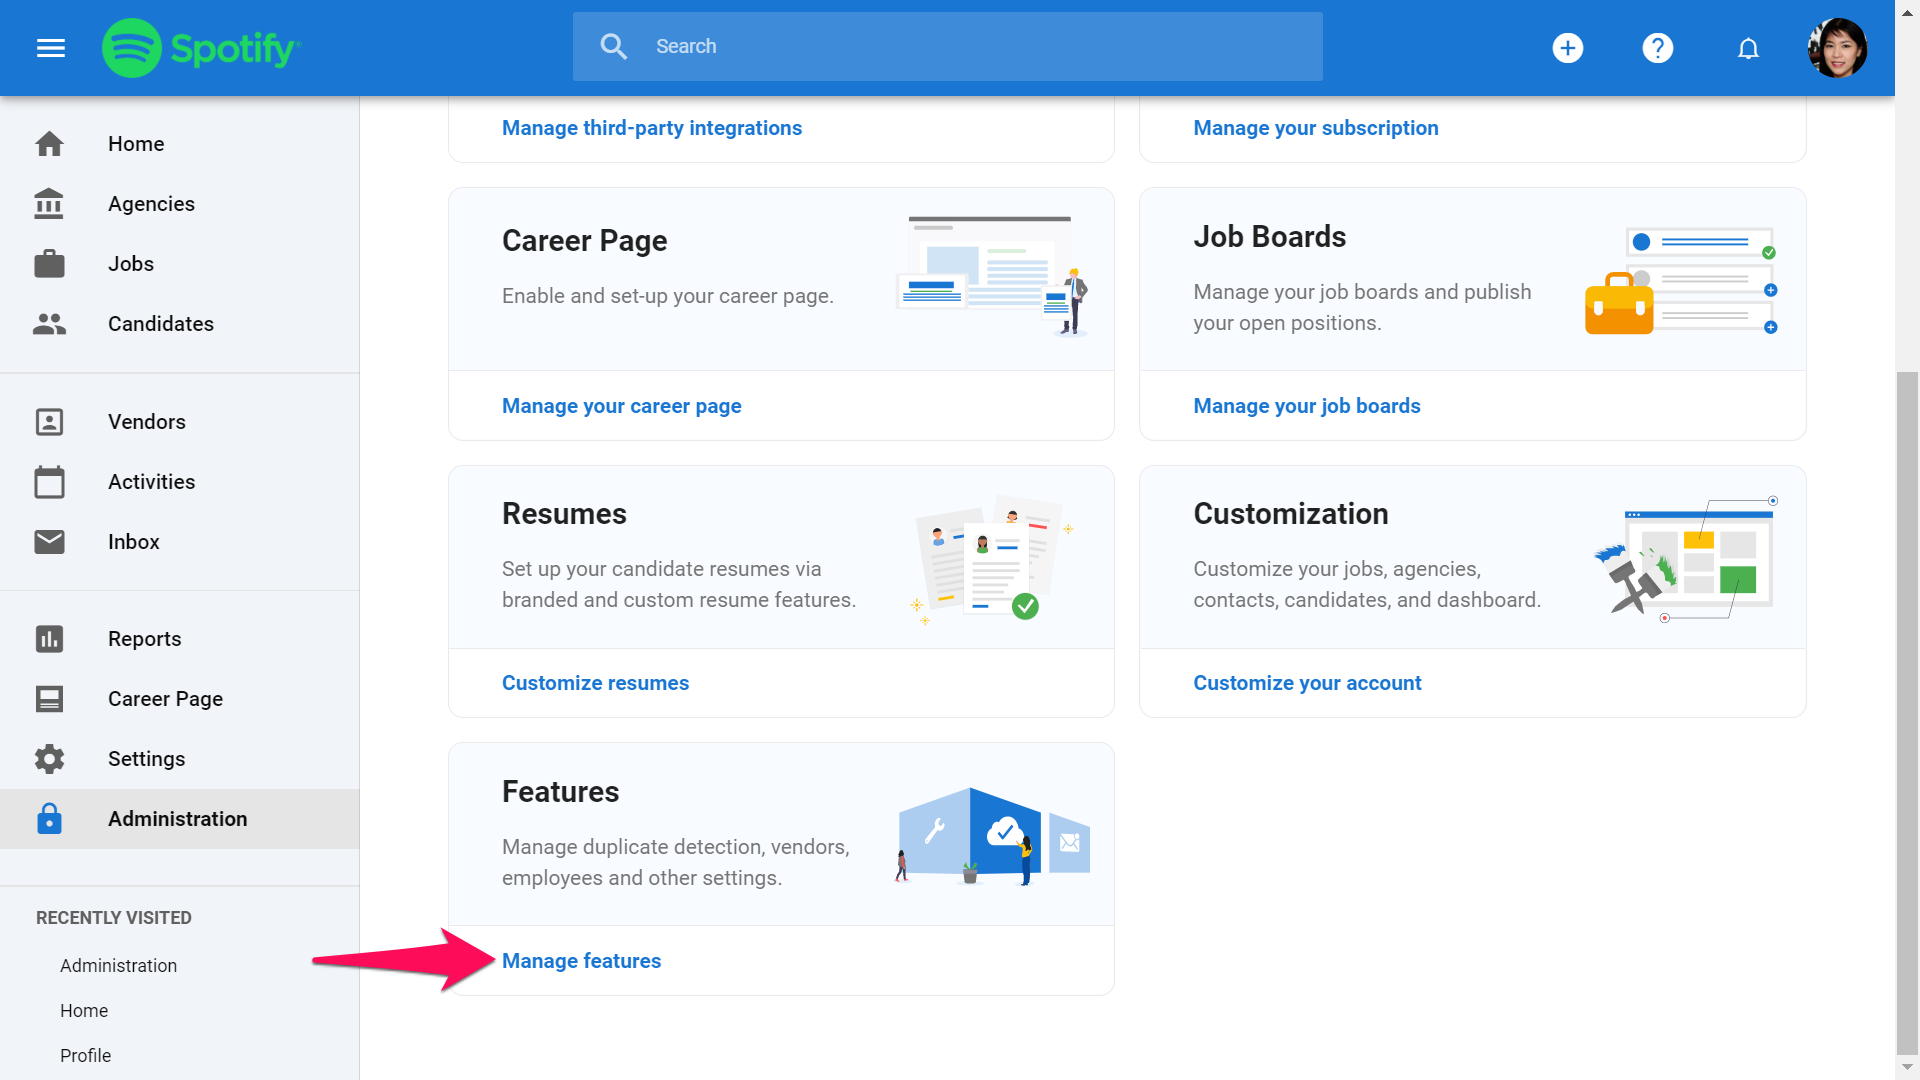
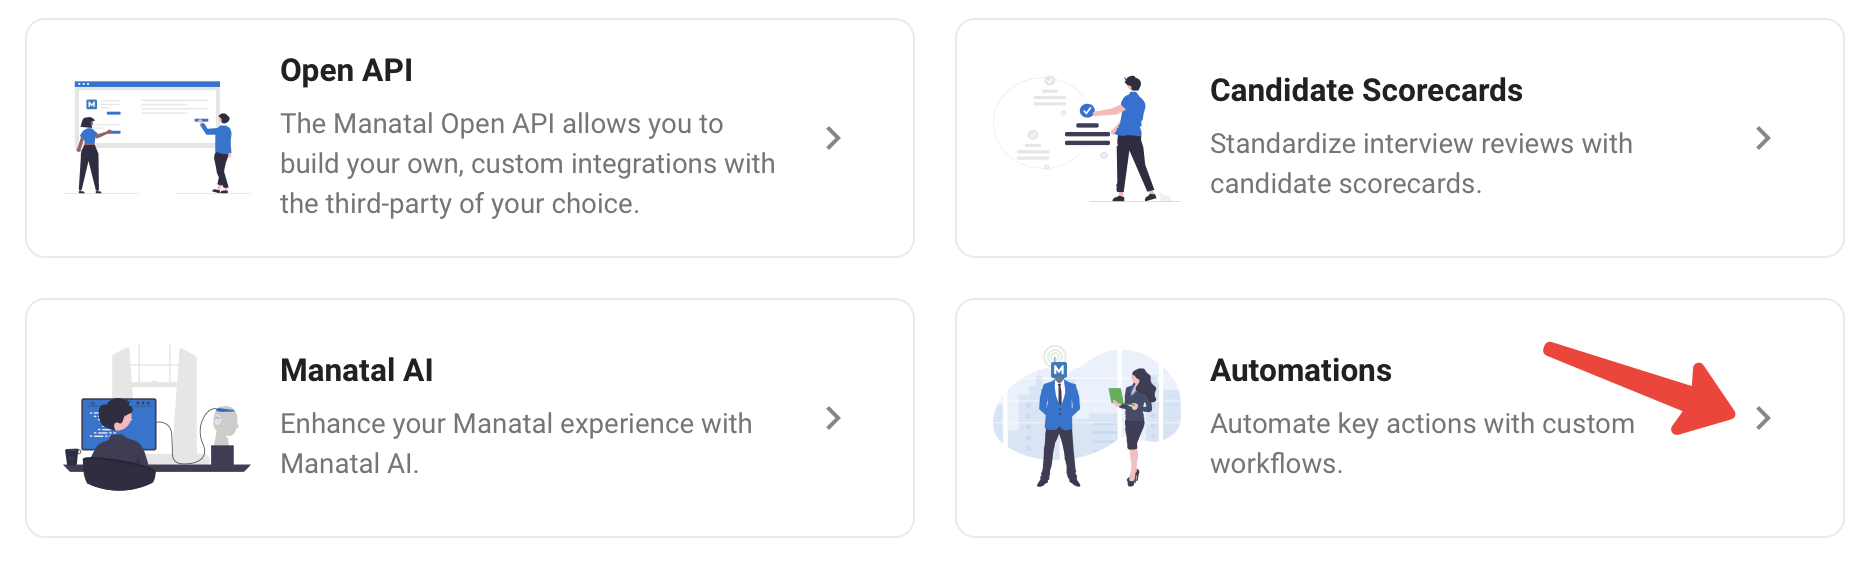
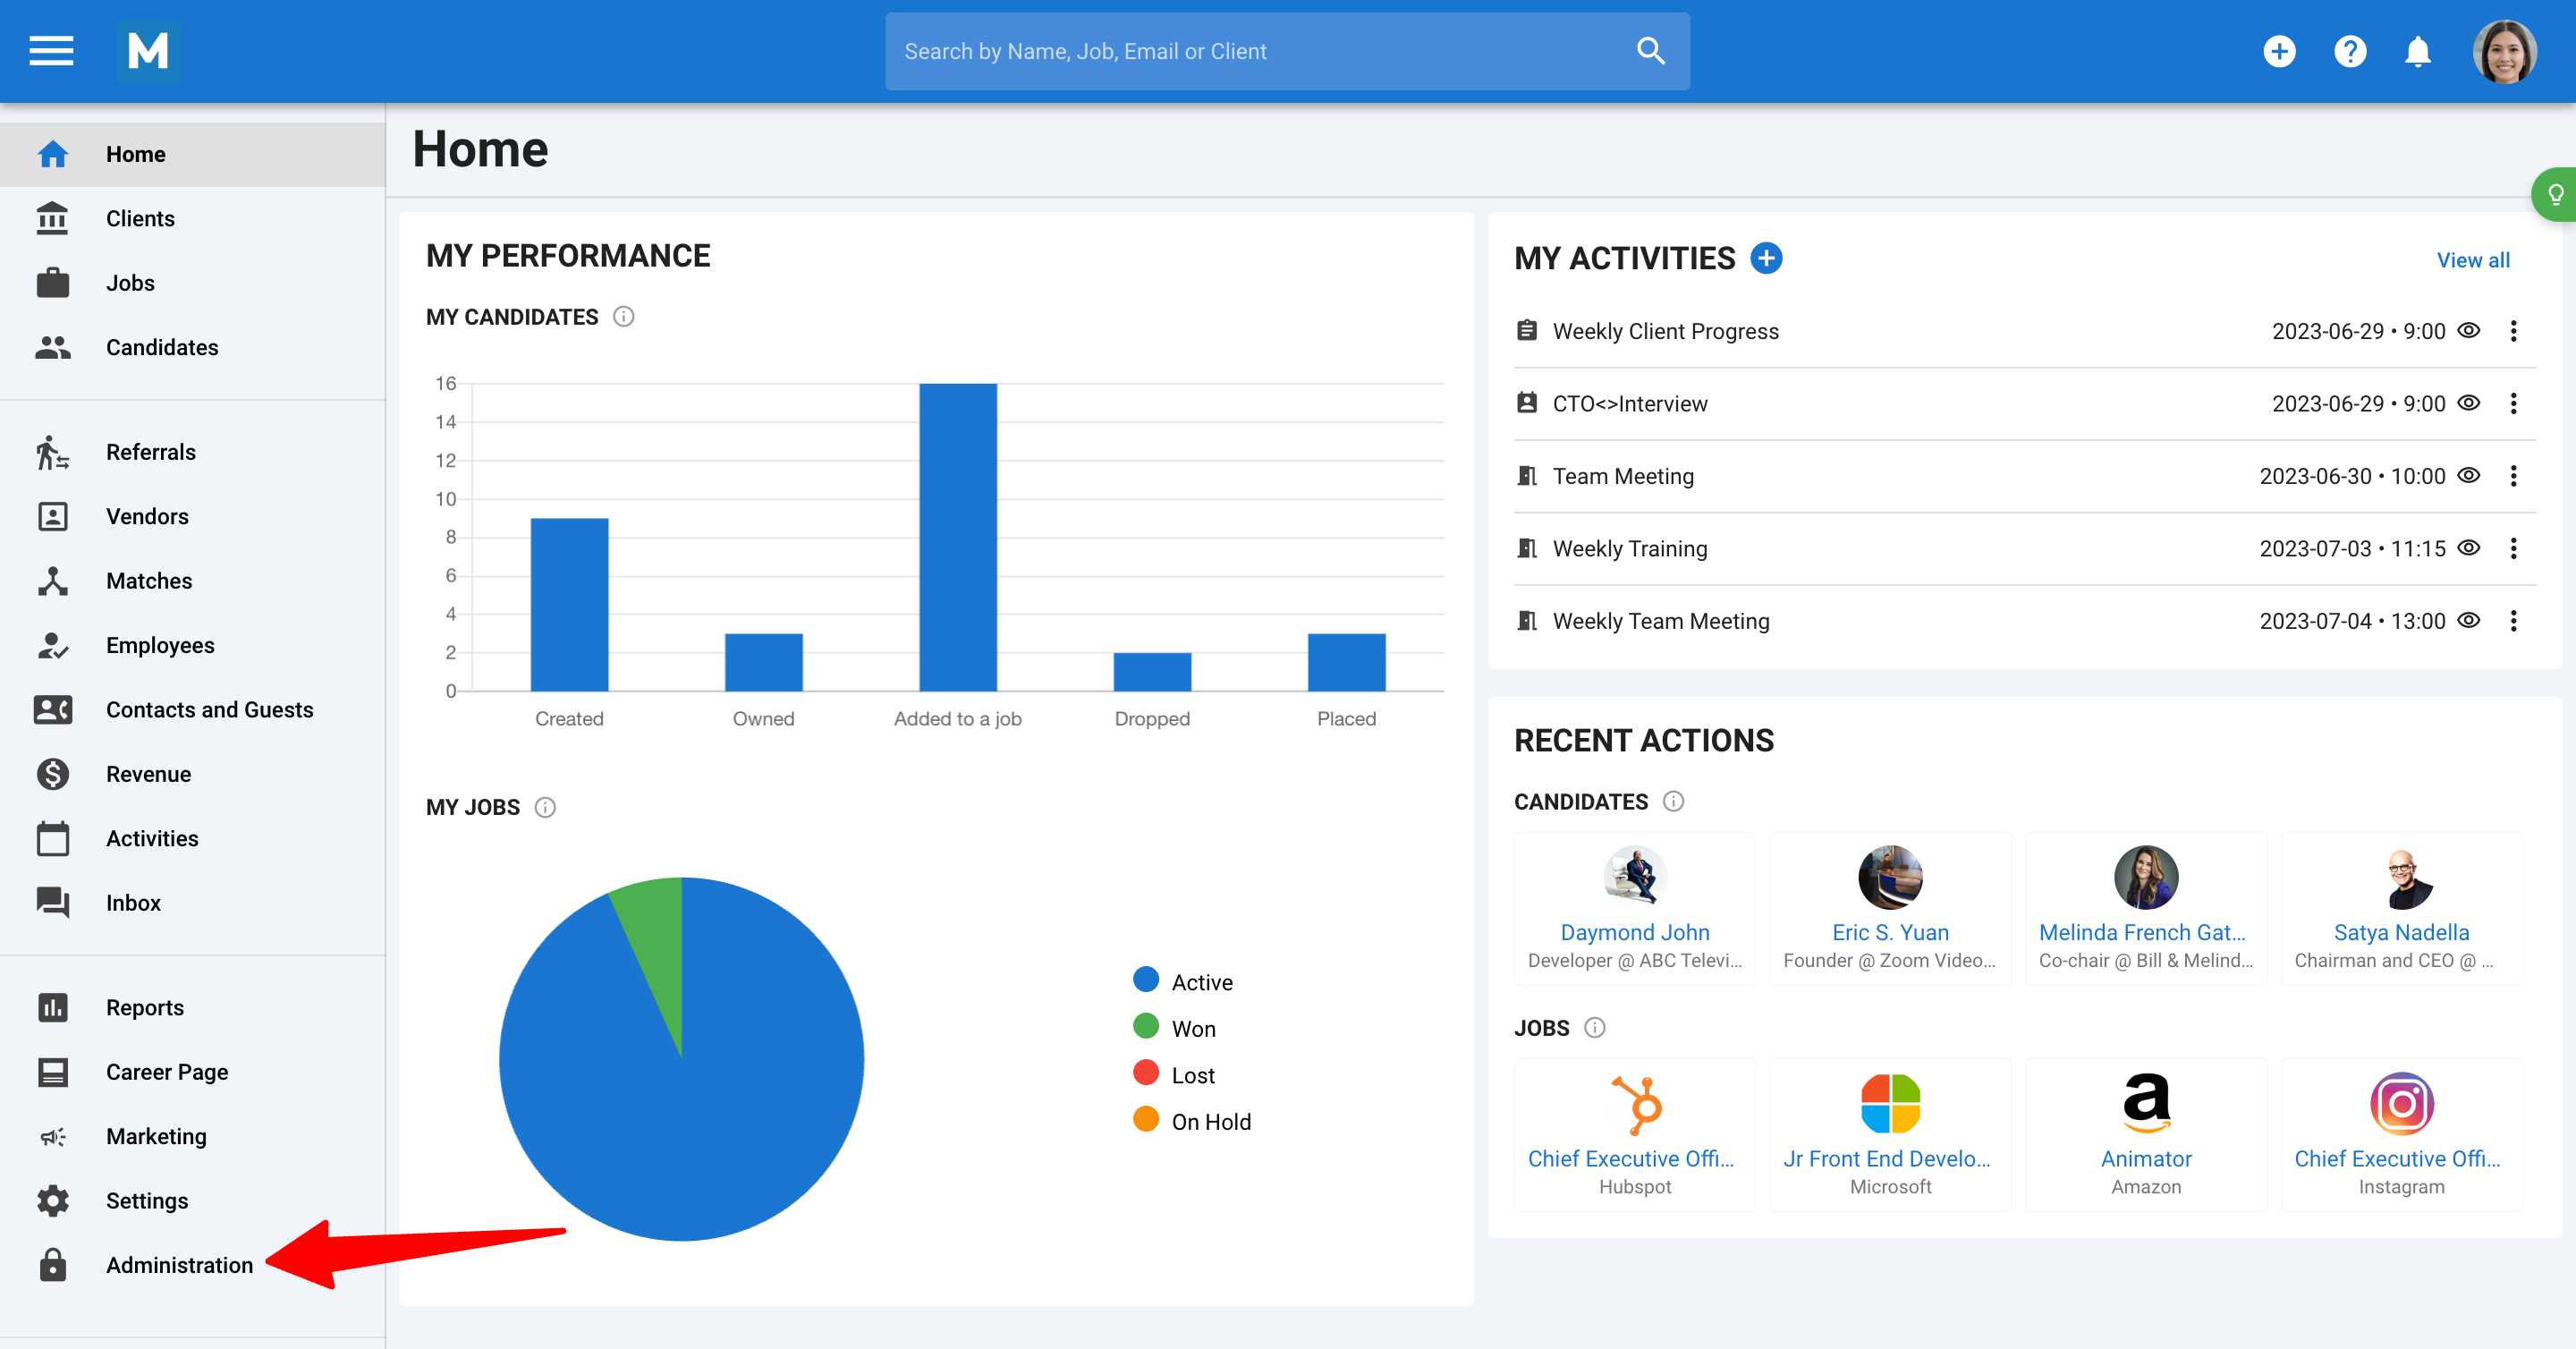
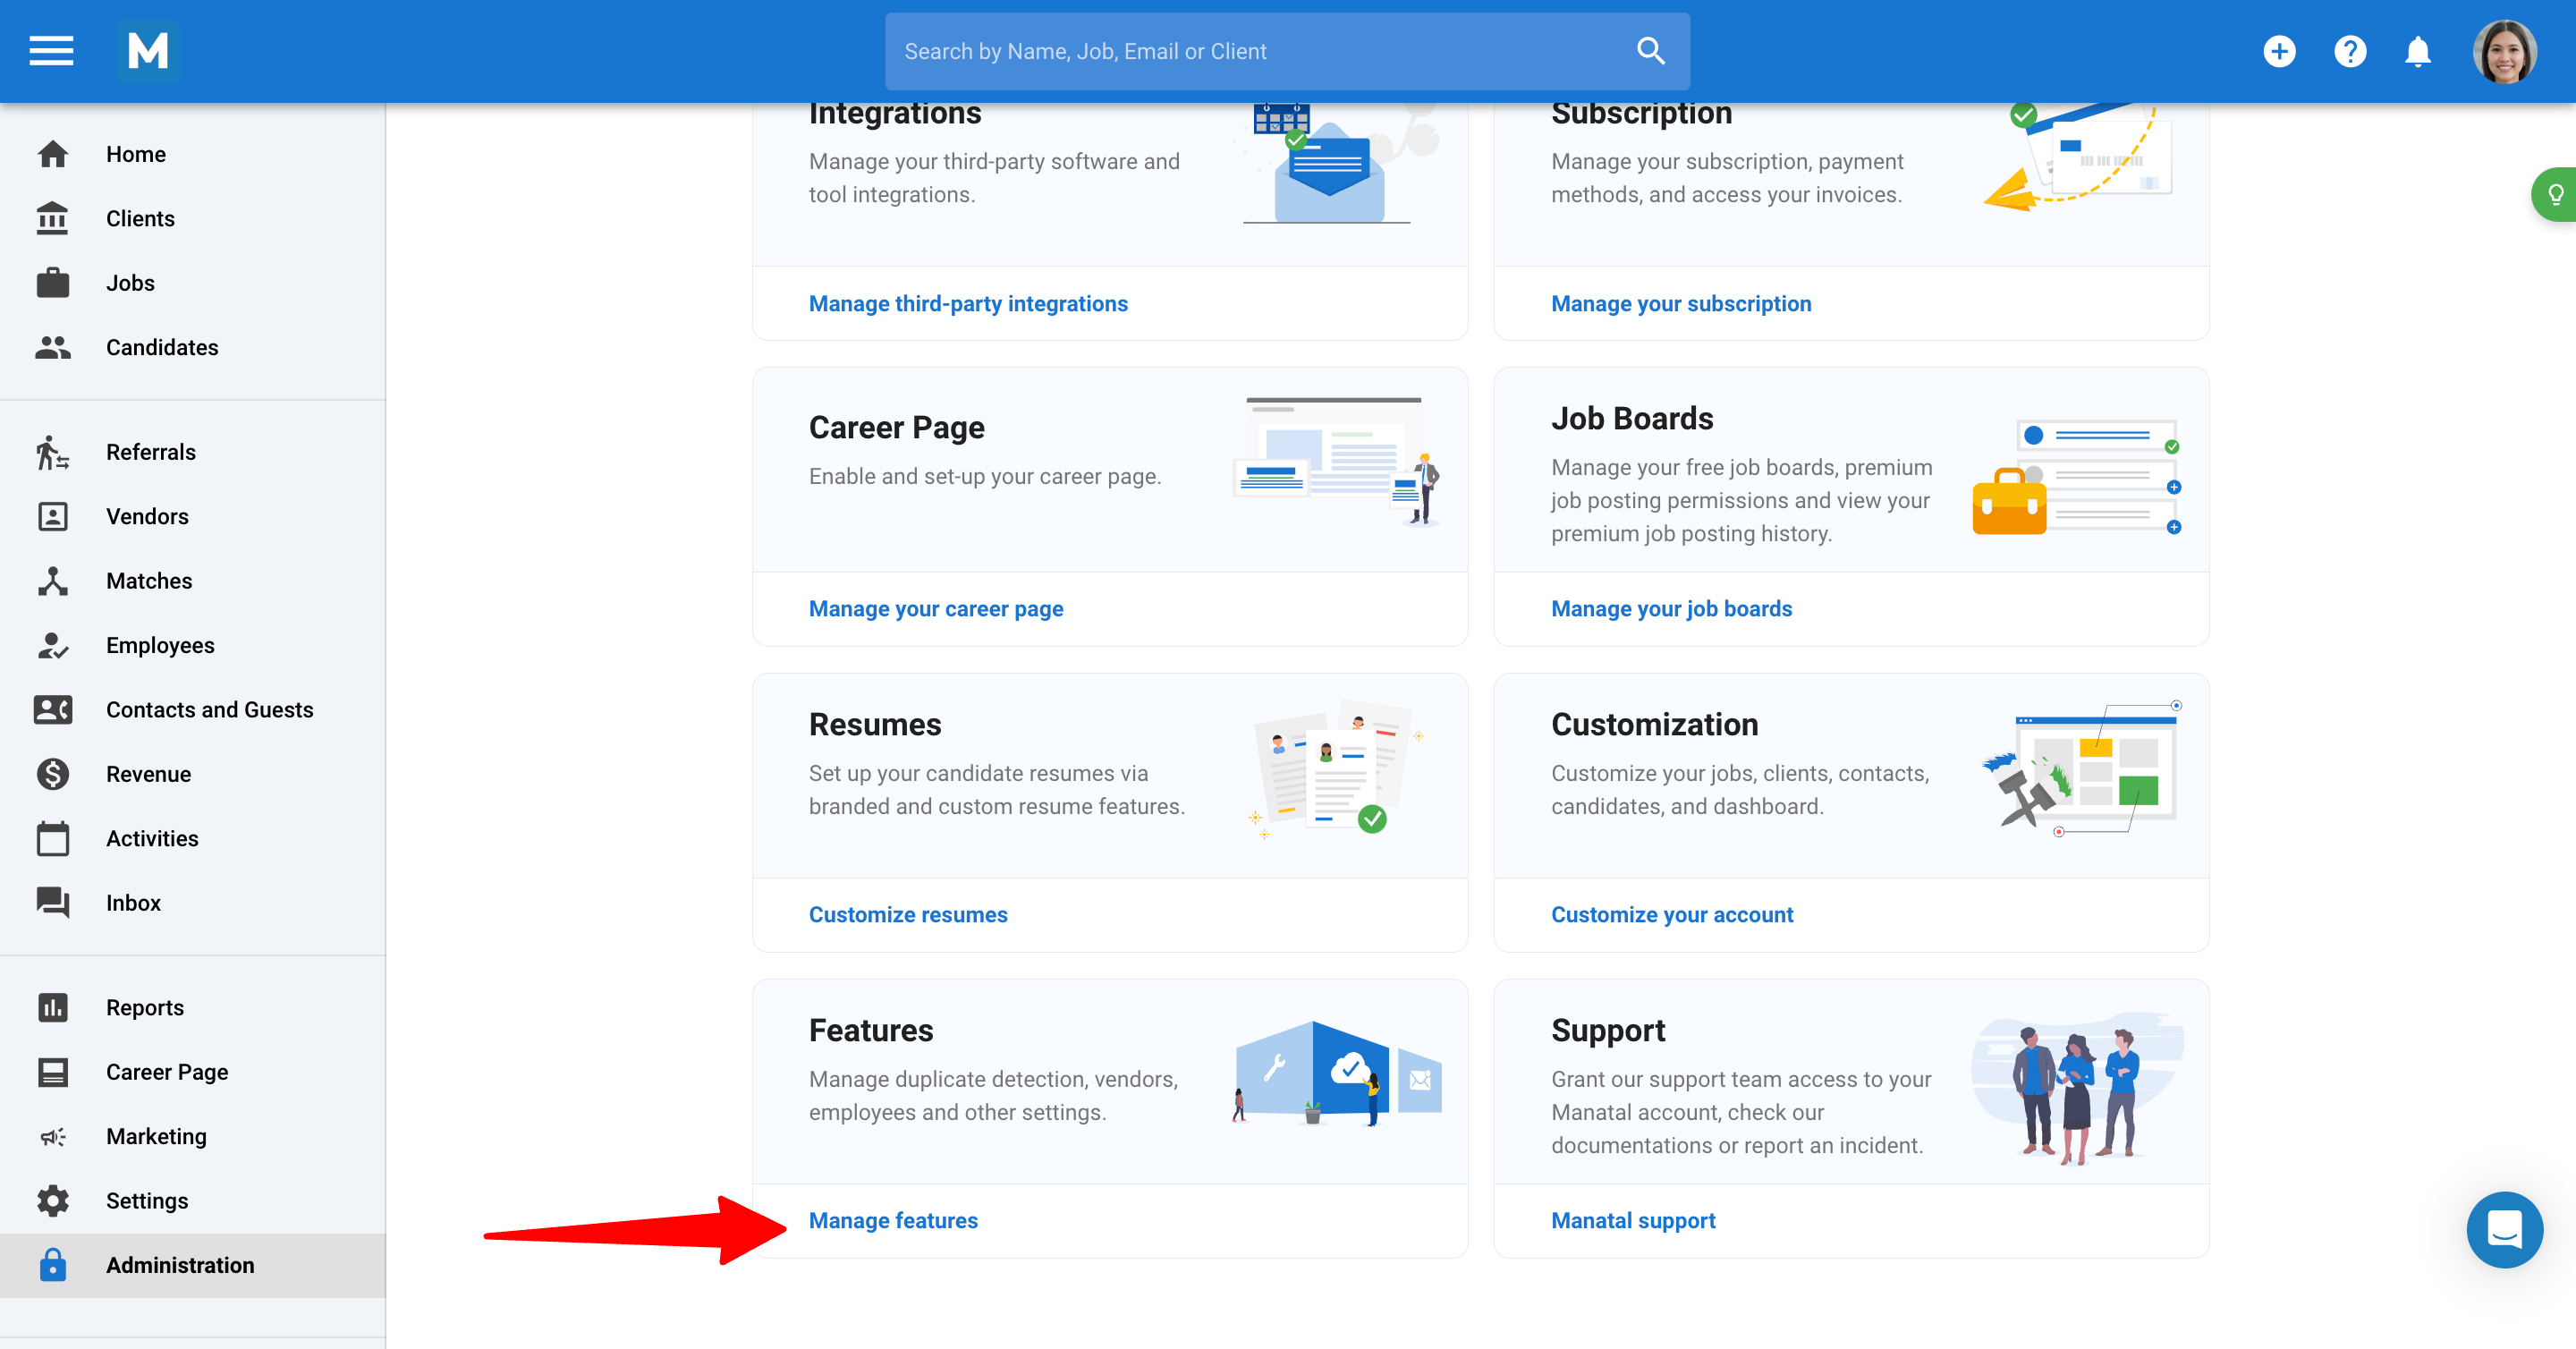
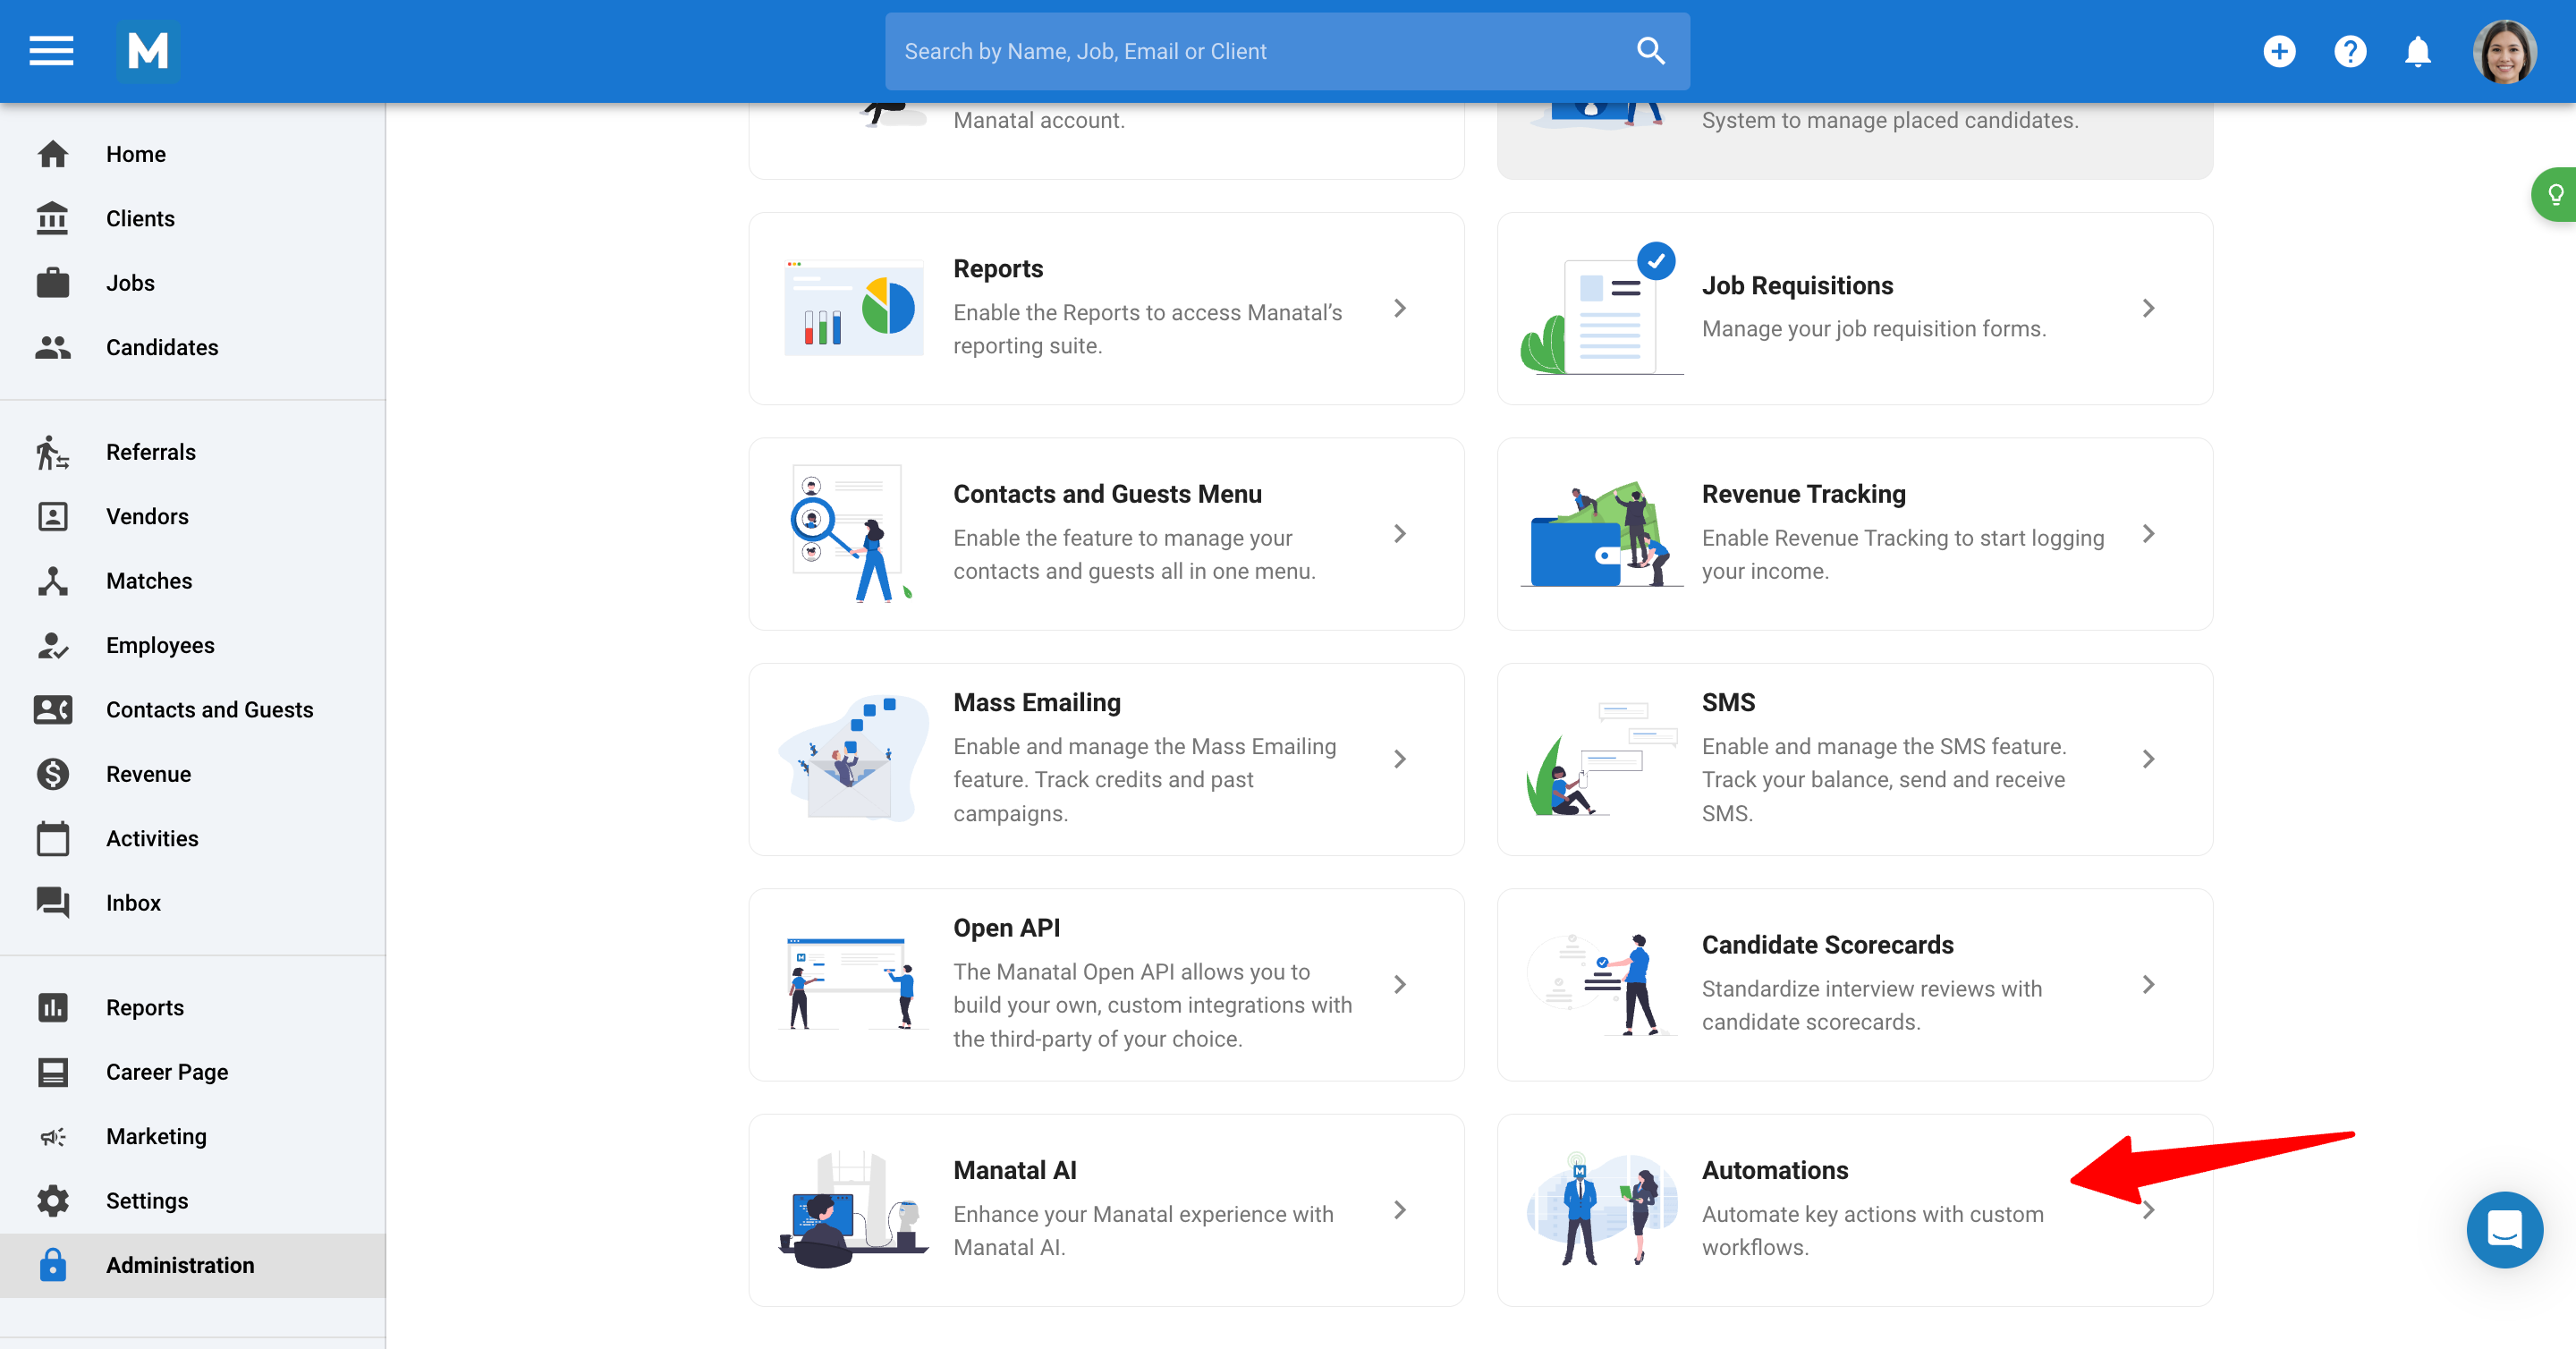
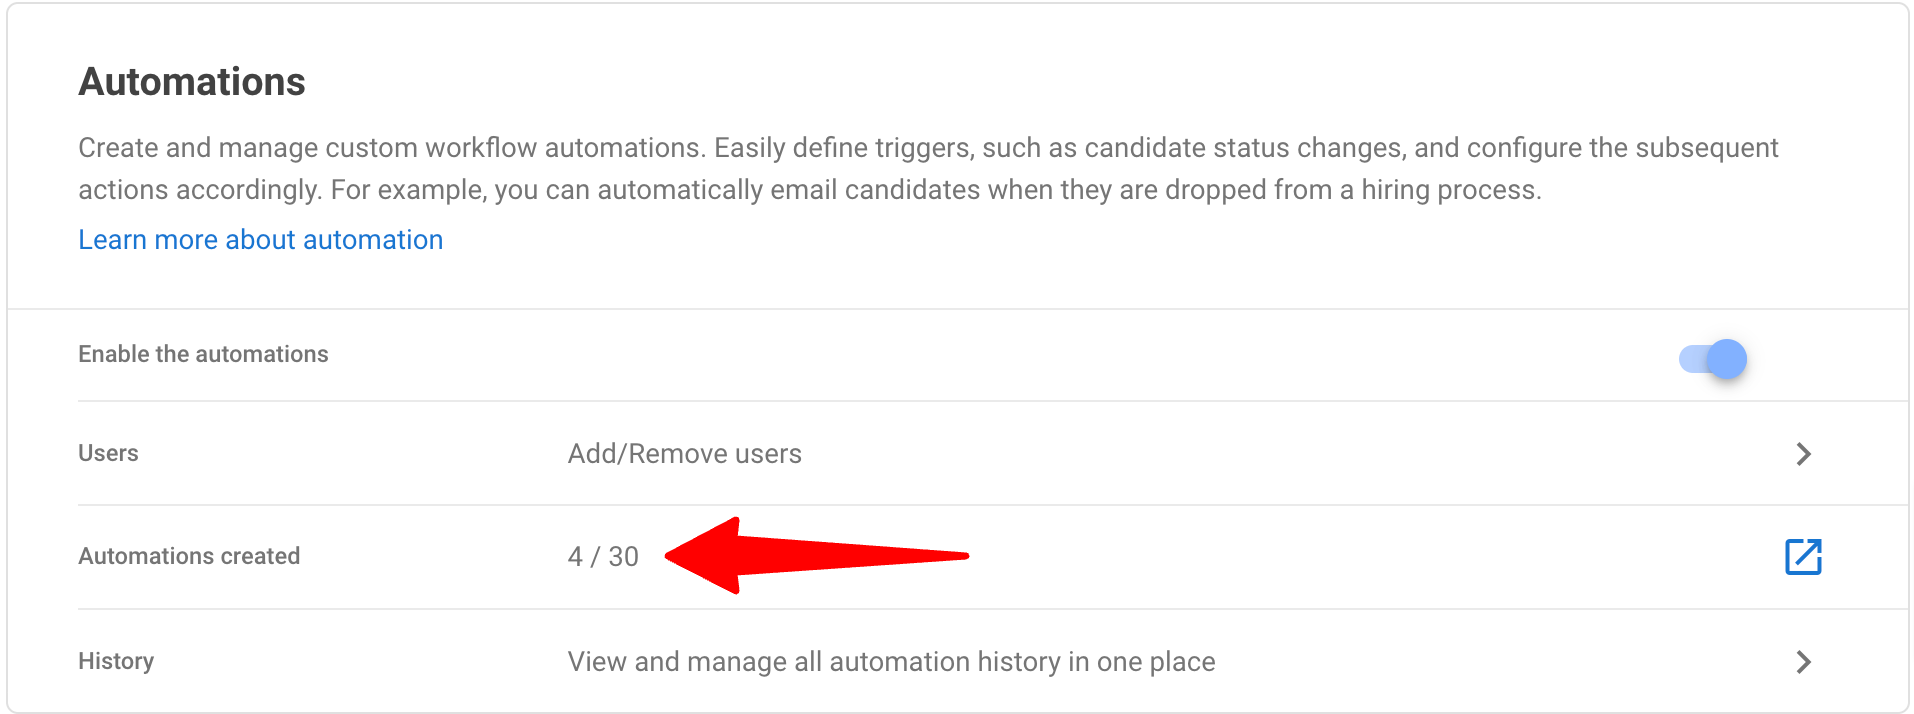
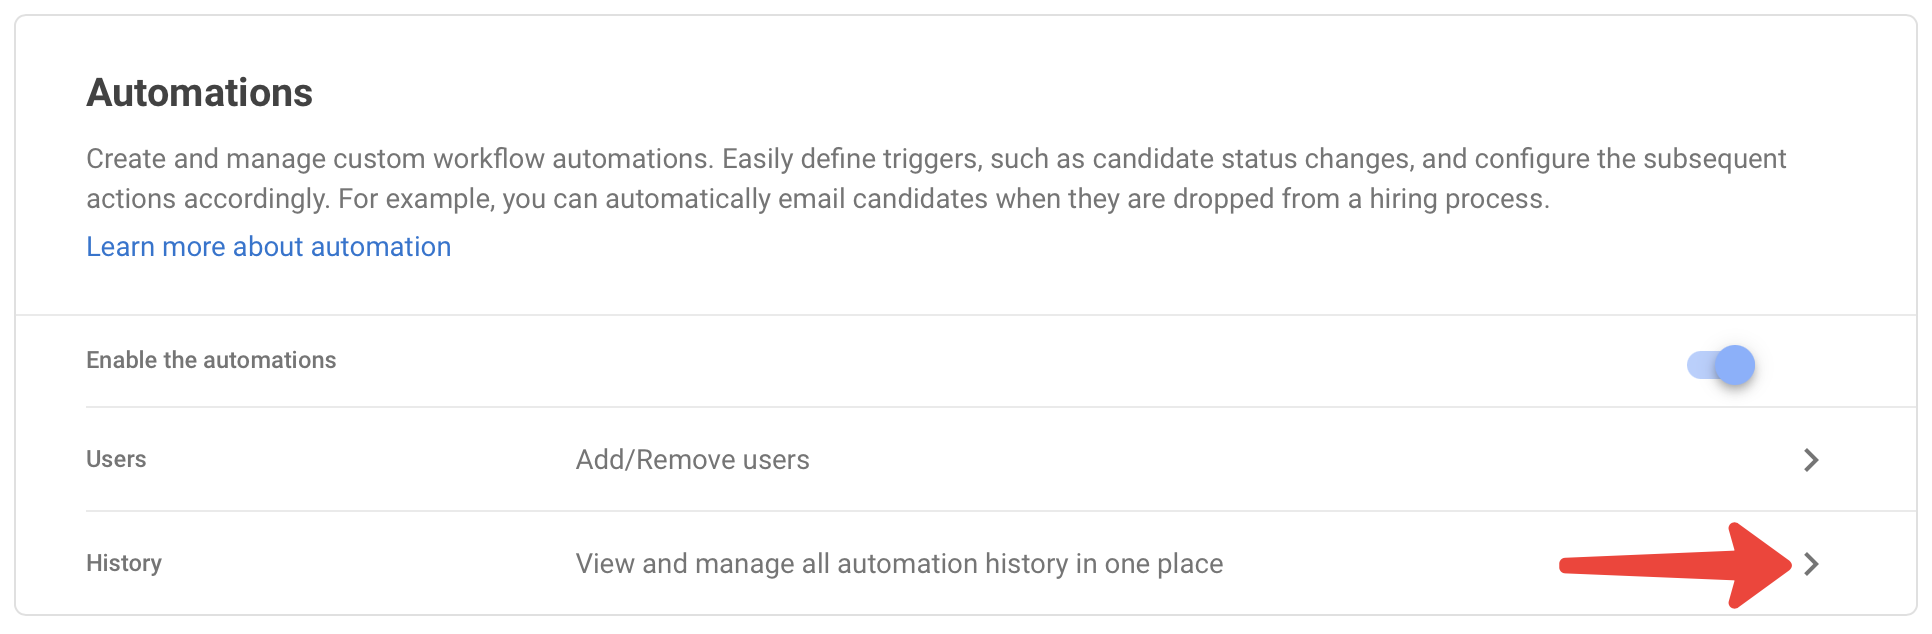
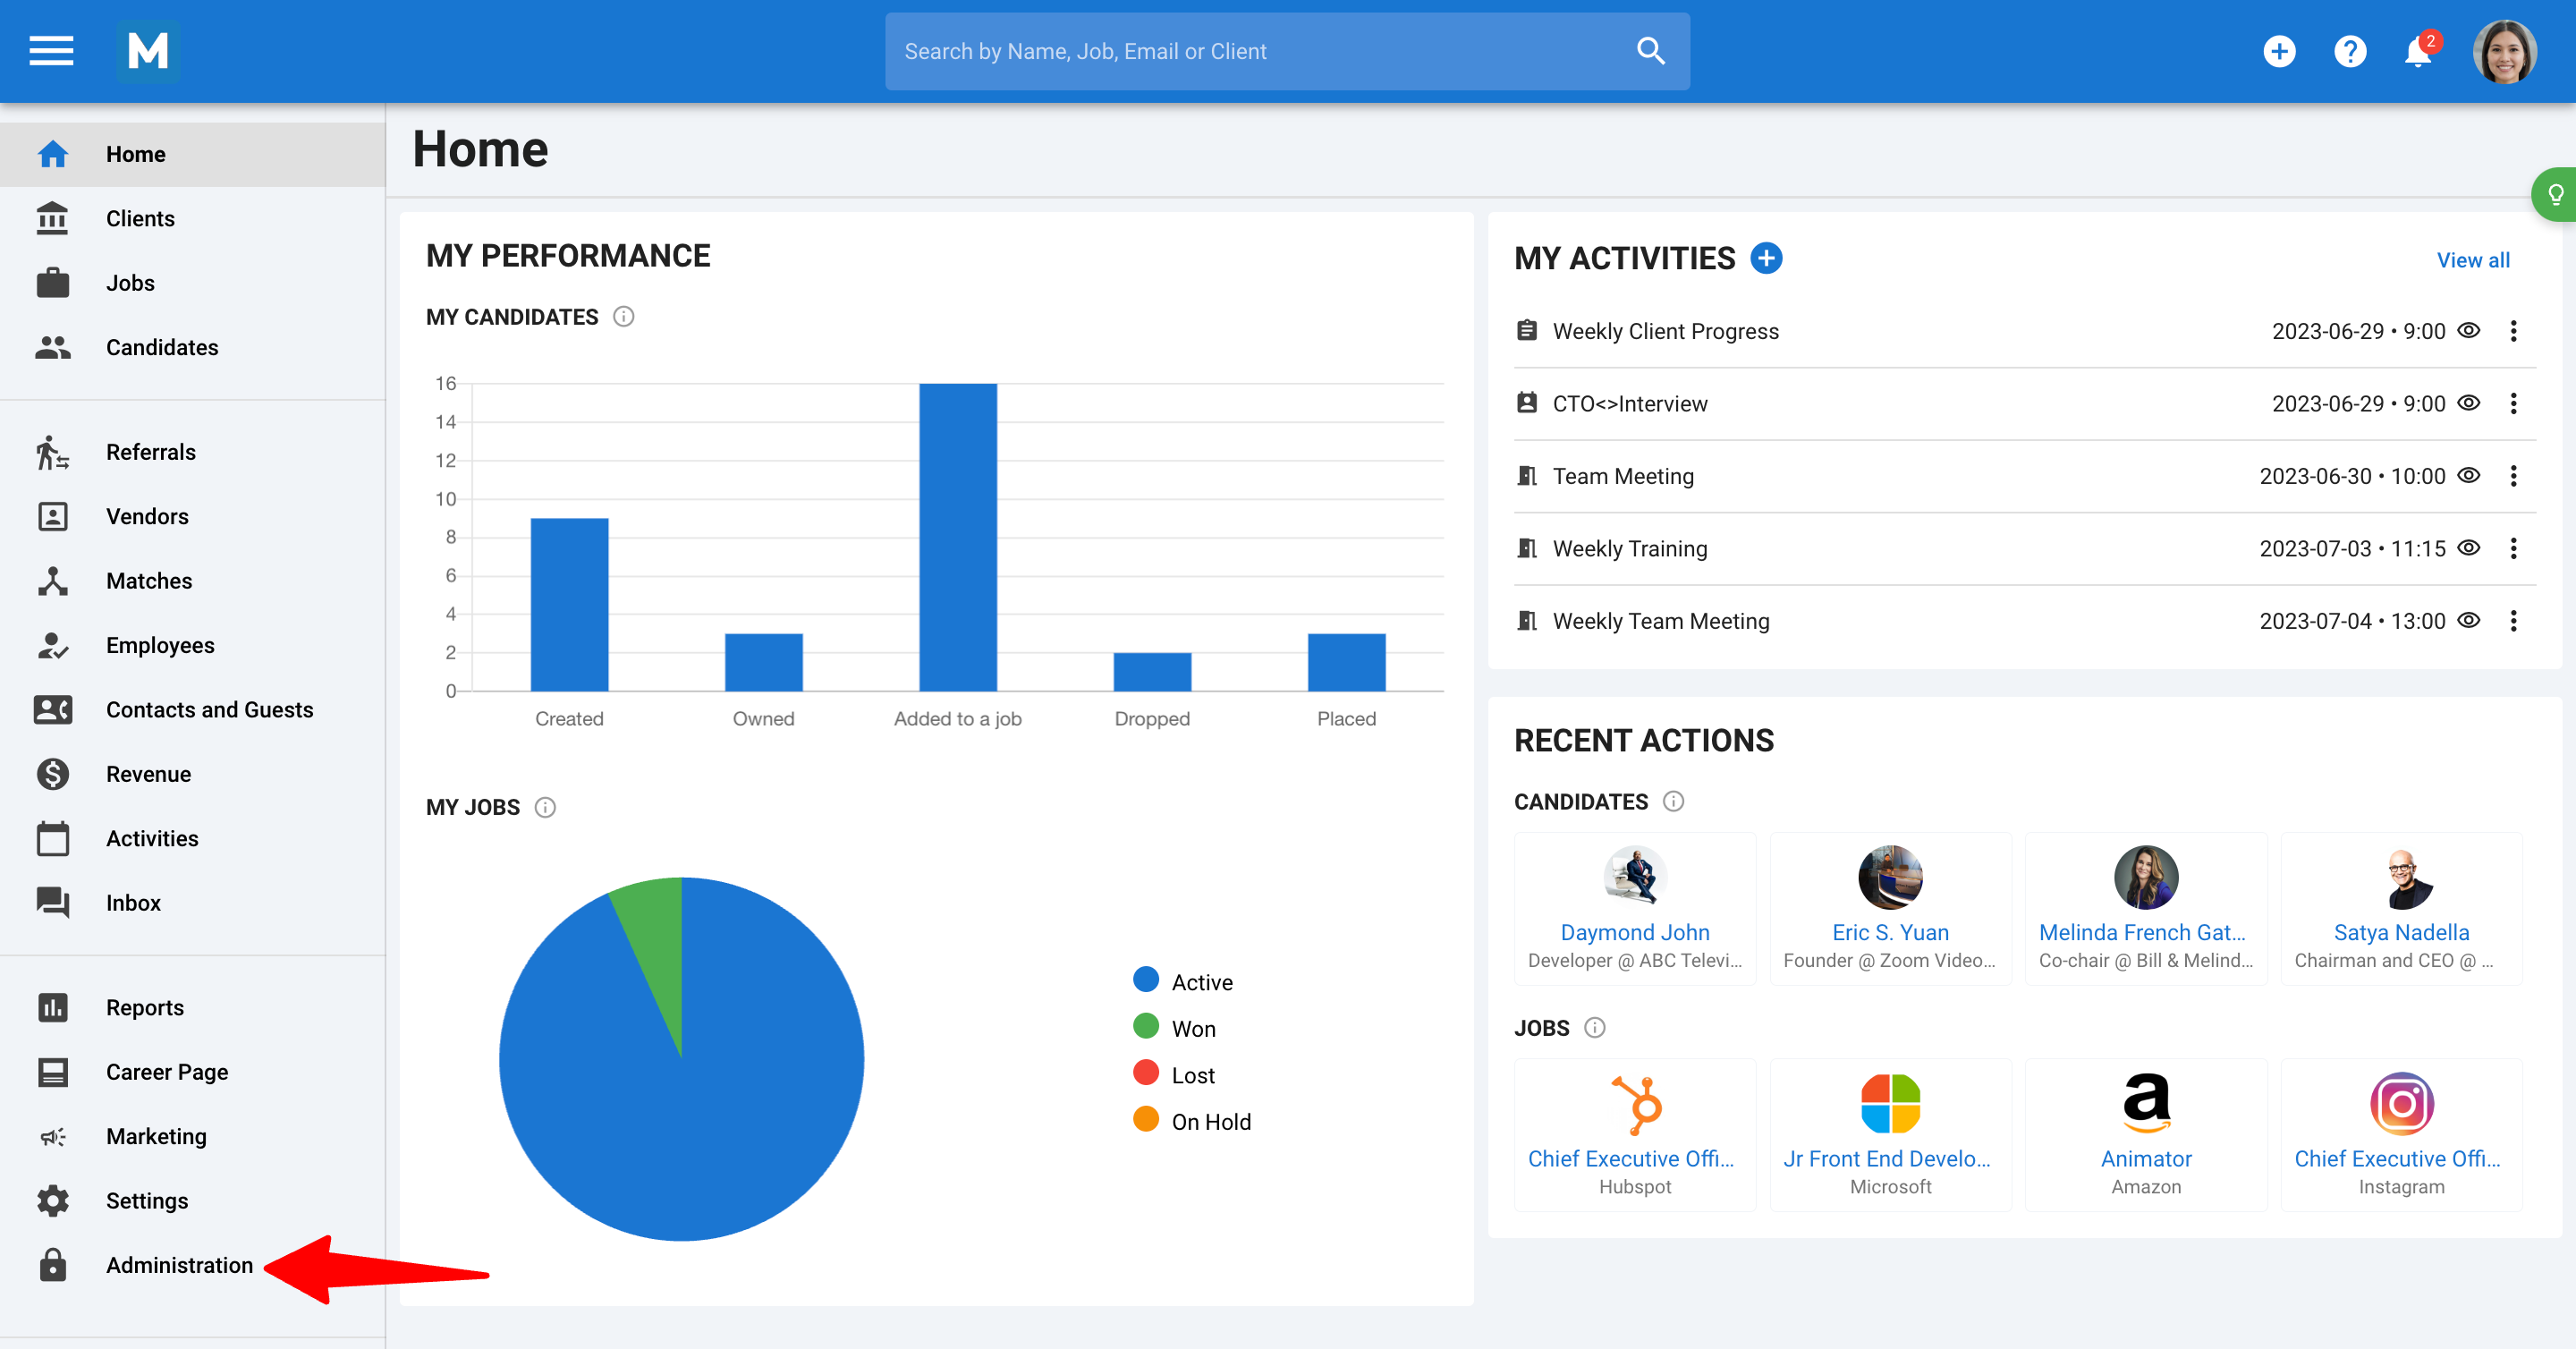
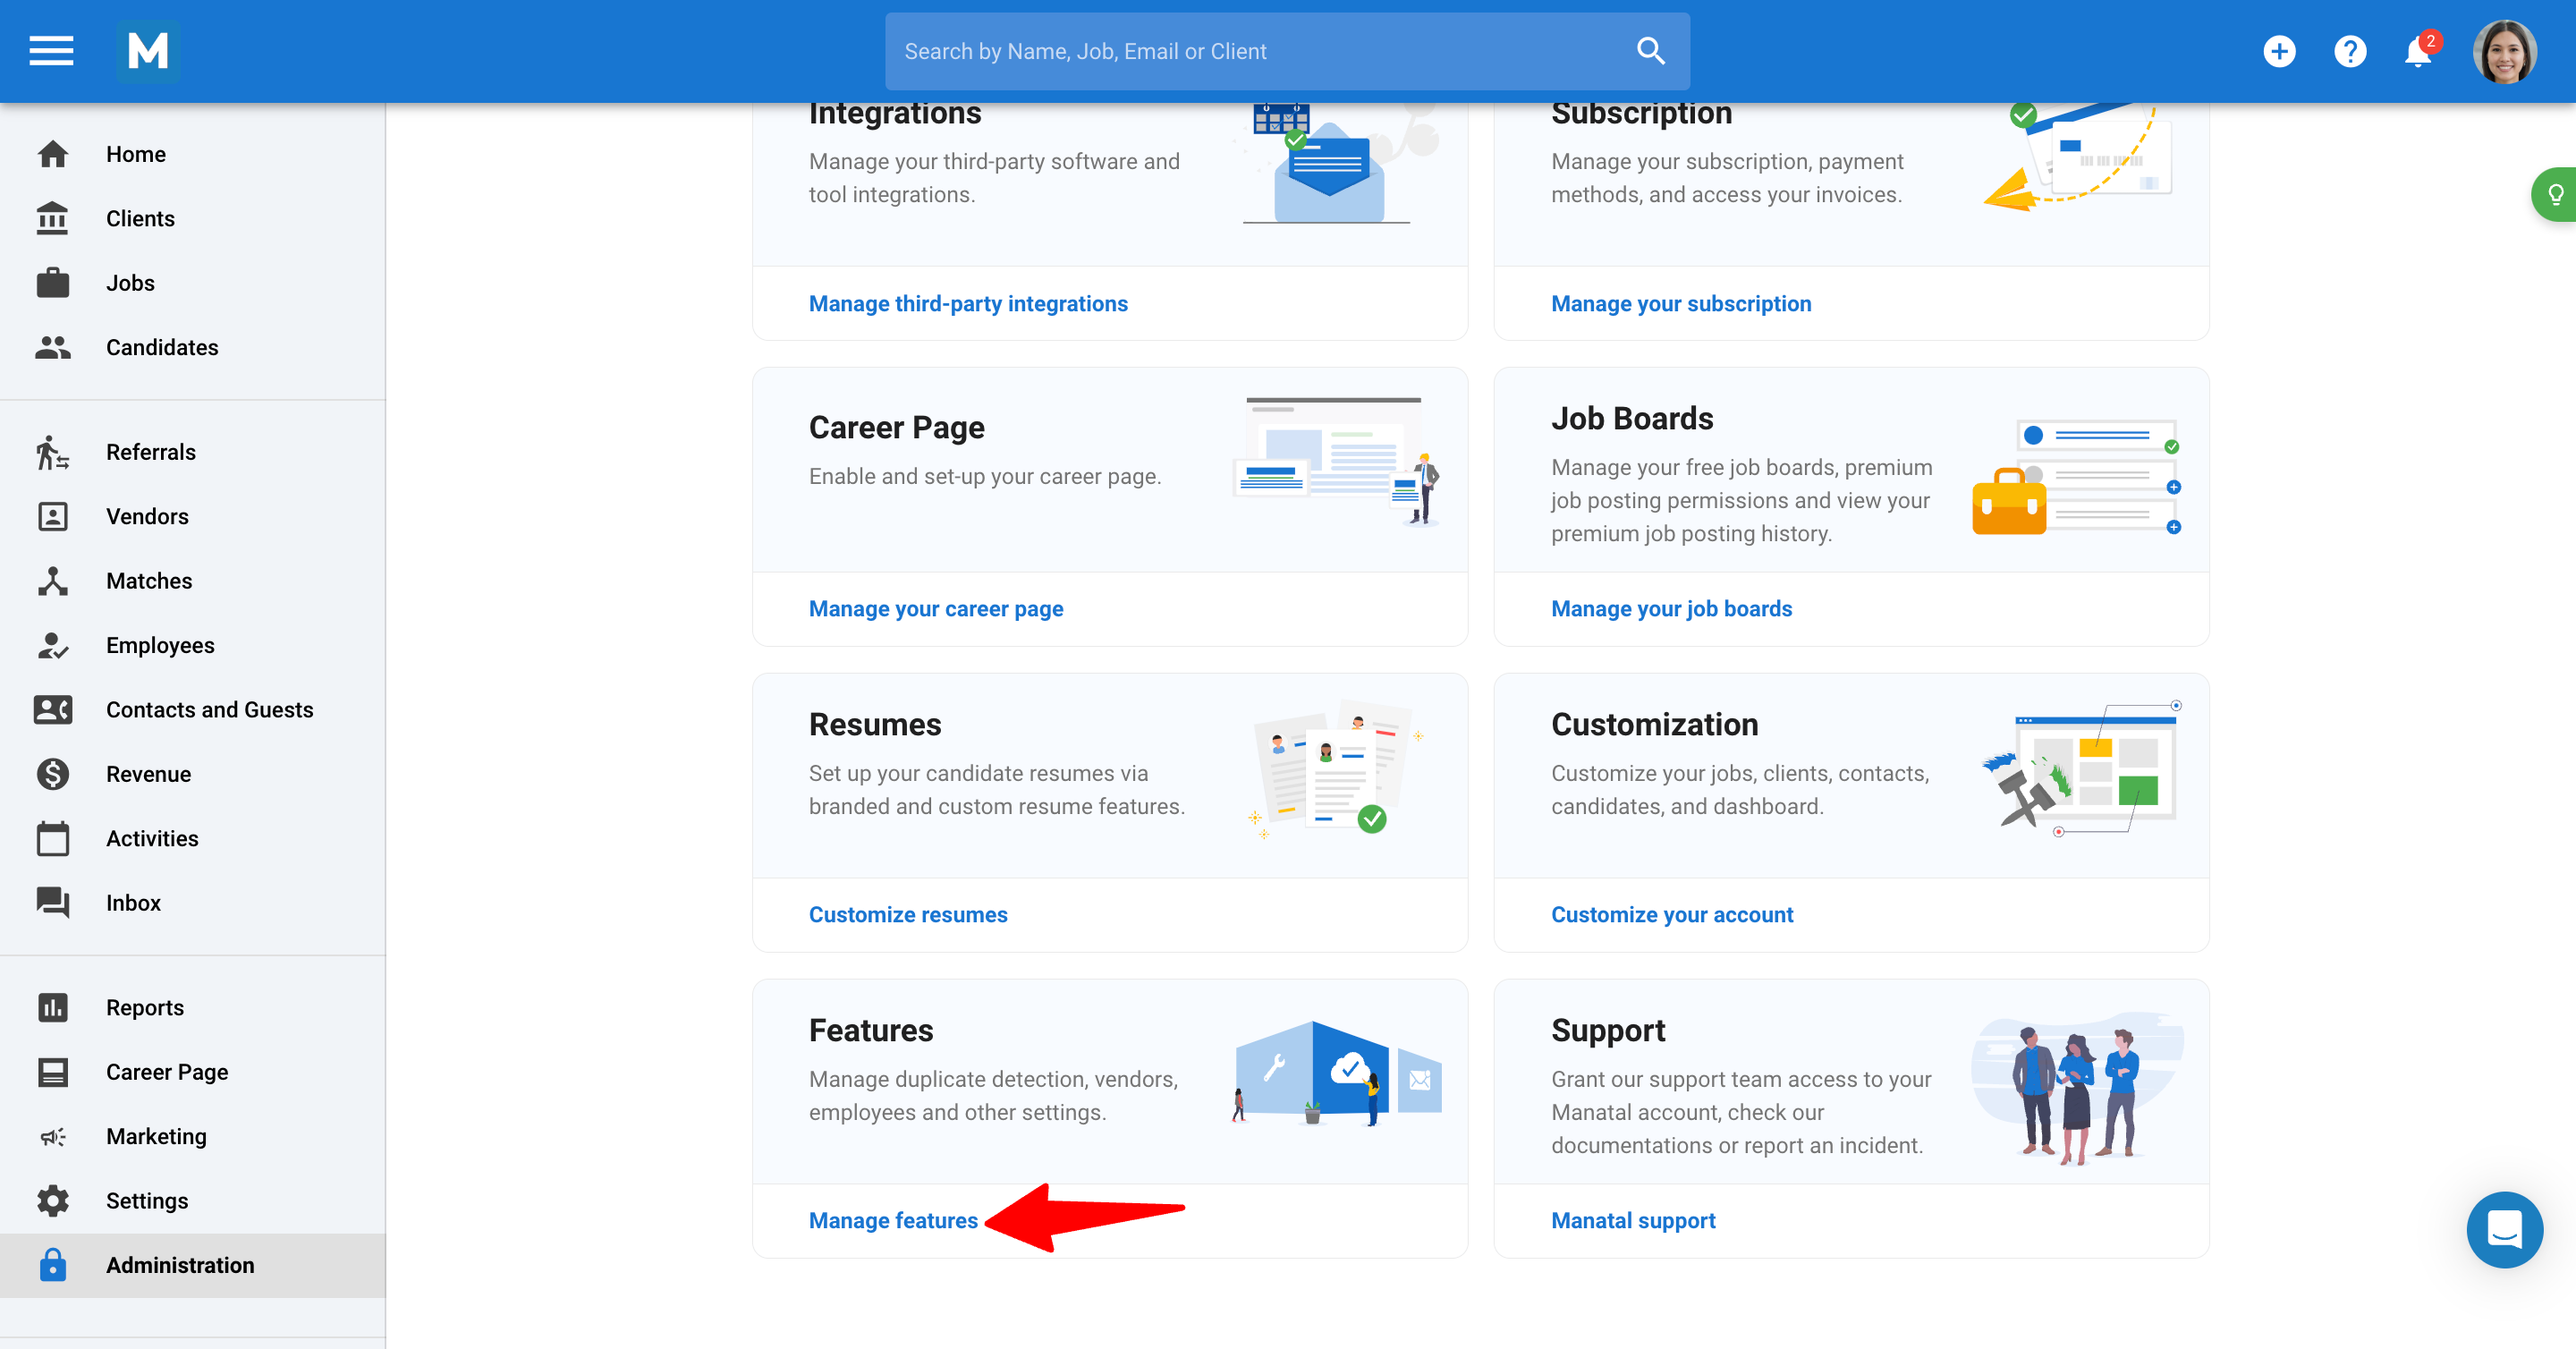
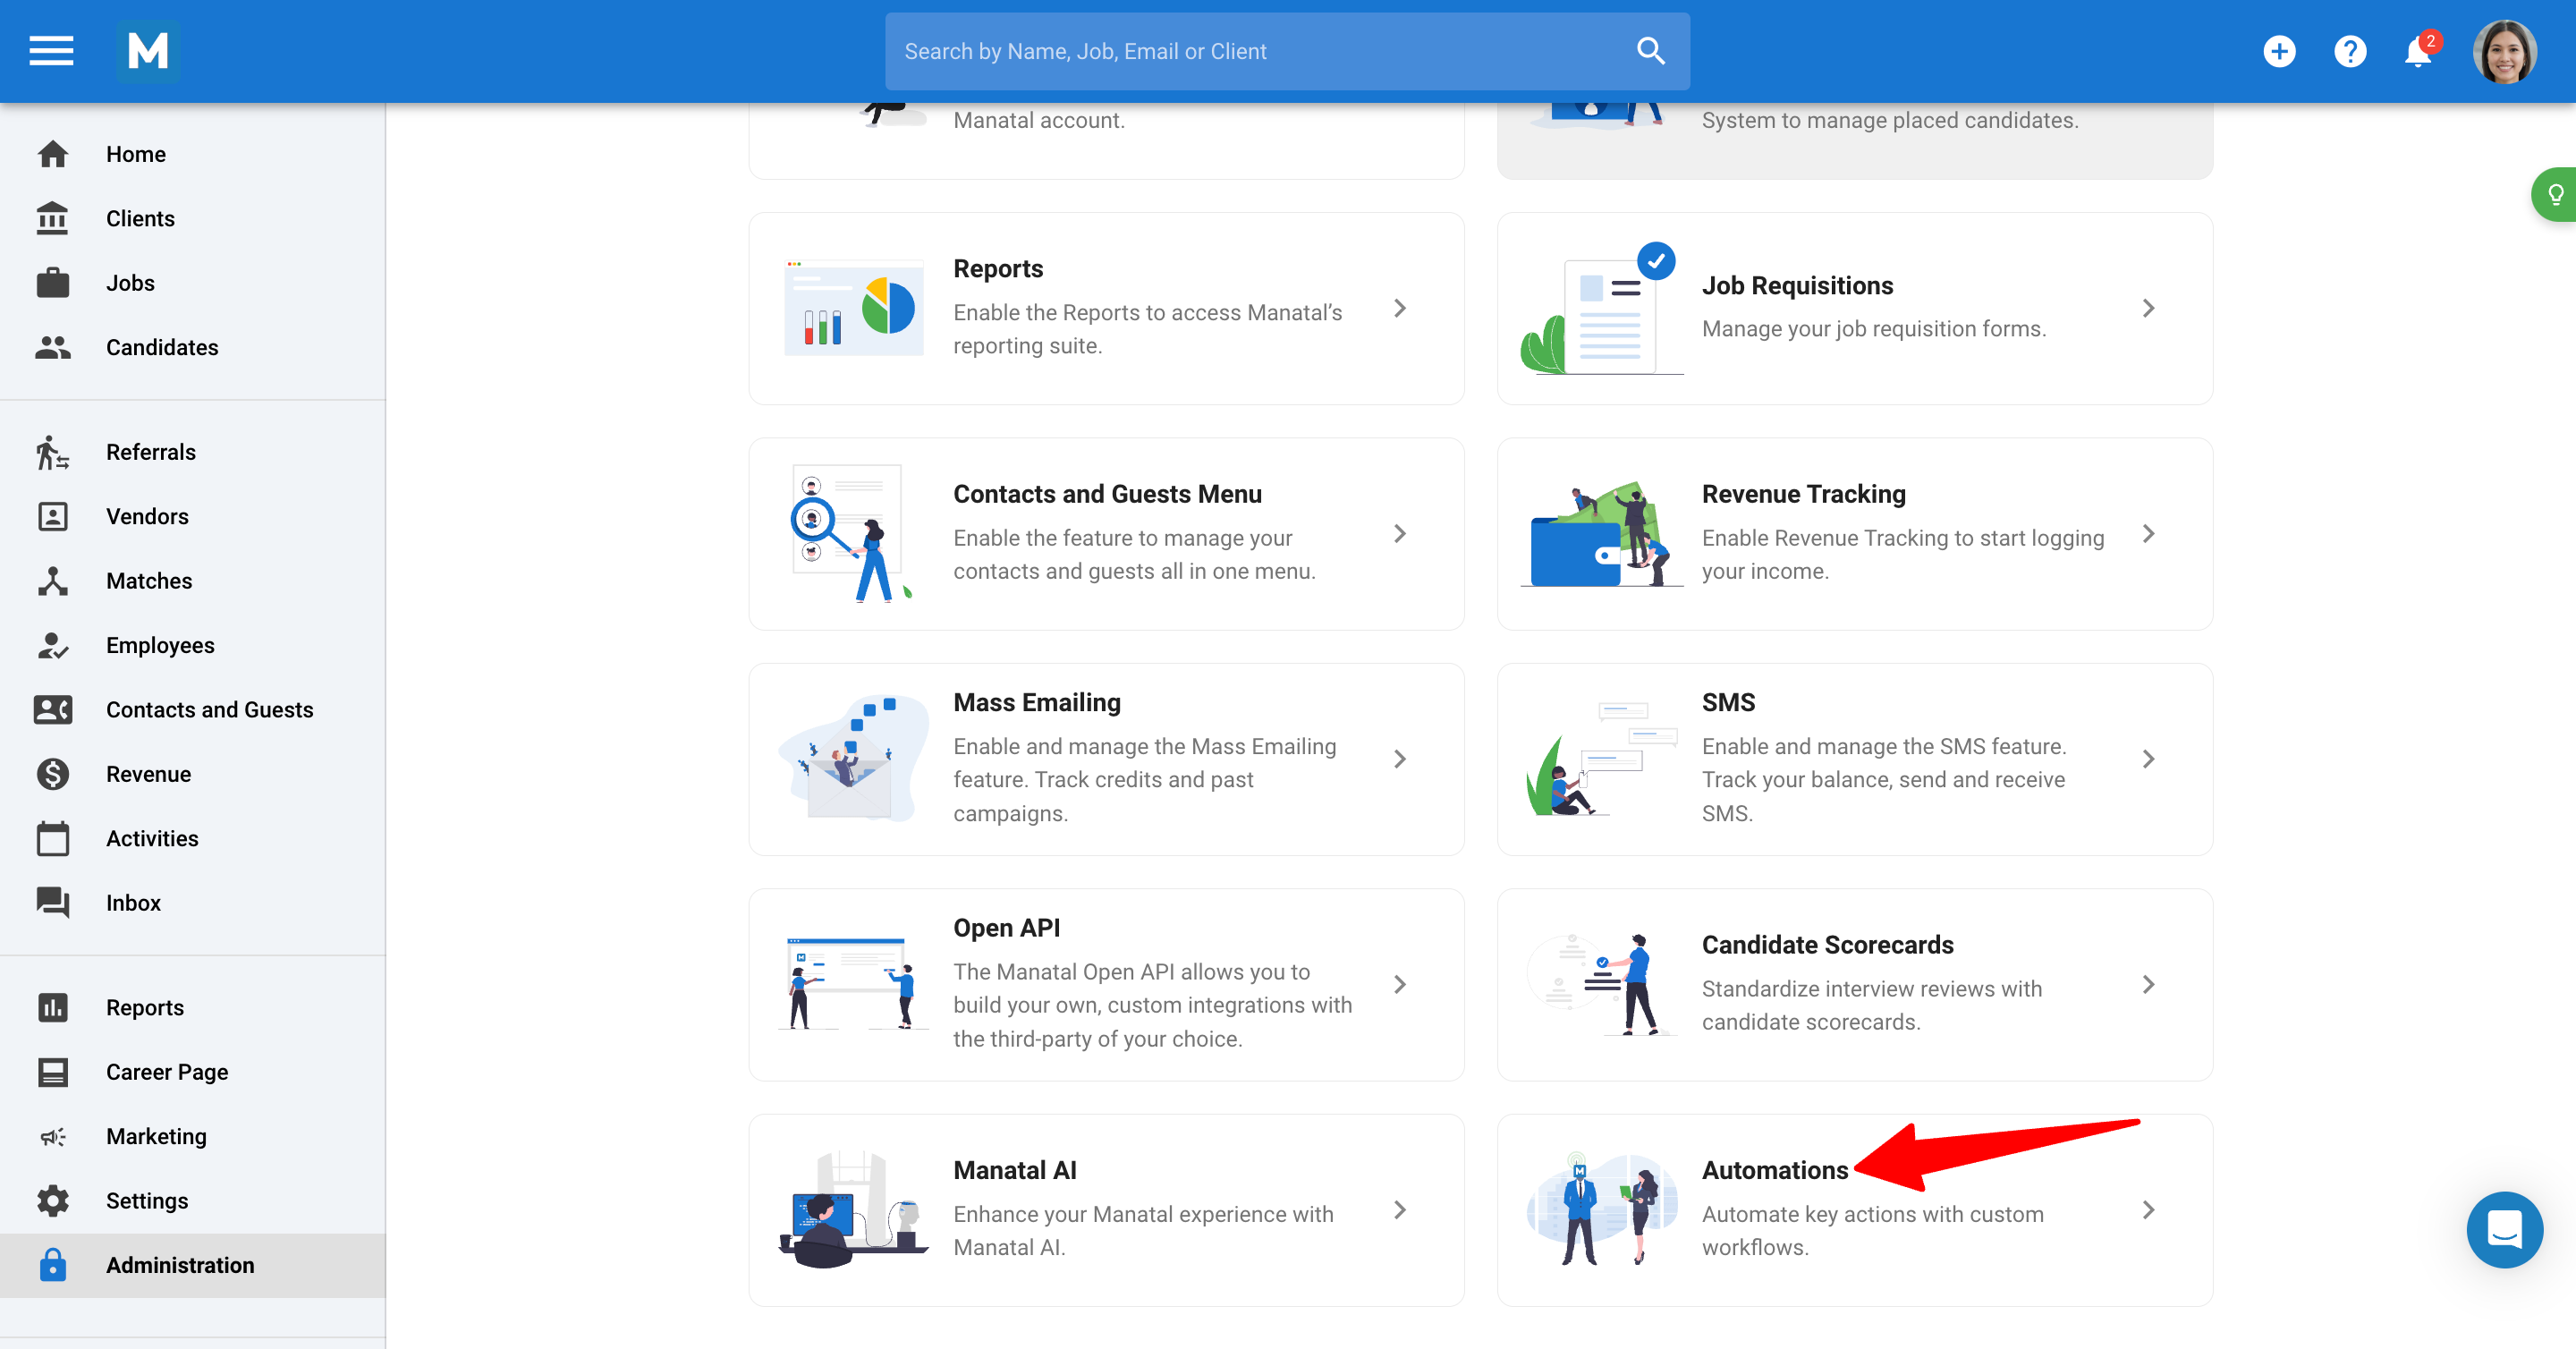
- Head to the following page. Alternatively, click on "Administration" from your side menu, open the "Features" section and then the "Automations" card.
-
Toggle on the automation feature.
-
Click on "Users," then "Add User" to grant specific non-admin users access to create and trigger automations.
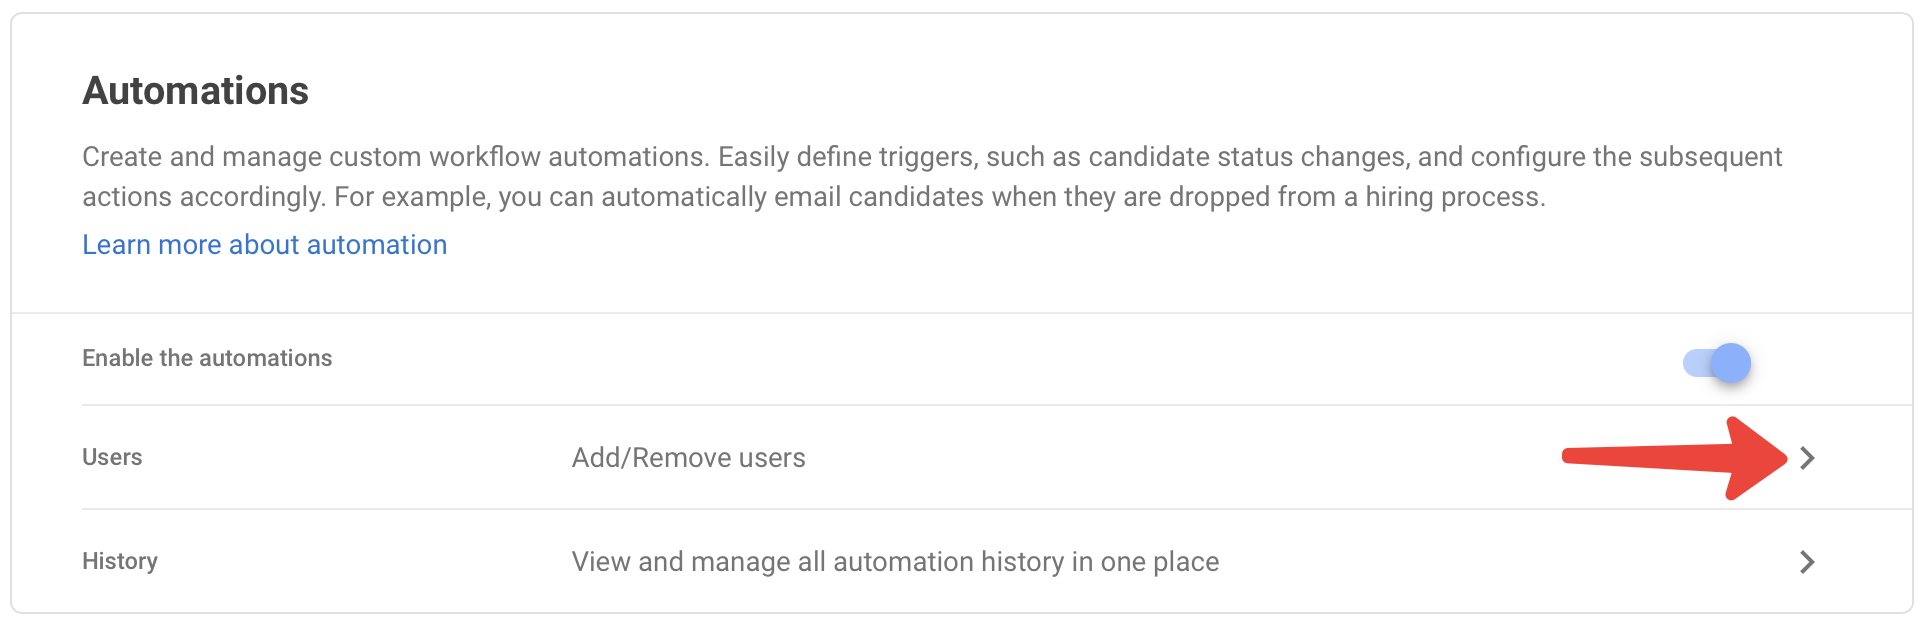
Non-admin users not added to the automation feature won't trigger automations.
Checking your Workflow Automation Balance
This action can only be performed by an admin user.
- Head to the following page. Alternatively, click on "Administration" from your side menu, open the "Features" section and then the "Automations" card.
- You can find the number of automations created and the limit for automations in the Automations created section.
Creating a Global Automation
This action can only be performed by an admin user.
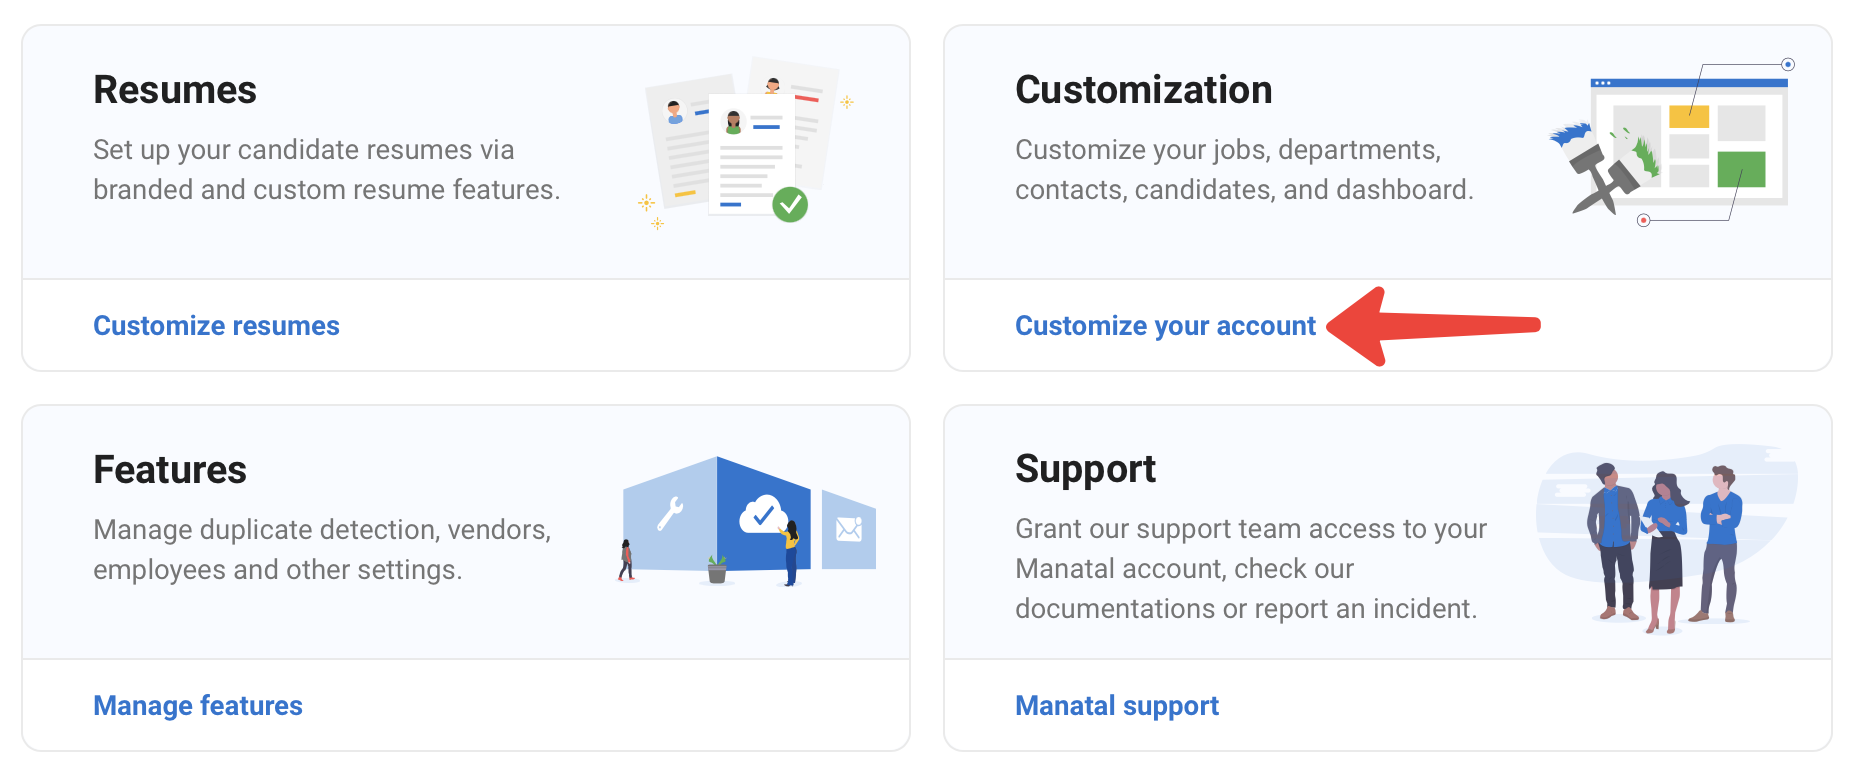
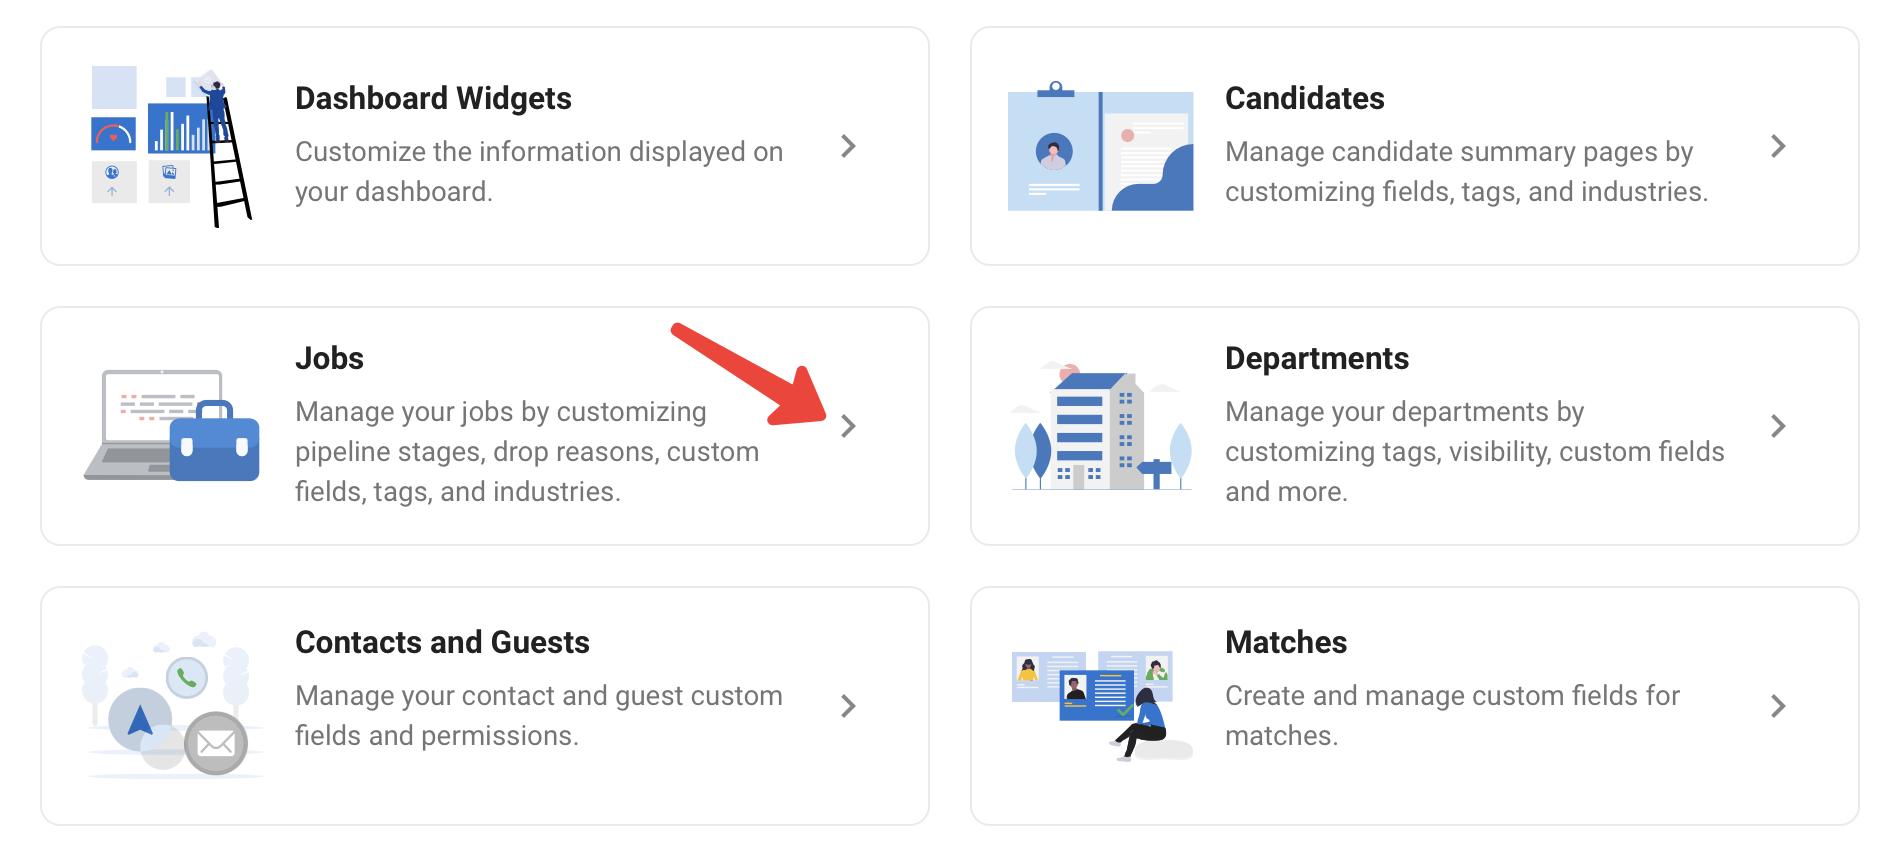
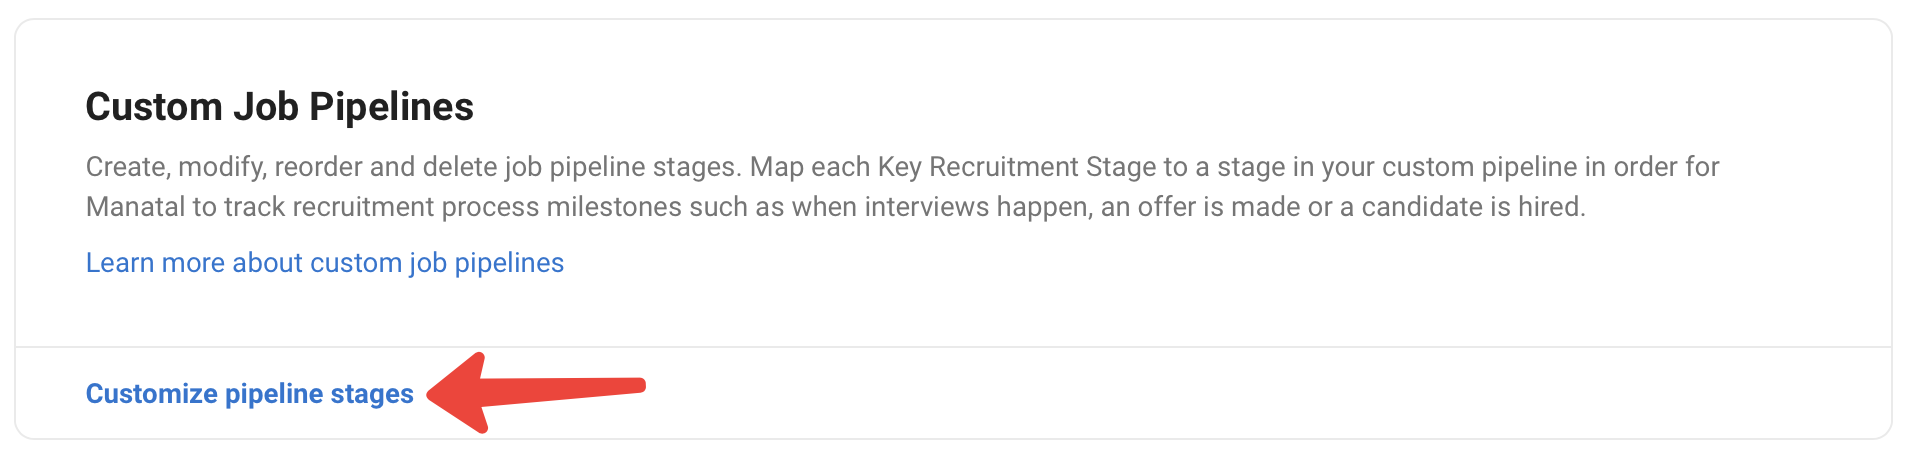
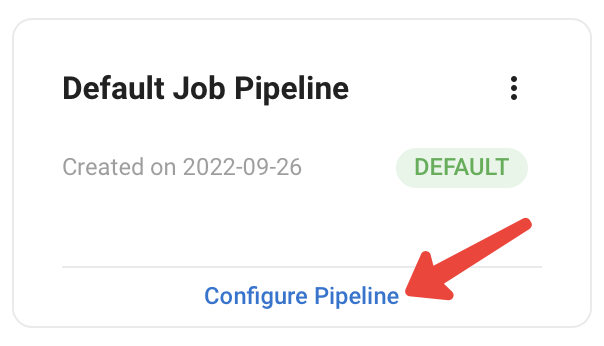
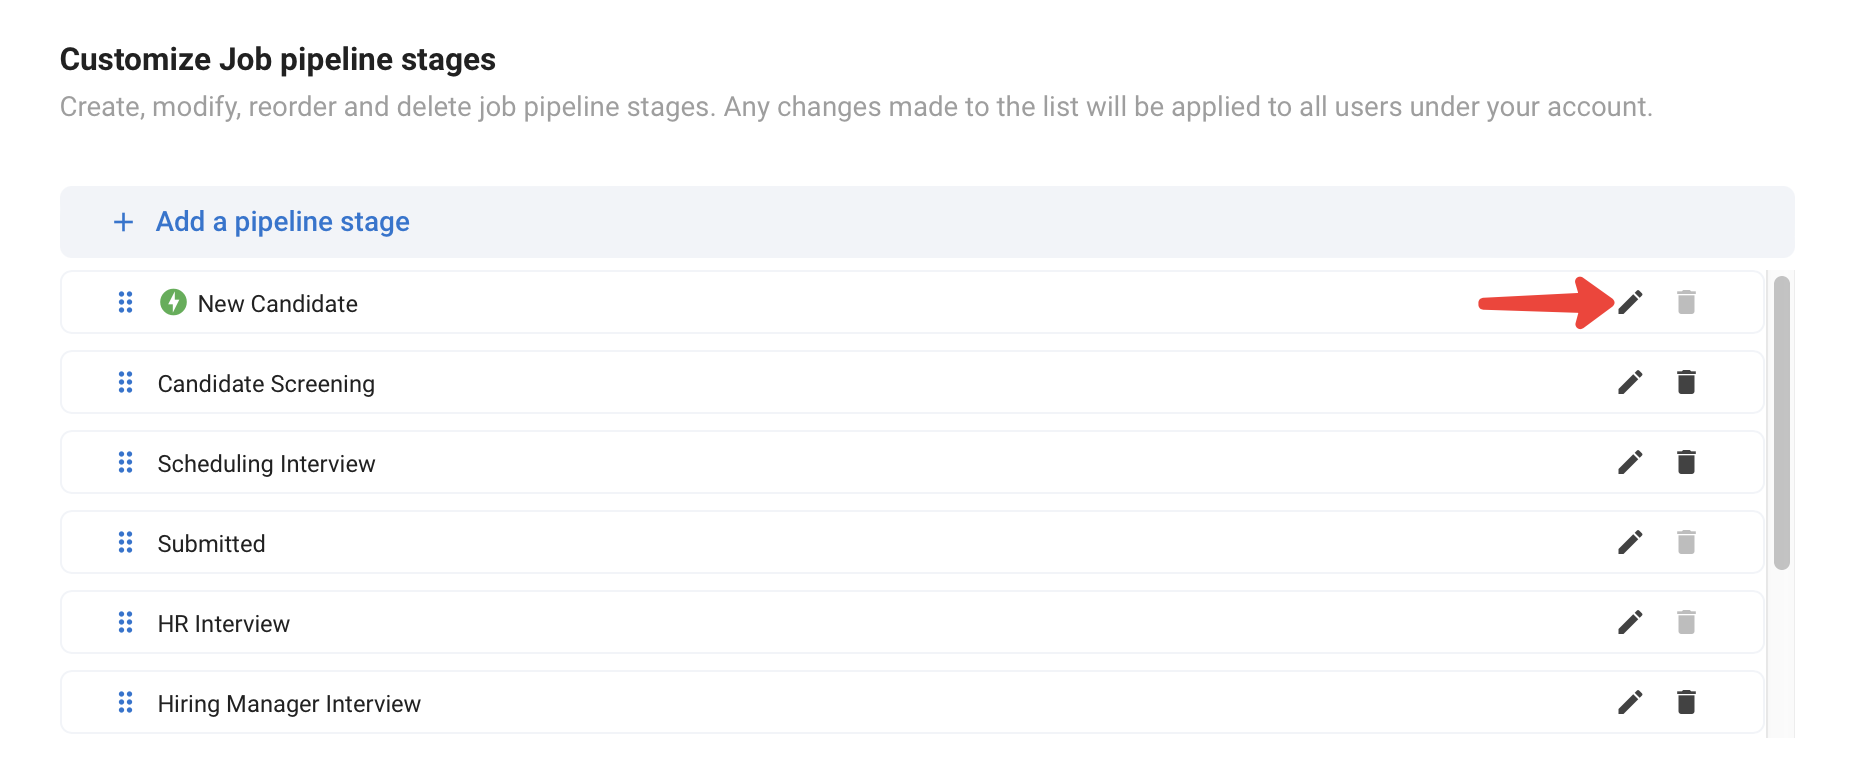
- Head to the following page. Alternatively, click on "Administration" from your side menu, open the "Customization" section and then the "Jobs" card. Then click “Custom Job Pipelines”.
-
Click on "Configure Pipeline" under the pipeline you wish to add an automation under.
-
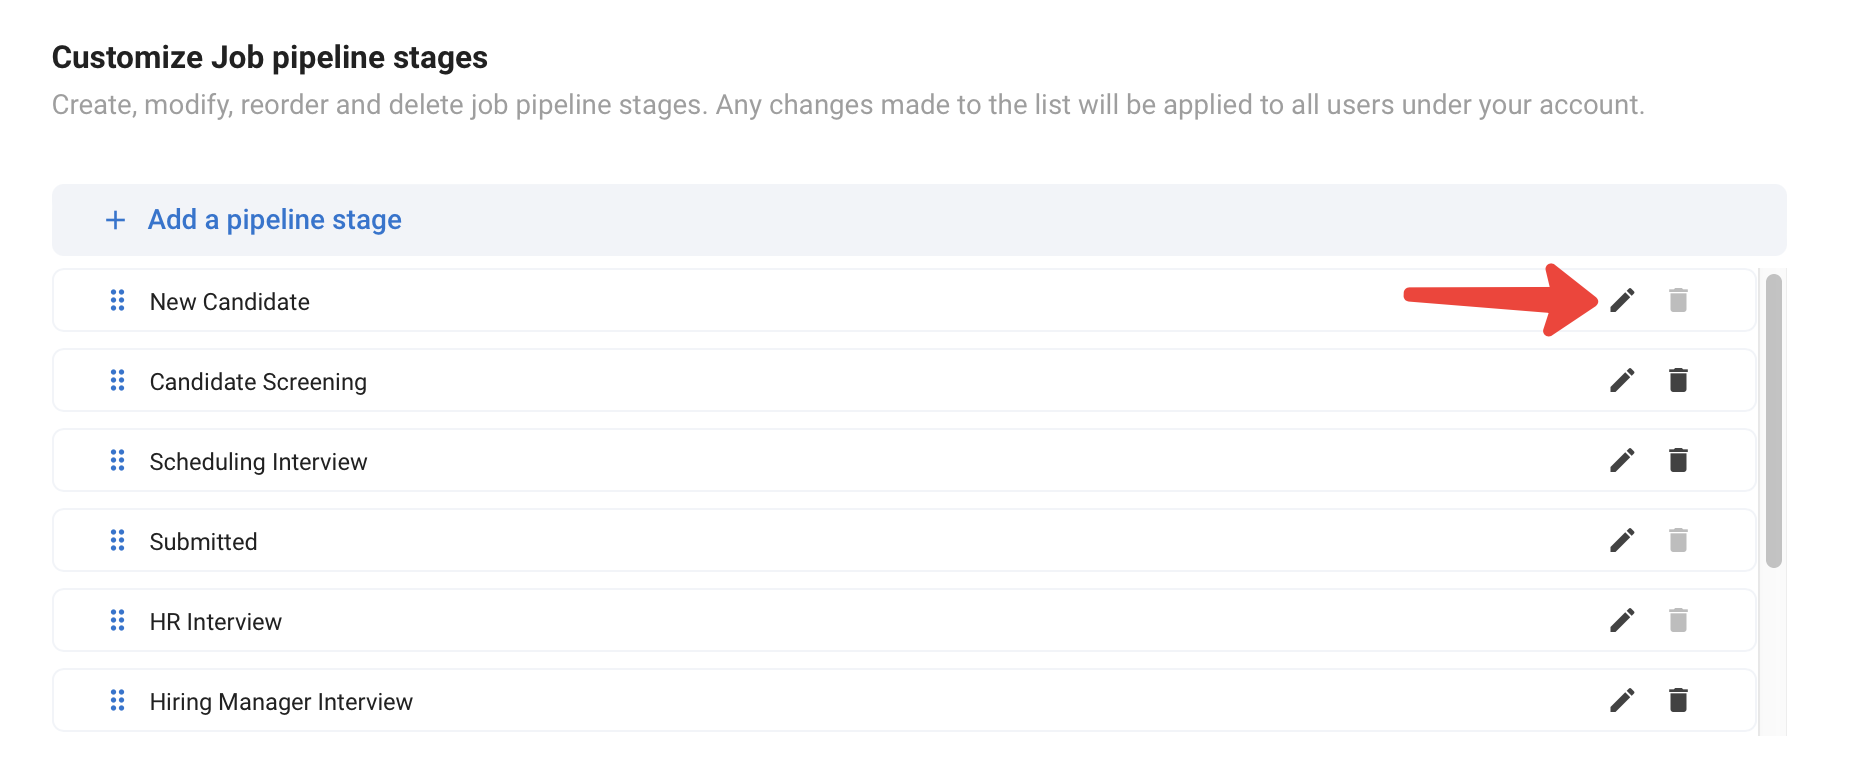
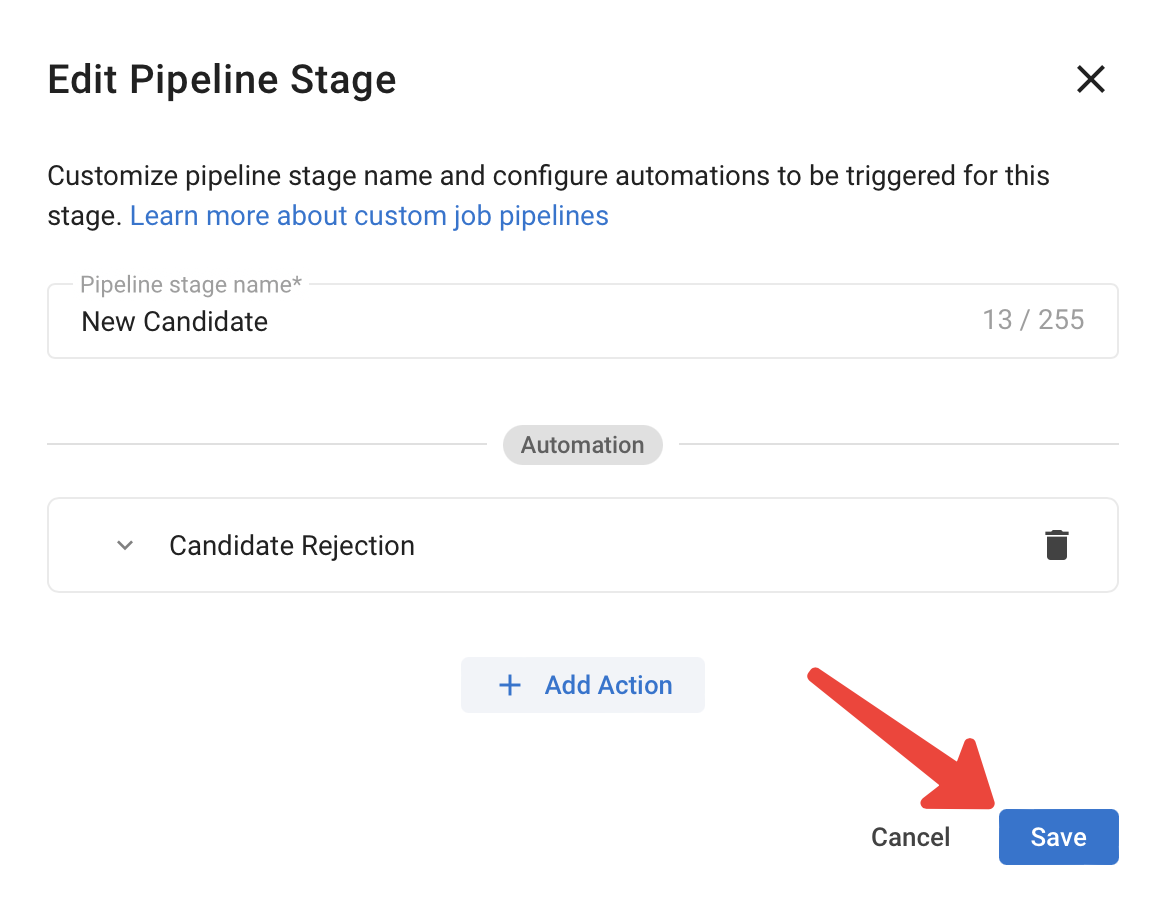
Click on the pencil icon next to the stage you’d like to add the automation in.
-
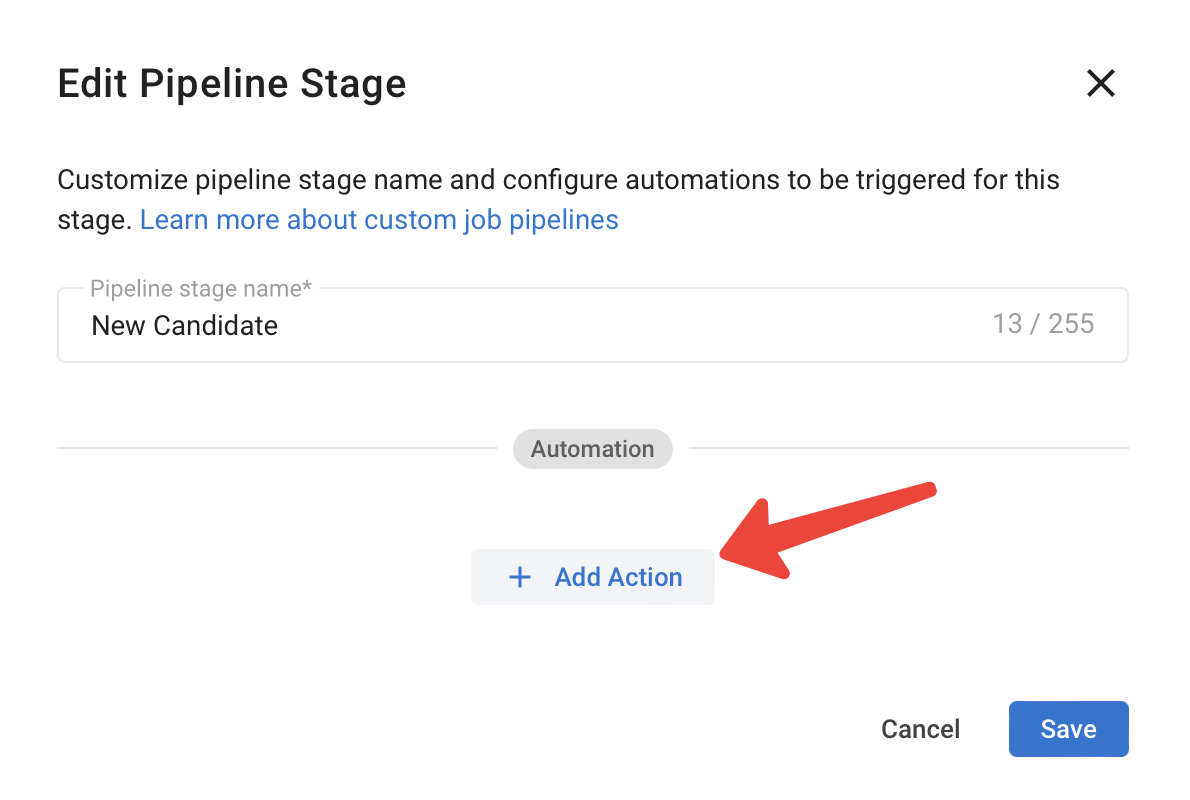
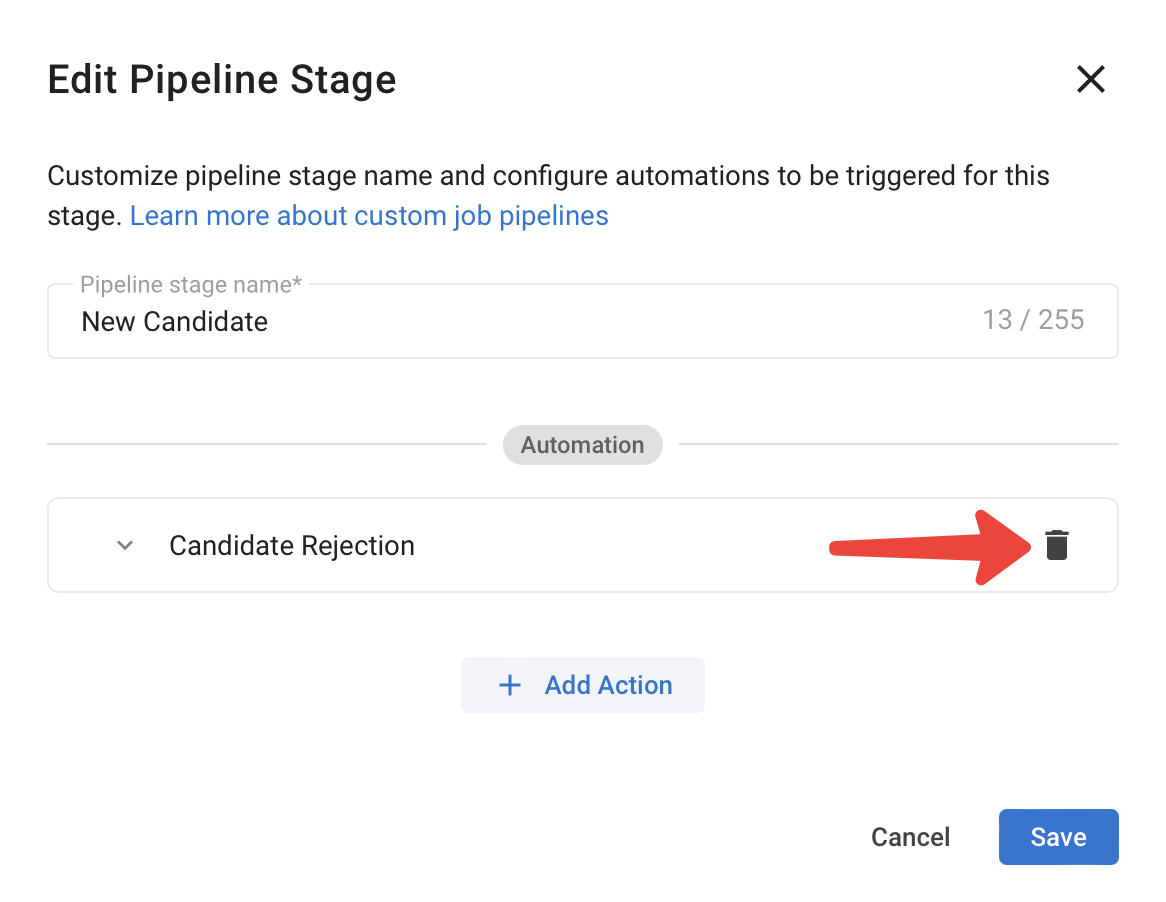
Click the “Add action” button.
-
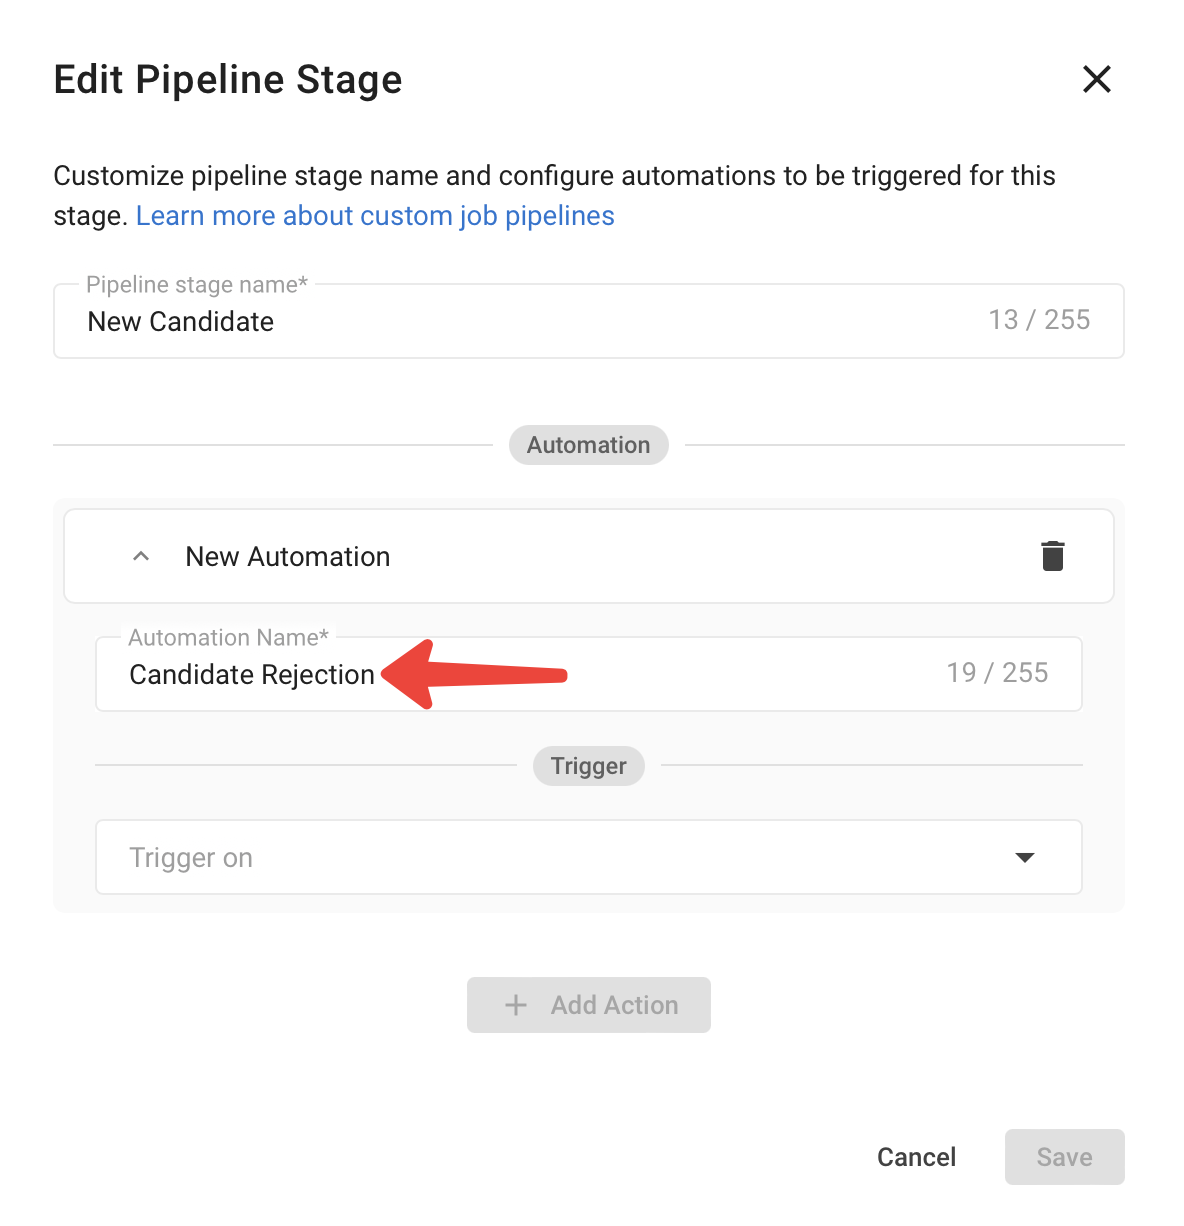
Enter a name for the automation
-
Select the trigger from the dropdown (an event you’d like the automation to be triggered after)
-
Select the action to follow that trigger
-
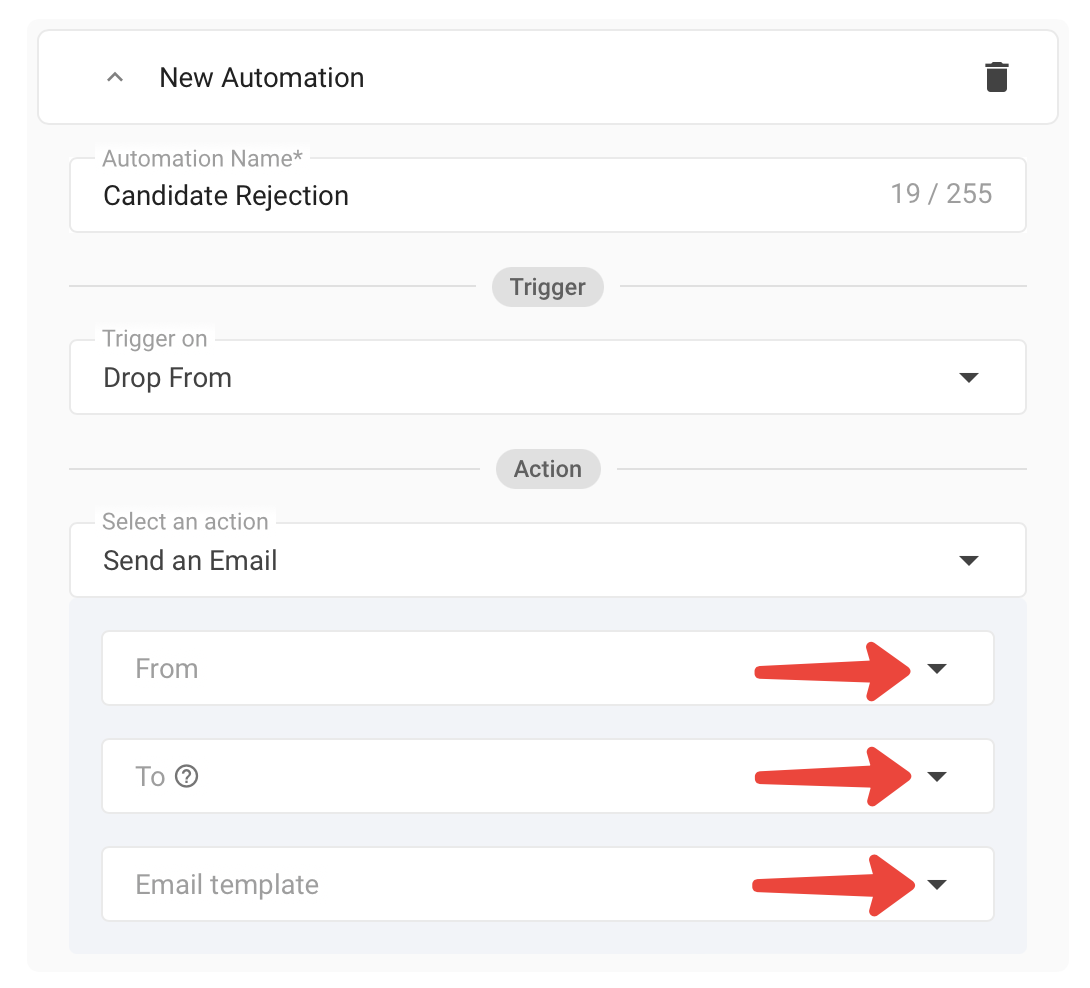
Select 'From', 'To', and 'Email Template' from their respective dropdowns if the action is to send an email.
-
Click "Save" on the pop up.

-
Click "Save" on the Pipeline page.

Creating a Job Automation
This action can only be performed by an admin user or non-admins added to the feature.
-
In the Jobs menu, click on a job.
-
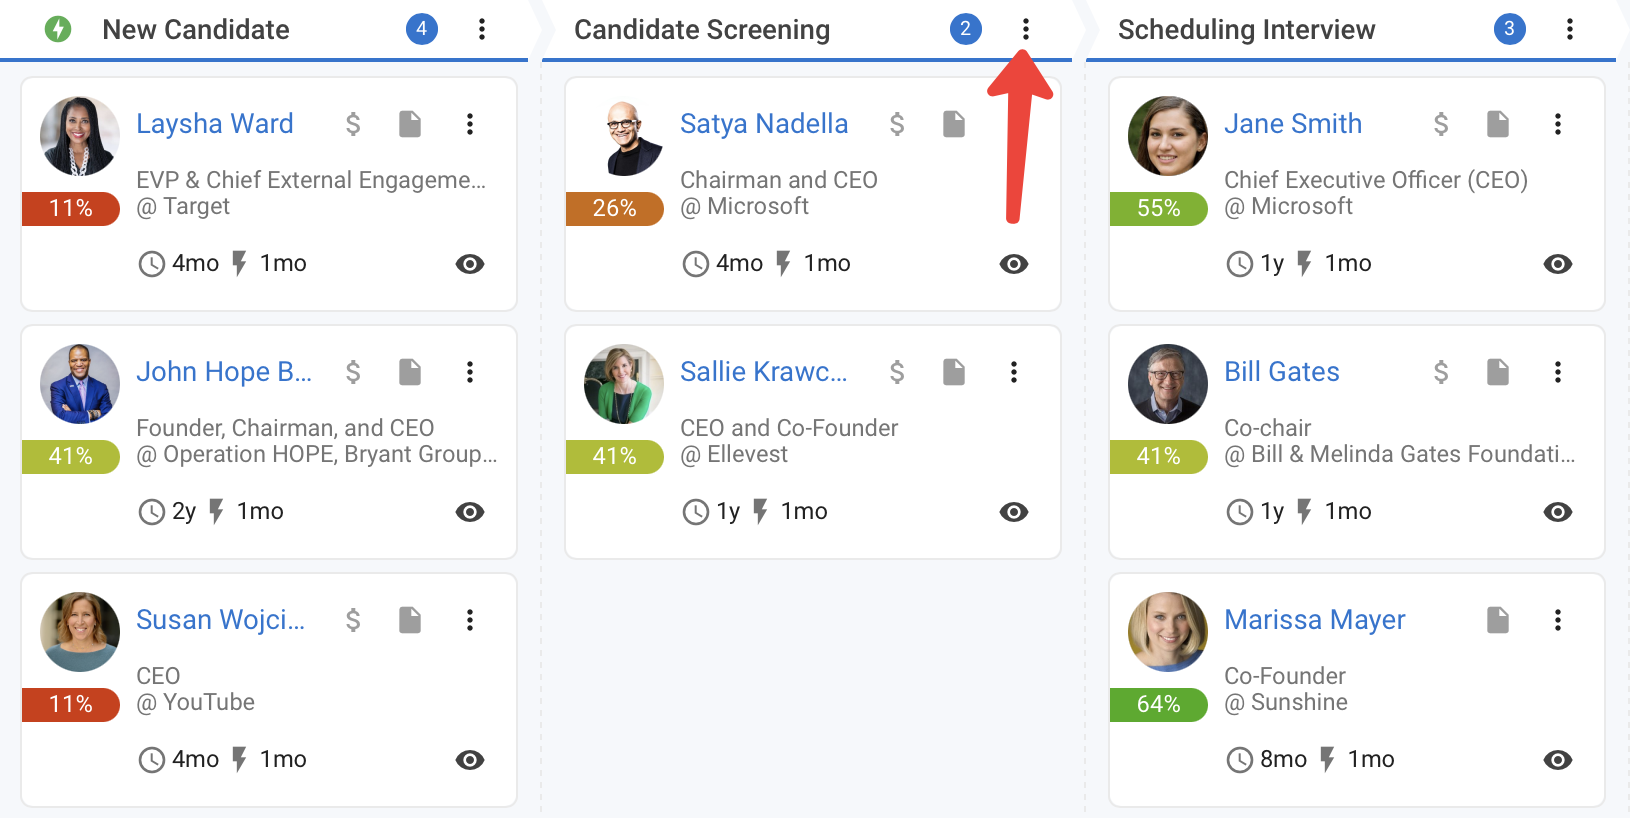
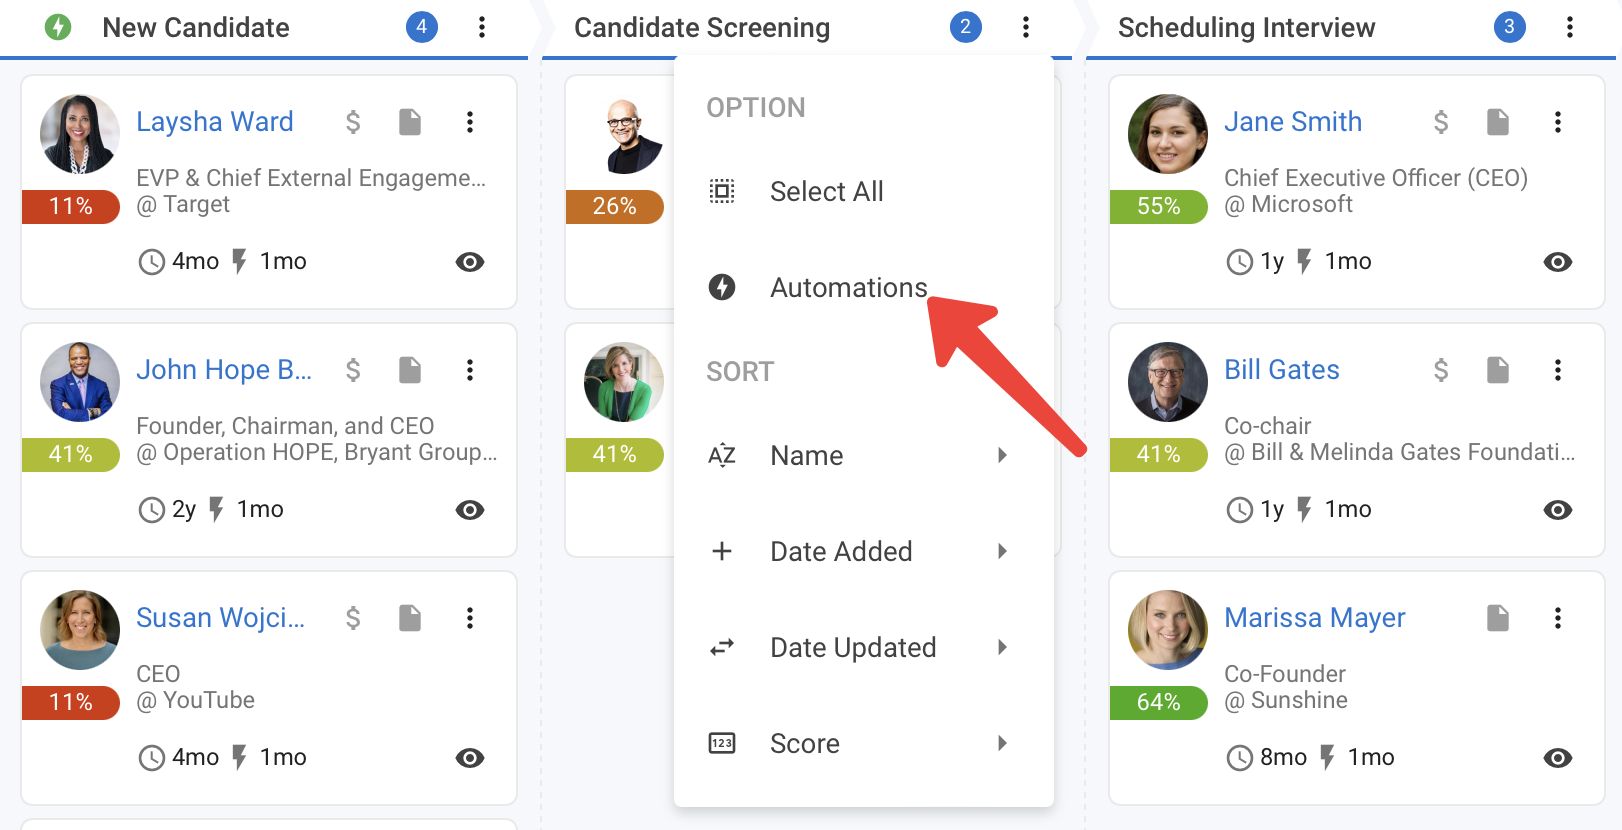
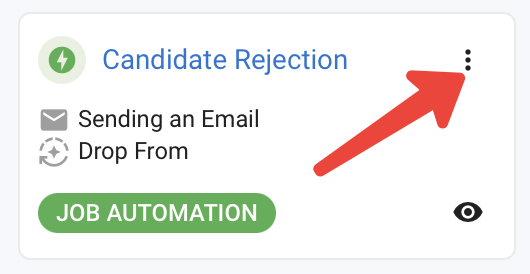
Click the three dots next to a stage name and select “Automations.”
-
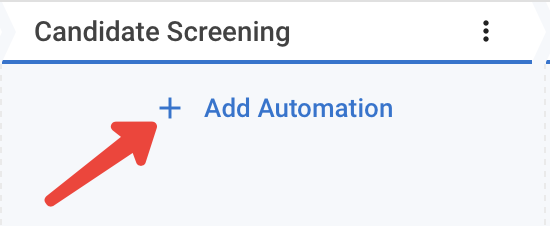
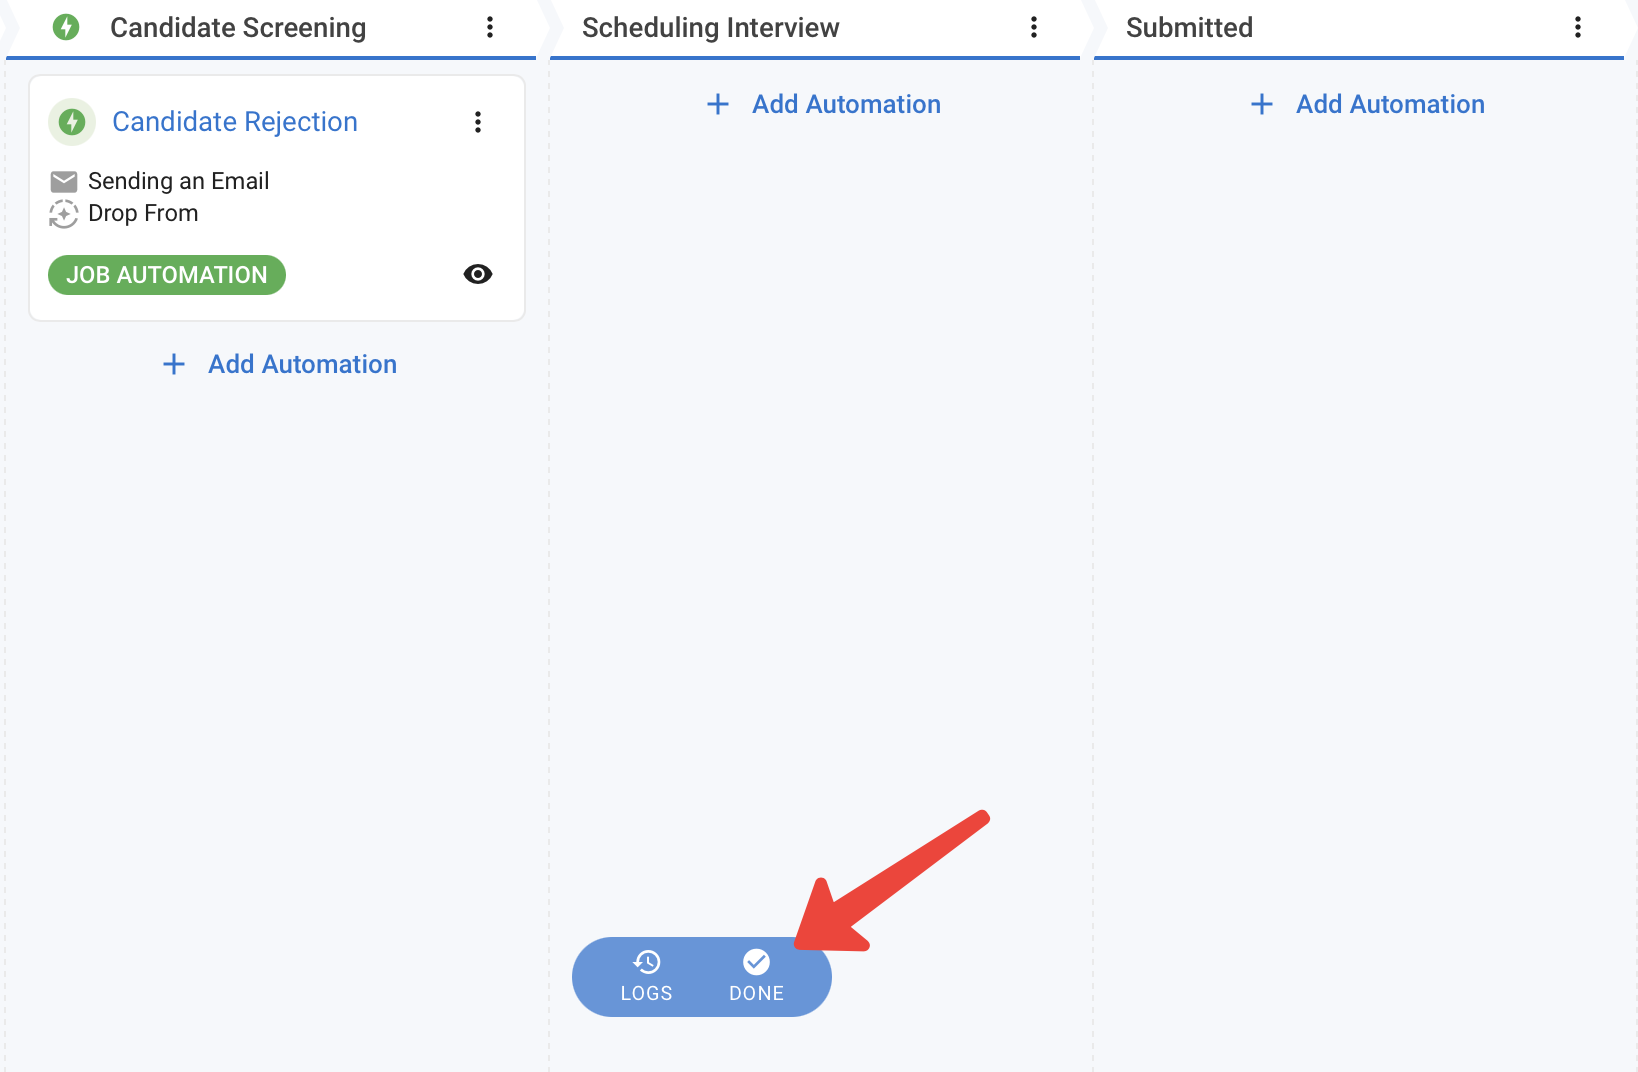
Click “+ Add Automation” under the stage you’d like to add an automation to.
-
Define the automation:
- Enter a name for the automation
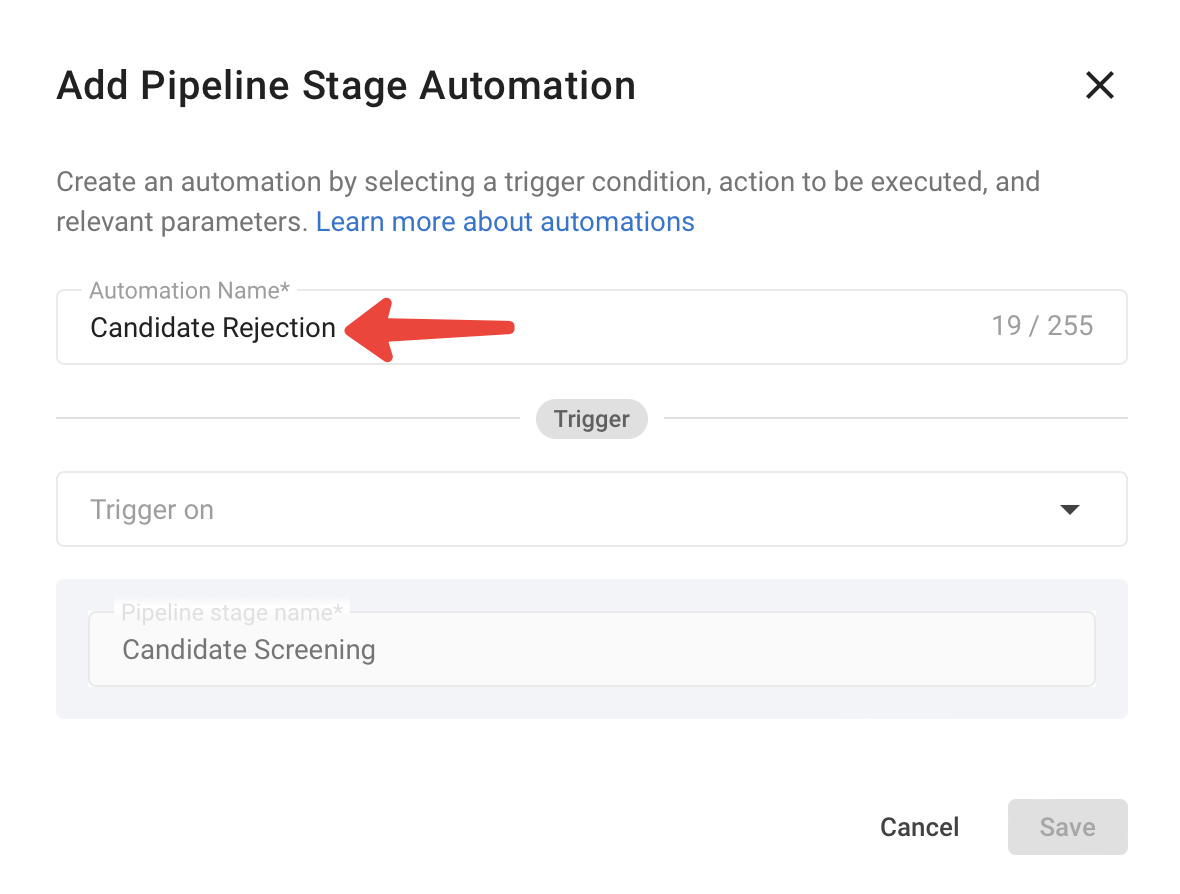
- Select the trigger from the dropdown (an event you’d like the automation to be triggered after)
-
Select the action to follow that trigger
-
Select 'From', 'To', and 'Email Template' from their respective dropdowns if the action is to send an email.

-
Click "Save" on the pop up.
-
Click "Done" in the Automation Kanban.
Triggering and Cancelling an Automation
- Trigger an automation by performing the respective action (e.g., drag a candidate for a "Move To" automation).
- A pop-up will appear, allowing you to cancel the automation if needed.
- If not canceled, the execution begins, and results can be viewed in the automation logs.
Automation Logs
- You can access the logs via this link. Alternatively, click on "Administration" from your side menu, open the "Features" section and then the "Automations" card and the click on “History”. Another way to access the automation history is by clicking the “Logs” button on the automation kanban for a job.
- Another way to access the automation history is by clicking the “Logs” button on the automation kanban for a job.
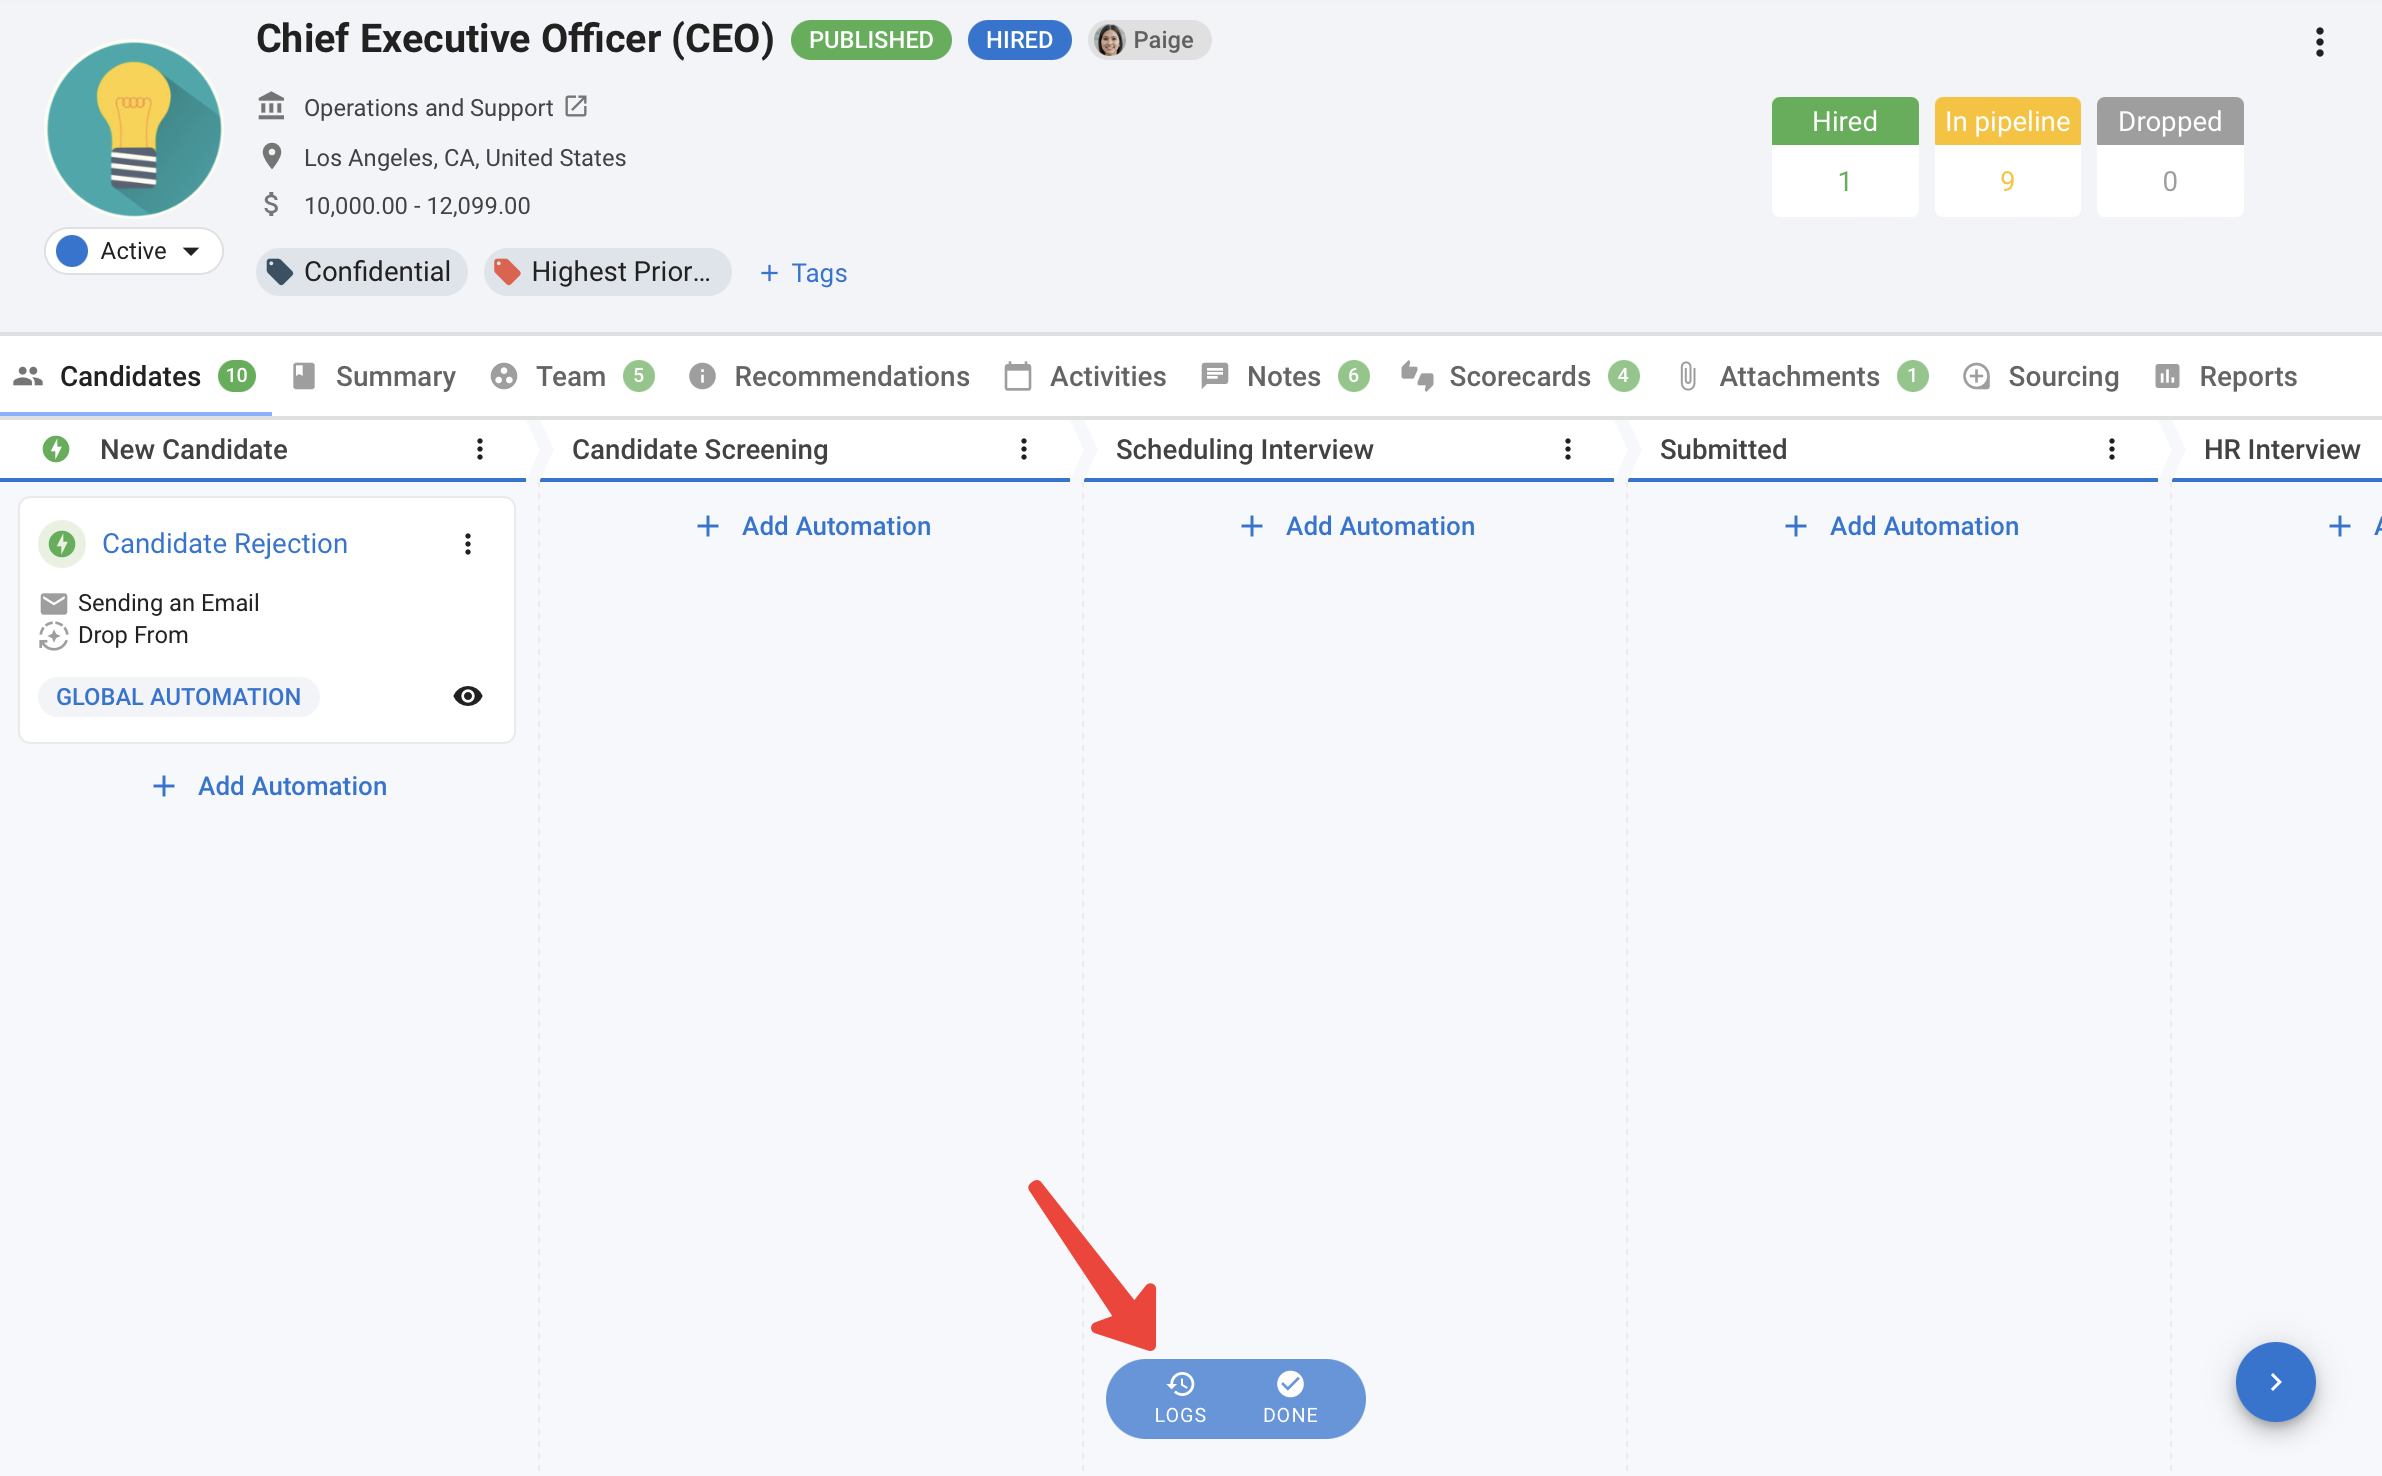
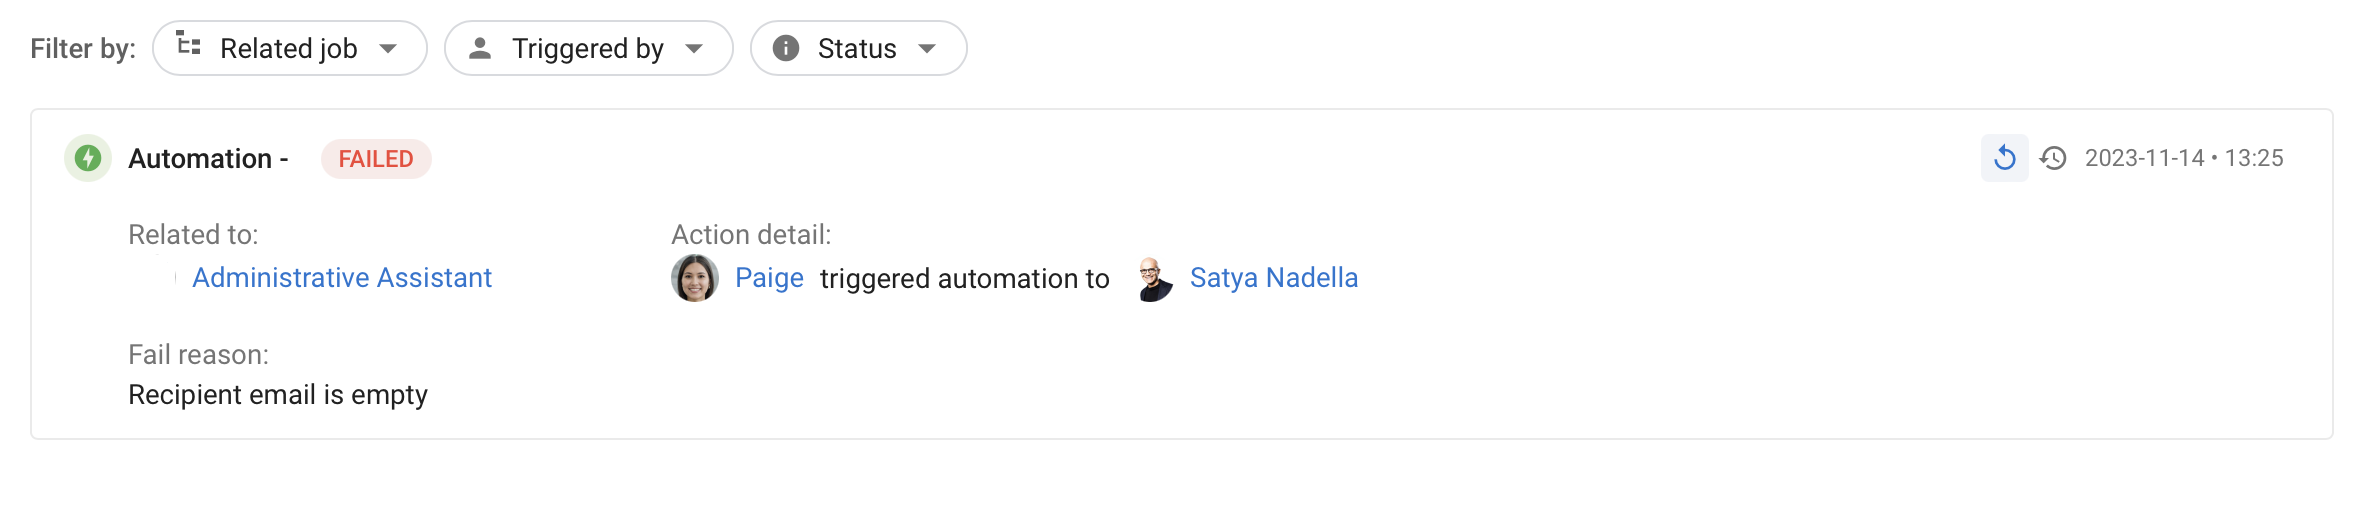
- View past run automations with different statuses and take actions based on the status.
| Status | Description | Possible action |
|---|---|---|
| Created | Automatio created and ready to run | |
| Success | Automation successfully executed | |
| Failed | Automation execution failed | Retry |
| Scheduled | Execution scheduled for later | Trigger now, Cancel |
| Cancelled | Execution cancelled | Retry |
| Processing | Execution is running |
- You can filter the automation logs, by related job, person who triggered the automation and result status
Deleting a Global Automation
- Head to the following page. Alternatively, click on "Administration" from your side menu, open the "Customization" section and then the "Jobs" card. Then click “Custom Job Pipelines”.
-
Click on "Configure Pipeline" for the Job Pipeline, you’d like to delete the automation from.
-
Click on the pencil icon next to the stage you’d like to delete the automation from.
-
Click on the trash icon next to the automation name and click "Delete" on the confirmation pop up.
-
Click "Save" on the pop up.
-
Click "Save" on the Pipeline page.
Deleting a Job Automation
-
In the Jobs menu, click on a job you would like to delete the automation from.
-
Click the three dots next to a stage name and click on “Automations”.
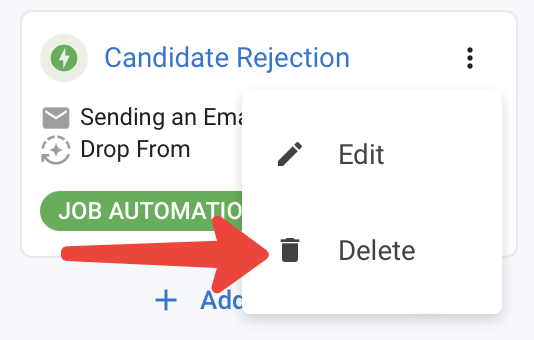
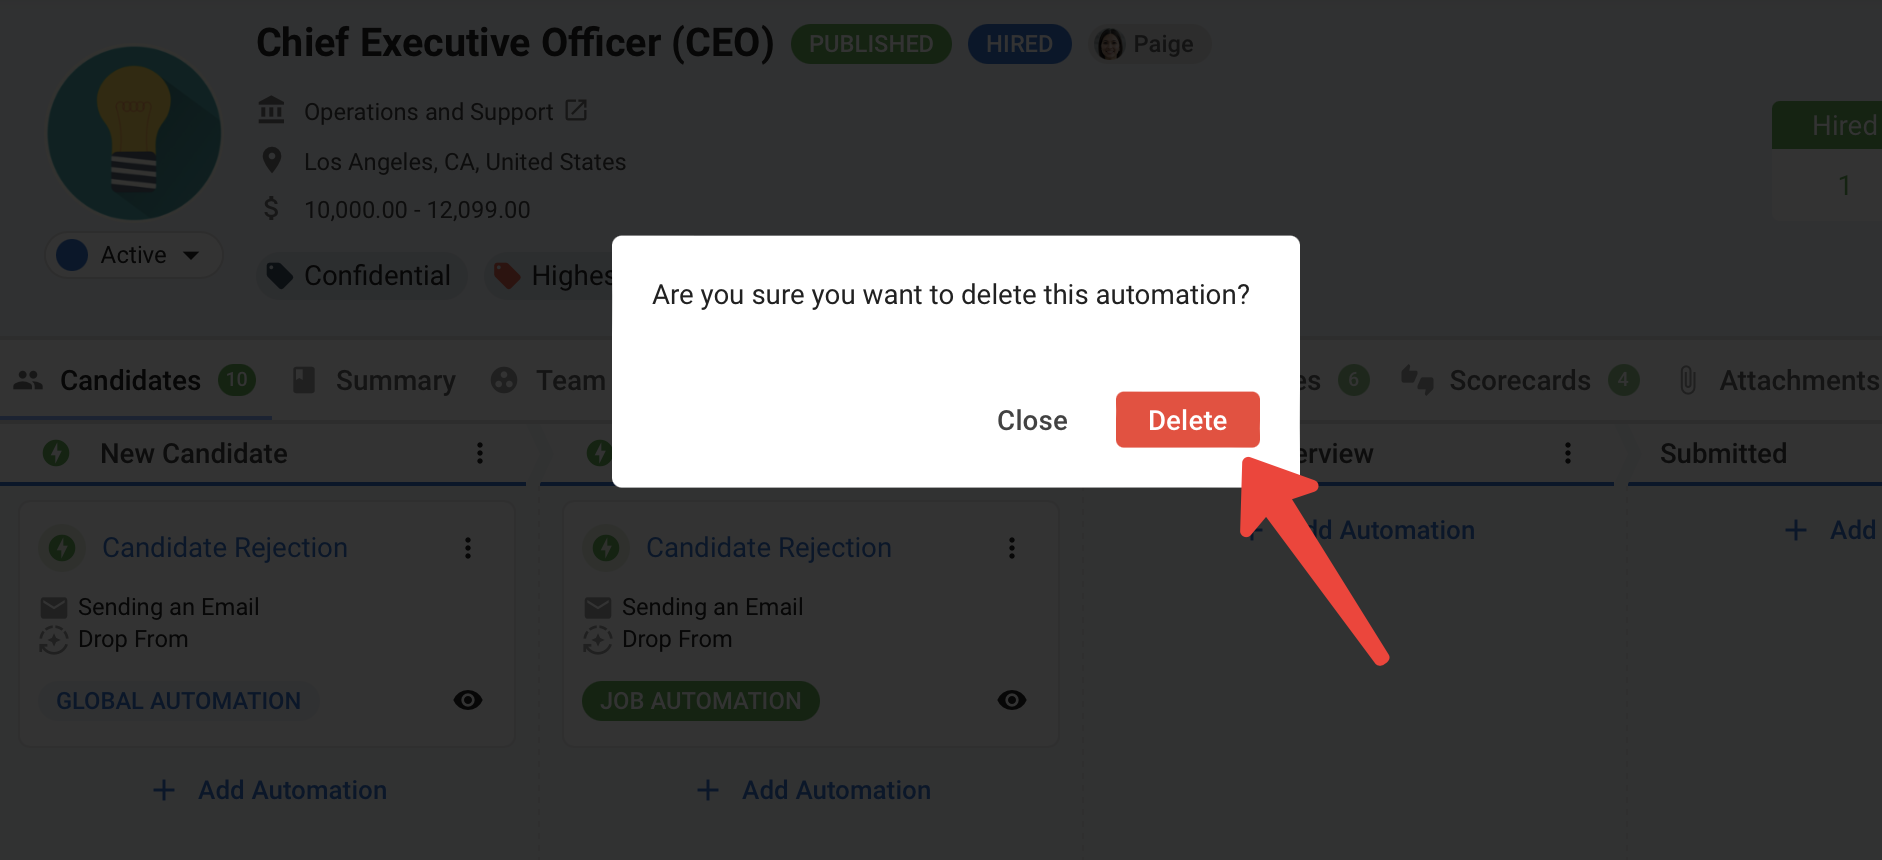
- Click on the three dots next to the automation name and click the Delete option.
-
On the delete confirmation pop up, click on "Delete".
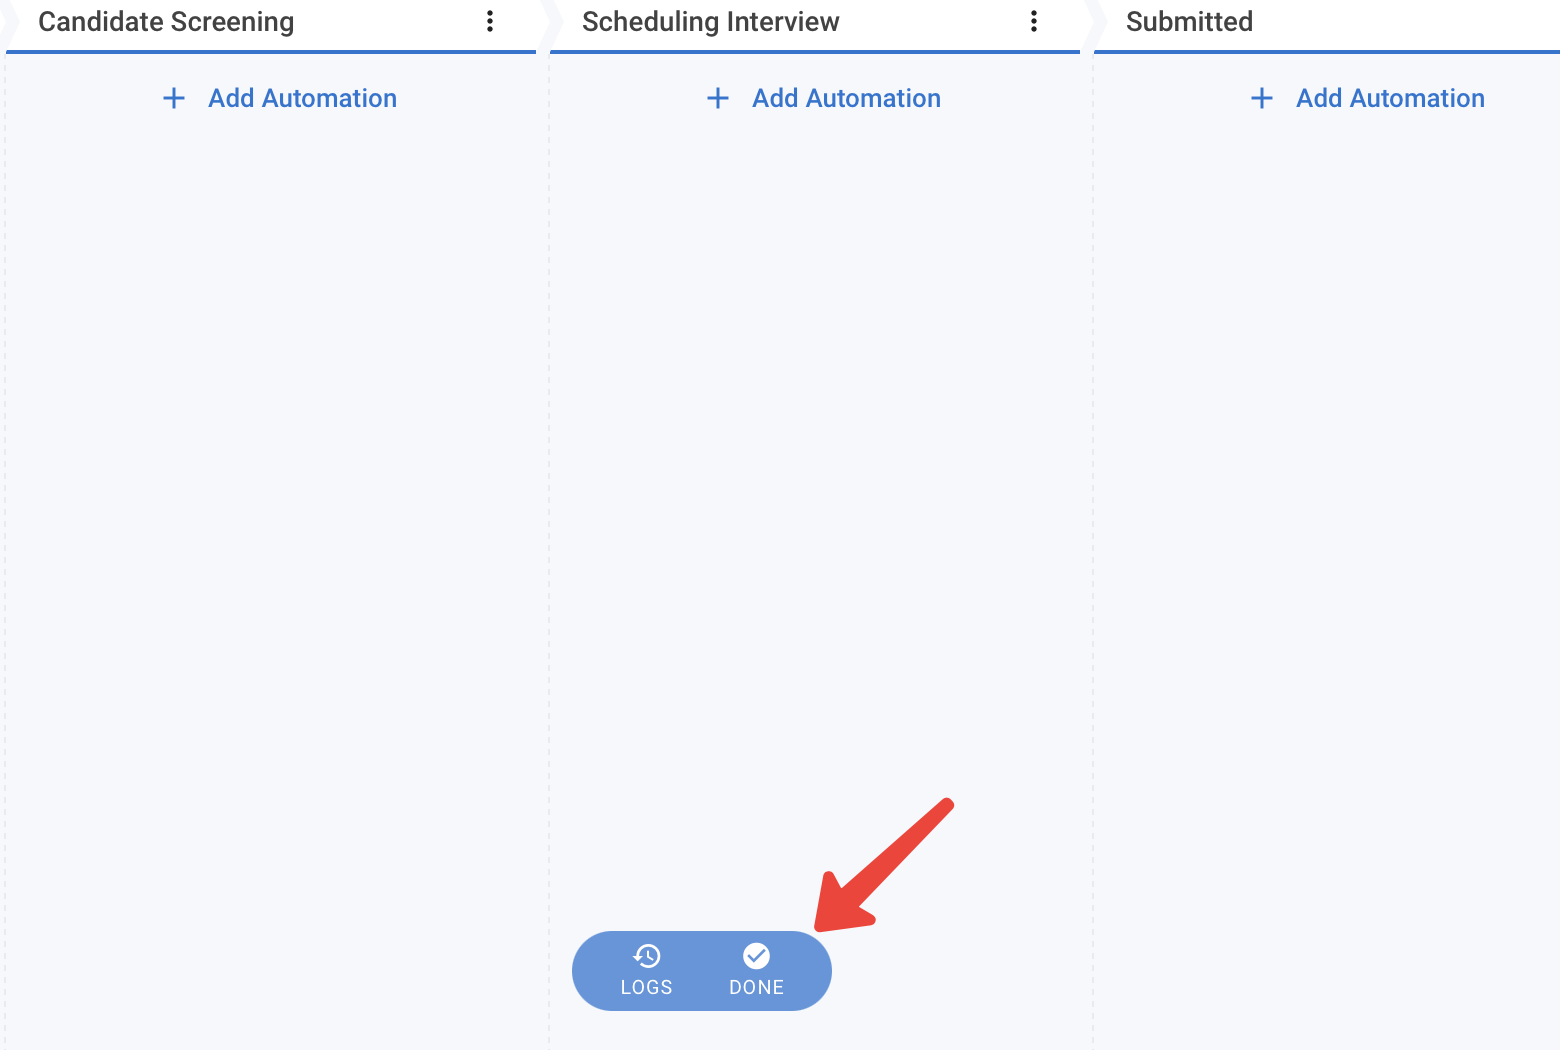
-
Click "Done" and the automation is removed.
Disabling the Workflow Automation Feature
- Visit the following page. If you prefer, you can reach the same destination by clicking on "Administration" from your side menu, open the "Features" category and then click on "Automations".
- From here, you can disable the Workflow Automation feature by toggling it off.
Frequently Asked Questions
Q1. Whose email will the automated emails be sent from
- That depends on how each automation was setup. When defining an email action, there will be an option to pick the sender. It can be either:
- User who triggered the action (i.e. moved the candidate)
- Job owner
- Specific user
Q2. Can multiple actions be triggered at the same time?
- Yes, define multiple actions per stage, and they will be triggered simultaneously when moving multiple candidates.