This can only be done by an Admin.
- To modify your career page, please first activate the career page feature by following these instructions.
General Settings
Accessing the Advanced Career Page Settings
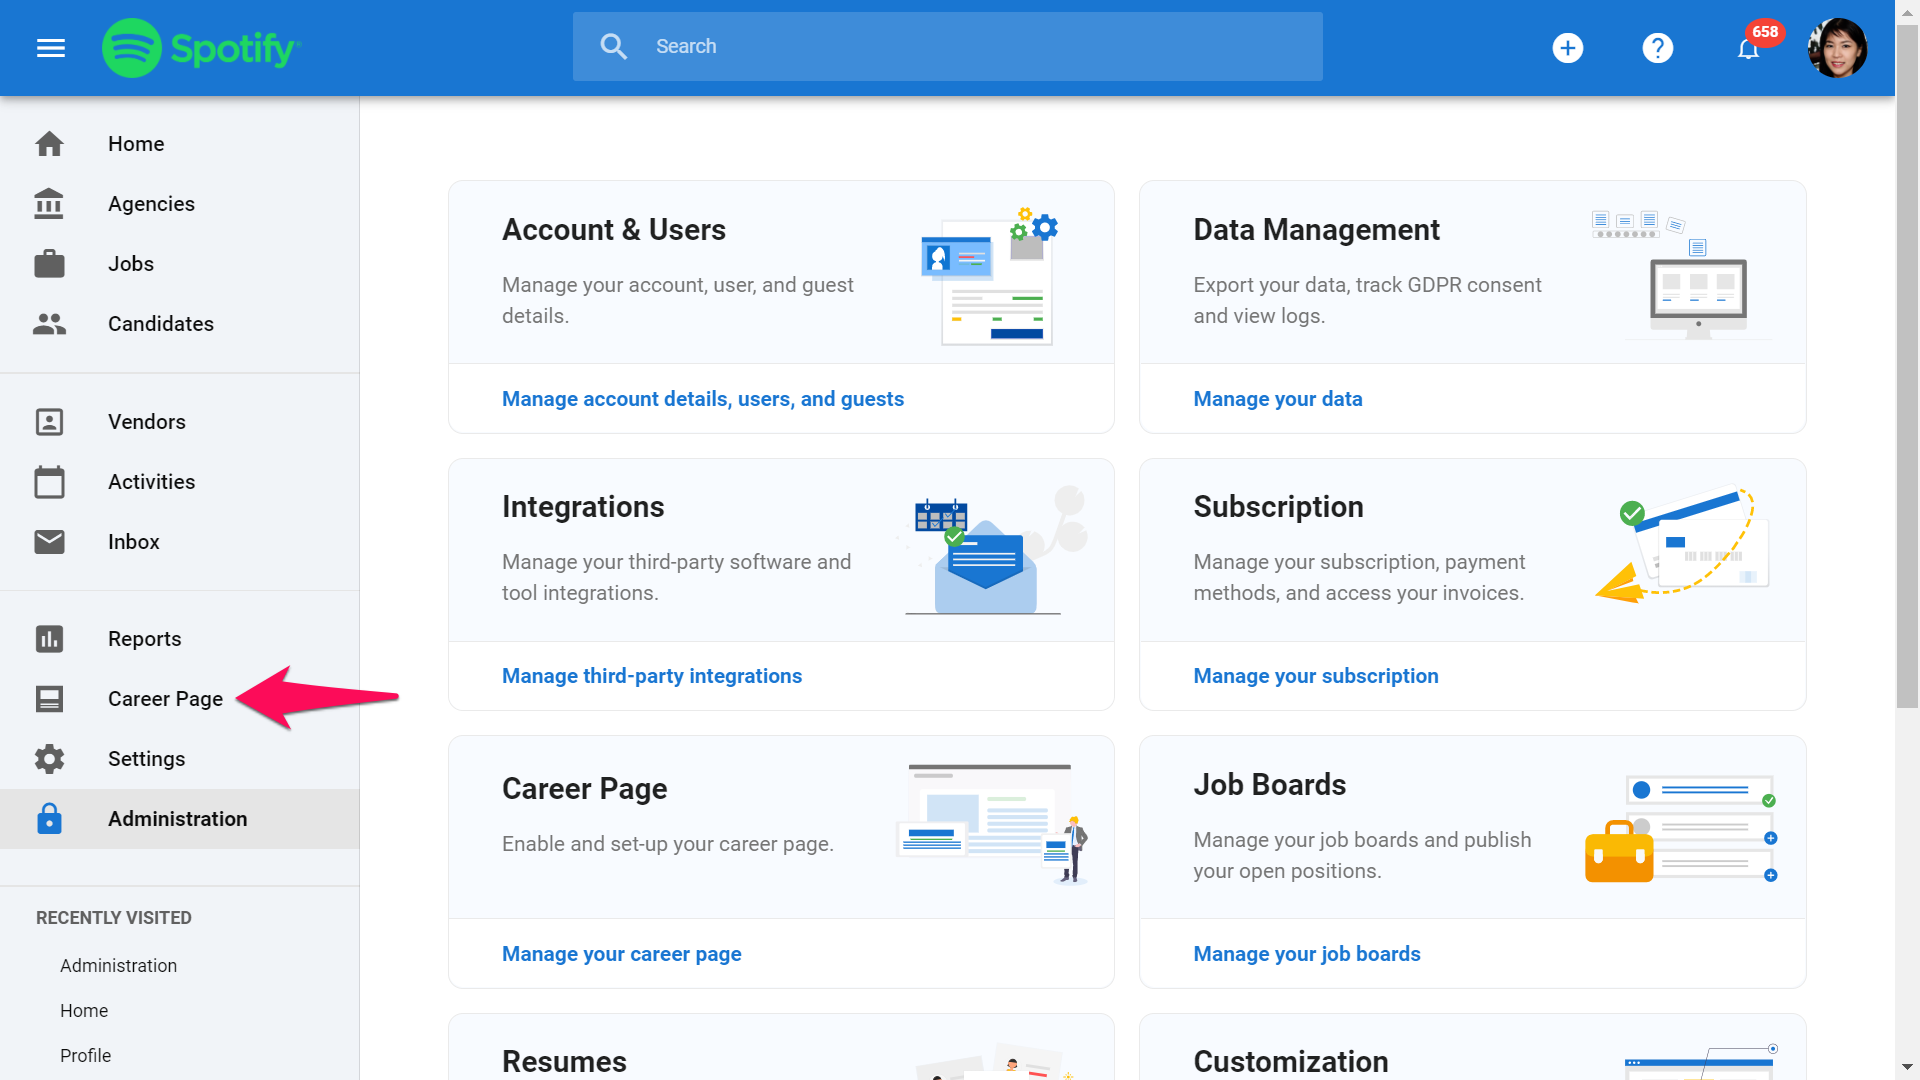
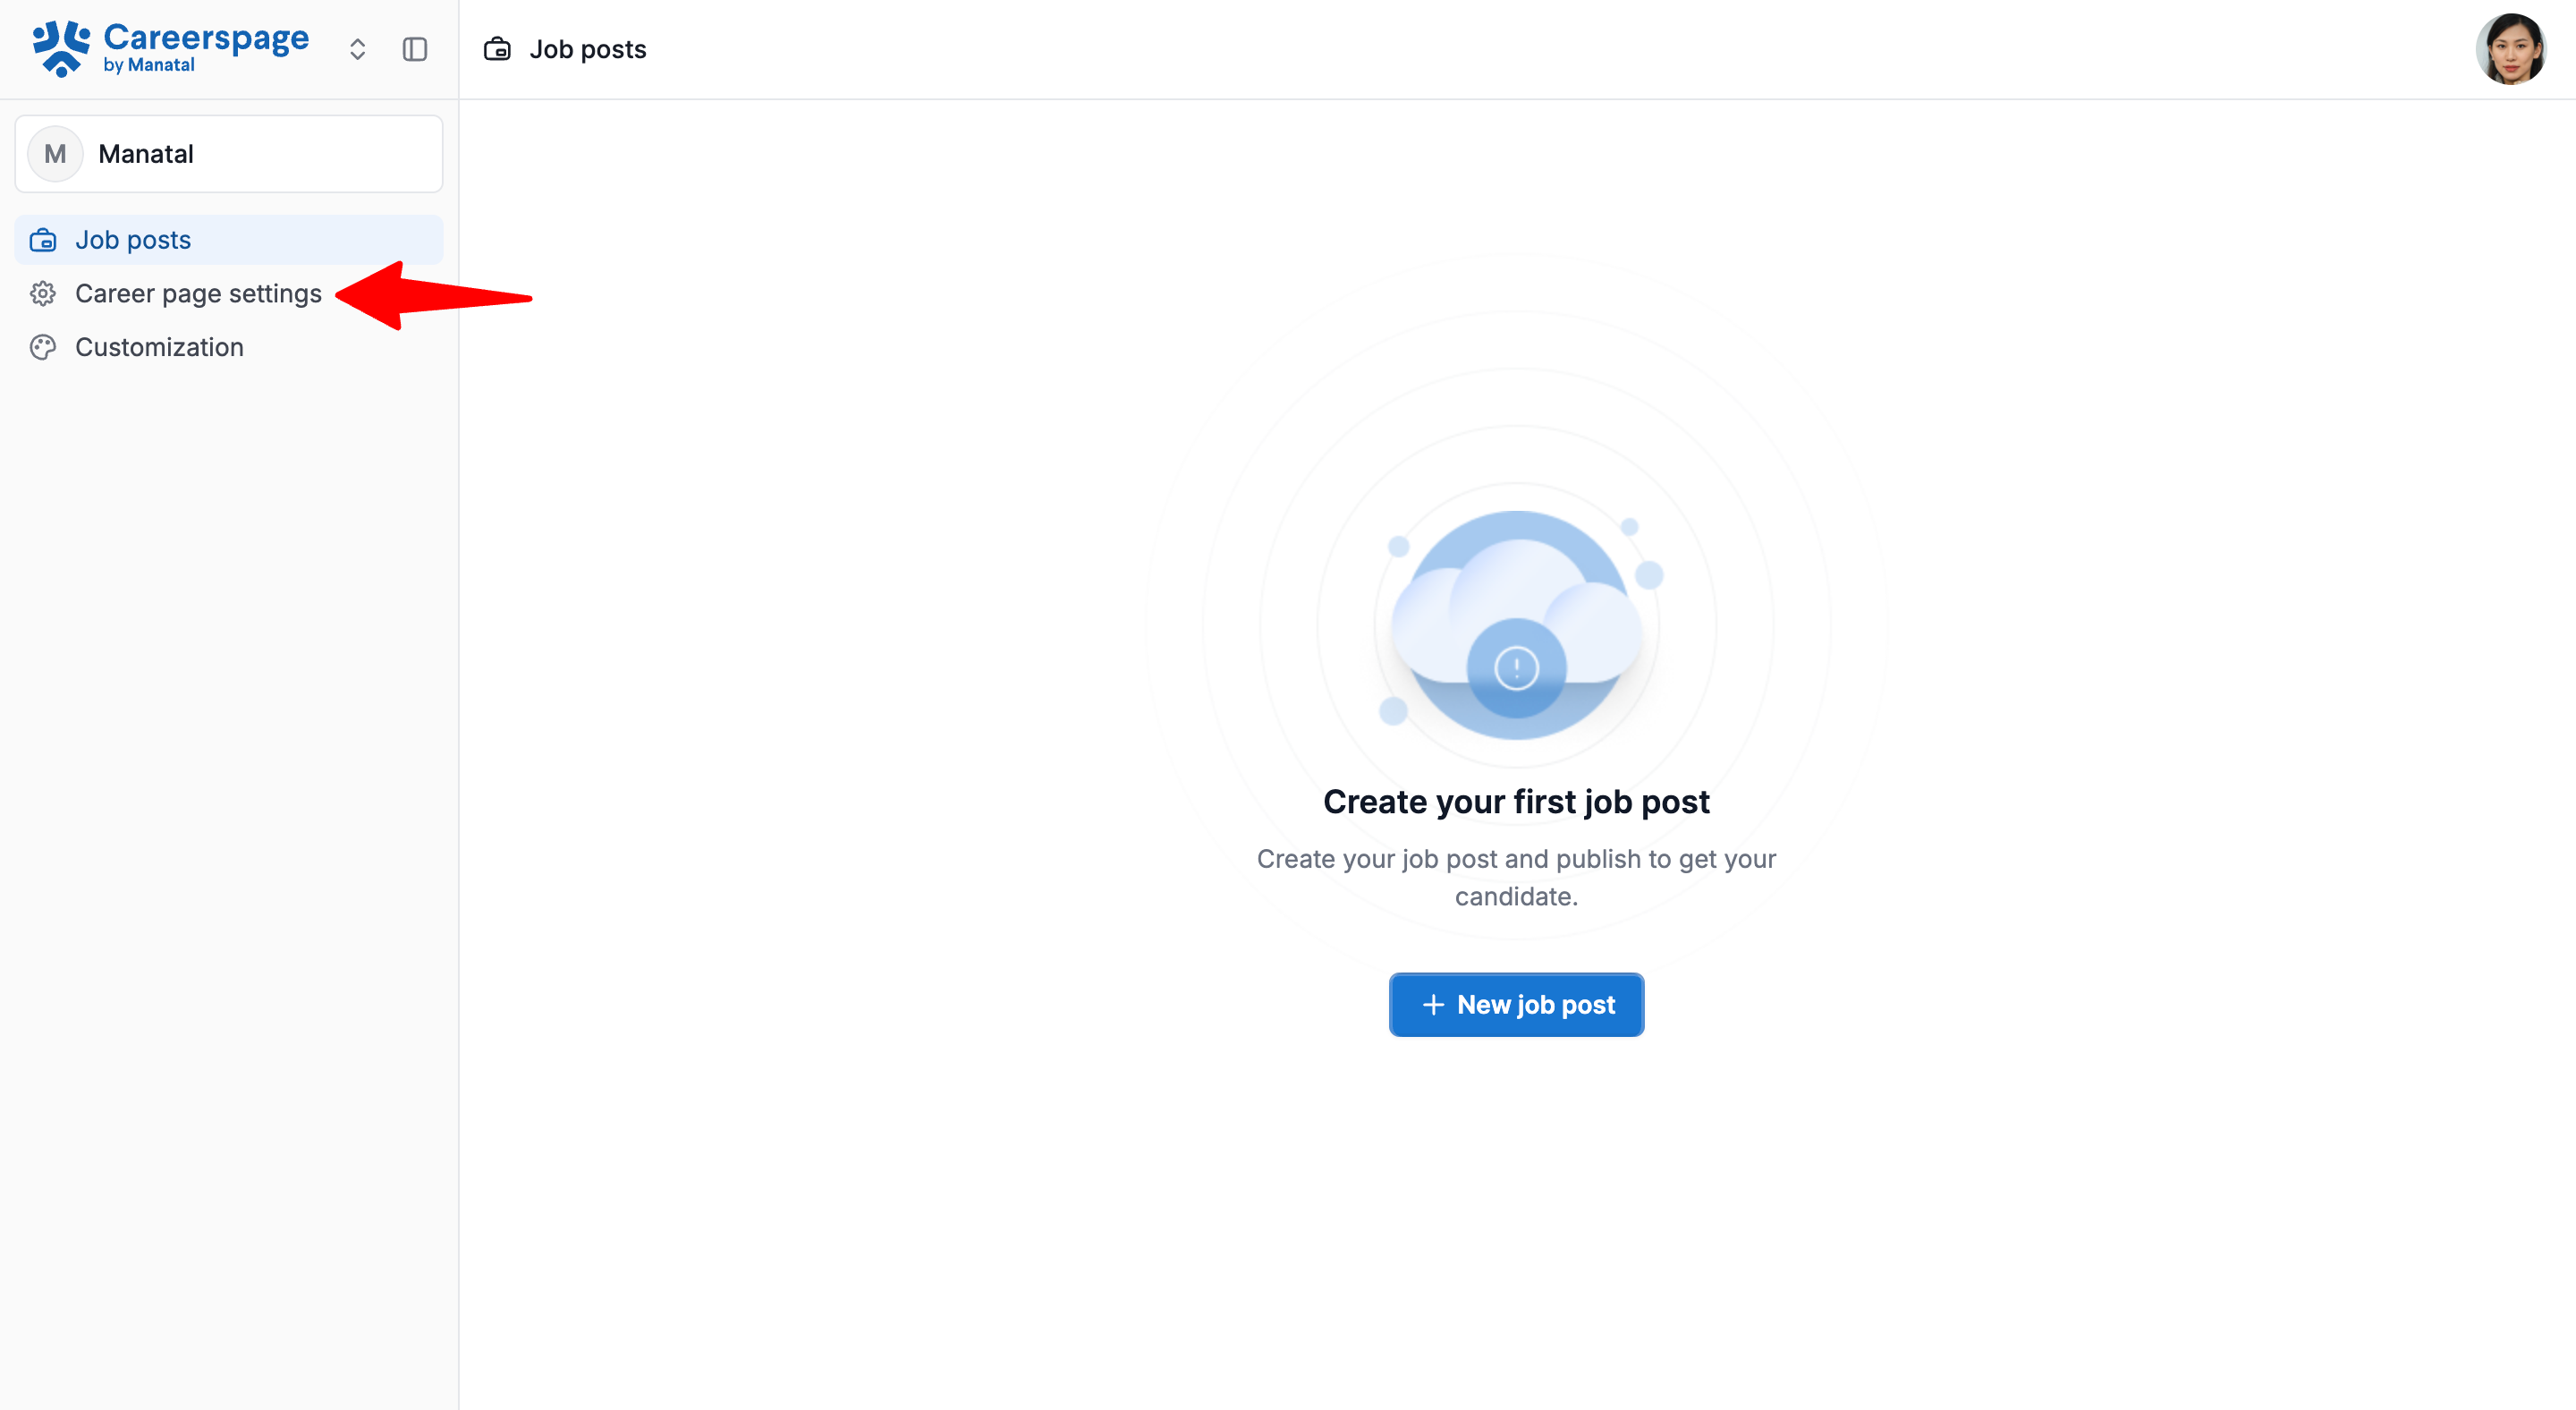
- Head to the following page. Alternatively, click on "Career Page" from the side menu, then click on "Career page settings".
Adding/Modifying your Company Name
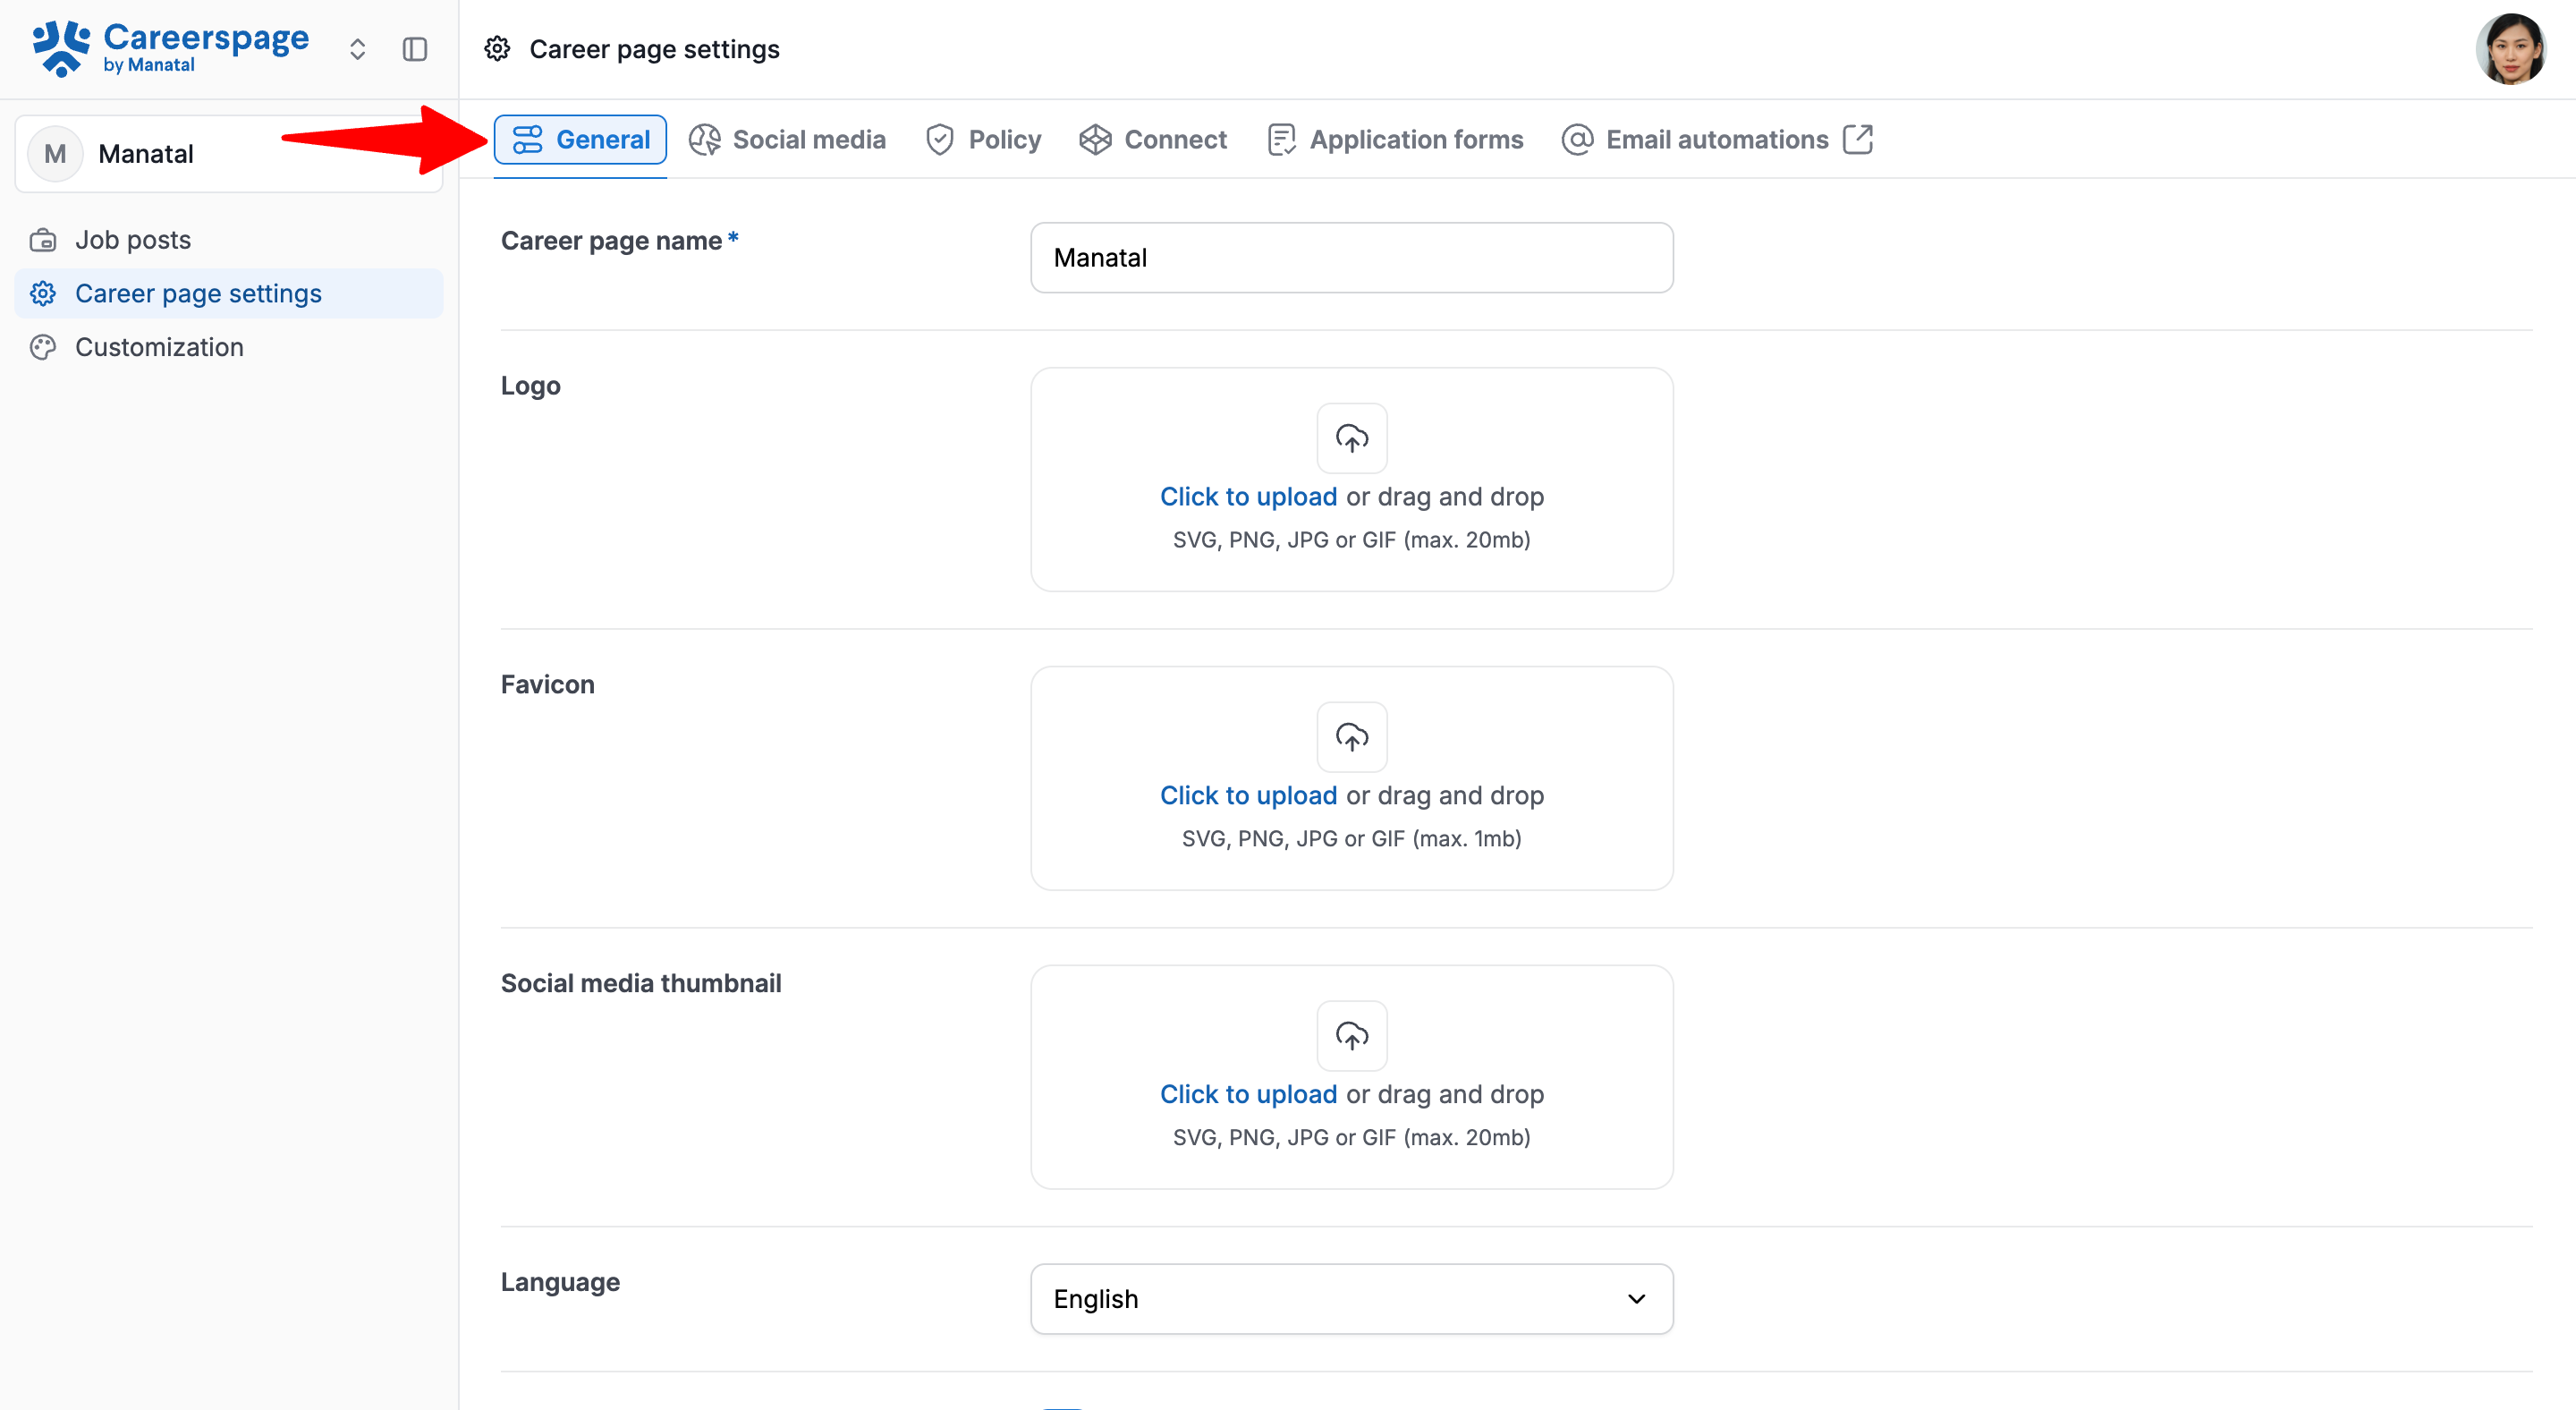
- Head to the following page. Alternatively, click on "Career page settings" from your side menu and then open the "General" tab.
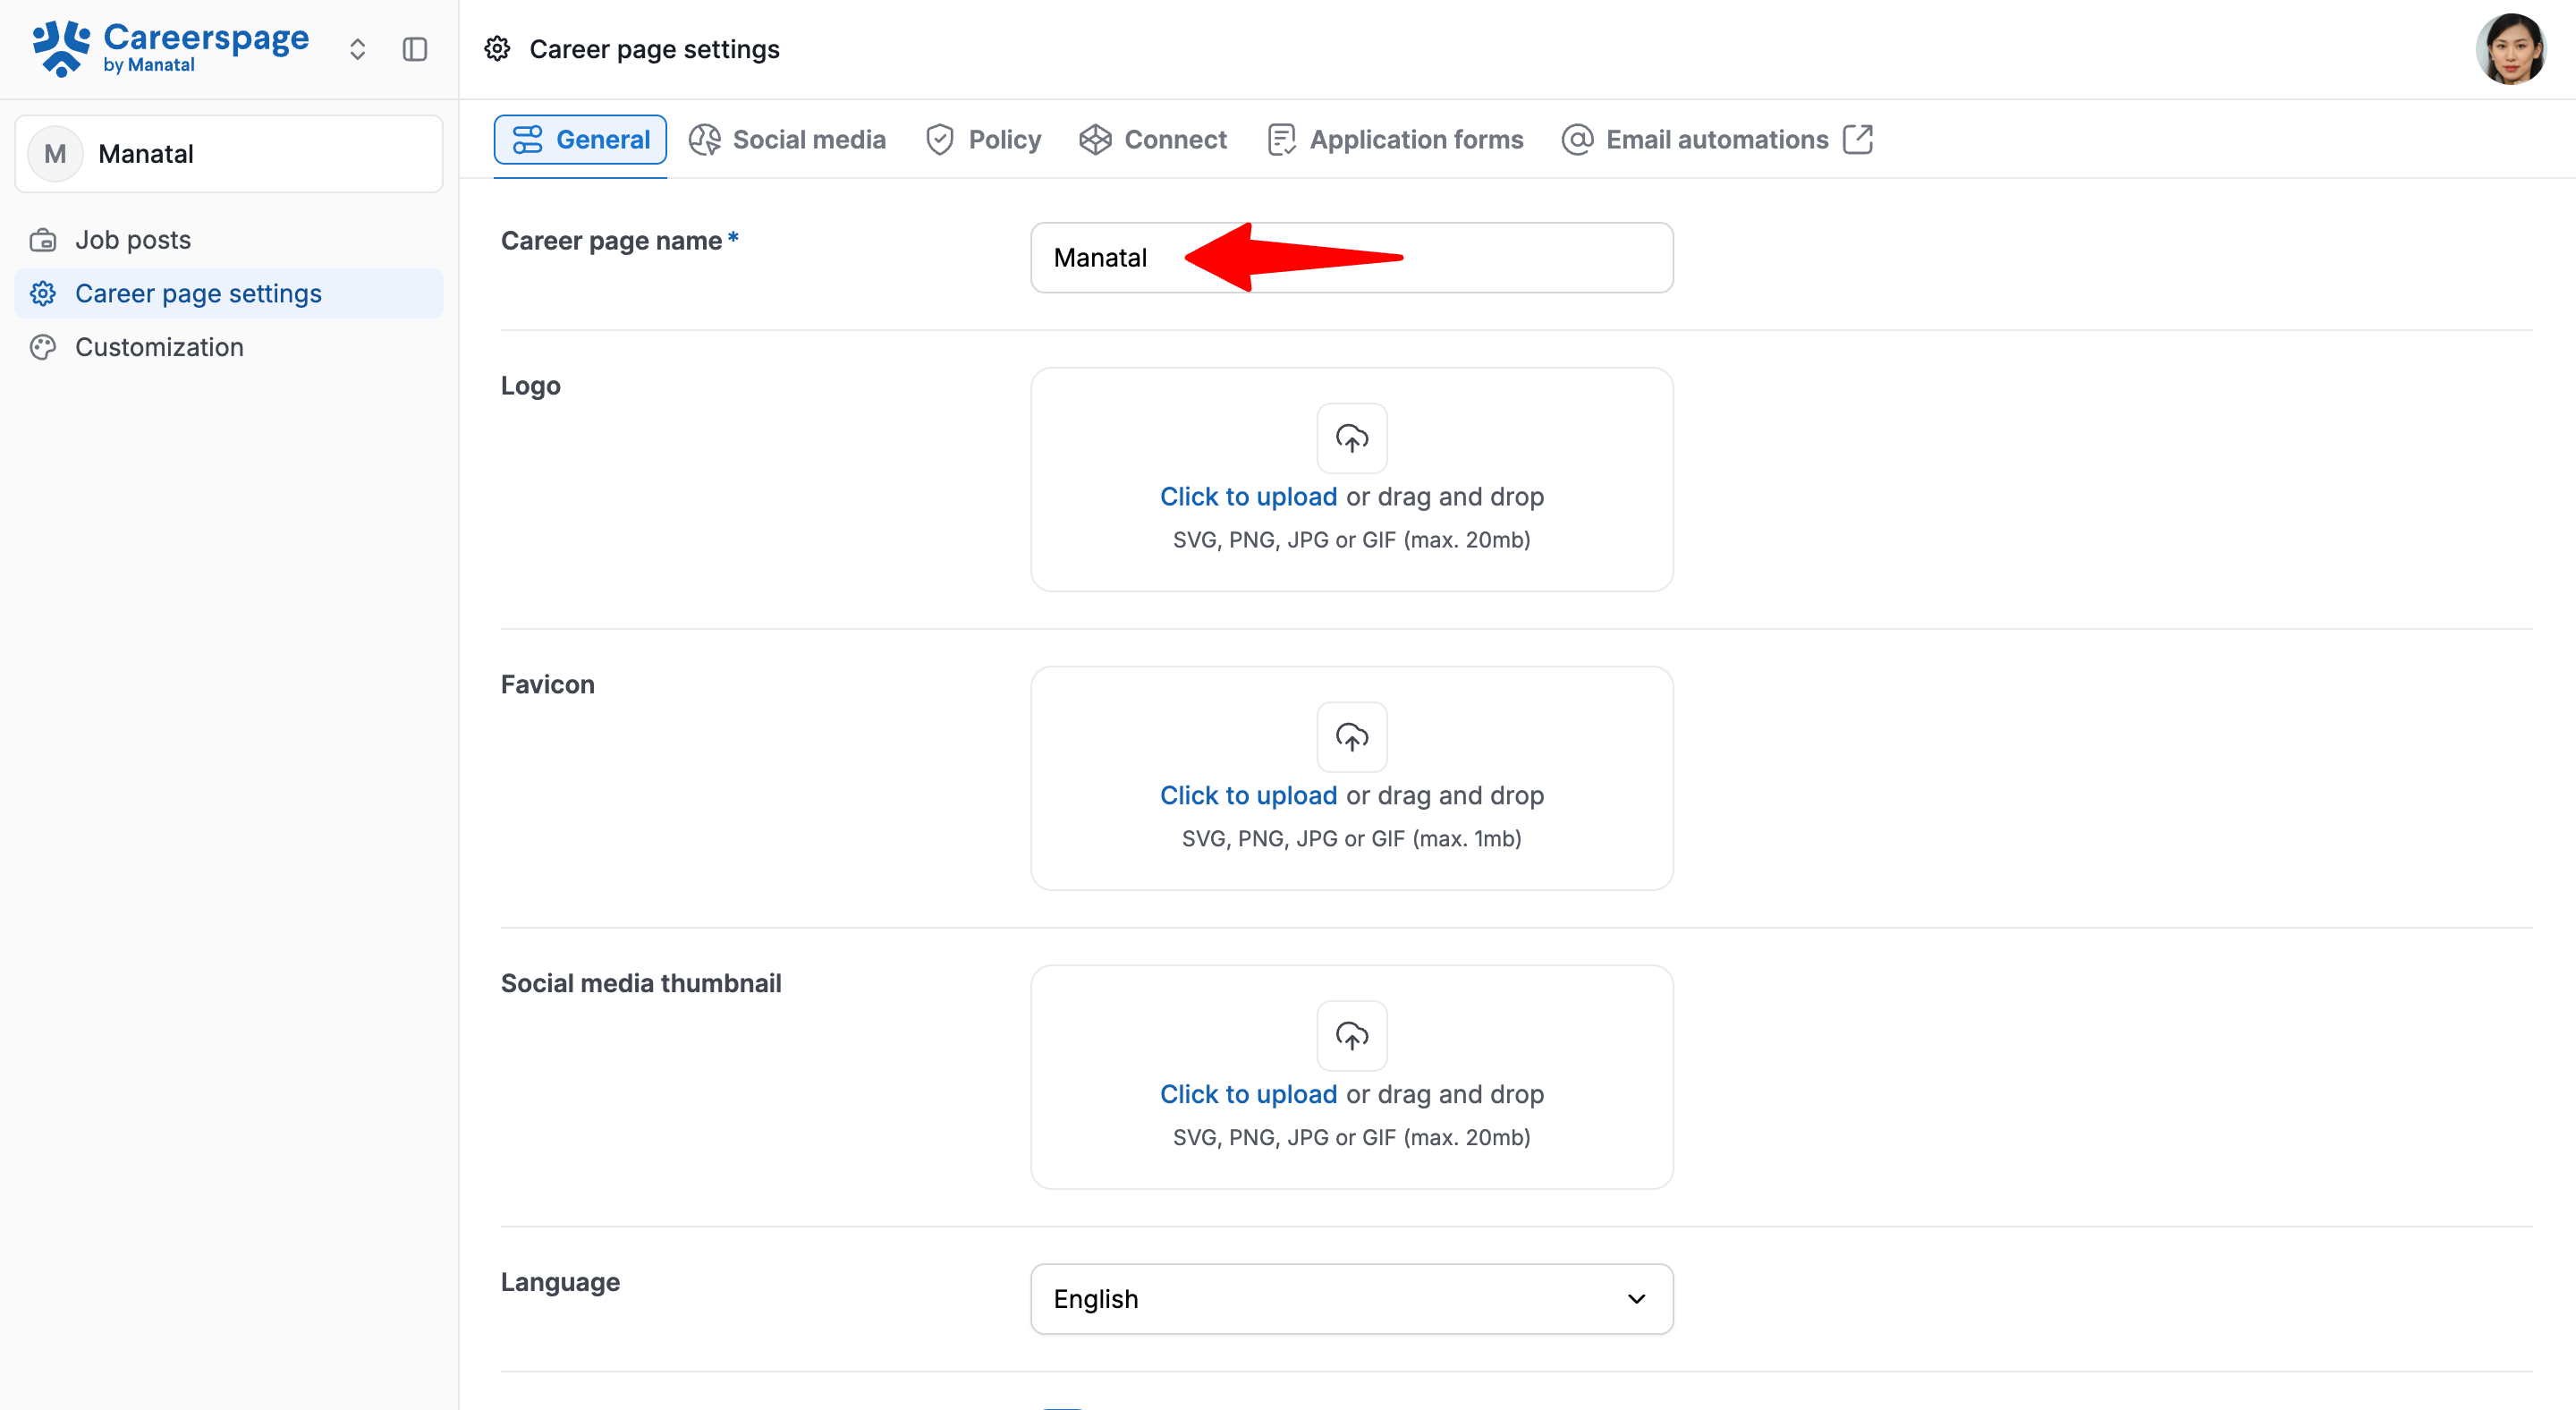
- Enter your company name. It will appear on the top left of your career page if you have not uploaded any logo.
Adding/Modifying your Company Logo
The first logo and favicon uploaded in the General tab will be applied by default when a theme is initialized in the Customization menu.
- For best results, we recommend using a logo with a ratio between 1:1 and 3:2 pixels, and not to crop the image when inserting your logo.
- In addition to appearing at the top left corner of your career page, this logo will be used as thumbnail image when sharing a job on Linkedin and Facebook through a post.
For best results when posting on those two social media, we recommend using a logo with a ratio of 1.91:1 and a minimum size of 600 x 314 pixels. The logo should also be at the center of the image, and there should be blank space on each side of the logo as both Facebook and Linkedin will crop the image on both sides when displaying on mobiles.
- Head to the following page. Alternatively, click on "Career page settings" from your side menu and then open the "General" tab.
-
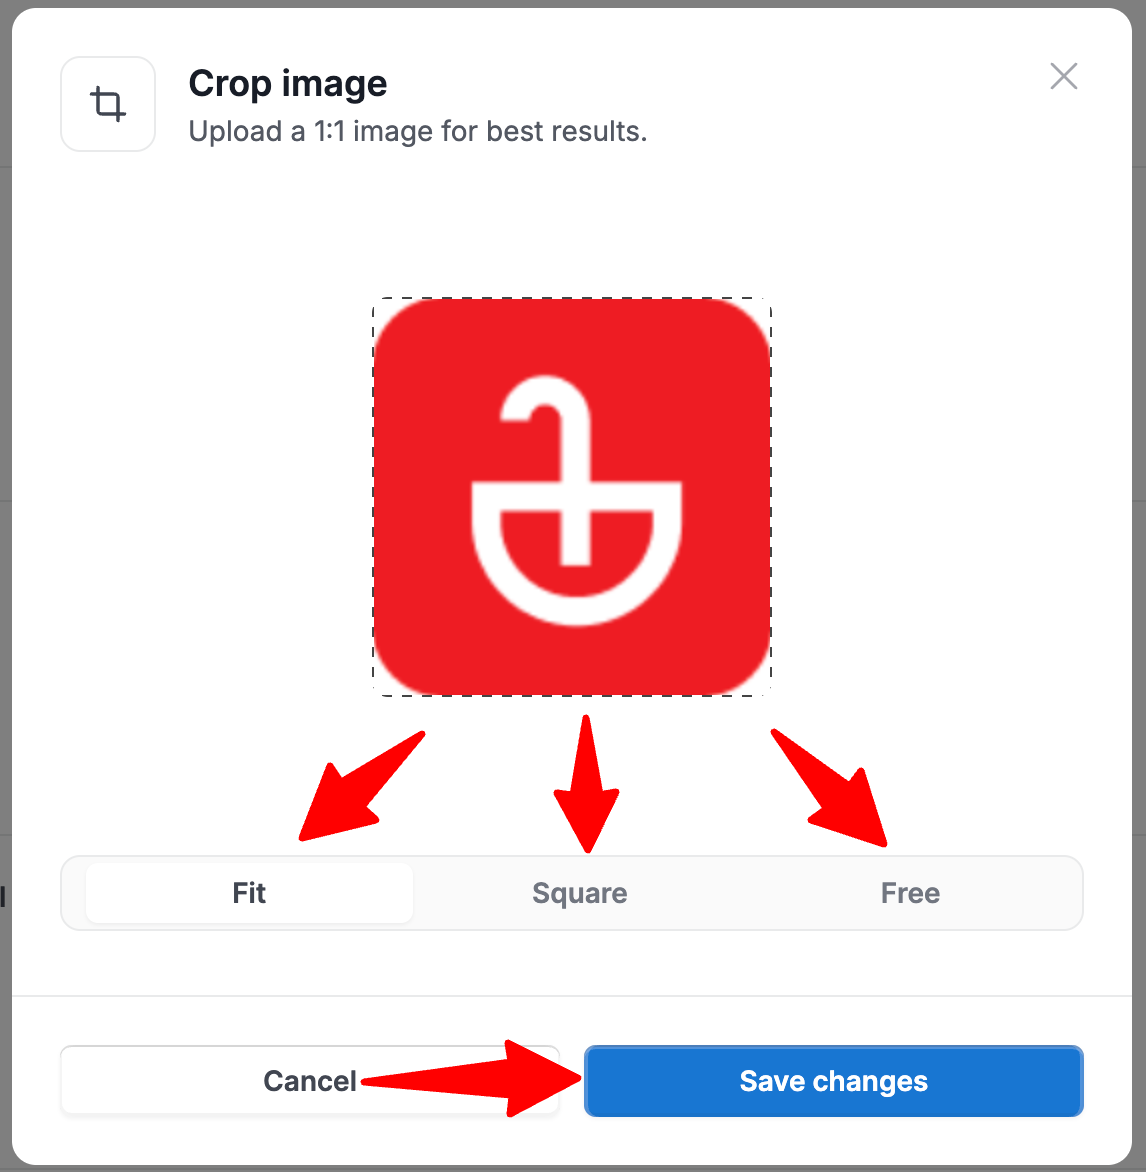
Click on the existing logo or the "Click to upload".

-
Select and adjust your company logo. Click "Save Changes". The logo will appear in the top left corner of your career page.
Adding a Favicon
- Head to the following page. Alternatively, click on "Career page settings" from your side menu and then open the "General" tab.
-
Click on the existing favicon or the "Click to upload".

-
Select and adjust your favicon. Click "Save Changes". The favicon will appear on the browser tab, bookmarks list, browser history and mobile shortcuts.
Adding a Social Media Thumbnail
- Head to the following page. Alternatively, click on "Career page settings" from your side menu and then open the "General" tab.
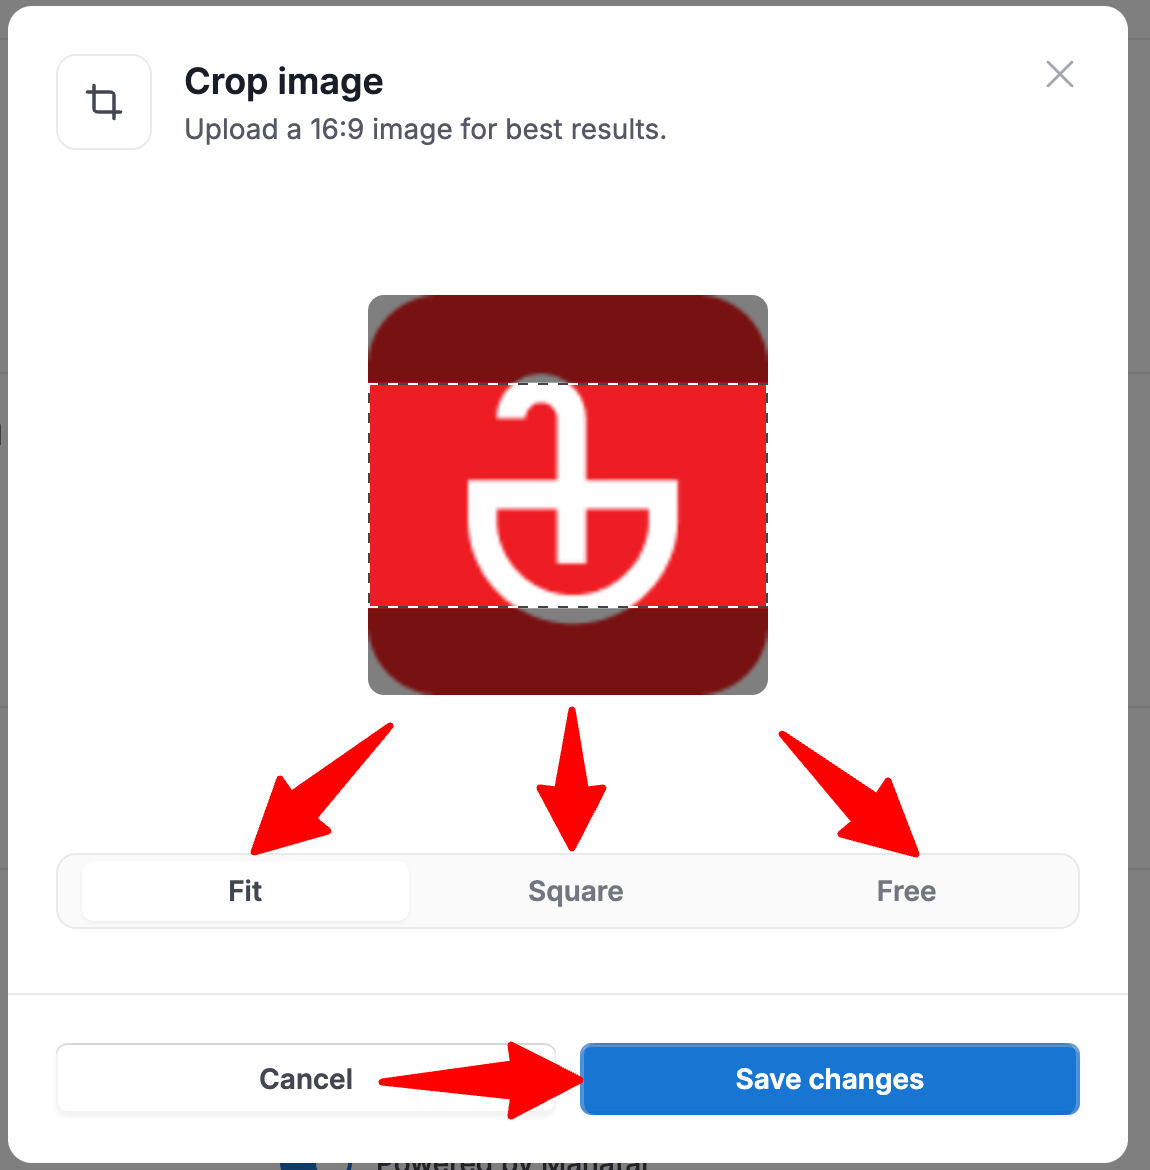
- Click on the existing social media thumbnail or the "Click to upload".

- Select and adjust your thumbnail. Click "Save Changes". This thumbnail will be used when your job posts are shared from the career page to social media platforms such as LinkedIn and WhatsApp.
When sharing jobs on both Facebook and LinkedIn, the social media thumbnail will be used as thumbnail image for the posts.
For best results when posting on those two social media platforms, we recommend using a thumbnail with a ratio of 1.91:1 and a minimum size of 600 x 314 pixels. The thumbnail should also be at the center of the image, and there should be blank space on each side of the thumbnail as both Facebook and Linkedin will crop the image on both sides when displaying on mobile devices.
Modifying the Language
The language setting allows users to change the language of their career page's interface. The Advanced Career Page currently supports the following languages:
- Bahasa Indonesia
- Dutch
- English
- French
- German
- Italian
- Spanish
- Portuguese
- Thai
Content customized on the career page is saved separately for each language.
This means:
- Changes made while the language is set to English will only apply to the English version of the career page.
- Changes made while the language is set to Spanish, French, or any other supported language will only apply to that specific language.
If you want the same content to appear across multiple languages, you will need to manually update the content in each language setting.
- Head to the following page. Alternatively, click on "Career page settings" from your side menu and then open the "General" tab.
- Select the language from the dropdown menu.

Configuring the Default Settings
Manage your referral program and set organization (client/department) visibility.
Managing your Referral Program
Enabling the referral program allows career page visitors to refer candidates.
- Head to the following page. Alternatively, click on "Career page settings" from your side menu and then open the "General" tab.
- In the Default settings section, enable/disable referral program. If enabled, you will now have access to the Referral Menu to manage all your referrals.
The changes will take effect 5 minutes after the setting has been changed.

Display Organizations
Enable to display each job’s oganization (client/department) on your career page.
- Head to the following page. Alternatively, click on "Career page settings" from your side menu and then open the "General" tab.
- In the Default settings section, enable/disable displaying organizations.
The changes will take effect 5 minutes after the setting has been changed.

Display "Powered by Manatal"
Enable to display “Powered by Manatal” at the bottom of the career page.
- Head to the following page. Alternatively, click on "Career page settings" from your side menu and then open the "General" tab.
- In the Default settings section, enable/disable displaying "Powered by Manatal".
The changes will take effect 5 minutes after the setting has been changed.

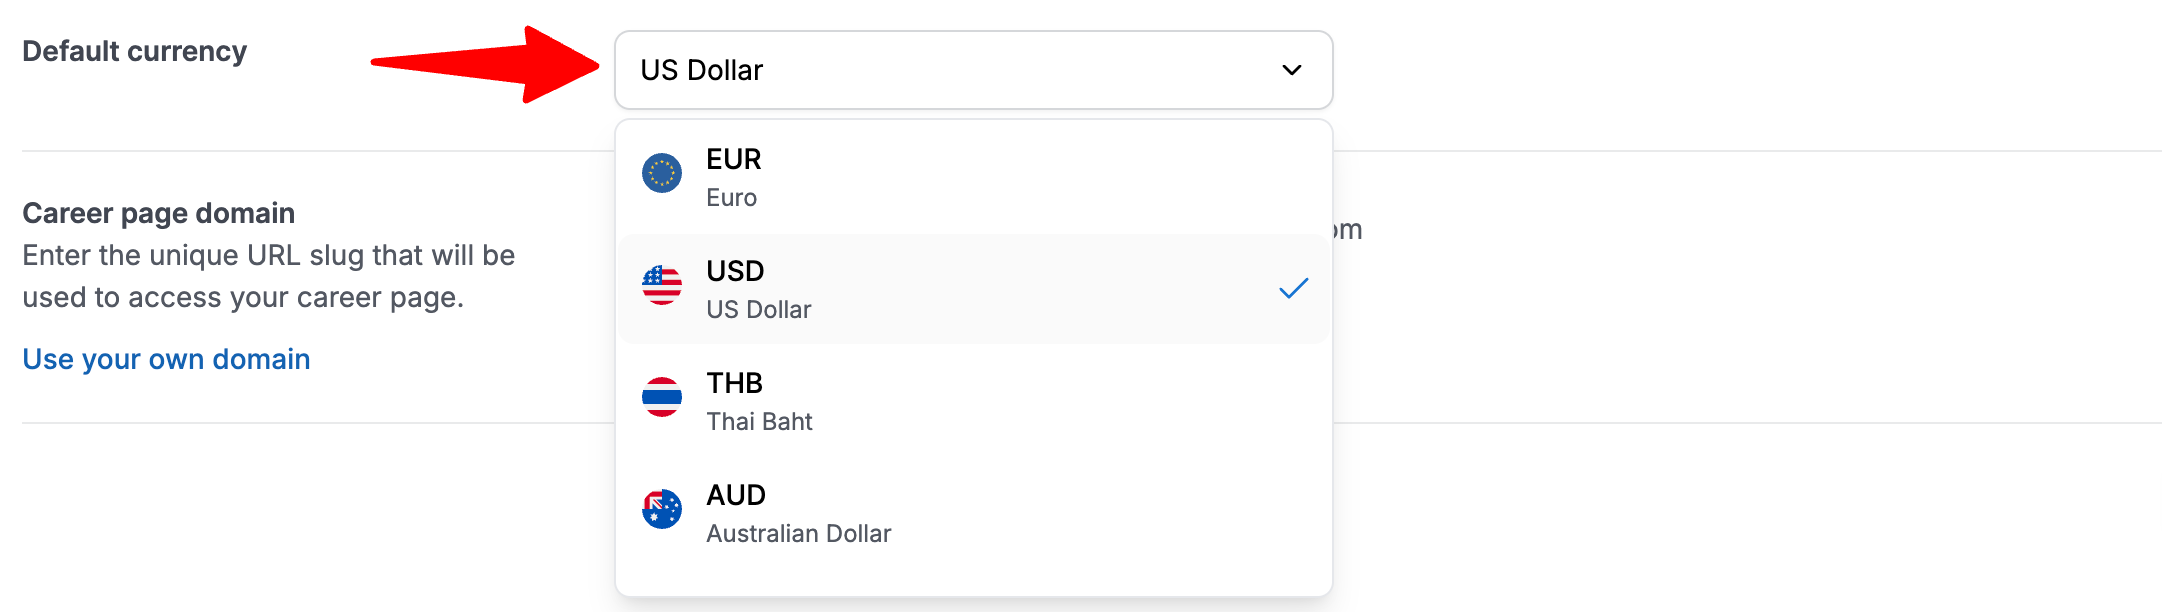
Setting Default Currency
When creating a new job post, the default salary currency is determined by the selection here.
- Head to the following page. Alternatively, click on "Career page settings" from your side menu and then open the "General" tab.
- In the Default currency section, select the currency from the dropdown.
Modifying your Career Page URL
This gives you the option to choose the URL of your Career Page.
- Changing this will update the URL for your career page and all of its job posts.
- Head to the following page. Alternatively, click on "Career page settings" from your side menu and then open the "General" tab.
- In the Career page domain section, enter the new URL. You can select any sub domain you want.

Setting up Google Analytics
Google Analytics allows you to track how candidates interact with your Advanced Career Page, such as page visits, job views, apply clicks, and application submissions. Manatal supports connection to your own Google Analytics 4 (GA4) property using a Measurement ID.
Before you start
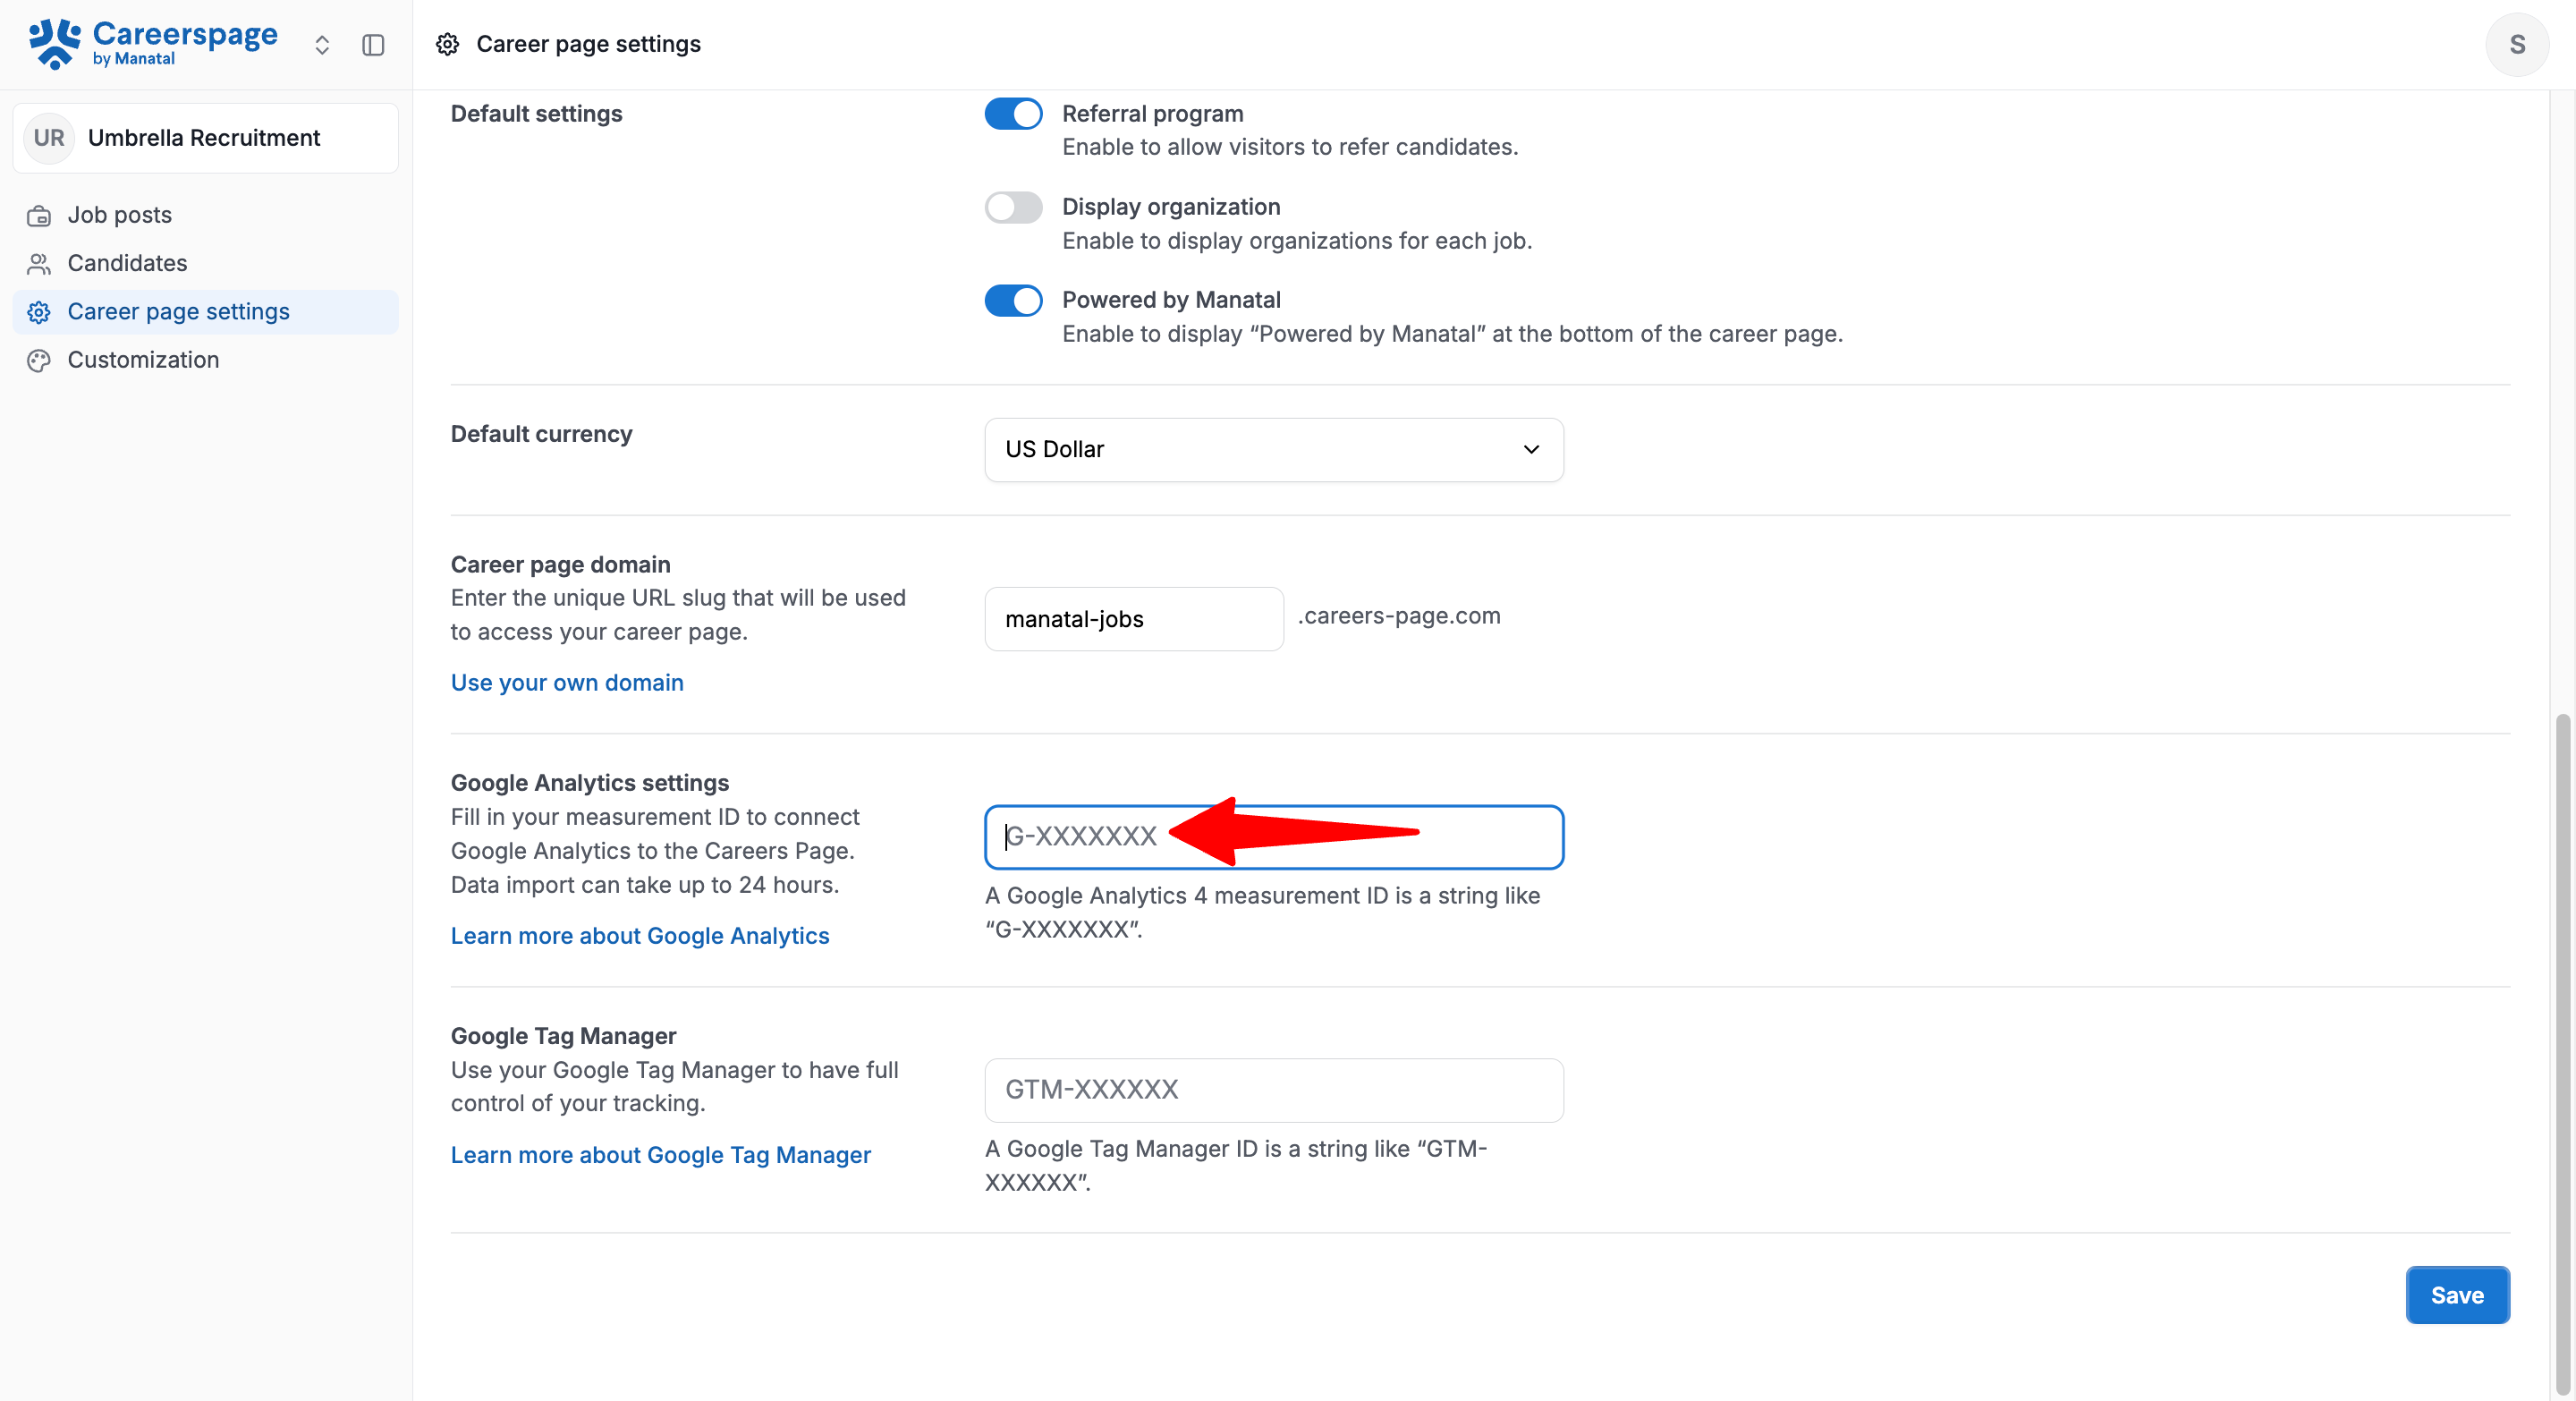
Make sure you have a valid GA4 Measurement ID from your Google Analytics account.
A valid Measurement ID looks like:
G-ABCD123456
Manatal validates the ID format before saving it. Invalid values will not be accepted.
How to find your GA4 Measurement ID
Refer to the Google Analytics 4 guide here to find the Measurement ID.
How to connect Google Analytics in Manatal
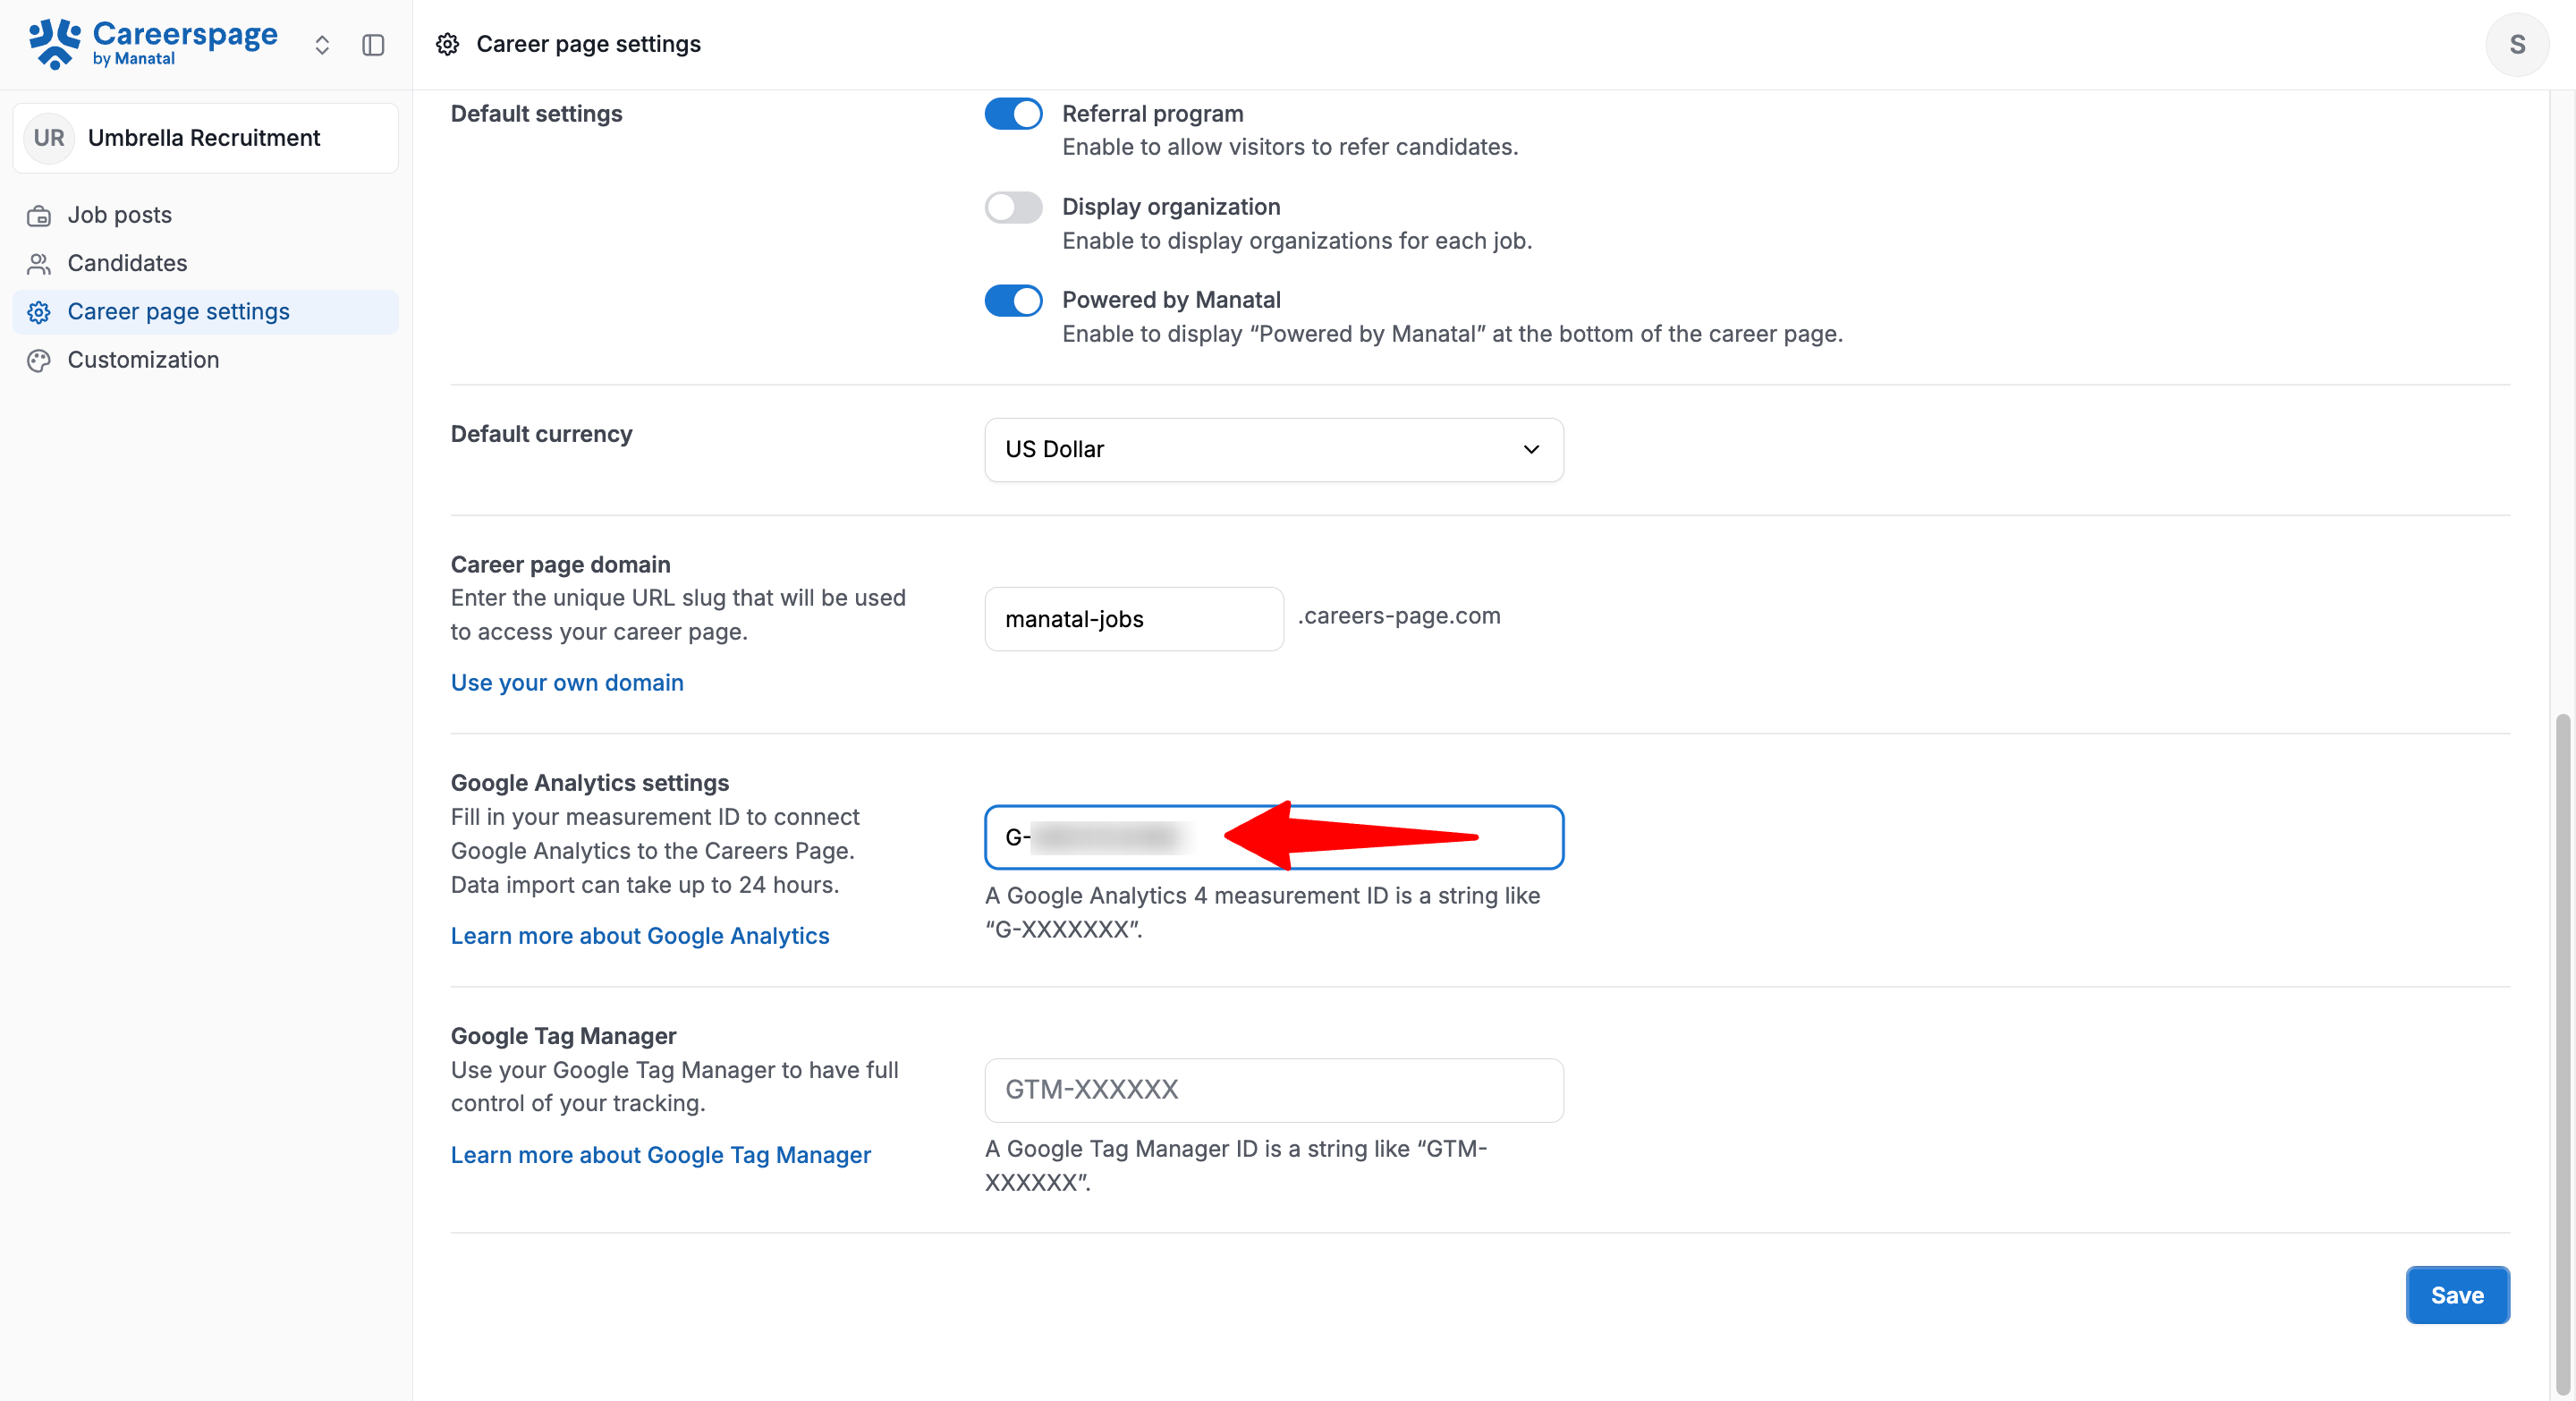
- Head to the following page. Alternatively, click on "Career page settings" from your side menu and then open the "General" tab.
2. Find the Google Analytics settings section.
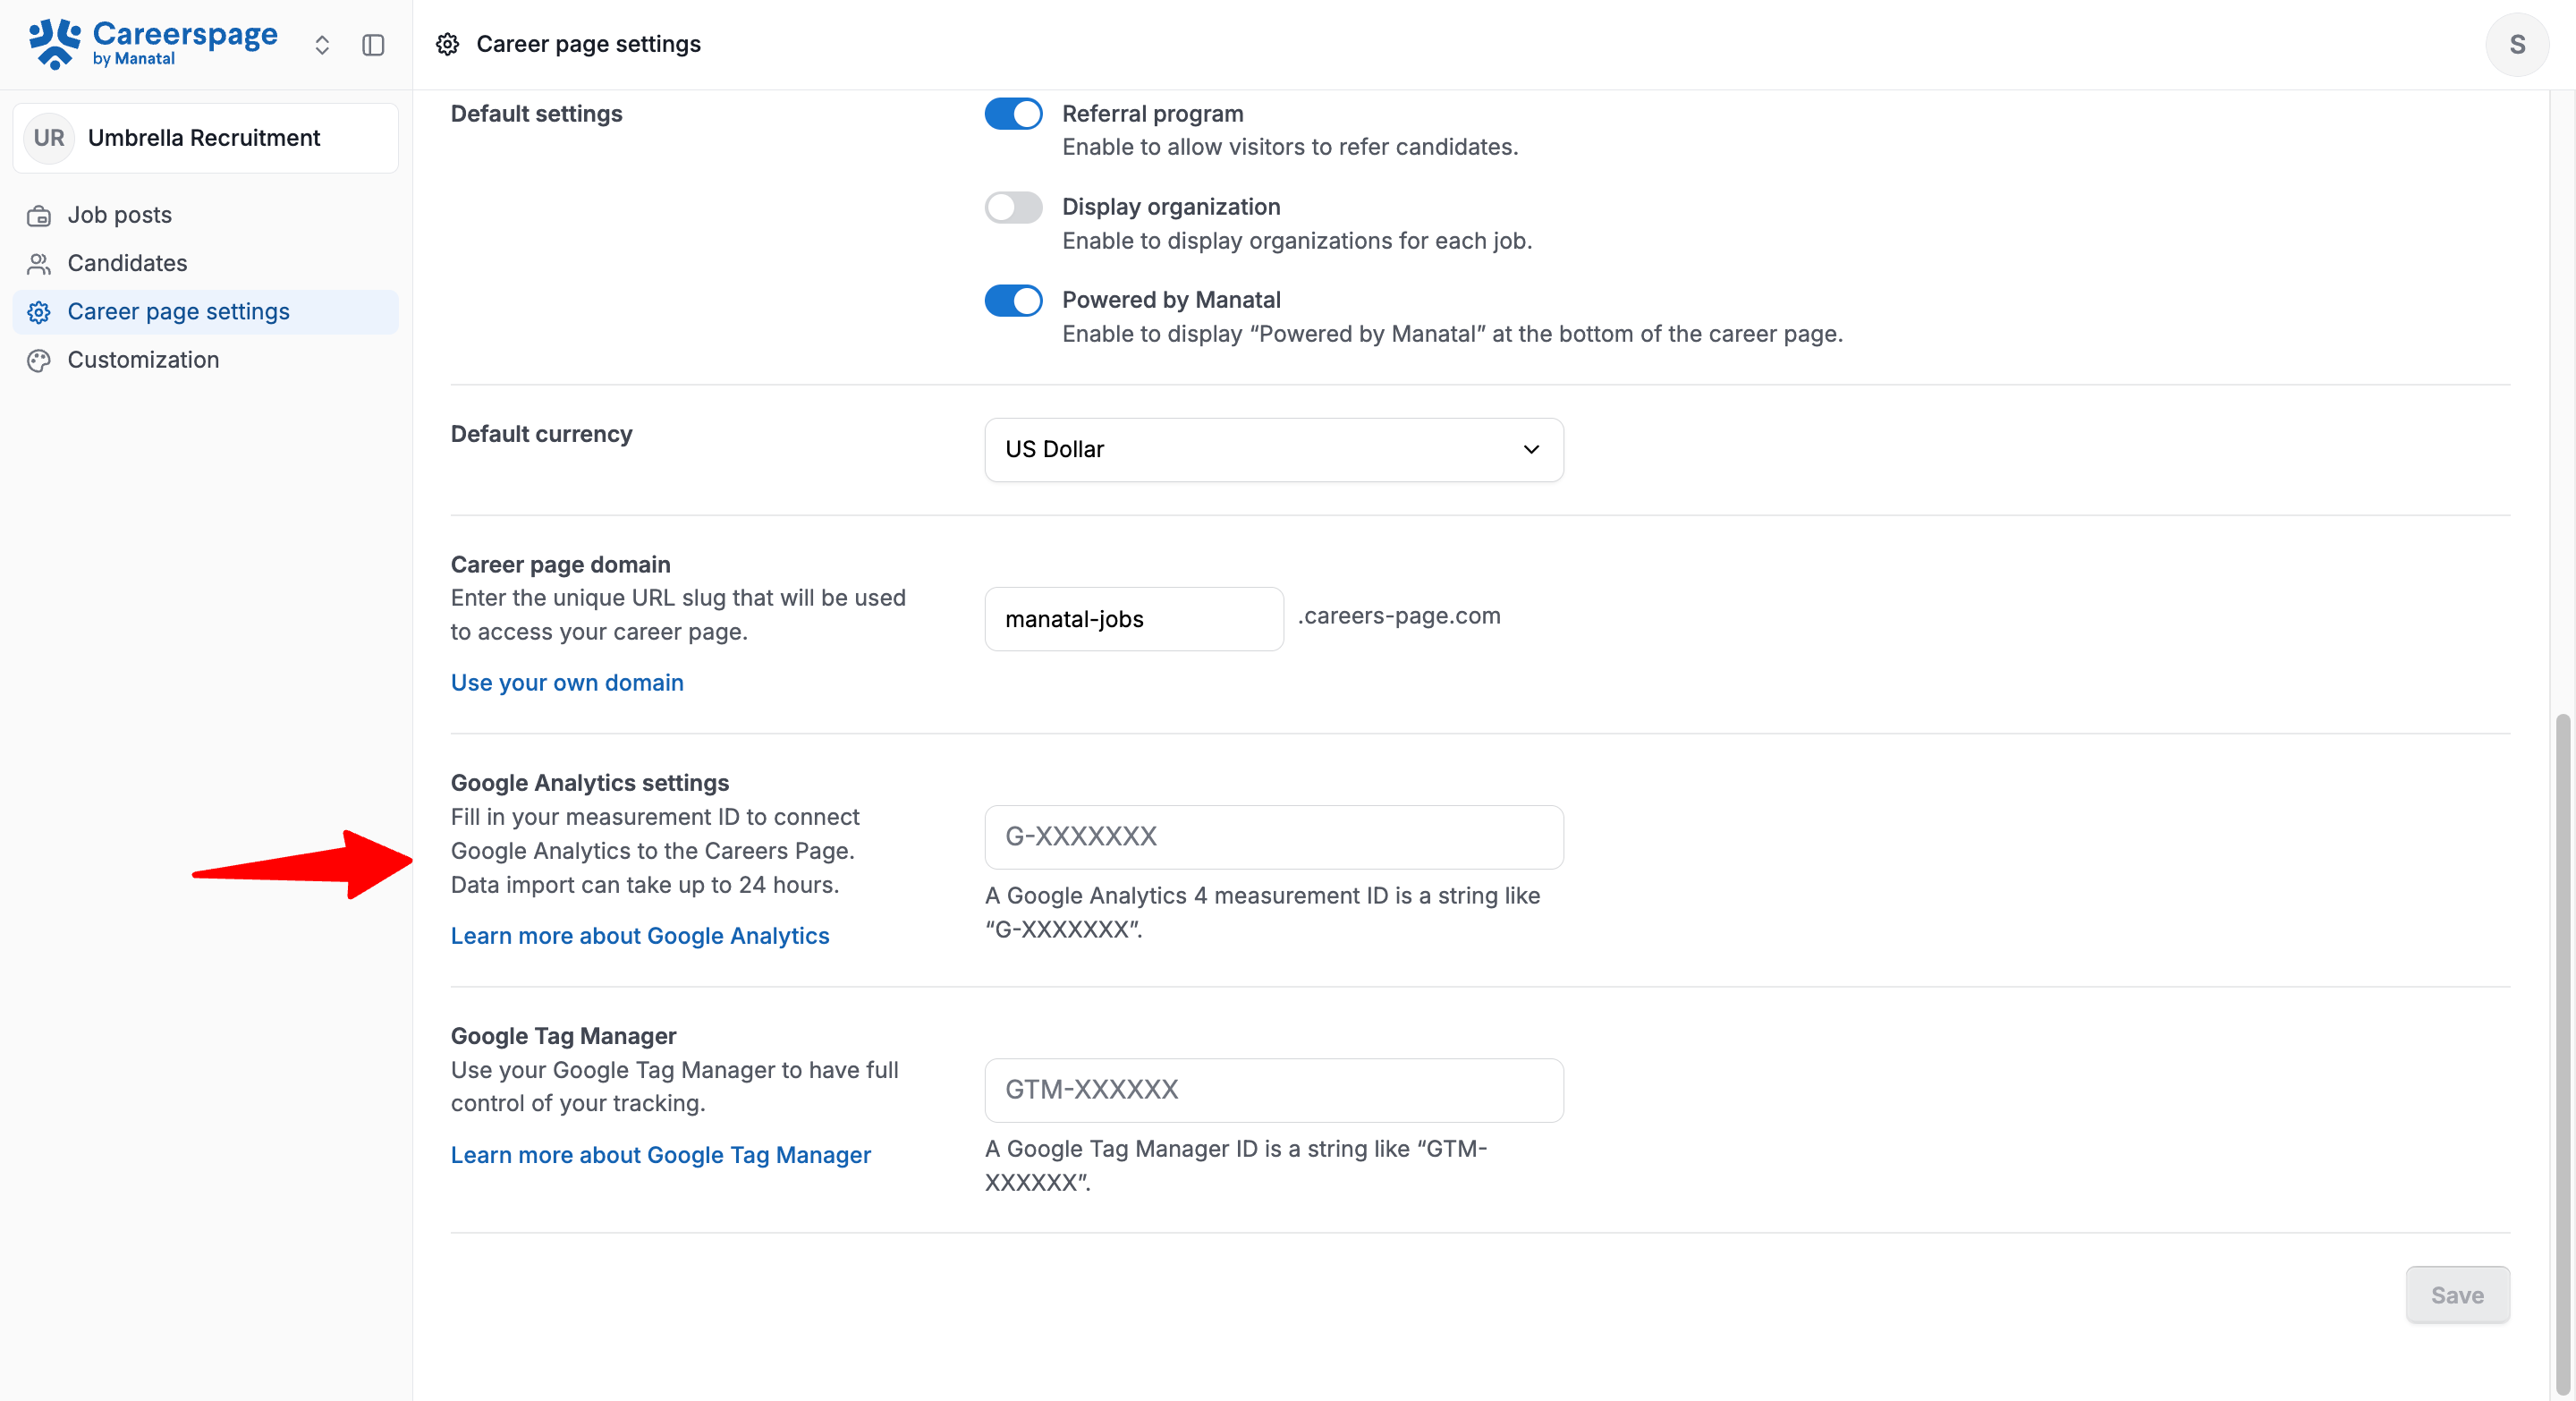
3. Paste your GA4 Measurement ID and click "Save".
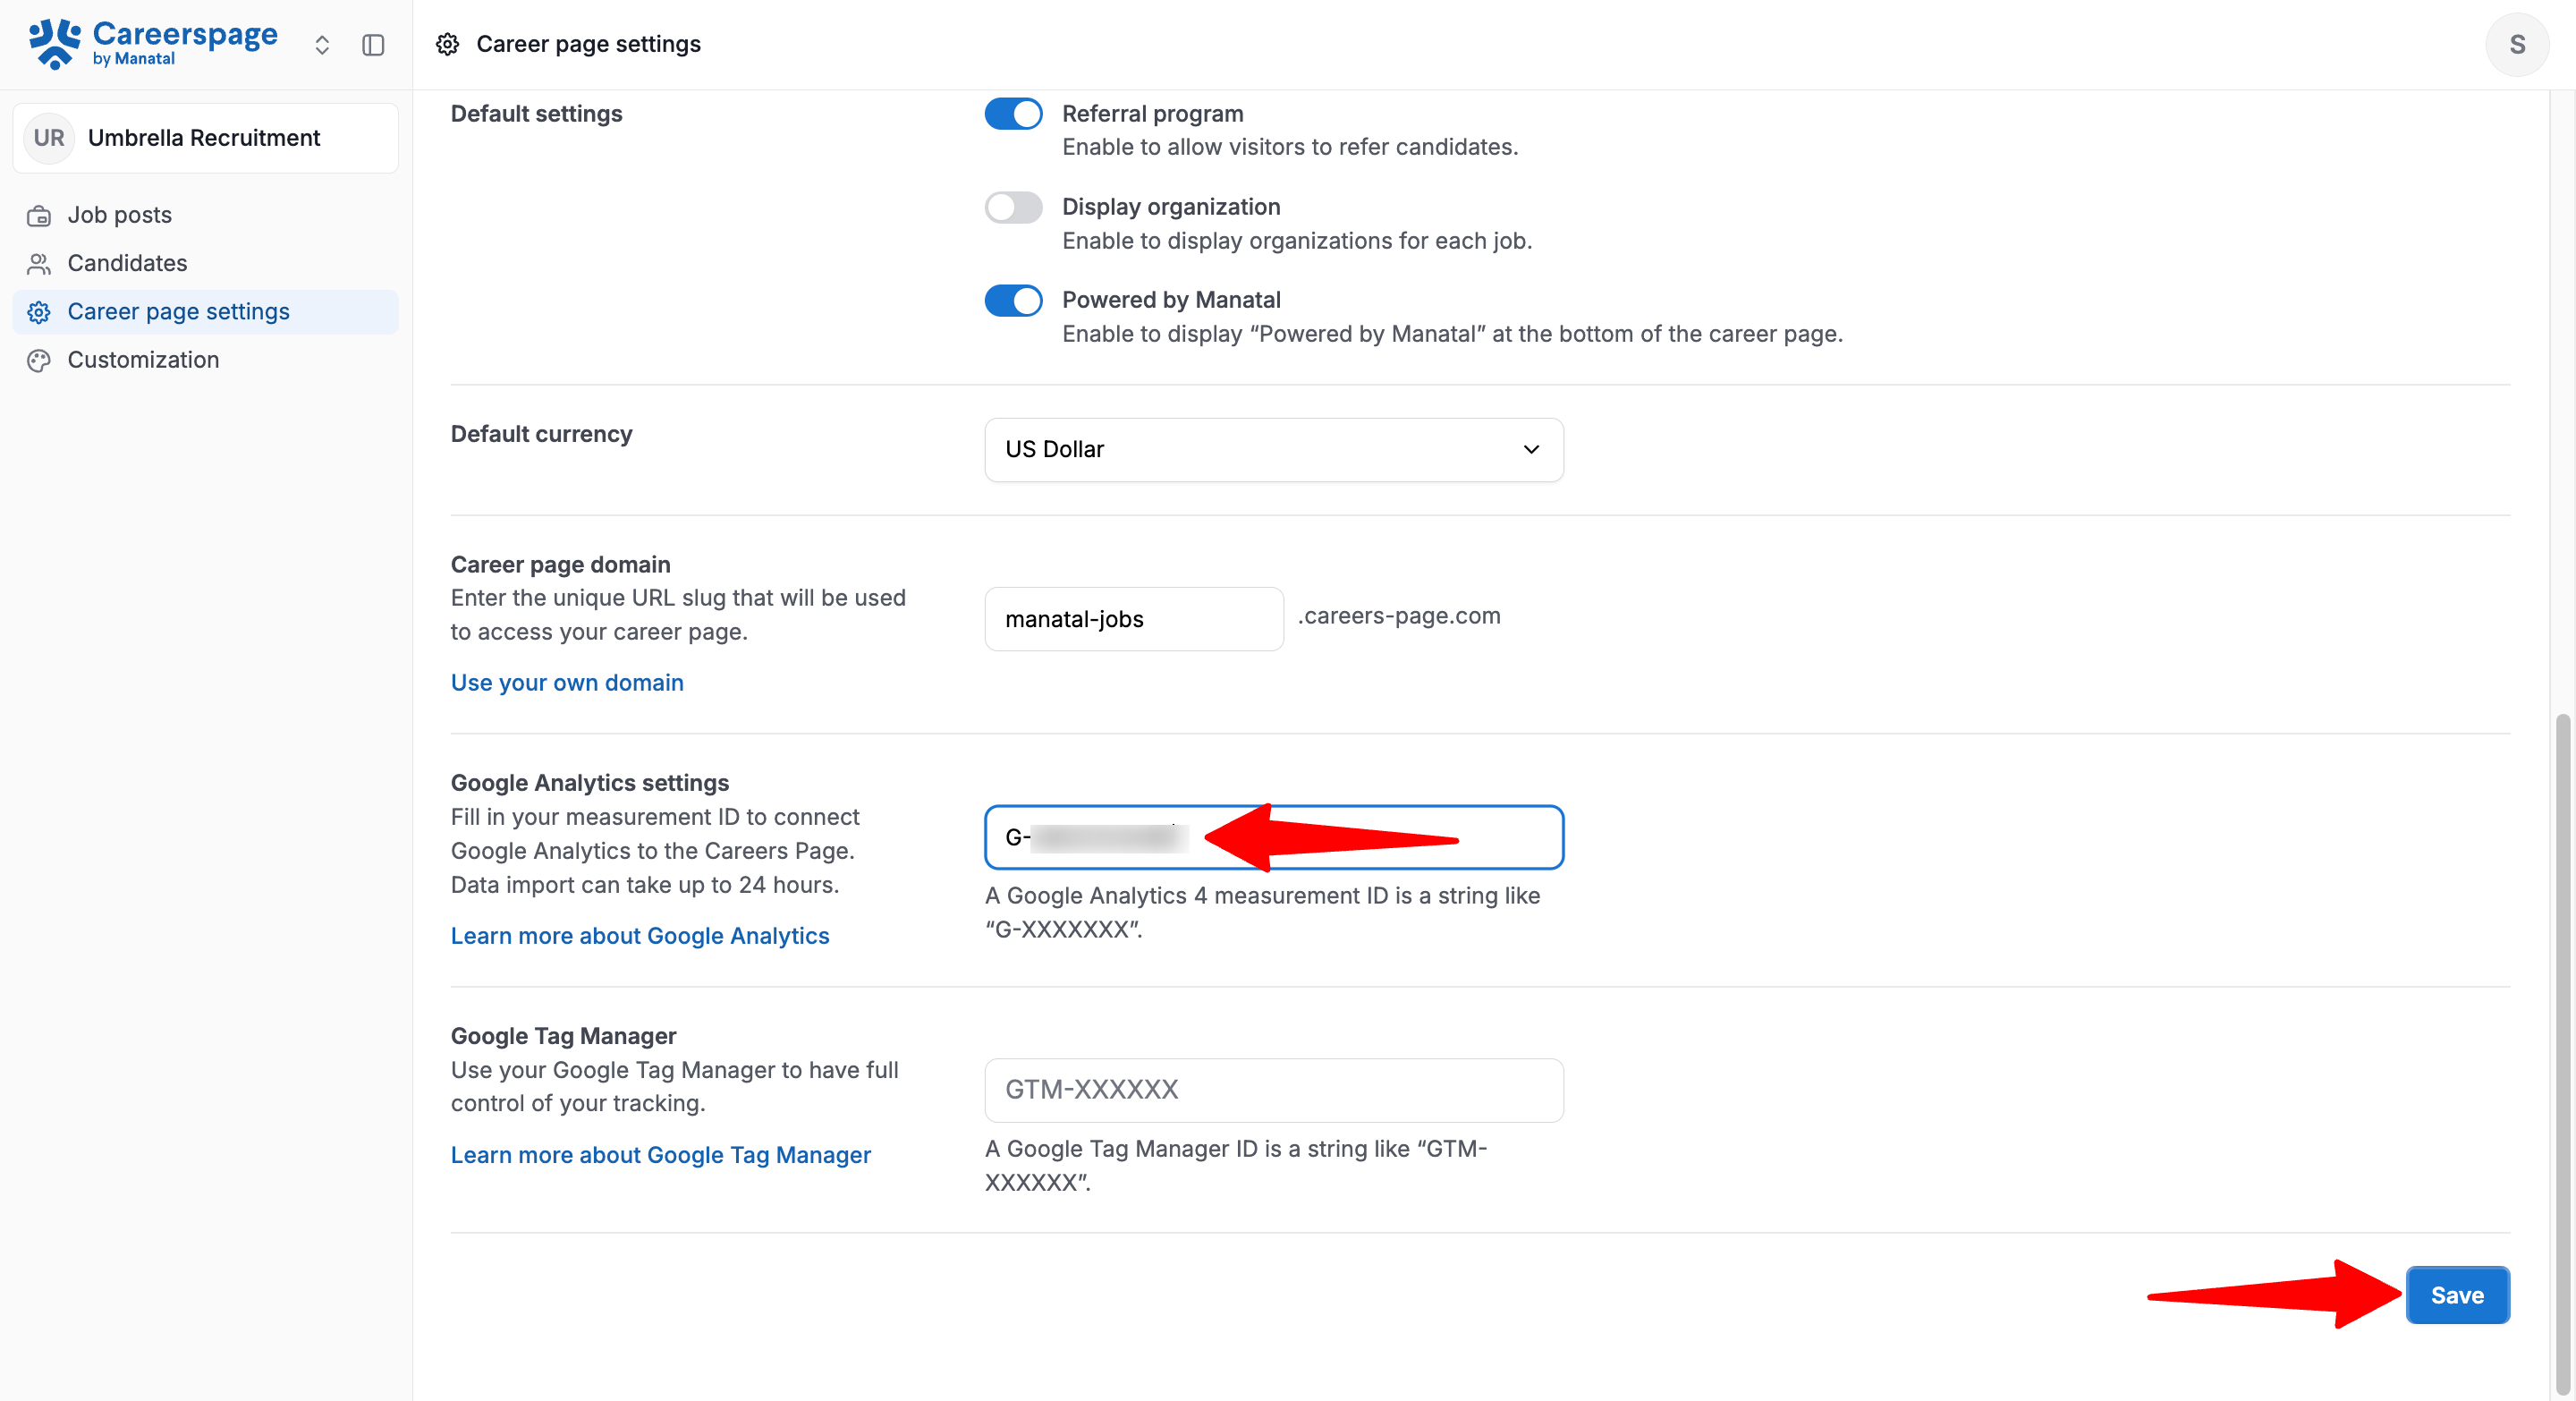
Once saved, Manatal injects the Google Analytics tracking script into your public Career Page and starts sending supported events to your GA4 property. The script is loaded only once per page load.
What can be tracked
Once connected, your Career Page can send events for actions such as:
- Career Page views
- Job detail views
- Application page views
- Job clicks
- Apply clicks
- Application submissions
This helps you understand candidate traffic, engagement, and conversion across your recruiting funnel.
Updating or disabling Google Analytics
You can return to the same field at any time to:
- replace the current Measurement ID with a new one
- remove the Measurement ID to stop new tracking from being sent
If the field is cleared and saved, Manatal stops injecting the tracking script.
Verify that tracking is working
After saving your Measurement ID:
1.Open your public Career Page and visit the job listings page, a job details page, or an application page.
2. In Google Analytics, check "Realtime" to confirm data is being received.
Troubleshooting
Invalid code
Make sure you entered a GA4 Measurement ID, not another Google Analytics value.
Correct format:
G-ABCD123456
No data appears in Google Analytics
Check that:
- the correct Measurement ID was saved
- your Career Page is publicly accessible
- you are testing on the live Career Page
- the save was completed successfully
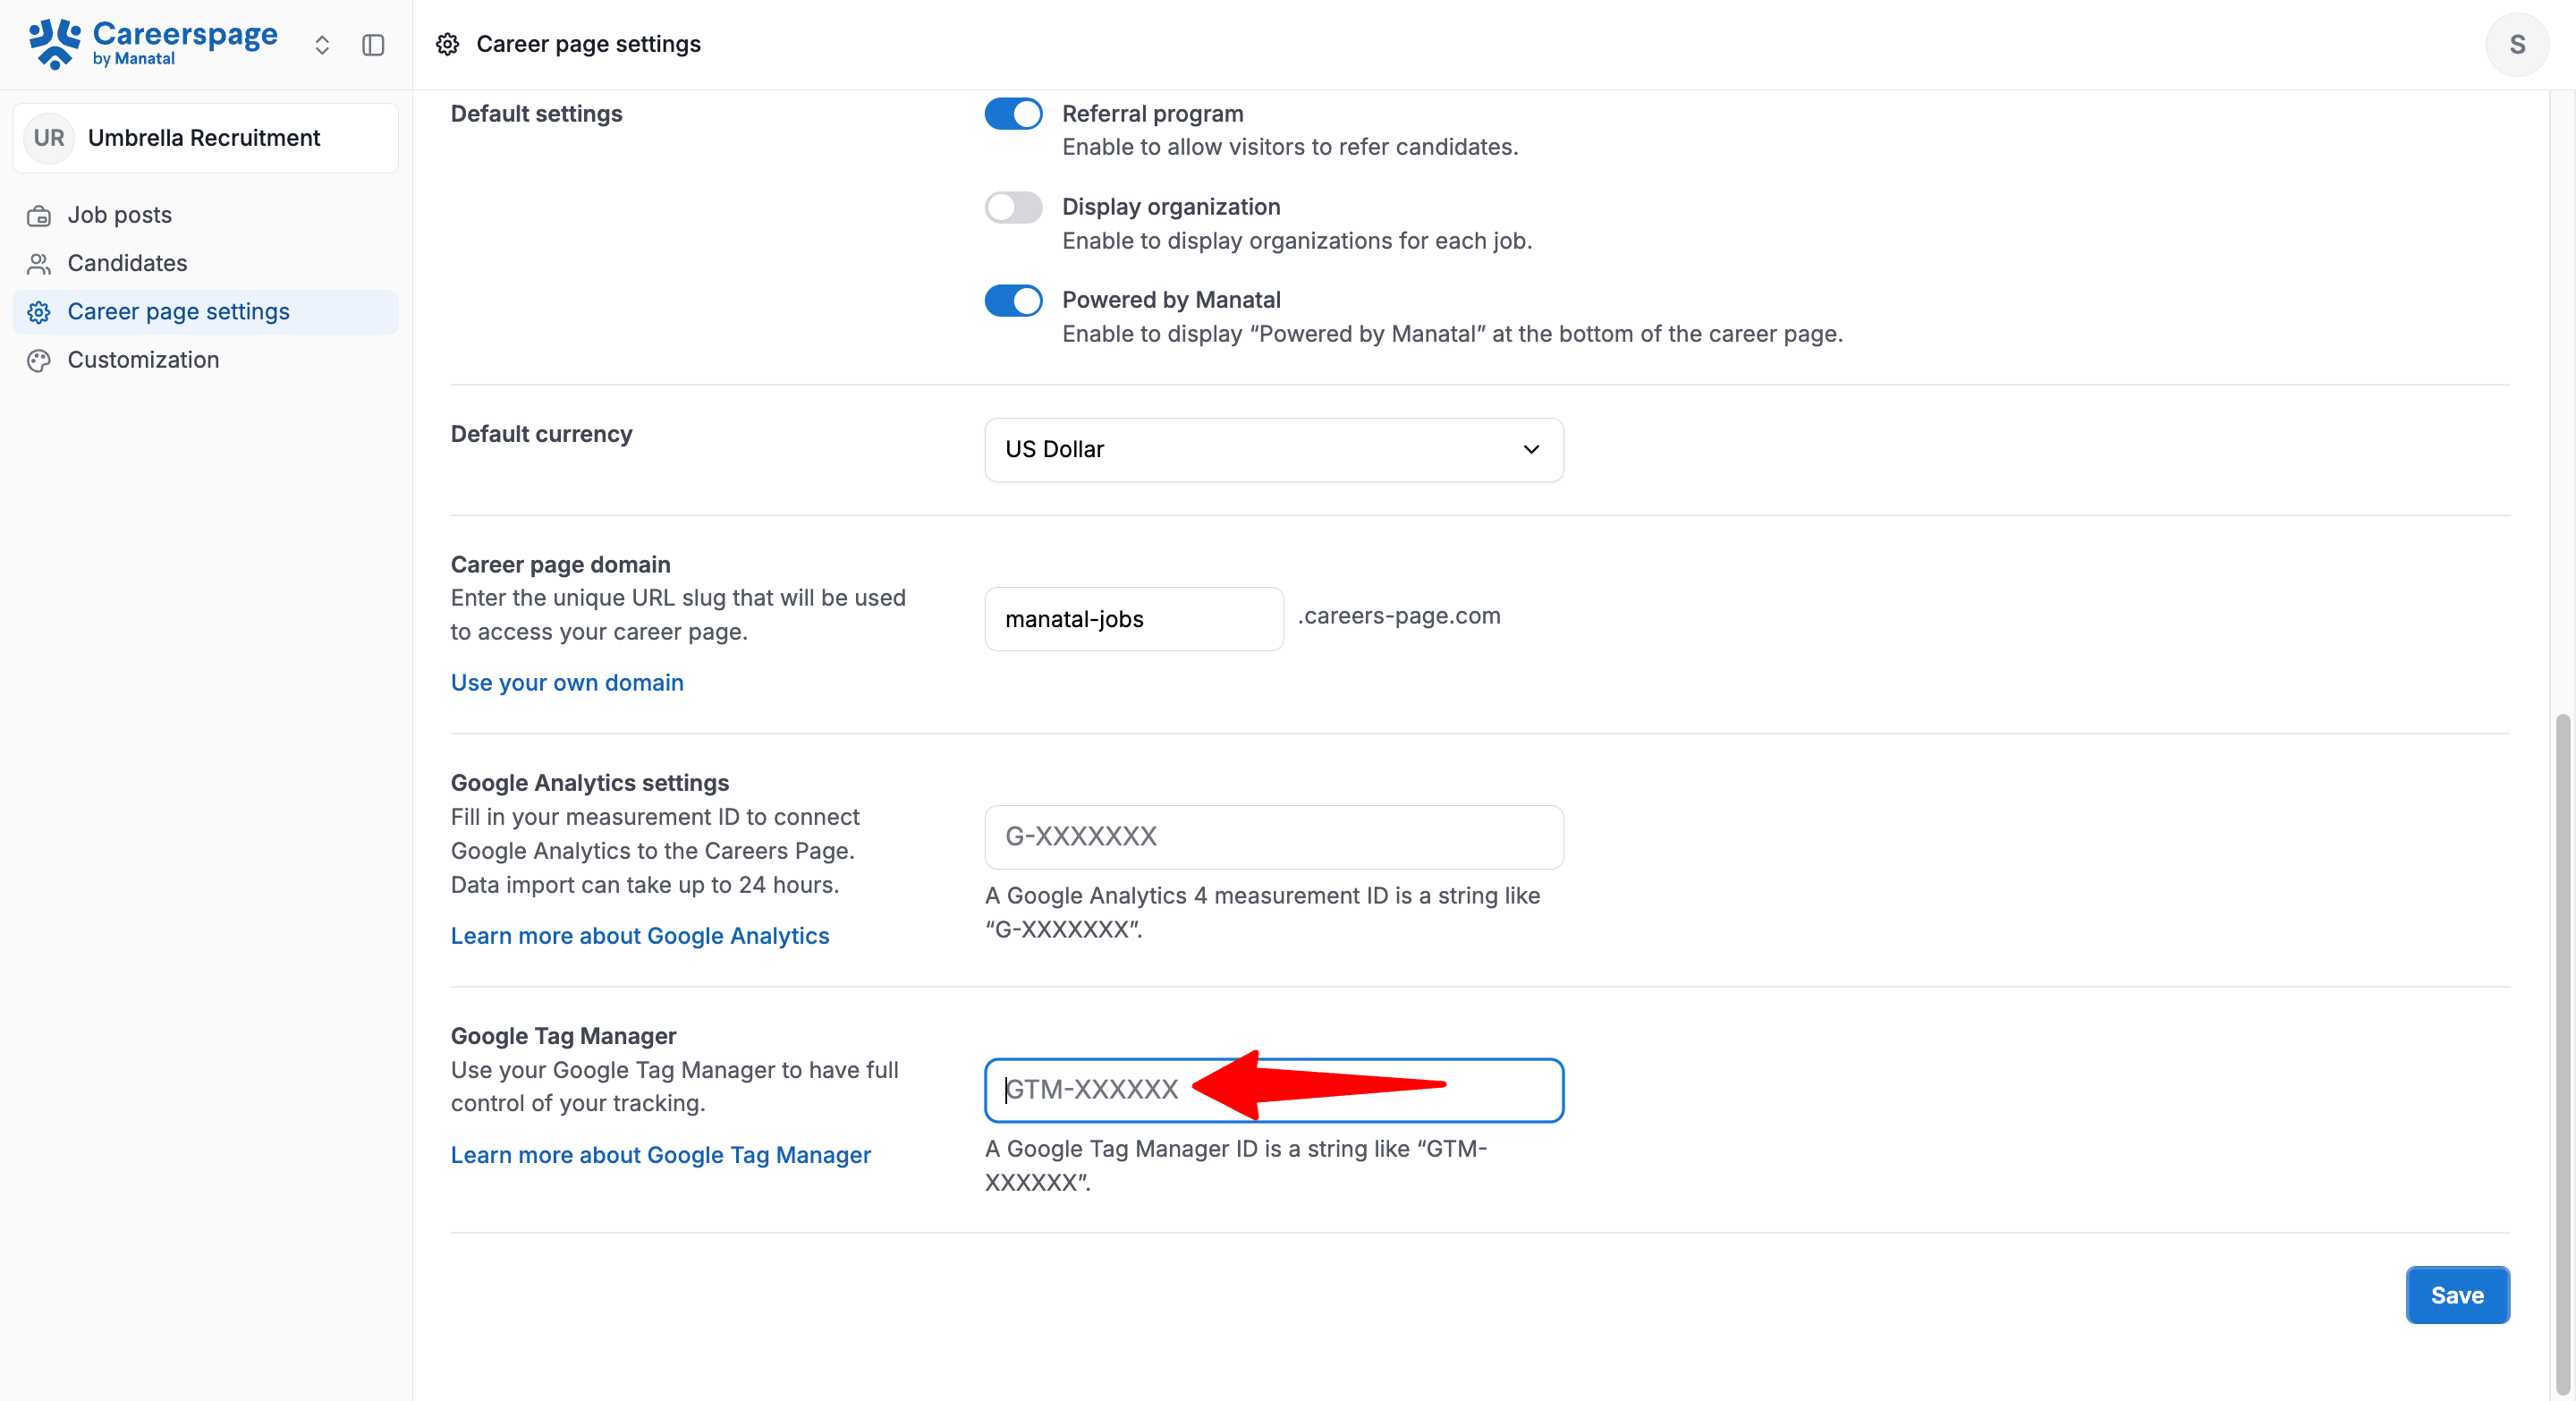
Setting up Google Tag Manager
Google Tag Manager allows you to manage tags and tracking from your own GTM container. In Manatal, you can connect your Advanced Career Page by entering a Google Tag Manager Container ID. The system then injects the standard GTM snippet into the Career Page.
Before you start
Make sure you have a valid Google Tag Manager Container ID.
A valid Container ID looks like:
GTM-XXXXXXX
Manatal validates the ID format before saving it. Invalid values will not be accepted.
How to find your GTM Container ID
Learn more about Google Tag Manager via their dedicated documentation here.
How to connect Google Tag Manager in Manatal
- Head to the following page. Alternatively, click on "Career page settings" from your side menu and then open the "General" tab.
2. Find the Google Tag Manager section.
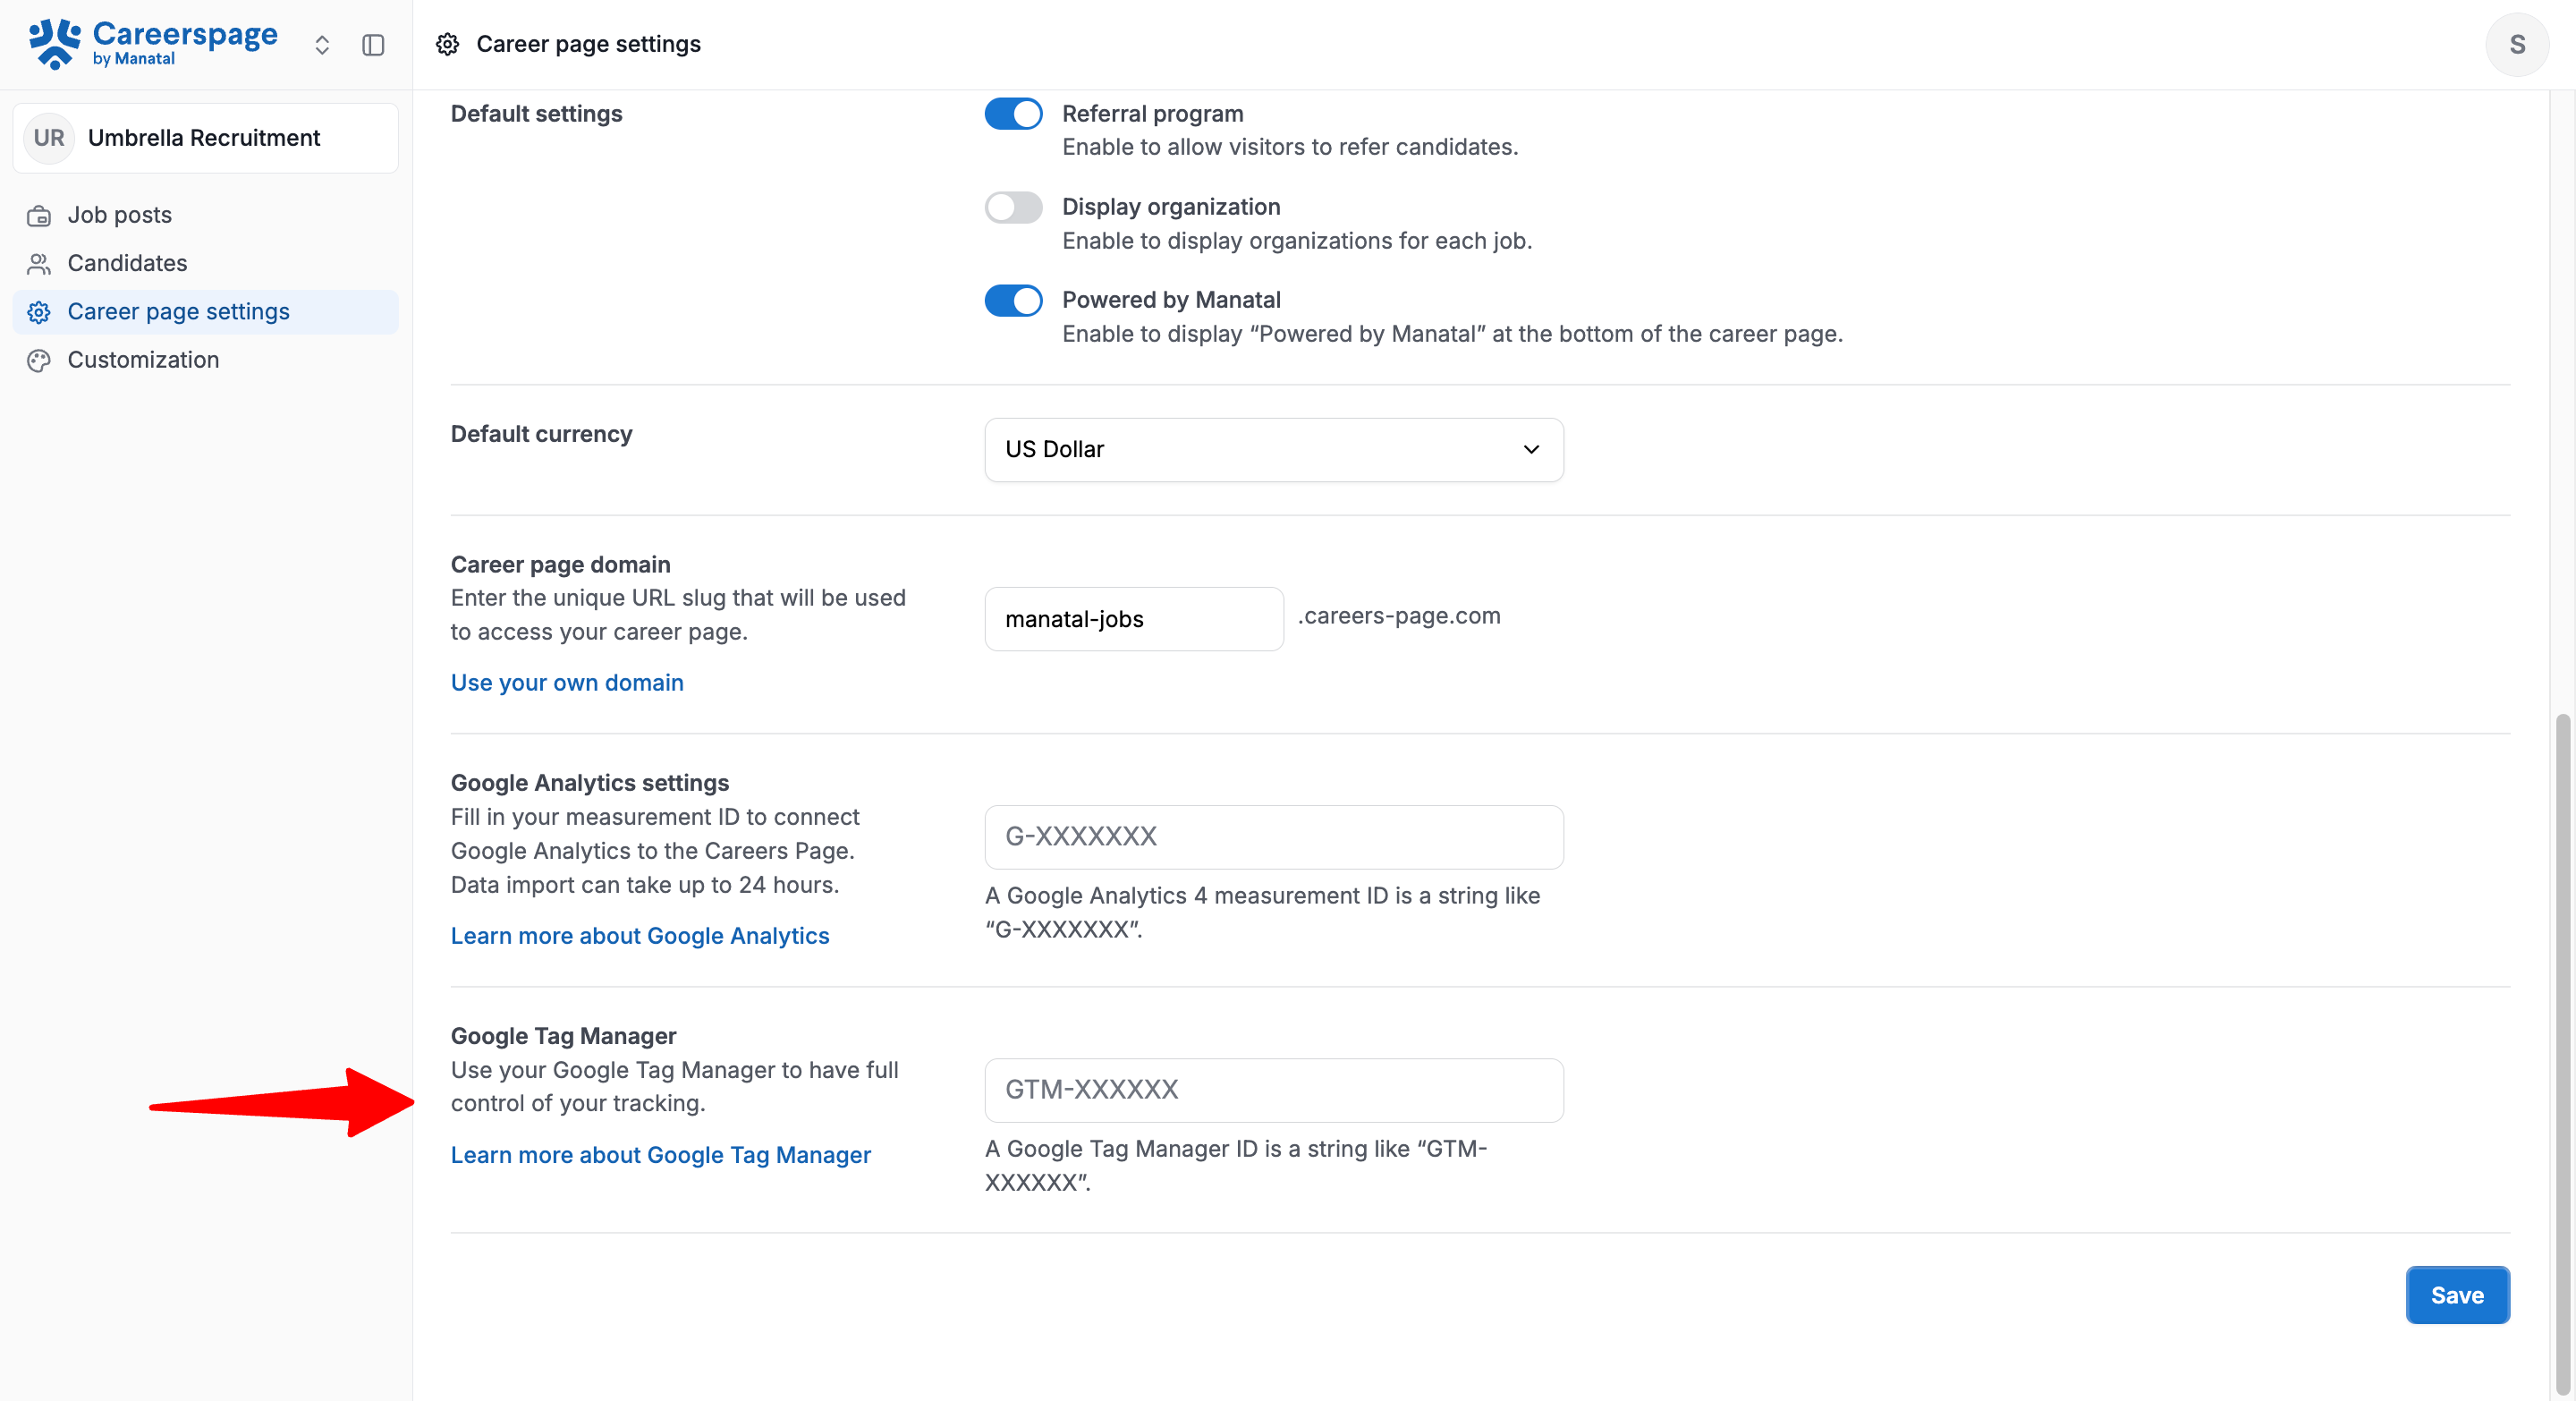
3. Paste your GTM Container ID and click "Save".
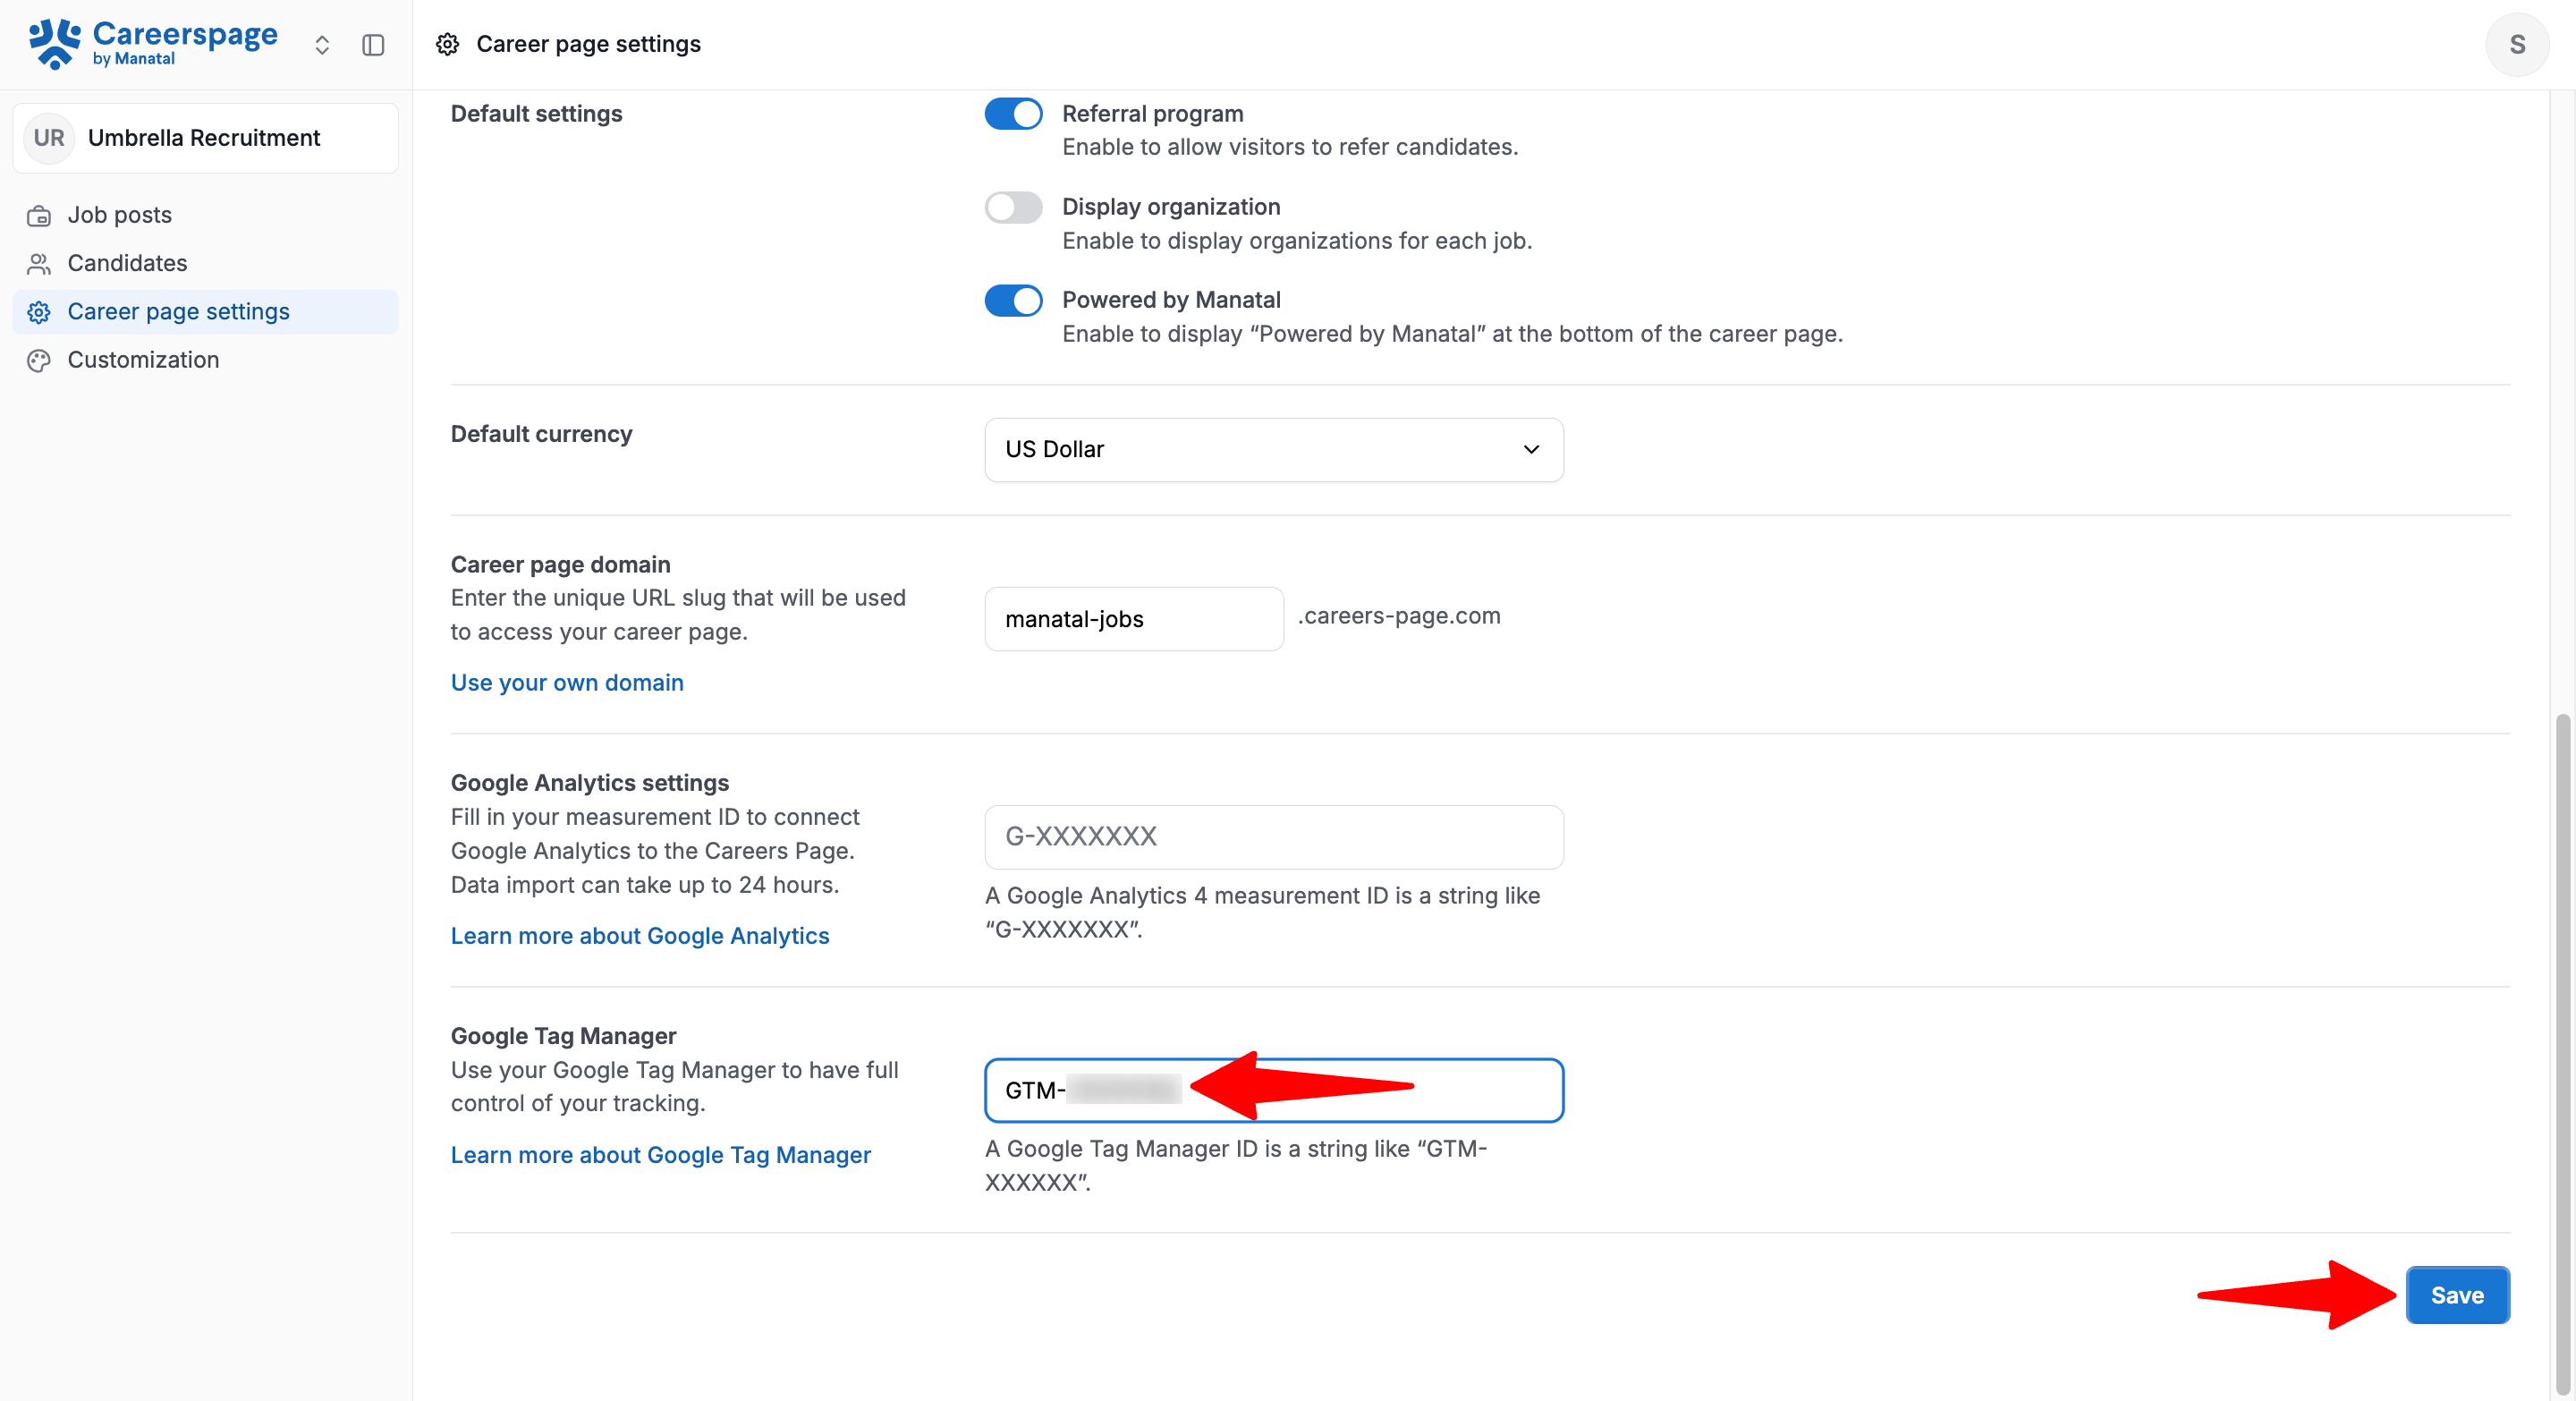
Once saved, Manatal injects the GTM snippet into the appropriate locations on the Career Page and loads it only once per page load.
Why use Google Tag Manager
Google Tag Manager is useful if you want to manage tracking through GTM instead of entering a GA4 Measurement ID directly.
For example, you may want to:
- manage tags from a single place
- configure Google Analytics through GTM
- add other supported tags through your GTM setup
Updating or disabling Google Tag Manager
You can return to the same field at any time to:
- replace the current Container ID

- remove the Container ID to stop loading GTM on your Career Page
If the field is cleared and saved, Manatal stops injecting the GTM snippet.
Verify that GTM is working
After saving your Container ID:
- Open your public Career Page.
- Open your GTM workspace. Use Preview mode to check whether the container is detected on the page.
If your GTM container is configured to send data to GA4, verify the events in Google Analytics as well.
Troubleshooting
Invalid code
Make sure you entered your GTM Container ID.
Correct format:
GTM-XXXXXXX
GTM is not detecting the page
Check that:
- the correct Container ID was saved
- your GTM container has been published
- you are testing on the live Career Page
- your GTM tags and triggers are configured correctly inside Google Tag Manager
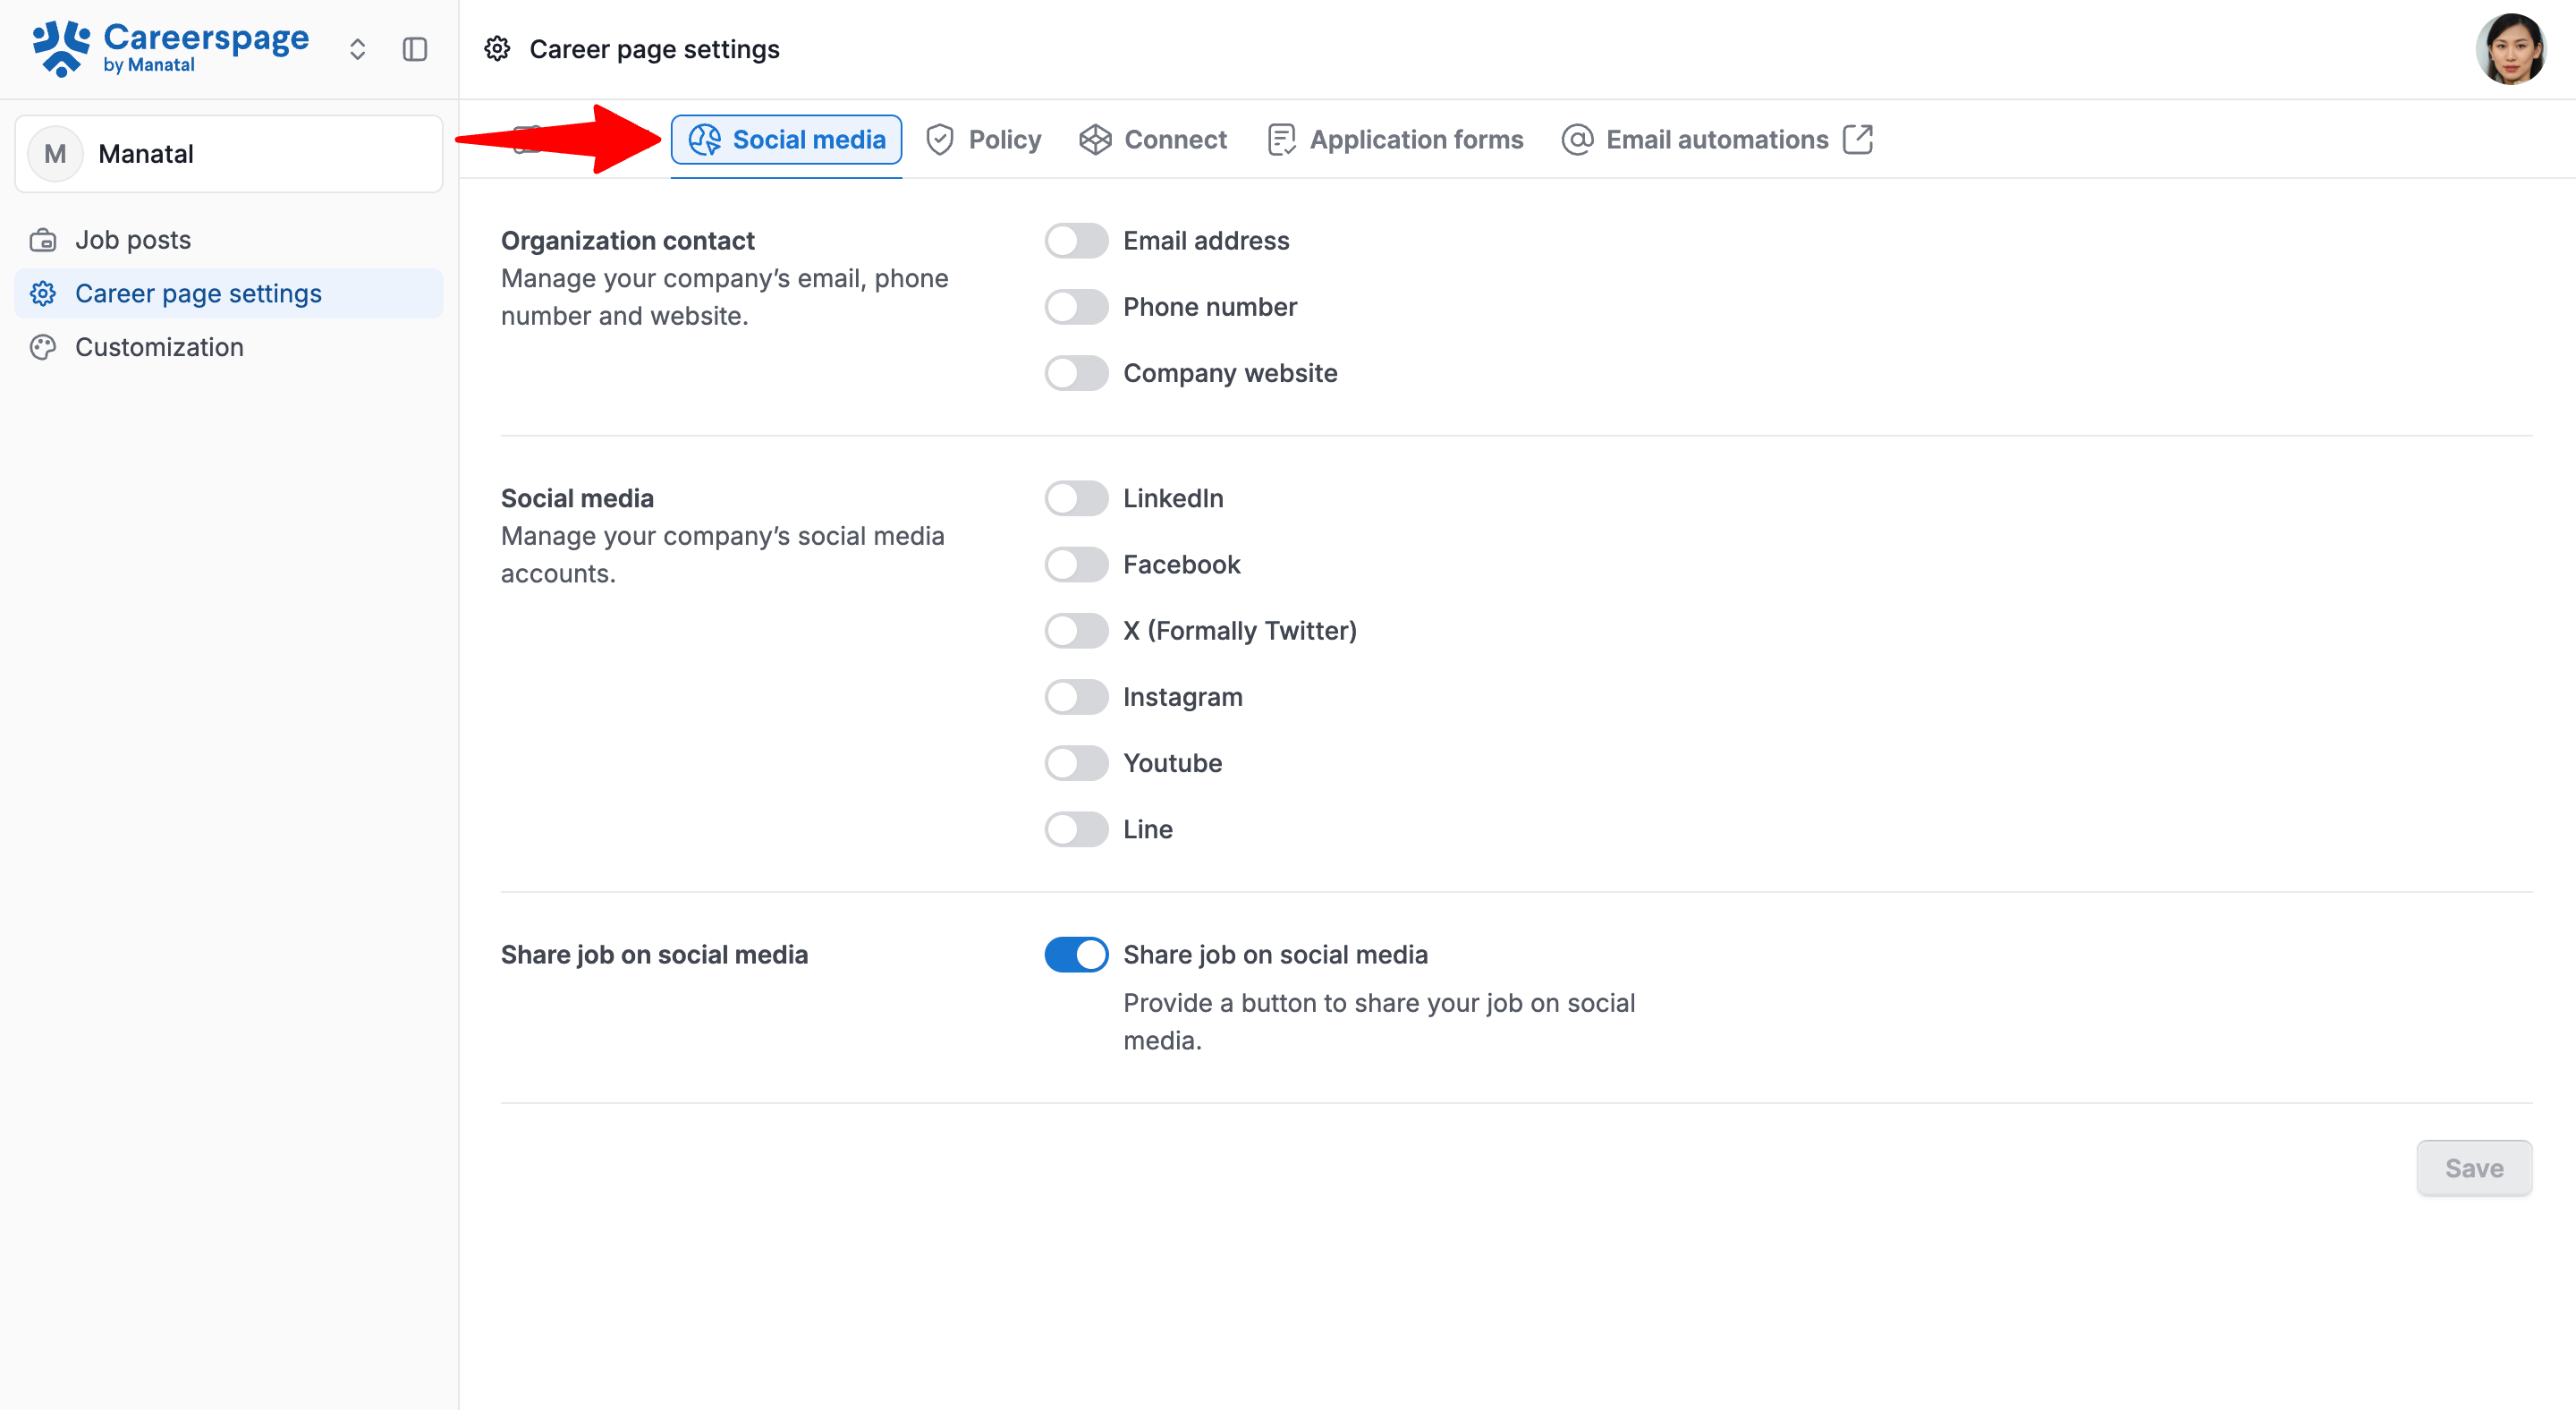
Social Media
Organization Contact
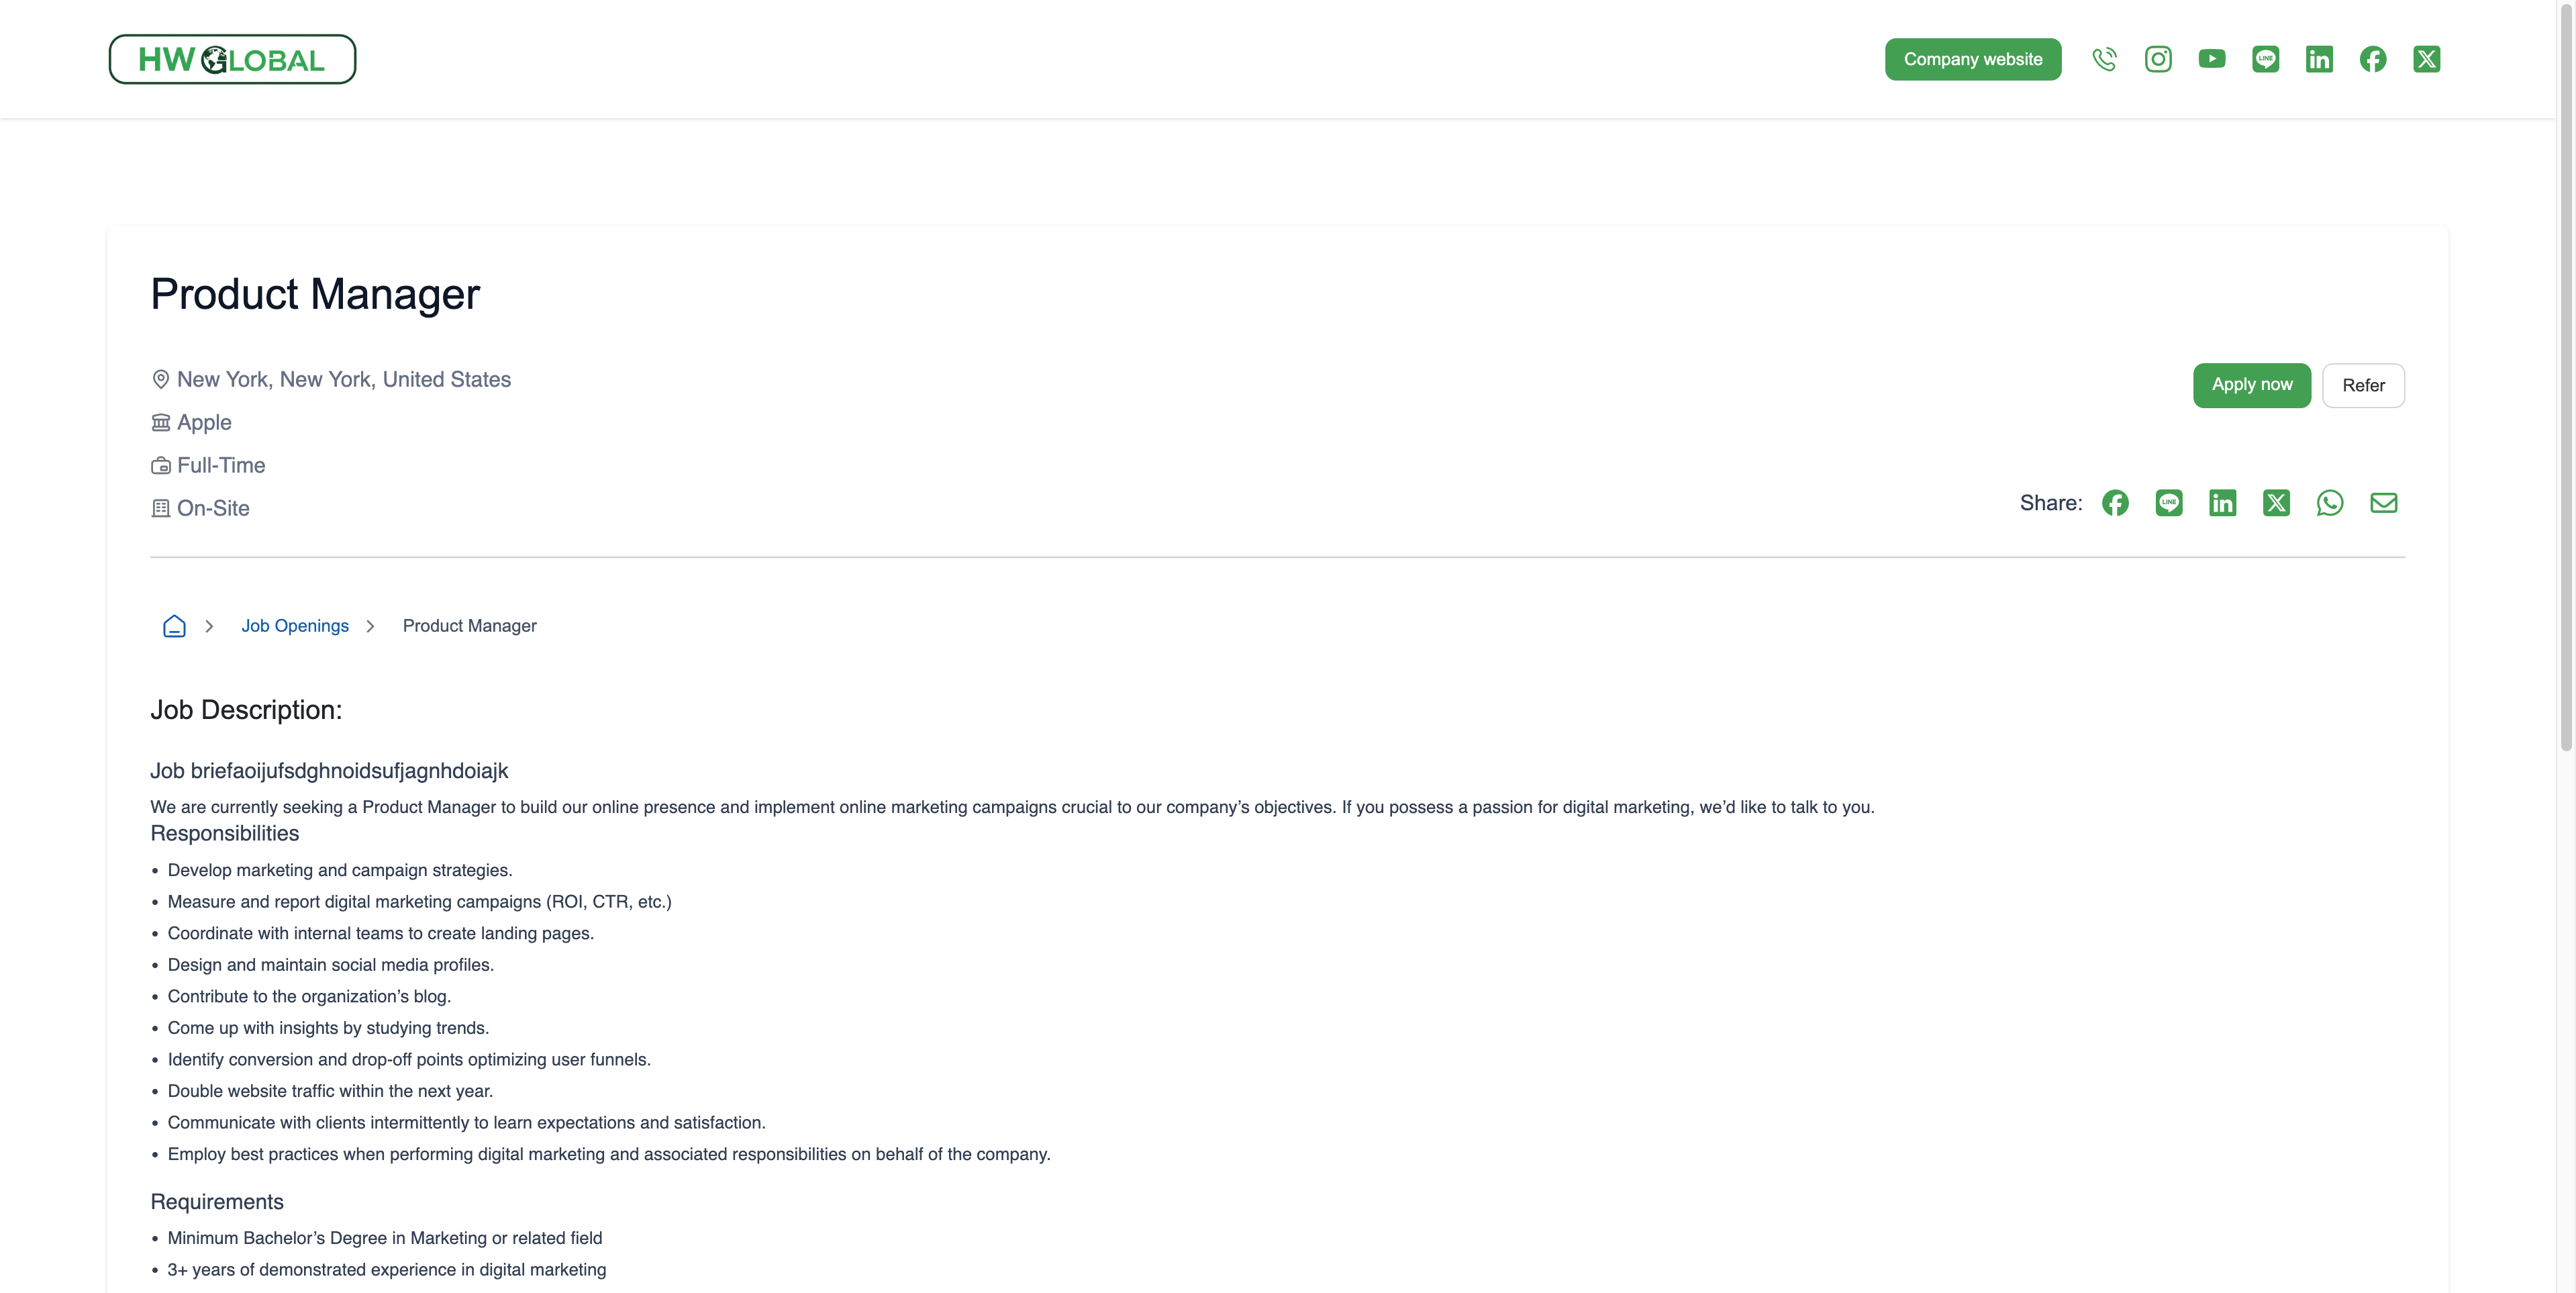
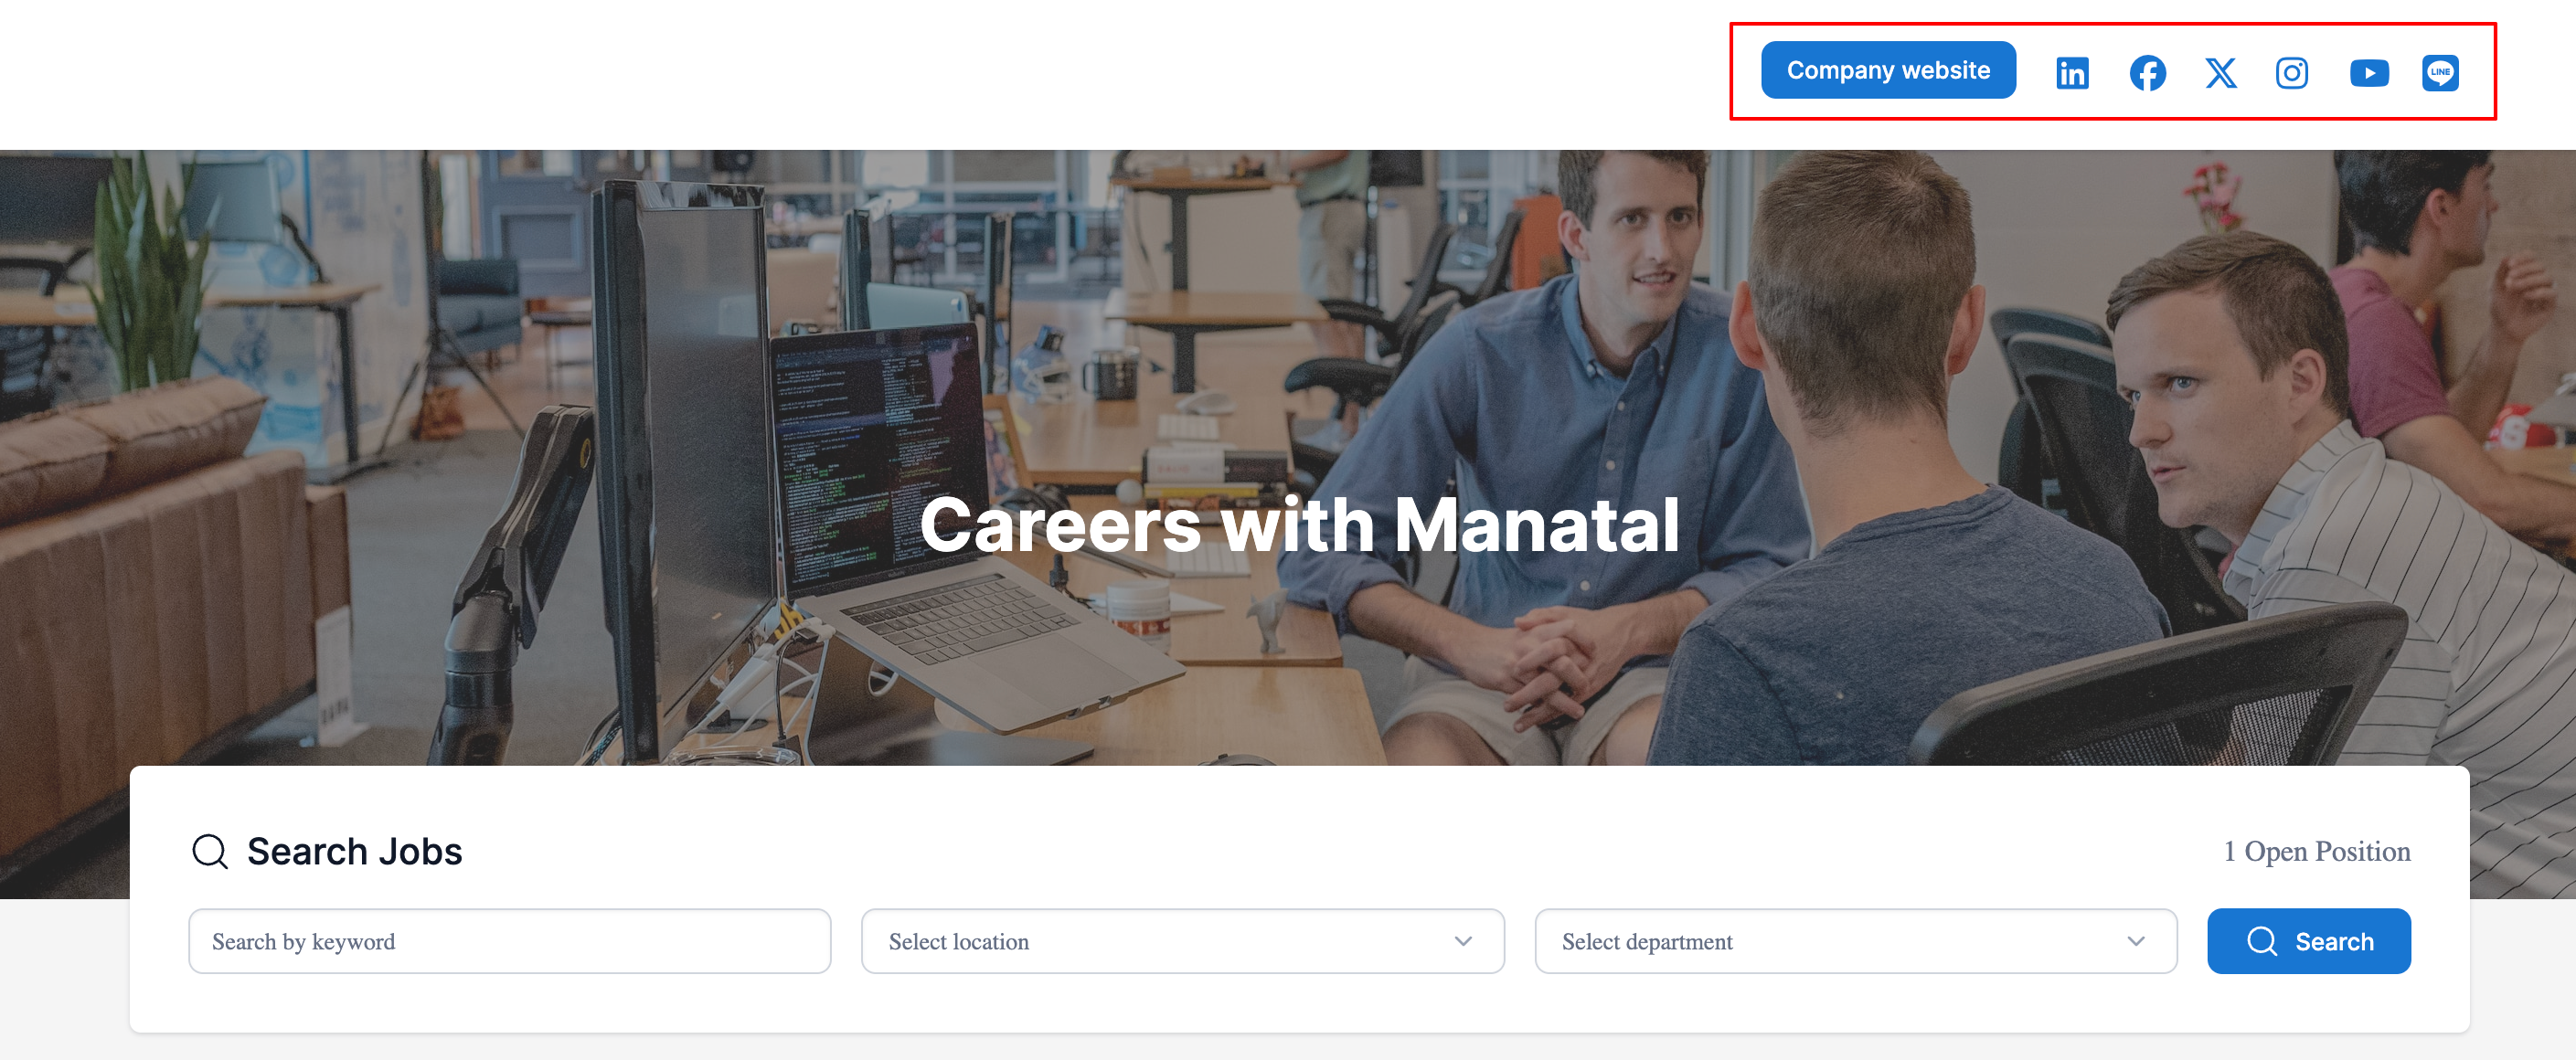
Adding your company contact information and social media will display each of them at the top right of your career page as in the following example.
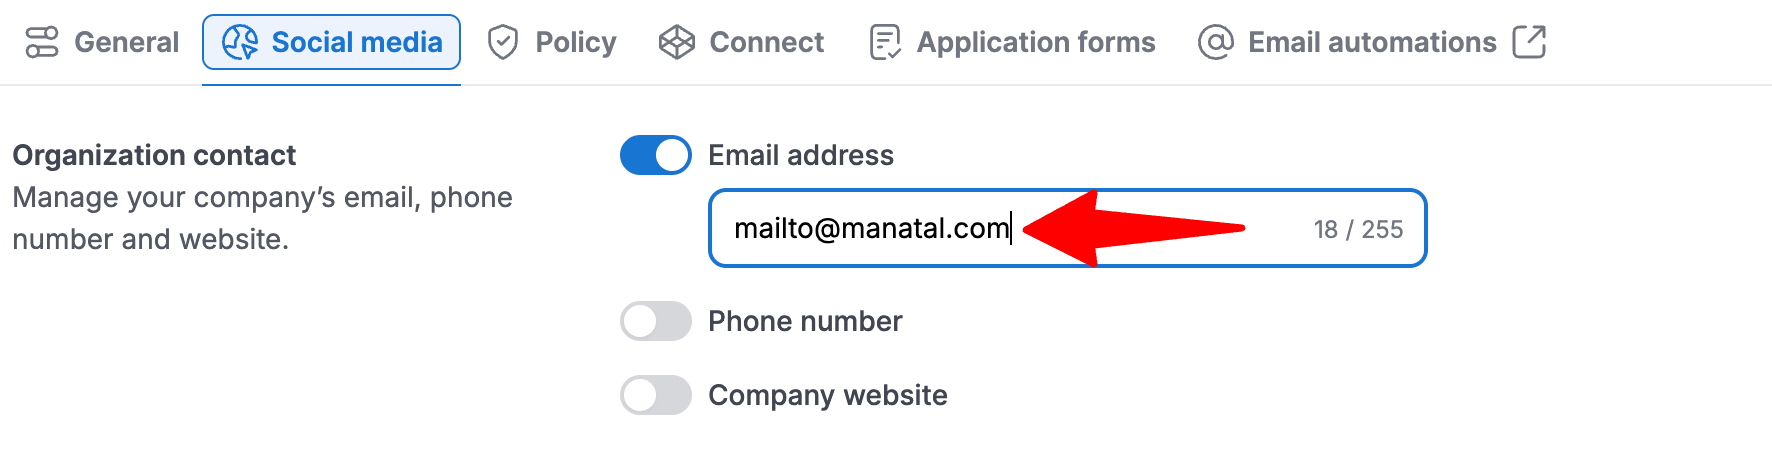
Email Address
- Head to the following page. Alternatively, click on "Career page settings" from your side menu and then open the "Social Media" tab.
- In the Organization contact section, enable displaying your company's contact email. Enter the email address.
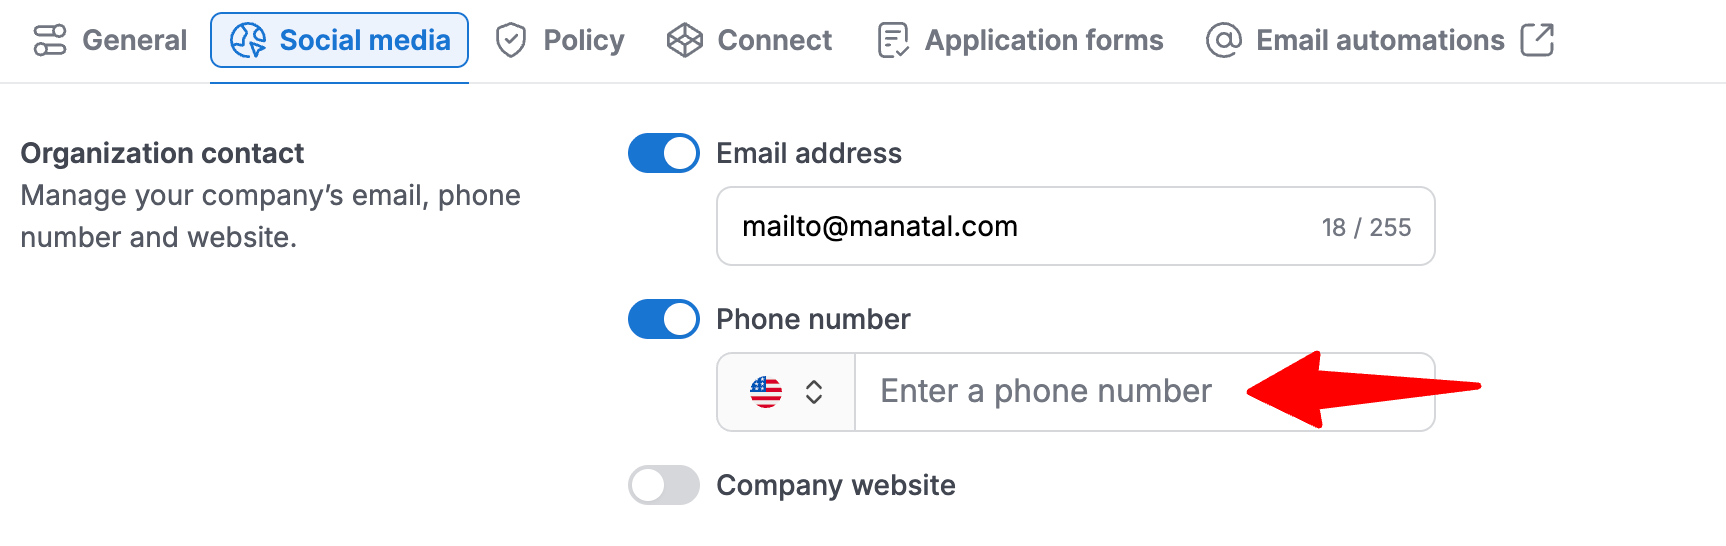
Phone Number
- Head to the following page. Alternatively, click on "Career page settings" from your side menu and then open the "Social Media" tab.
- In the Organization contact section, enable displaying your company phone number, and enter a phone number.
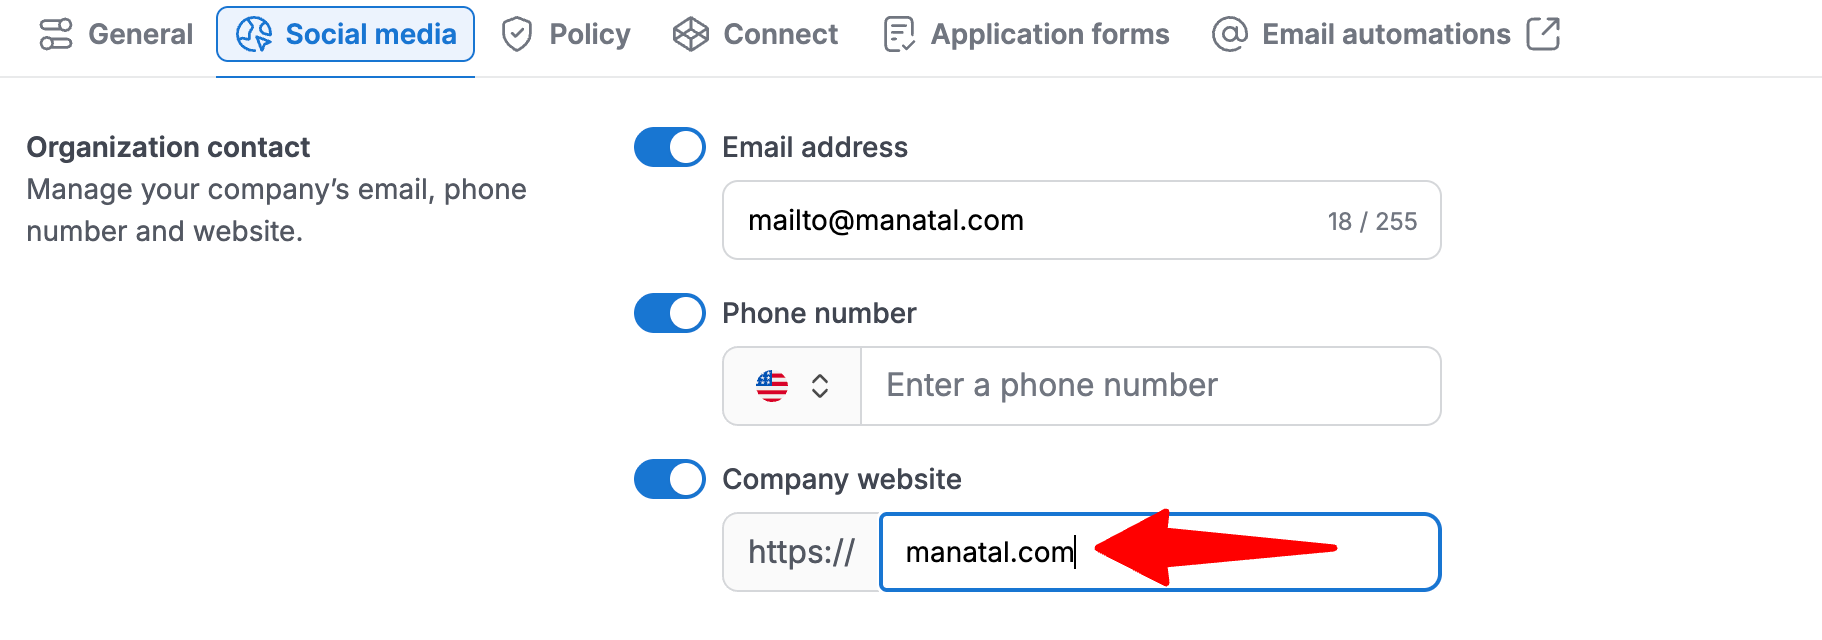
Company Website
- Head to the following page. Alternatively, click on "Career page settings" from your side menu and then open the "Social Media" tab.
- In the Organization contact section, enable displaying your company website, and enter your website URL.
Social Media
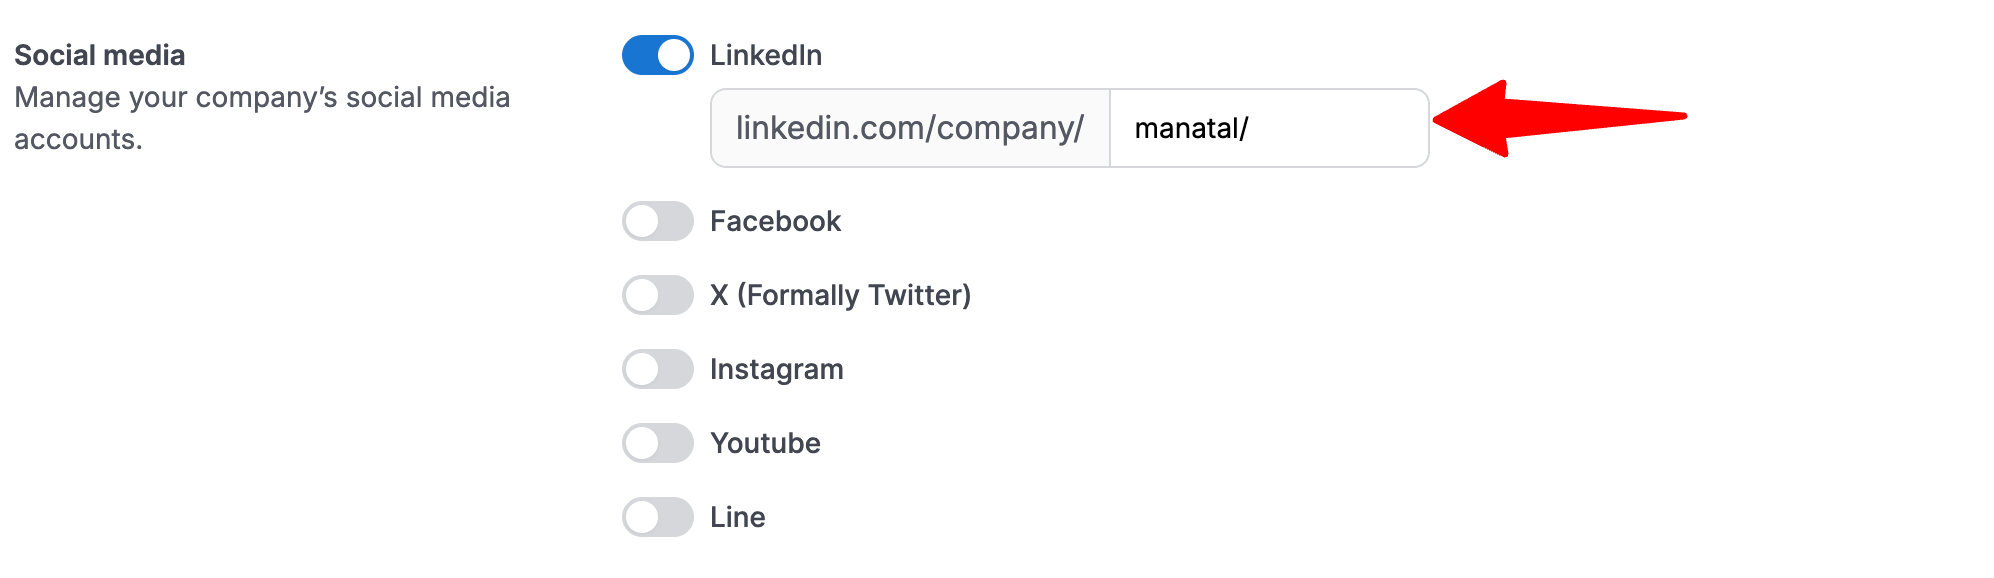
Company LinkedIn
- Head to the following page. Alternatively, click on "Career page settings" from your side menu and then open the "Social Media" tab.
- In the Social media section, enable displaying your company's LinkedIn page, and enter the URL of your company's LinkedIn profile.
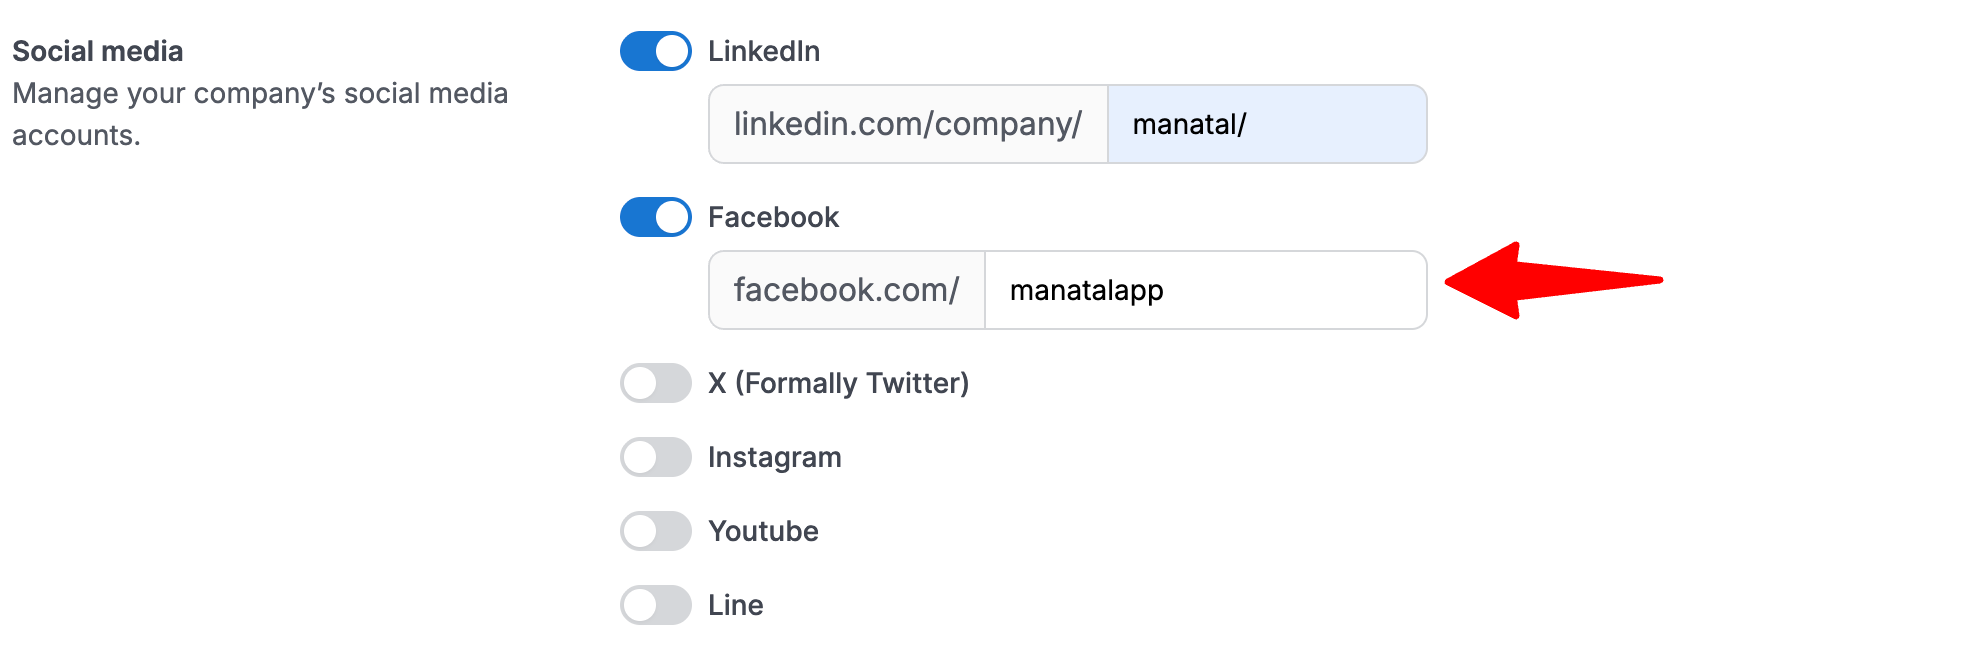
Company Facebook
- Head to the following page. Alternatively, click on "Career page settings" from your side menu and then open the "Social Media" tab.
- In the Social media section, enable displaying your company's Facebook page, and enter the URL of your company's Facebook.
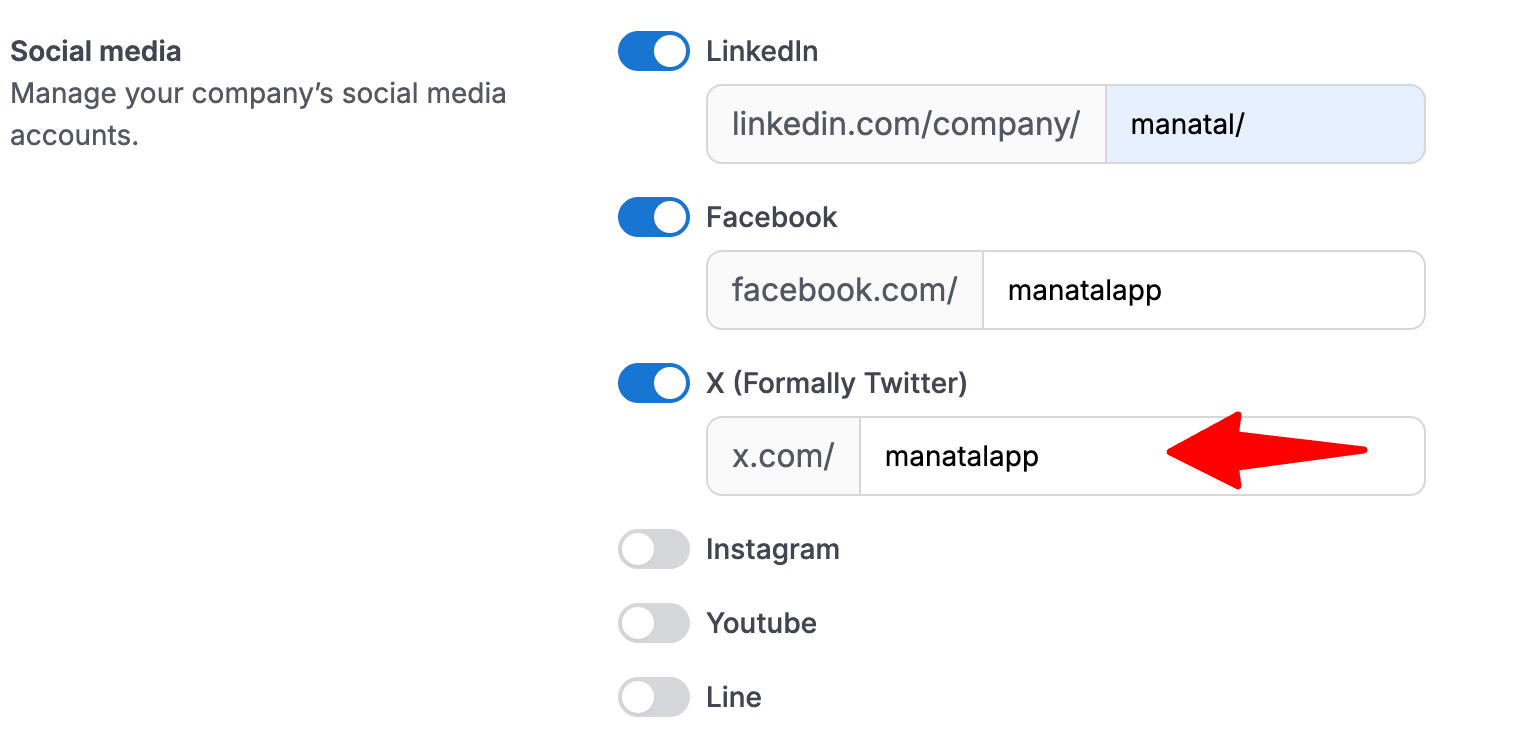
Company X
- Head to the following page. Alternatively, click on "Career page settings" from your side menu and then open the "Social Media" tab.
- In the Social media section, enable displaying your company's X page, and enter the URL of your company's X profile.
Company Instagram
- Head to the following page. Alternatively, click on "Career page settings" from your side menu and then open the "Social Media" tab.
- In the Social media section, enable displaying your company's Instagram page, and enter the URL of your company's Instagram profile.

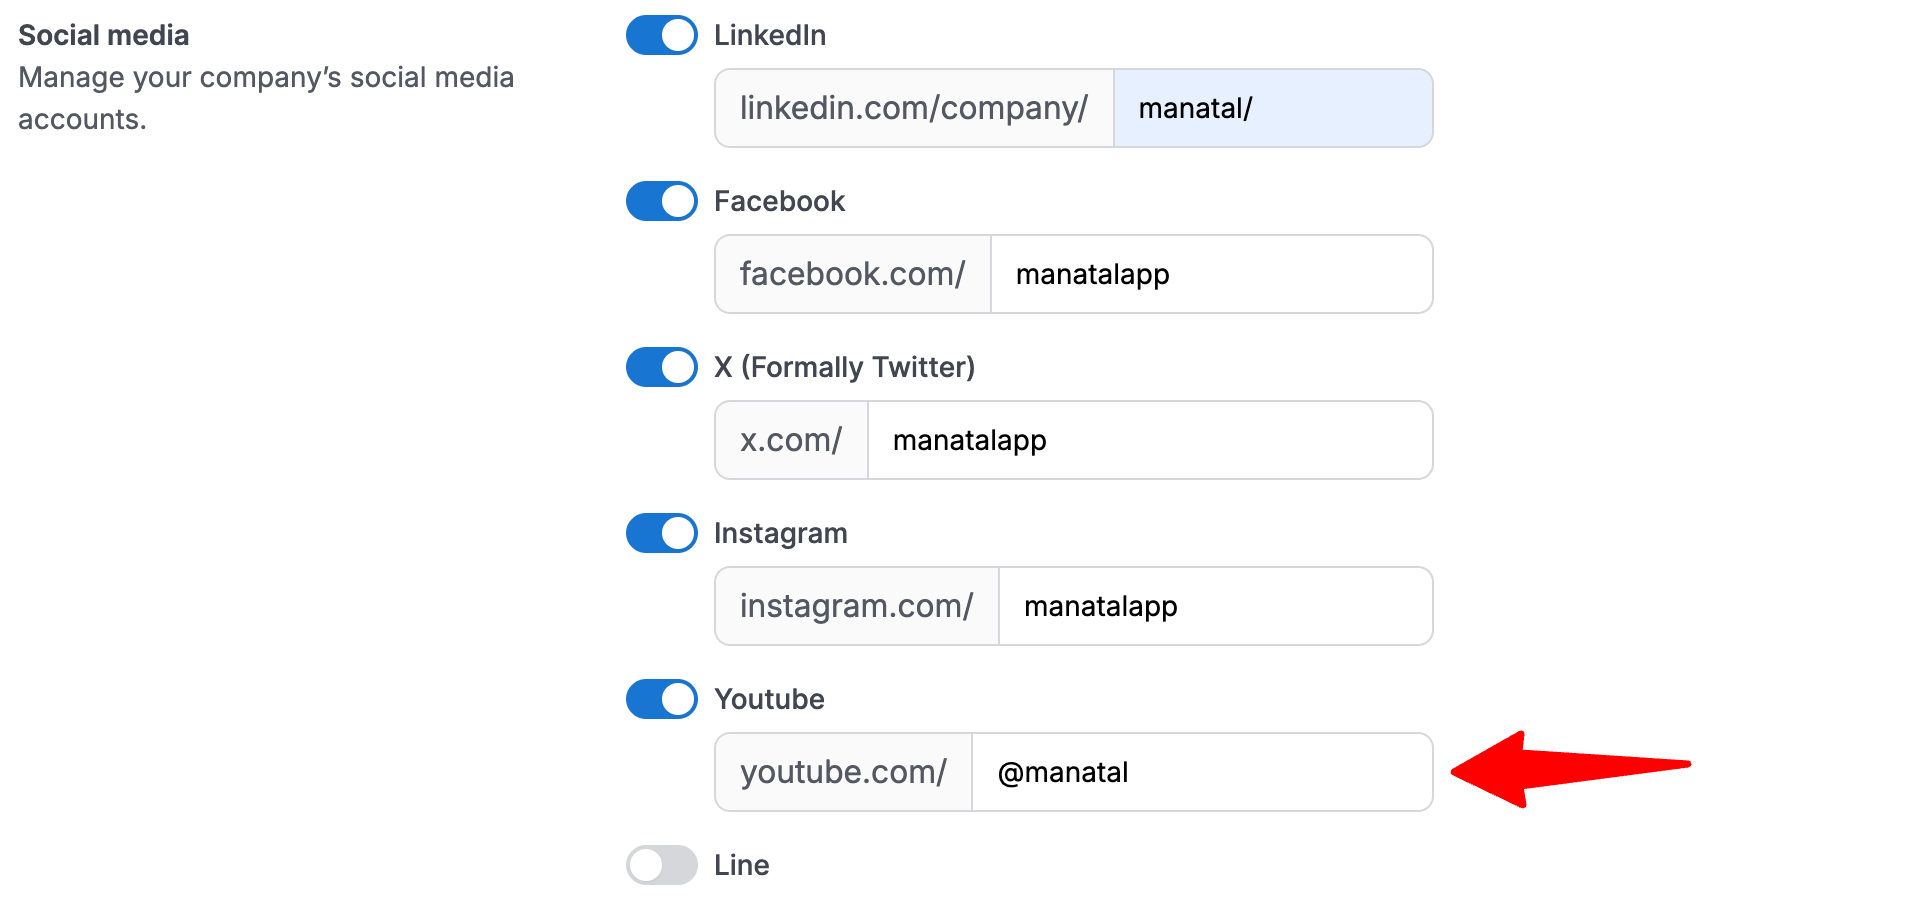
Company Youtube
- Head to the following page. Alternatively, click on "Career page settings" from your side menu and then open the "Social Media" tab.
- In the Social media section, enable displaying your company Youtube page, and enter the URL of your company's Youtube.
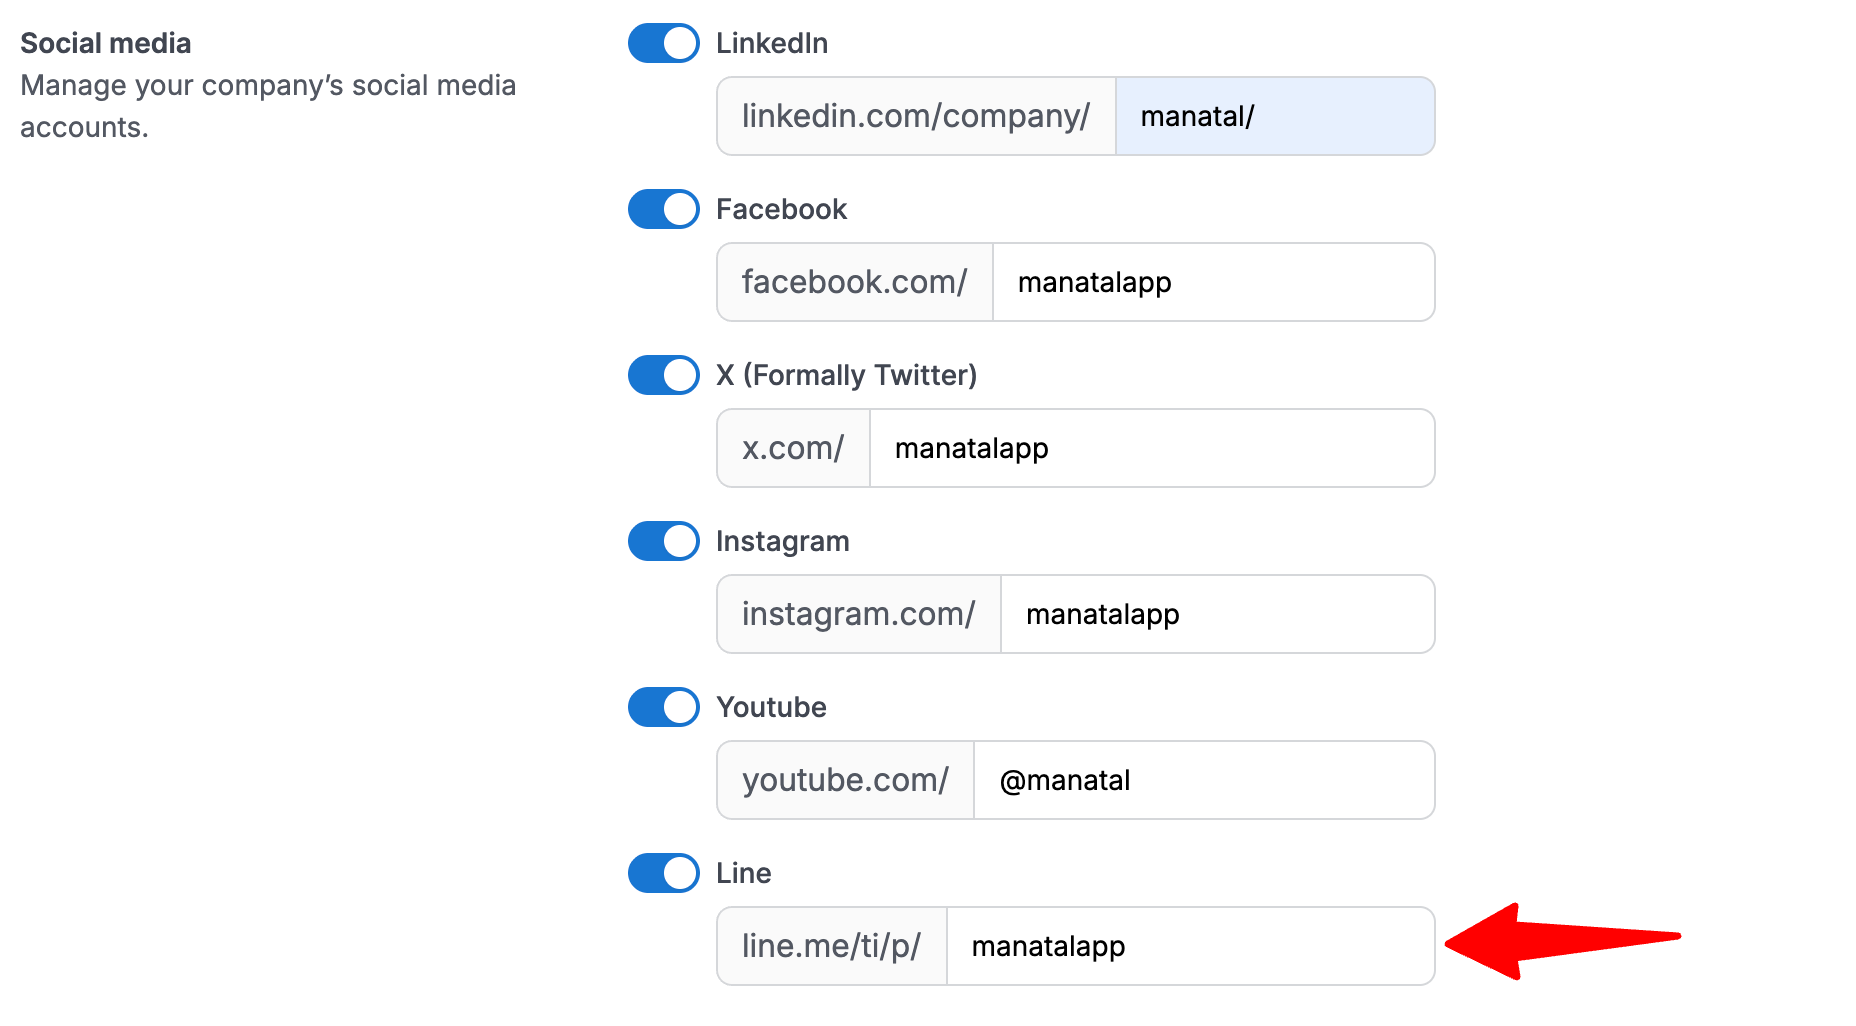
Company Line
- Head to the following page. Alternatively, click on "Career page settings" from your side menu and then open the "Social Media" tab.
- In the Social media section, enable displaying your company's Line page, and enter the URL of your company's Line.
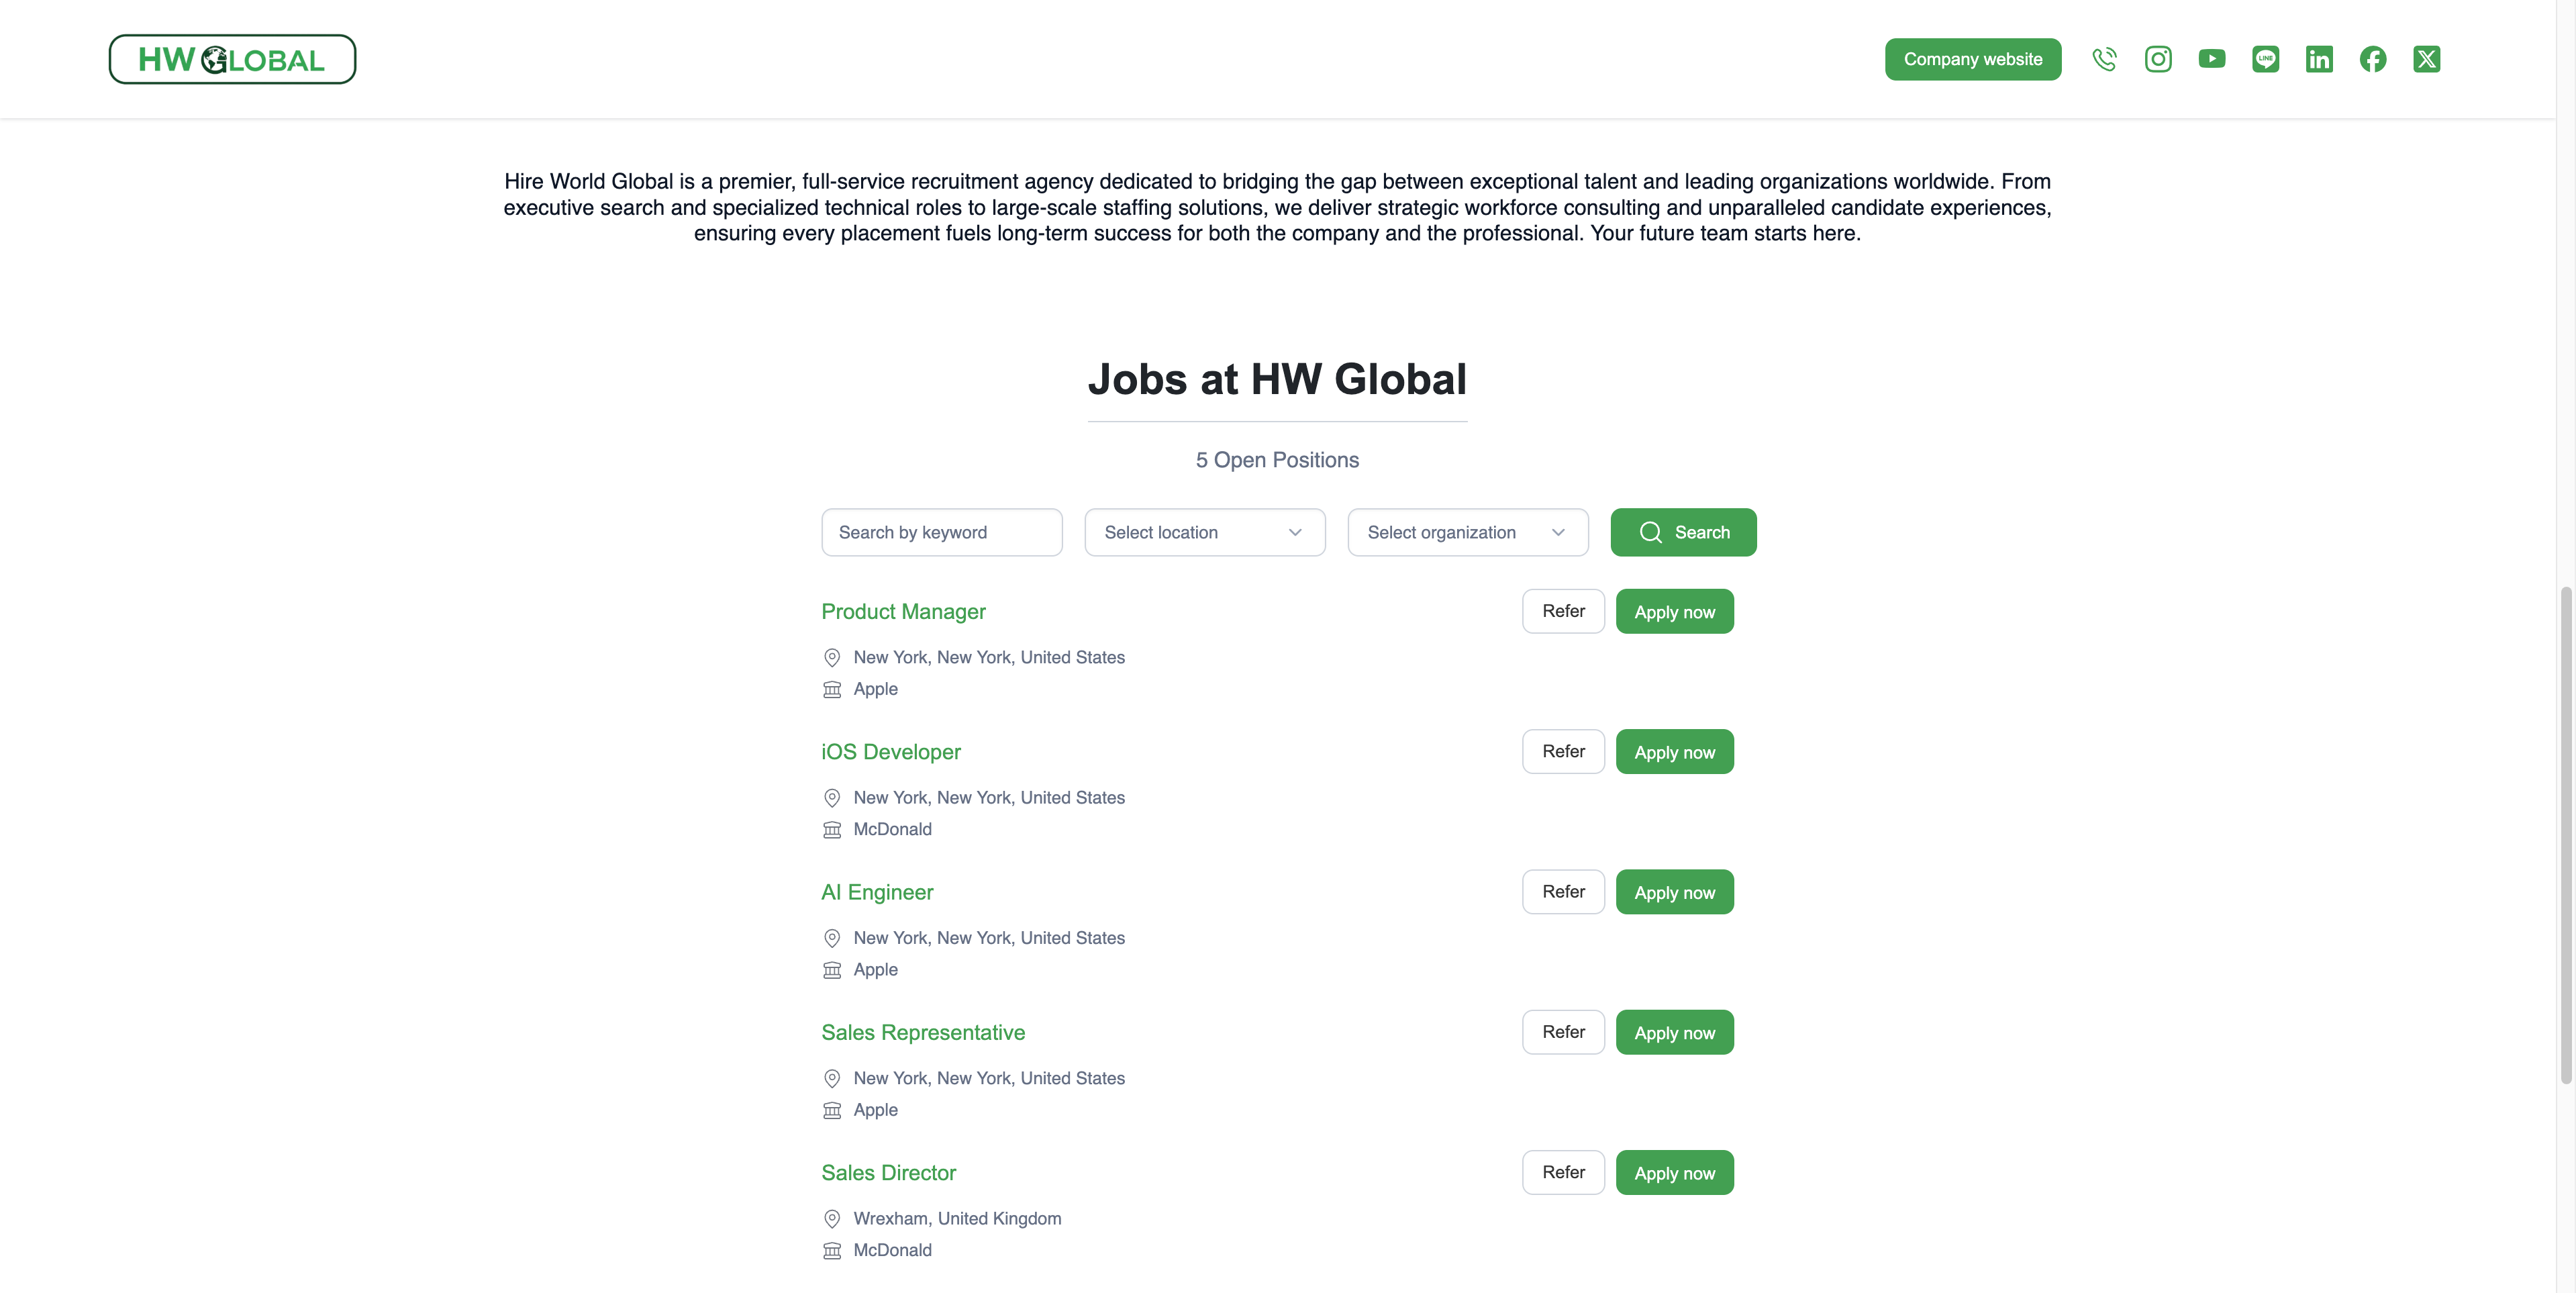
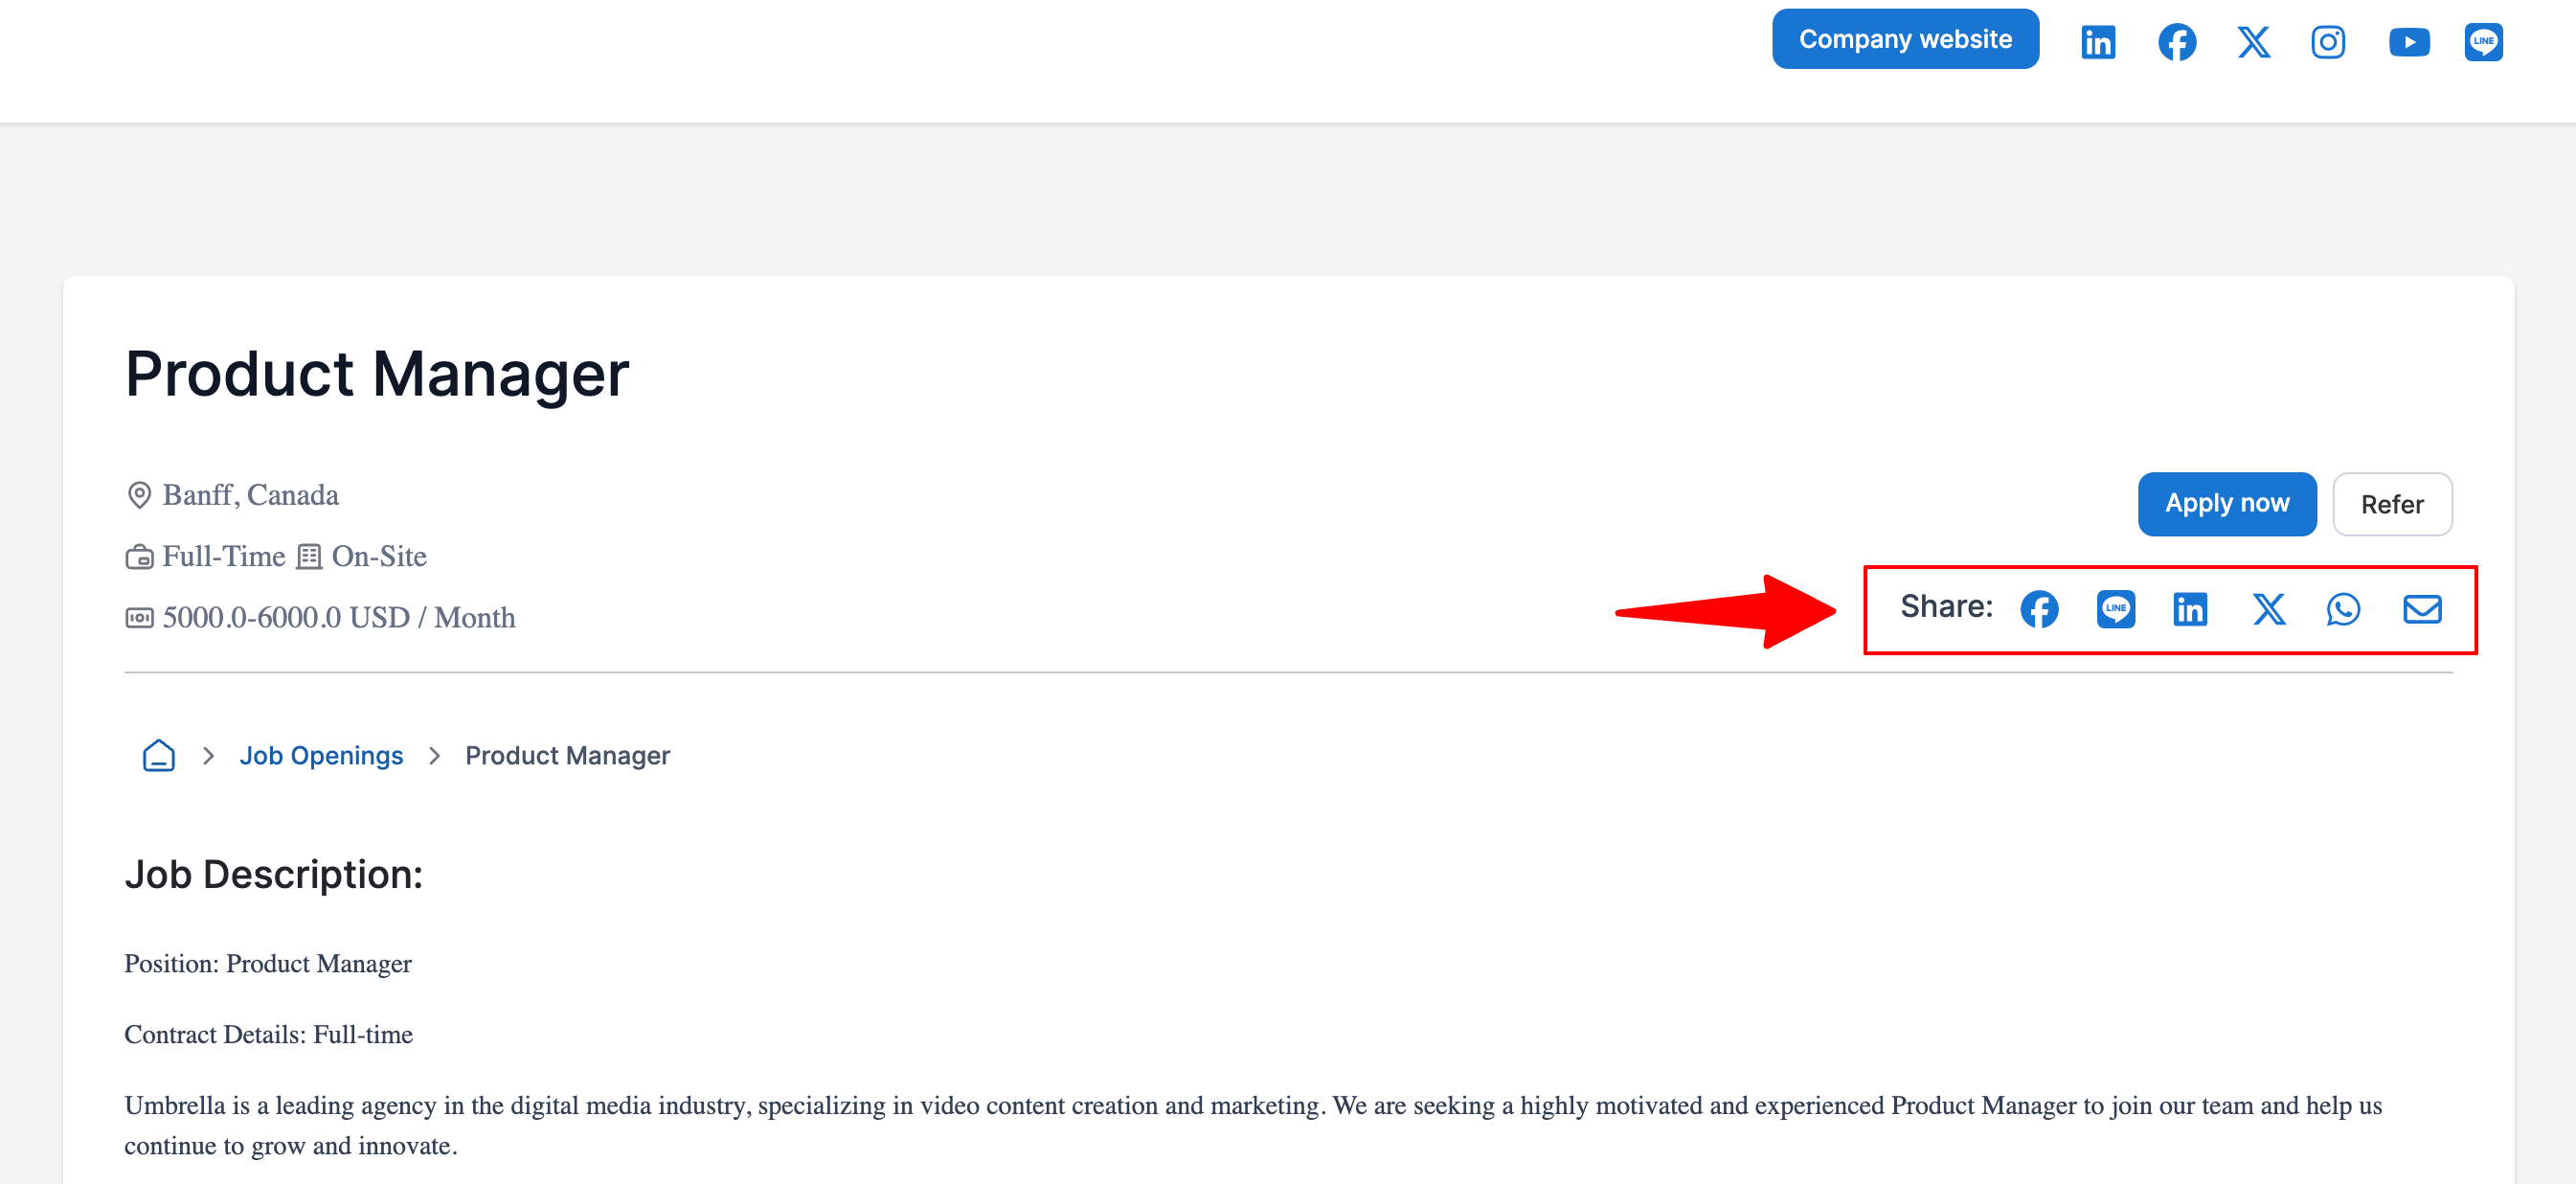
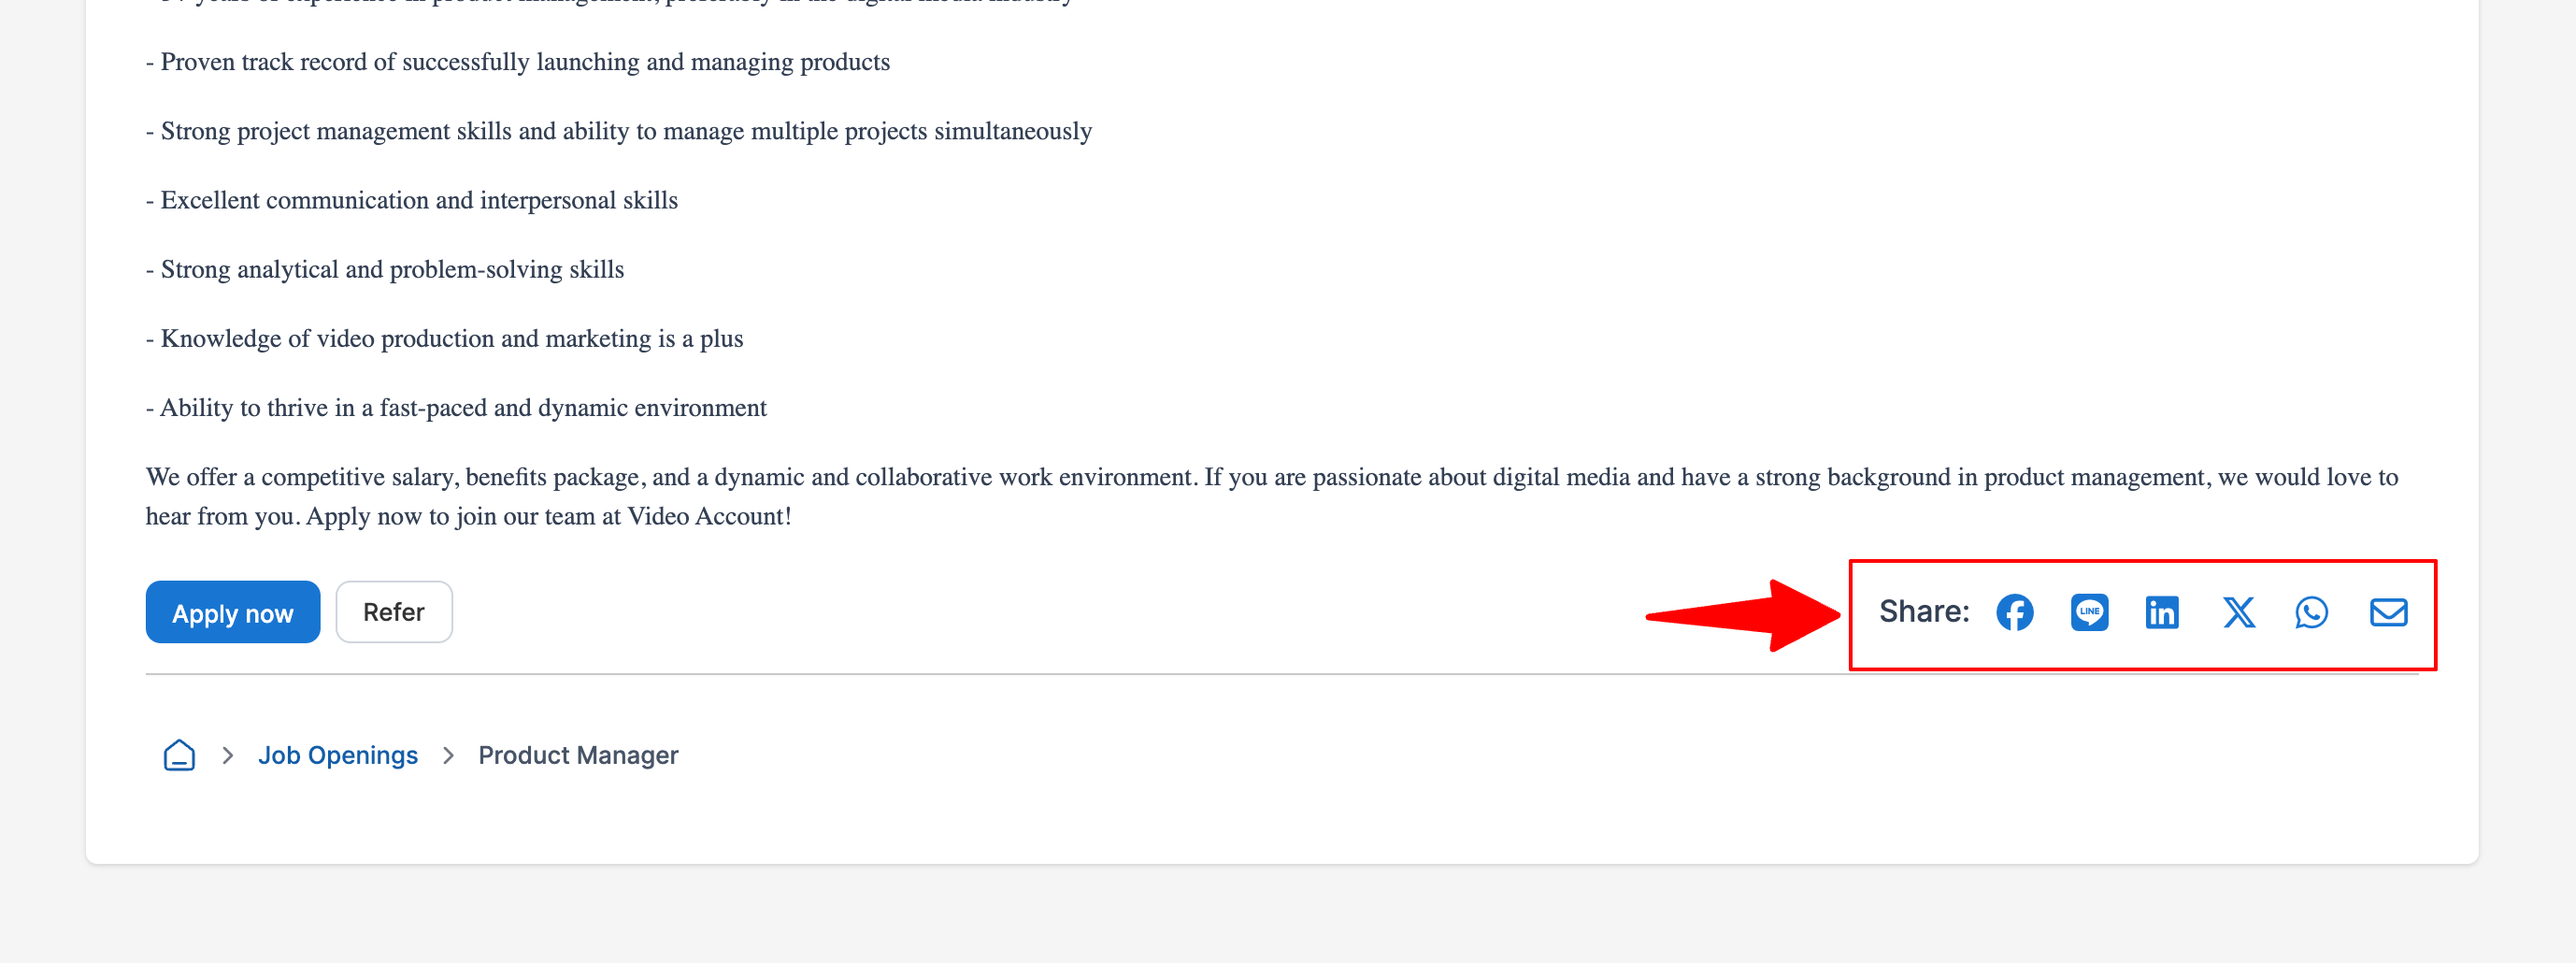
Sharing Jobs to Social Media
Enabling the Share jobs on social media function will allow anyone visiting your career page to easily share jobs on social media. The share button will be located above each job description as shown in the example below.
- Head to the following page. Alternatively, click on "Career page settings" from your side menu and then open the "Social Media" tab.
- In the Social media section, enable Share job on social media.

When sharing jobs on both Facebook and Linkedin, the social media thumbnail will be used as thumbnail image for the posts. For best results when posting on those two social media, please refer to the instructions above regarding the thumbnail.
-
Navigate to your career page, click on "Learn more" next to the position you wish to share.
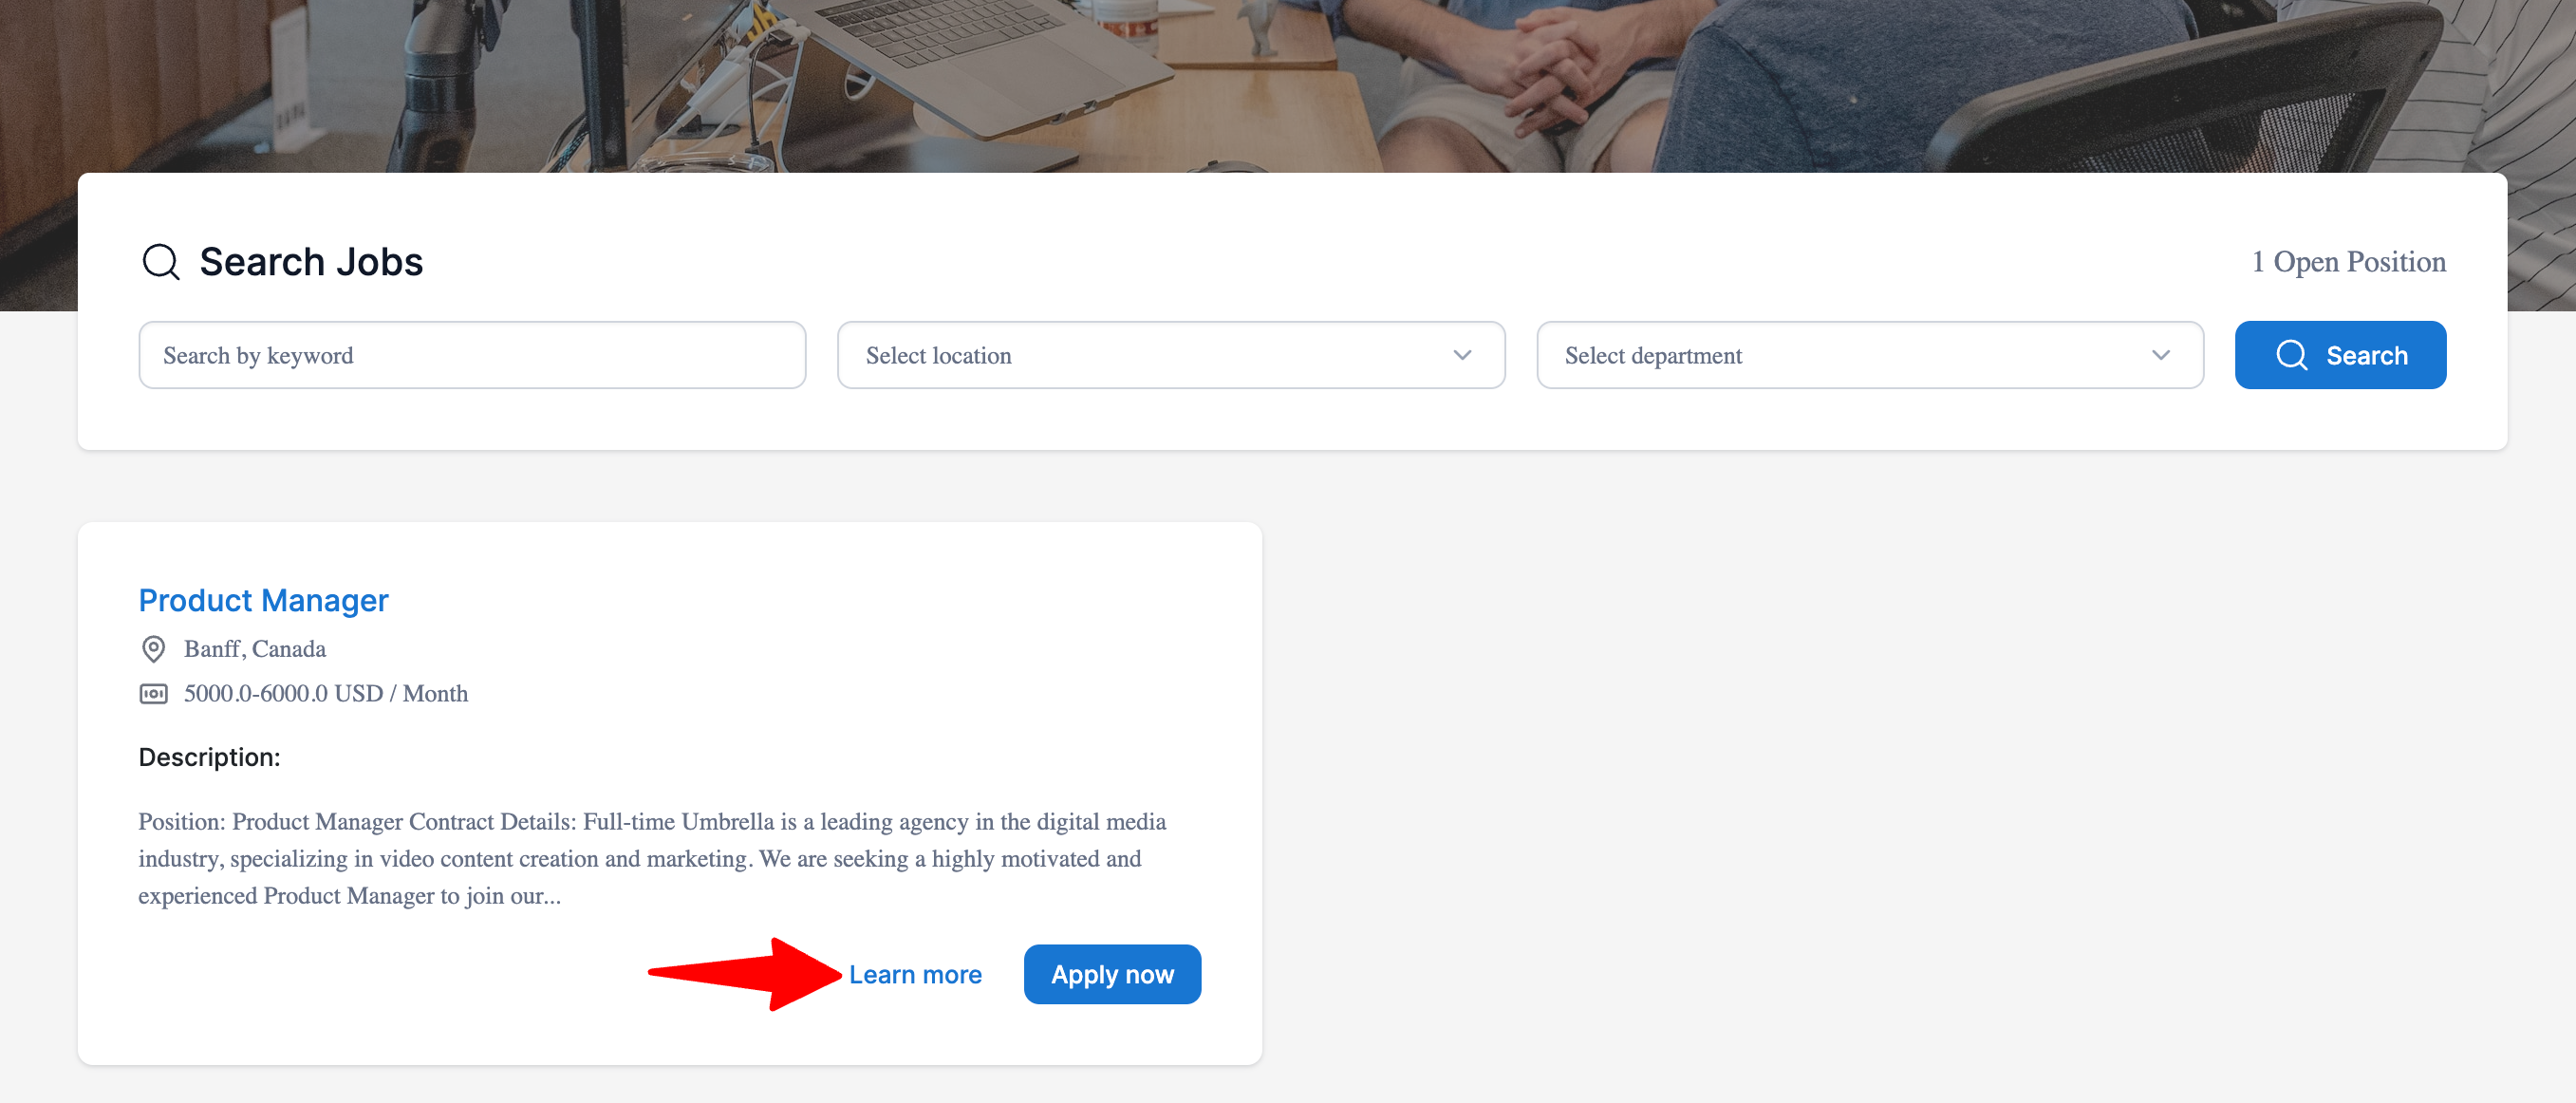
-
Select the social media platform you want to share on from the options at the top or bottom of the page.
Terms Conditions
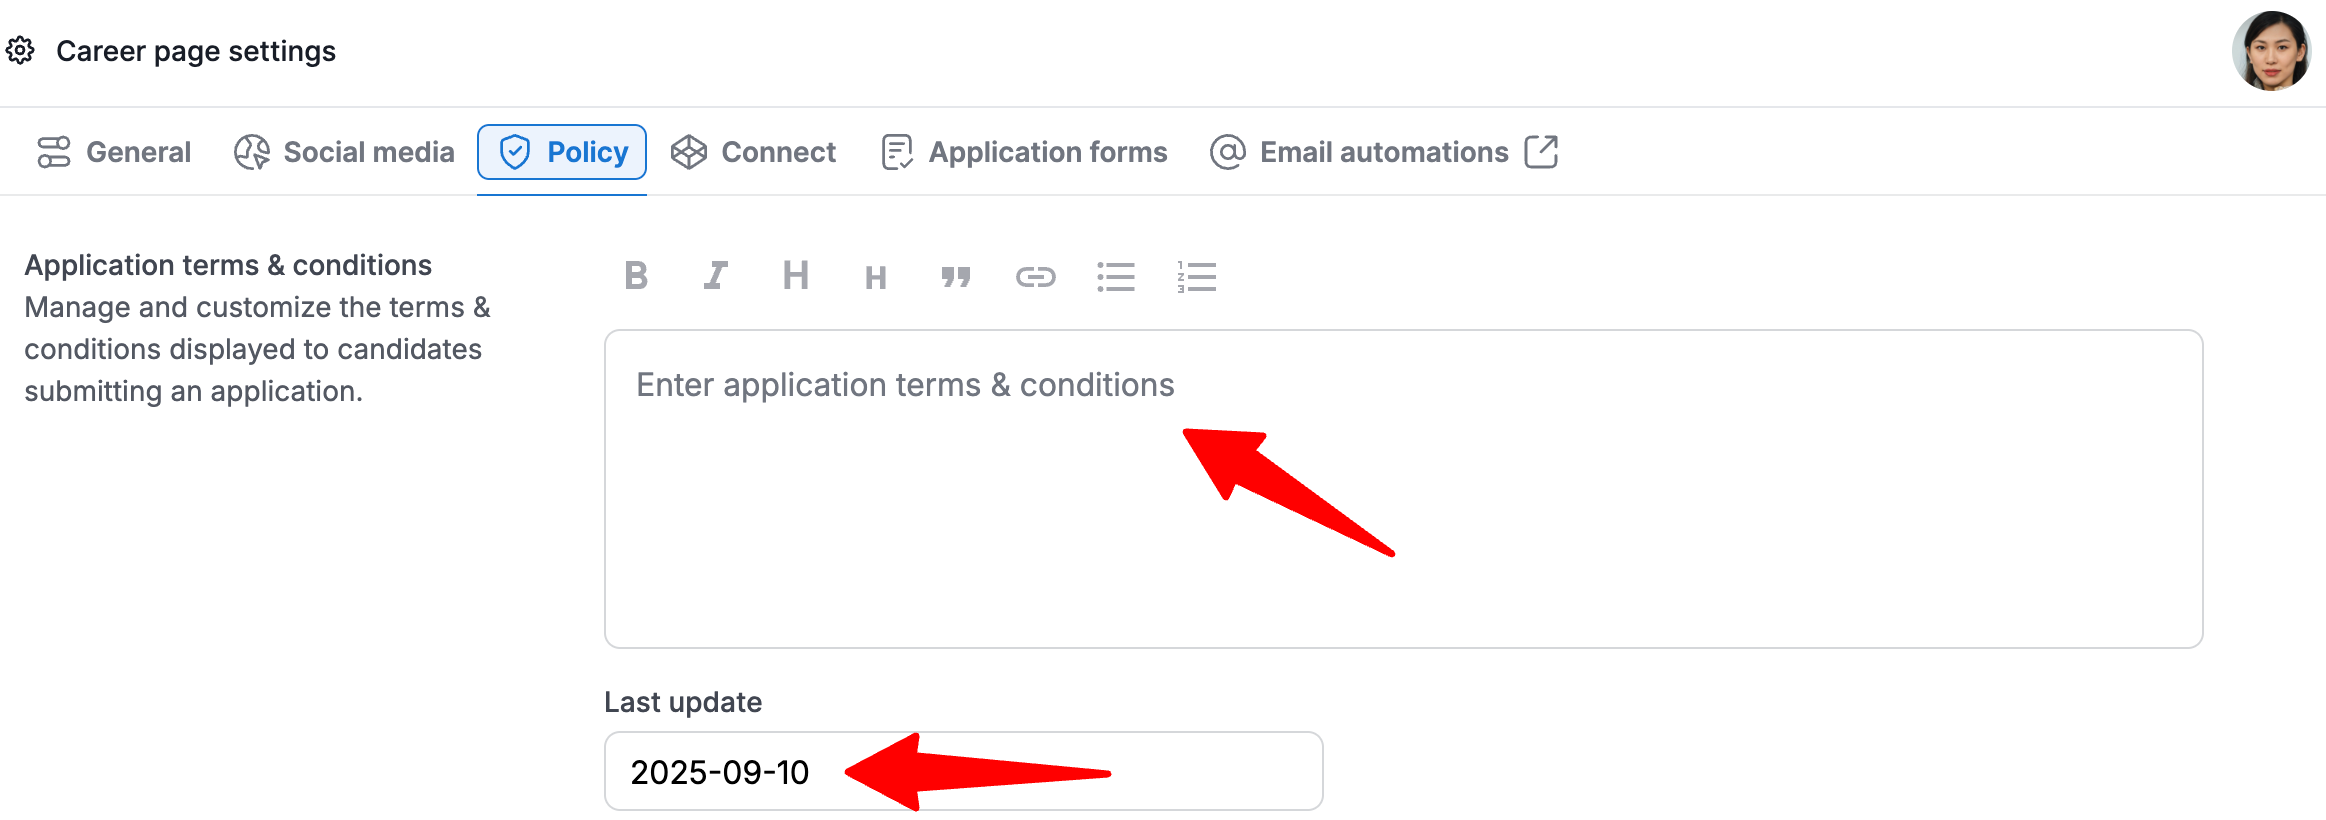
Customizing your Application Terms & Conditions
Customize the terms & conditions displayed to candidates submitting an application.
- Head to the following page. Alternatively, click on "Career page settings" from your side menu and then open the "Policy" tab.
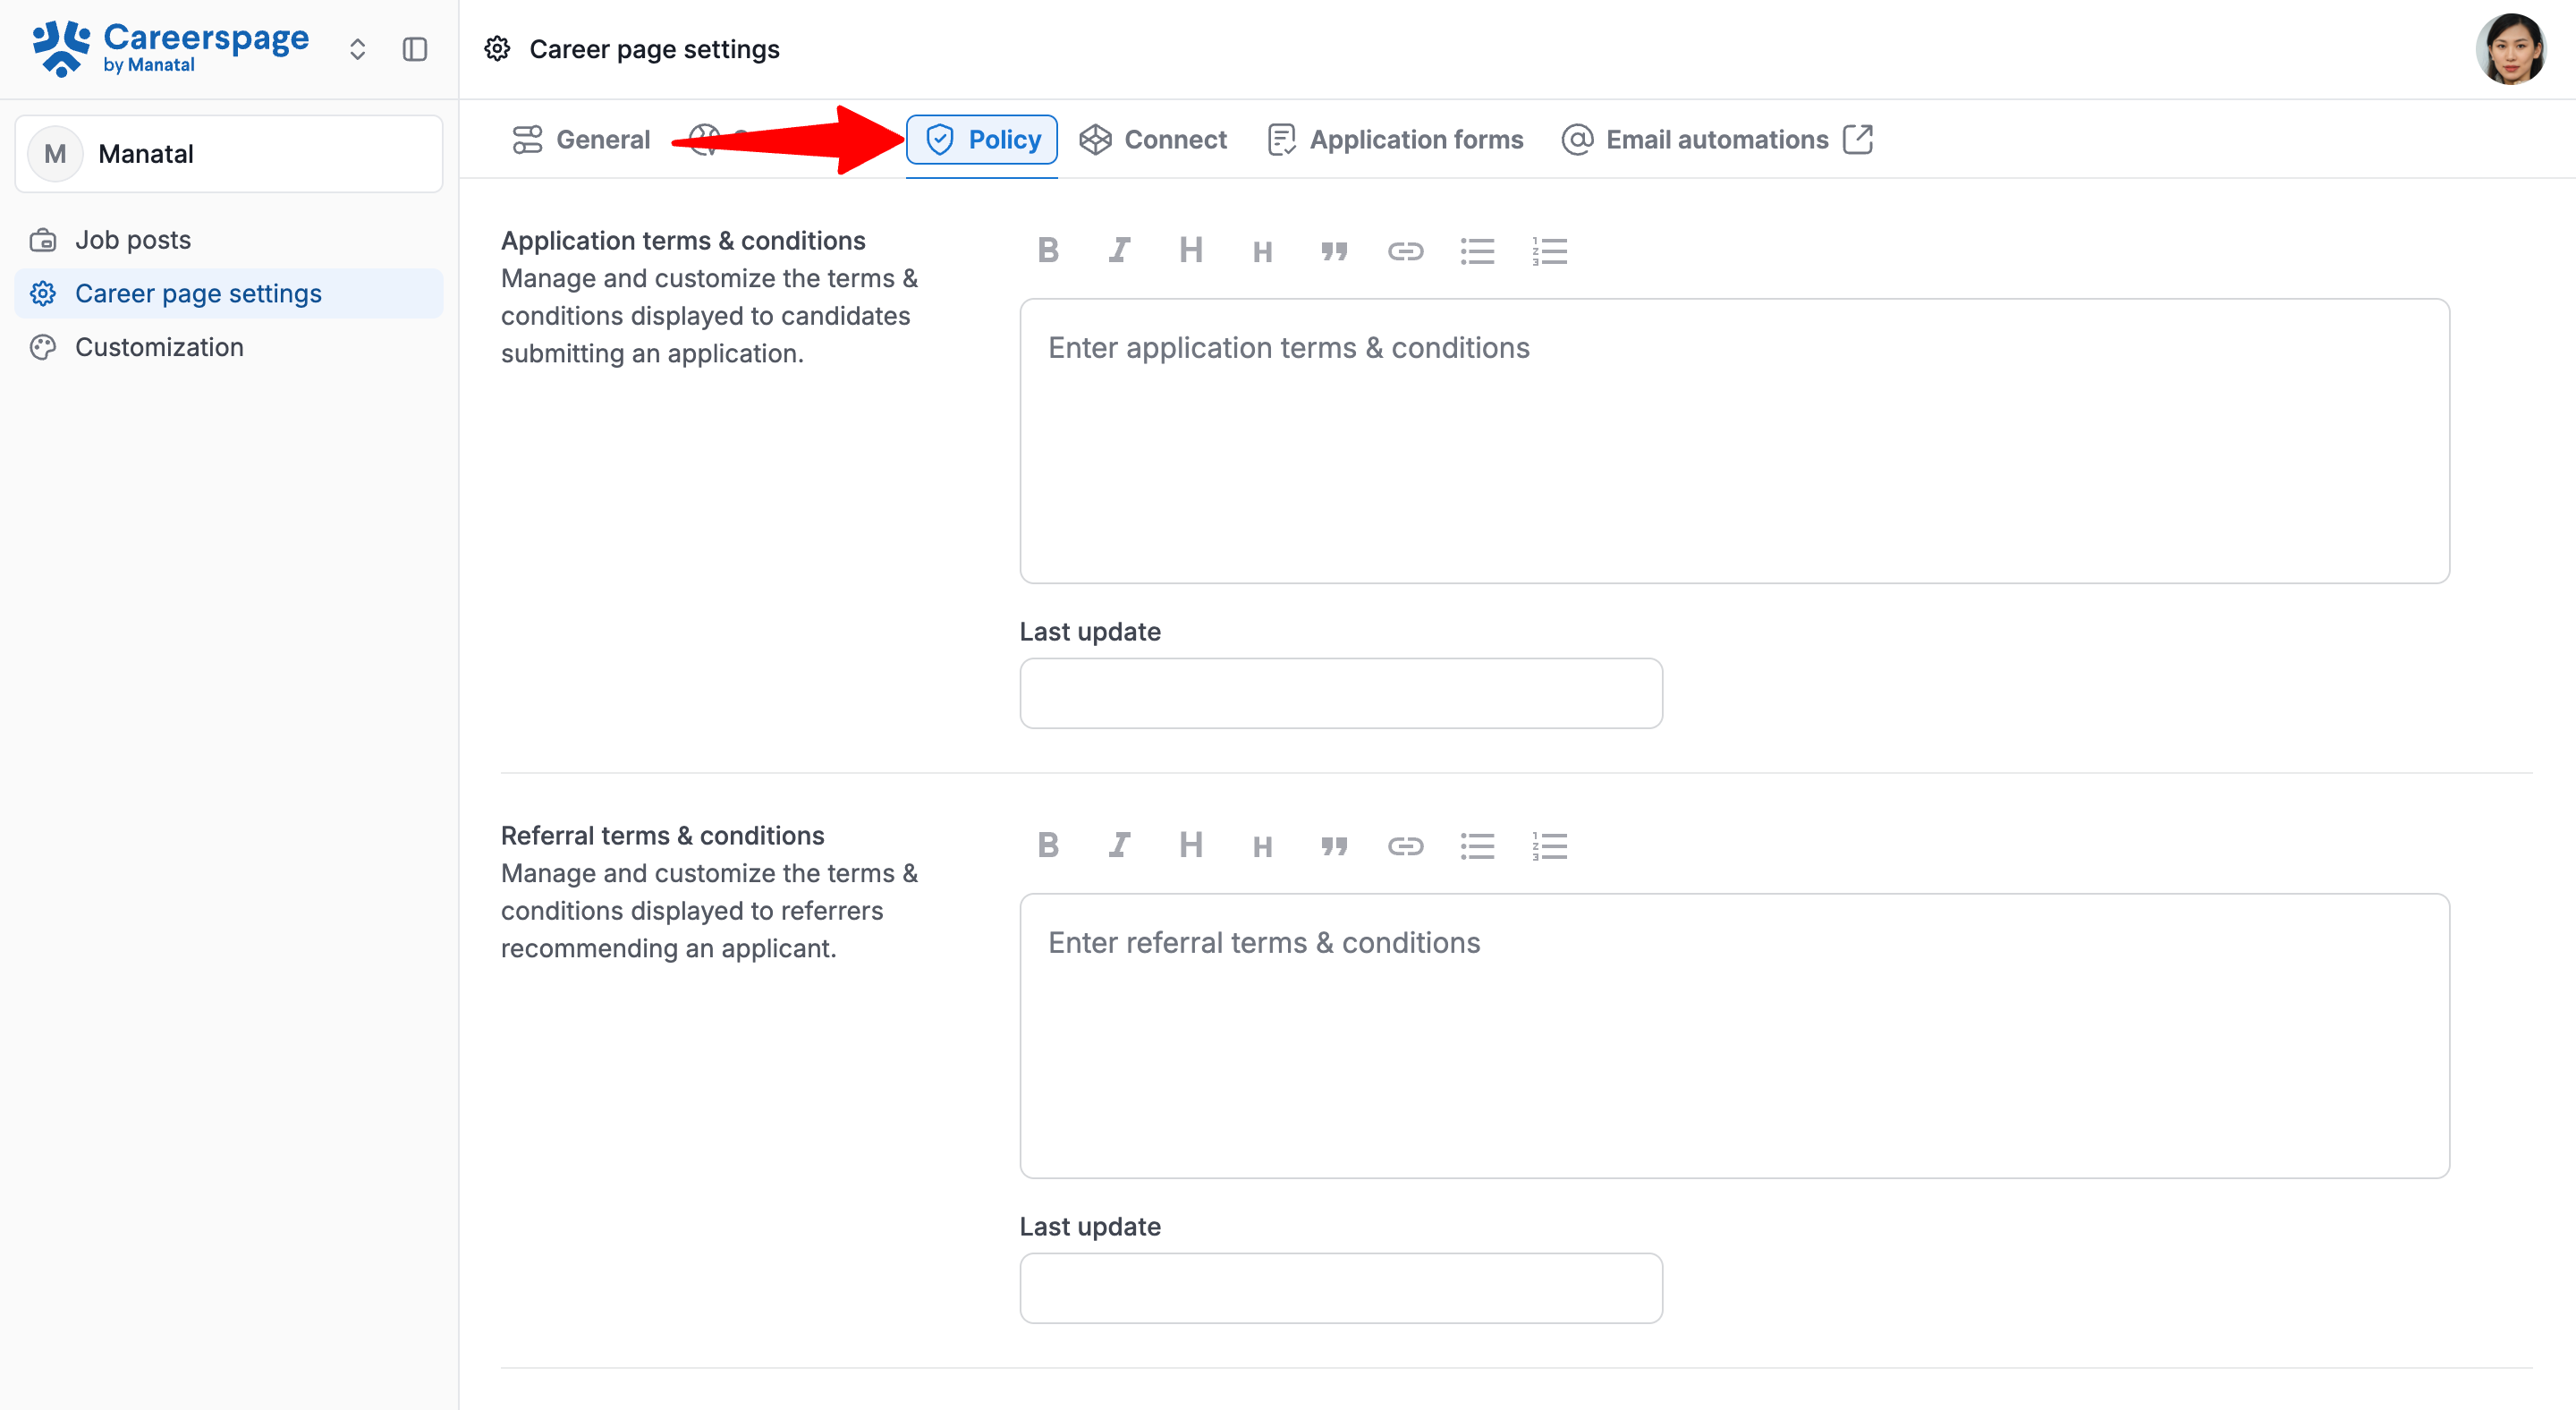
- Enter your application terms & conditions and last update date.
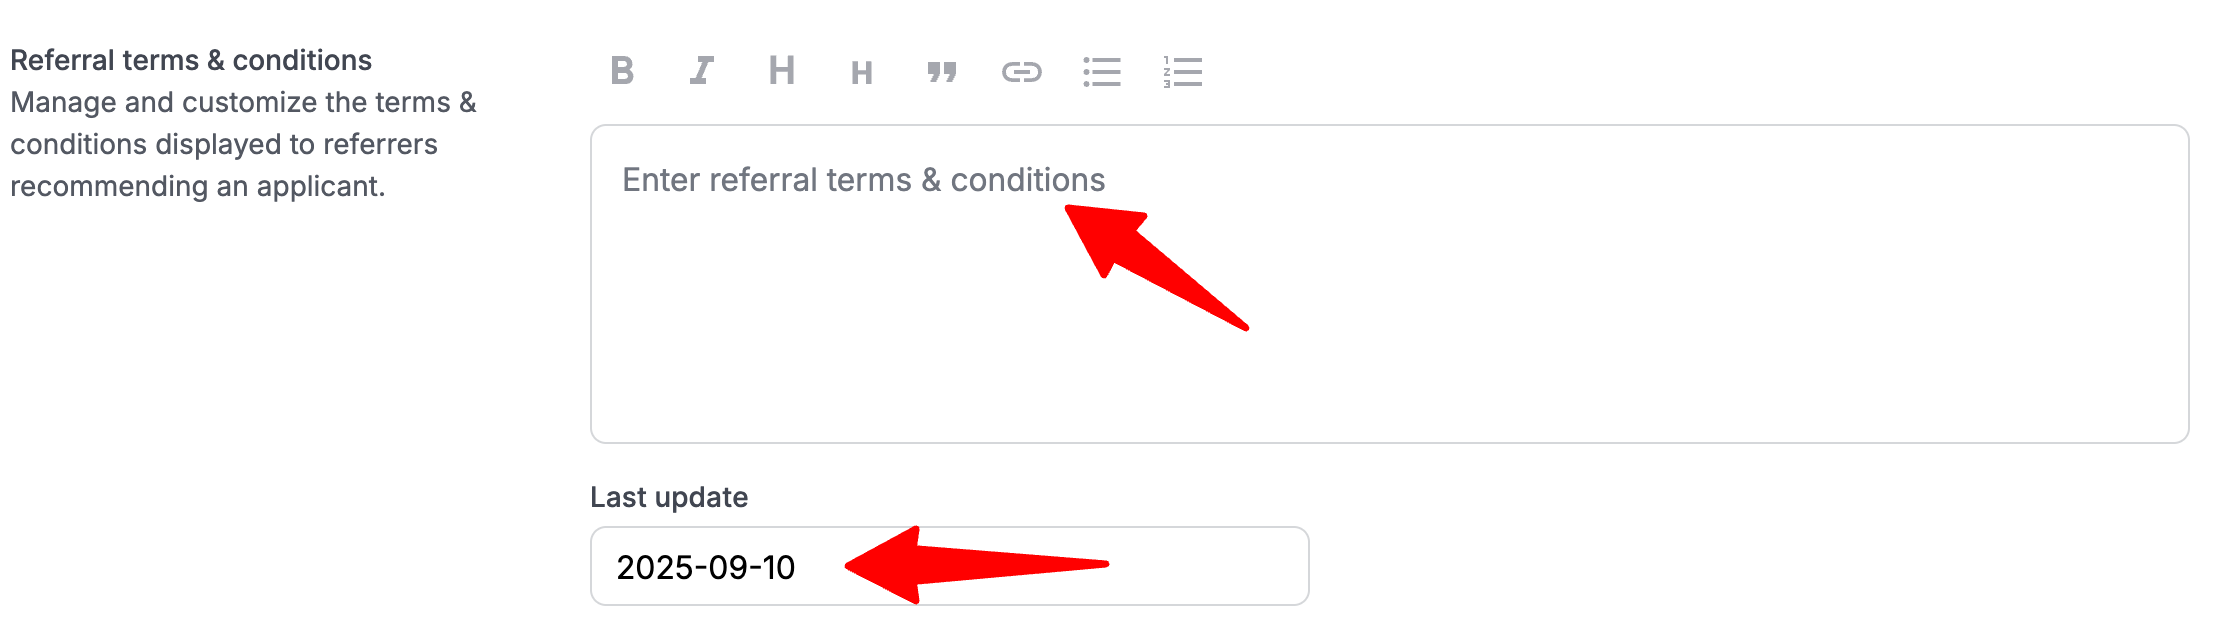
Customizing your Referral Terms & Conditions
Customize the terms & conditions displayed to referrers recommending an applicant.
- Head to the following page. Alternatively, click on "Career page settings" from your side menu and then open the "Policy" tab.
- Enter your referral terms & conditions and last update date.
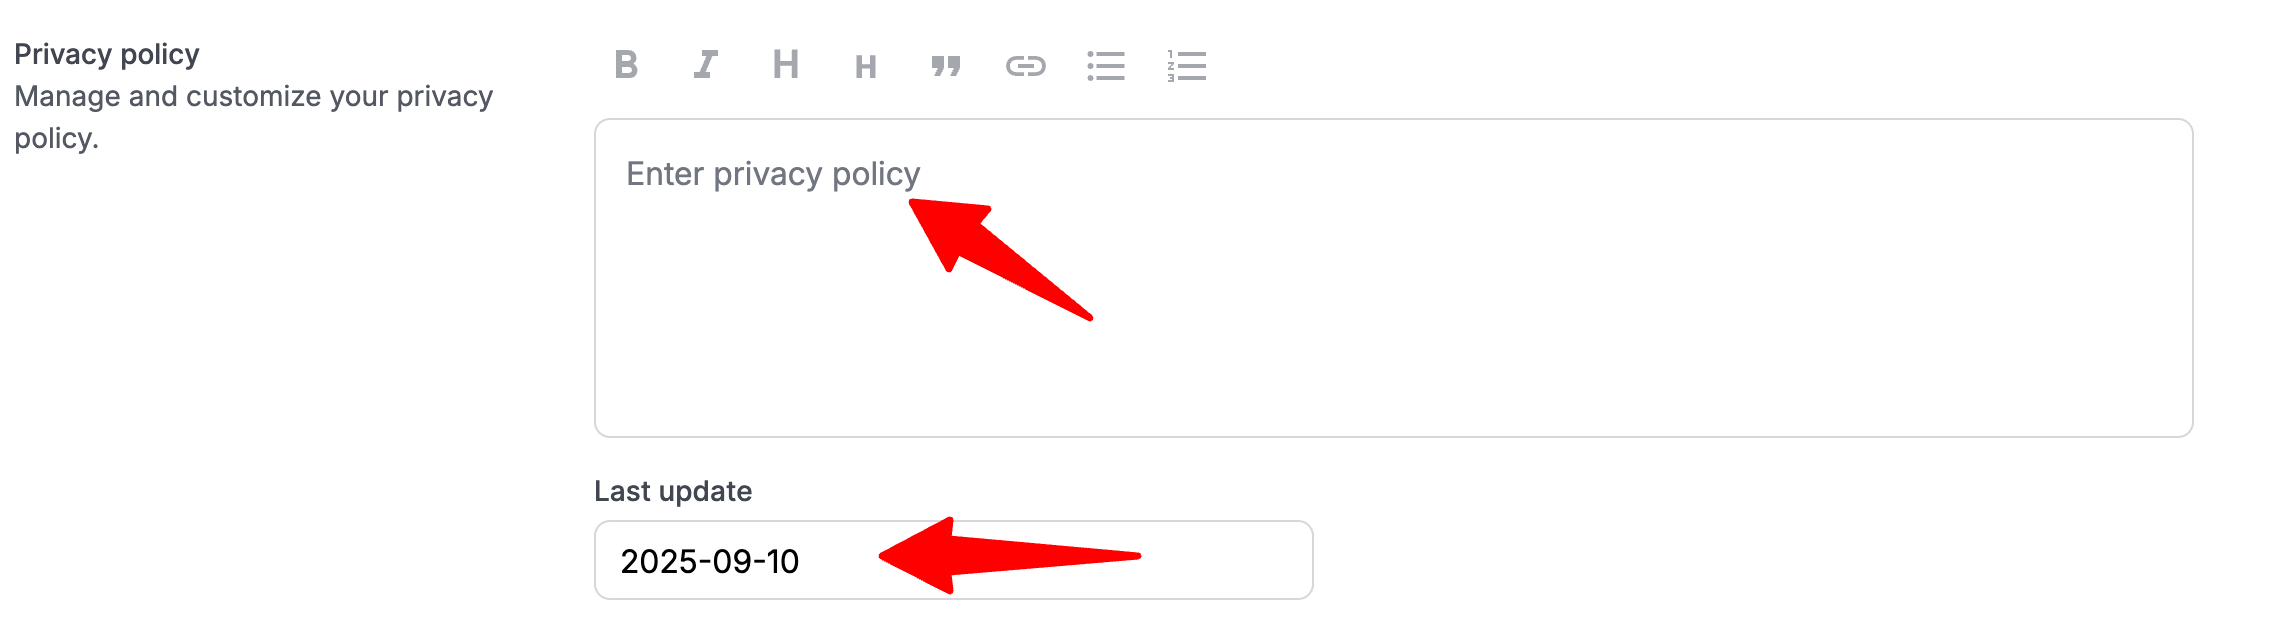
Privacy Policy
Manage and customize the privacy policy displayed on your career page.
- Head to the following page. Alternatively, click on "Career page settings" from your side menu and then open the "Policy" tab.
- Enter your privacy policy and last update date.
FAQ
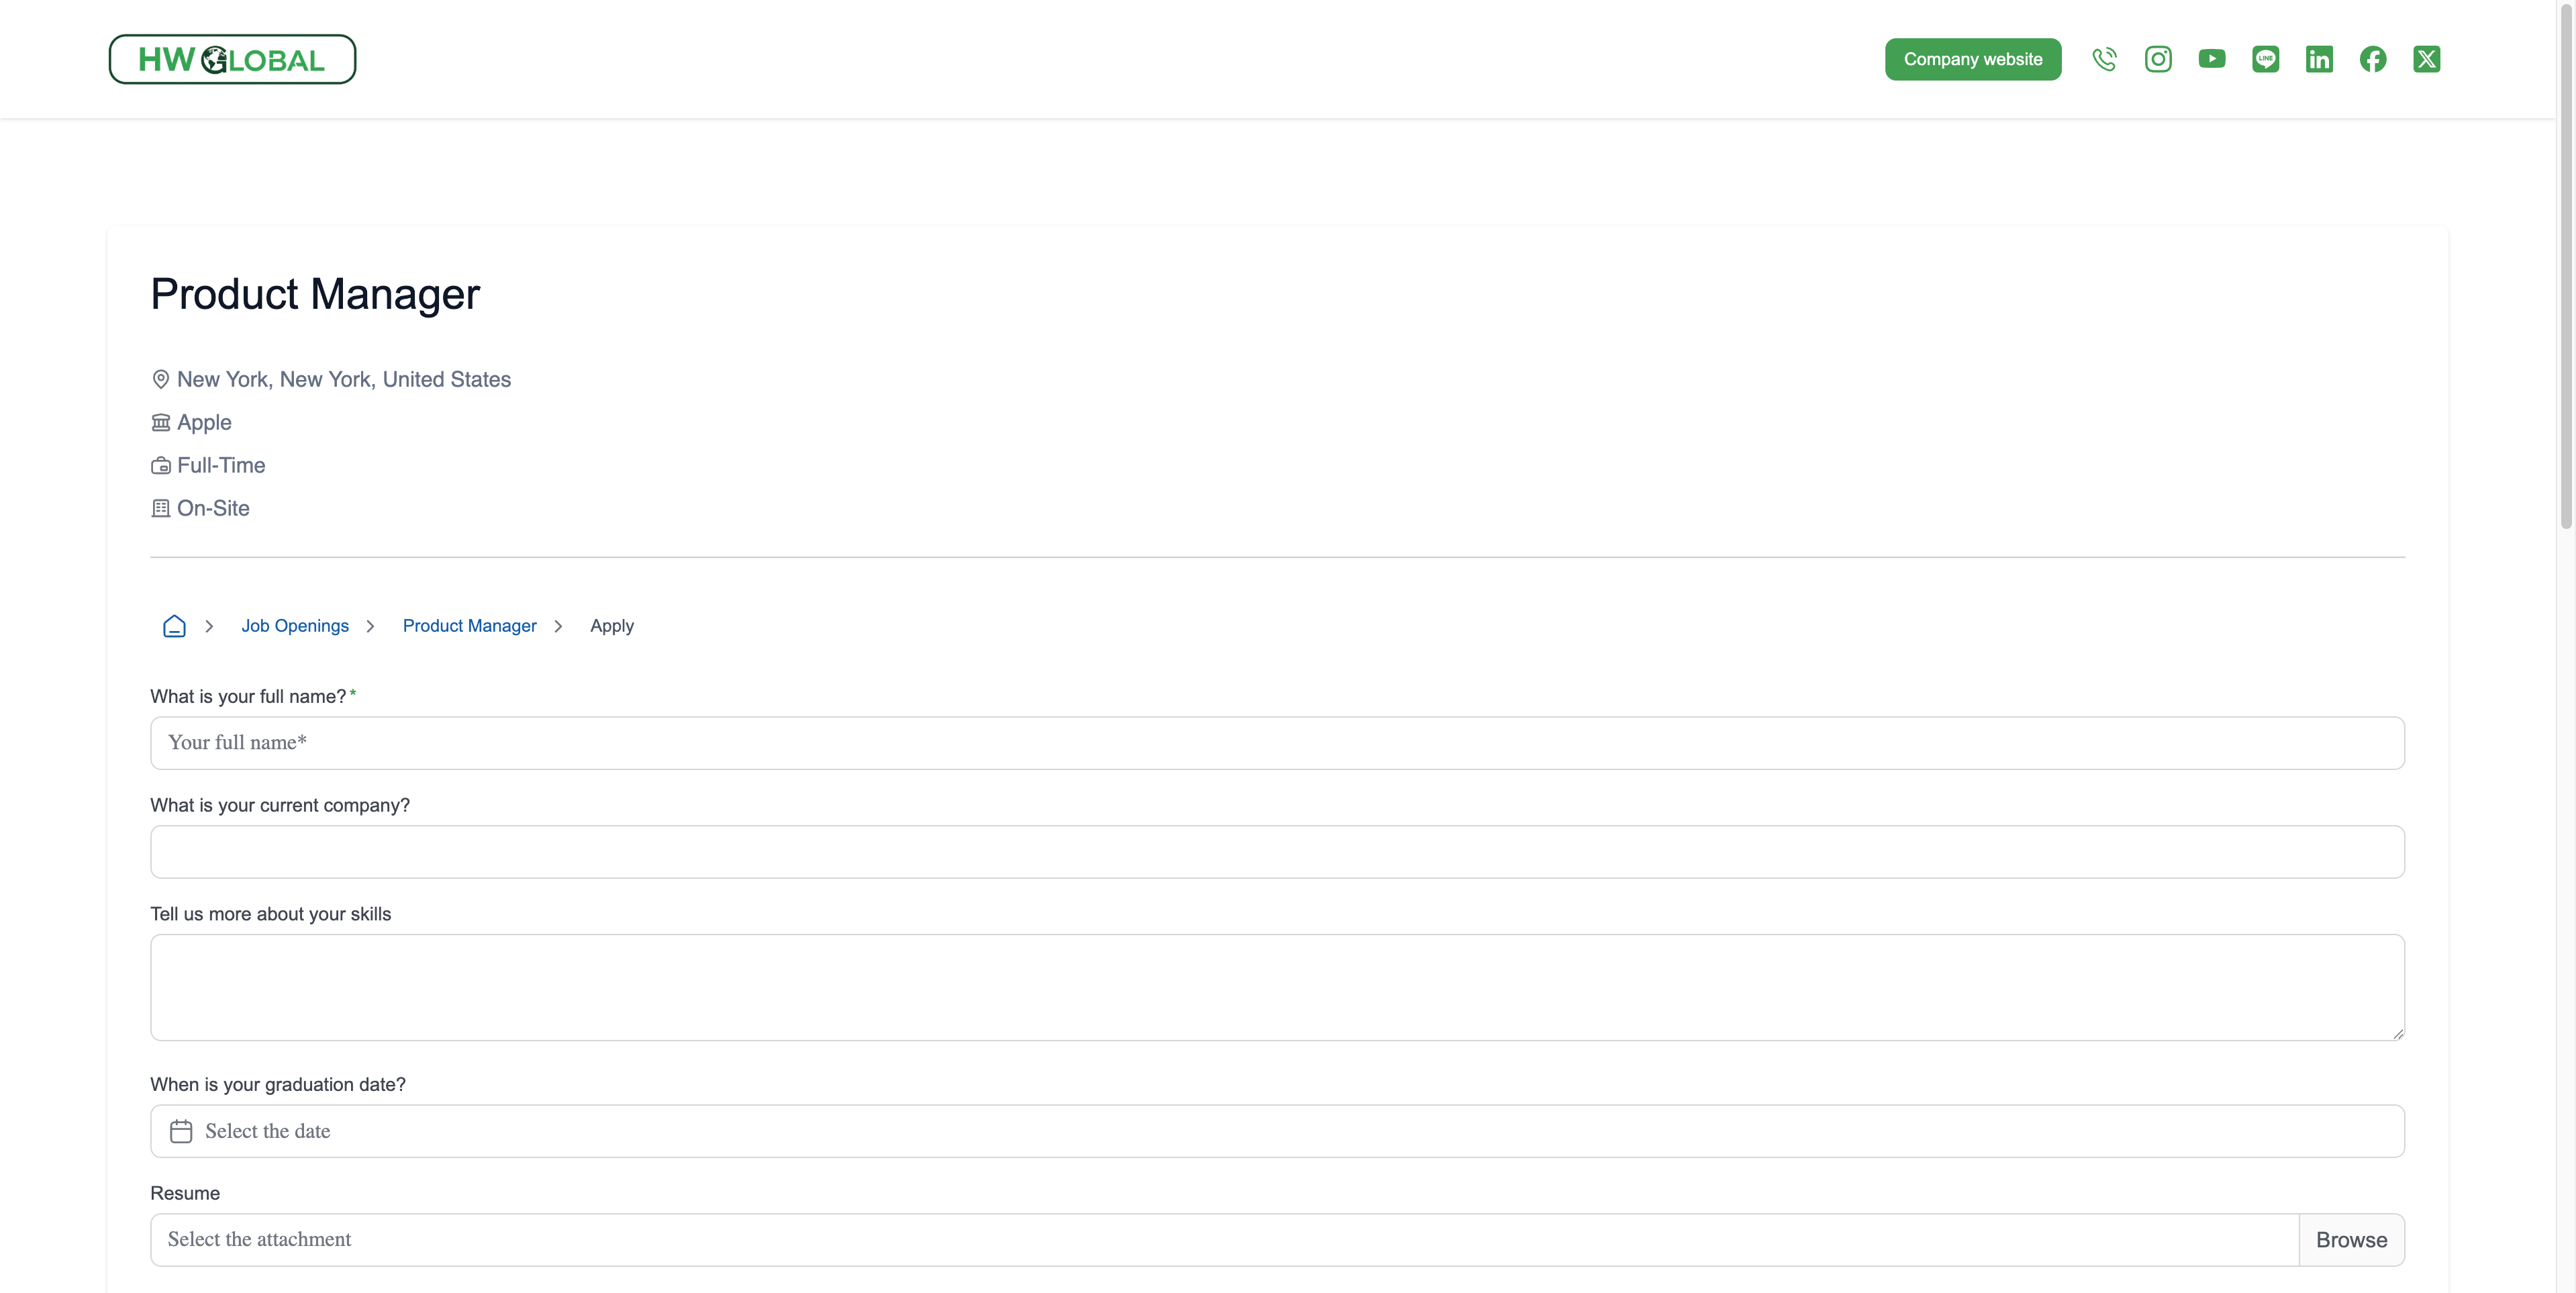
Q1. Will the applicants applying via the career page be created as candidates in Manatal?
- Yes, they will be automatically created as candidates in your Manatal account.
Q2. Can we have multiple career pages with one Manatal Account ?
- Currently, Manatal supports only one career page per account. Therefore, it's not possible to link multiple career pages to one account. However, you can integrate multiple career pages with Manatal using the Manatal Career Page API. Please find the documentation here.