In this guide, we will show you how to manage departments and jobs on Manatal. By the end of this guide, you'll know how to create and manage departments and jobs effectively.
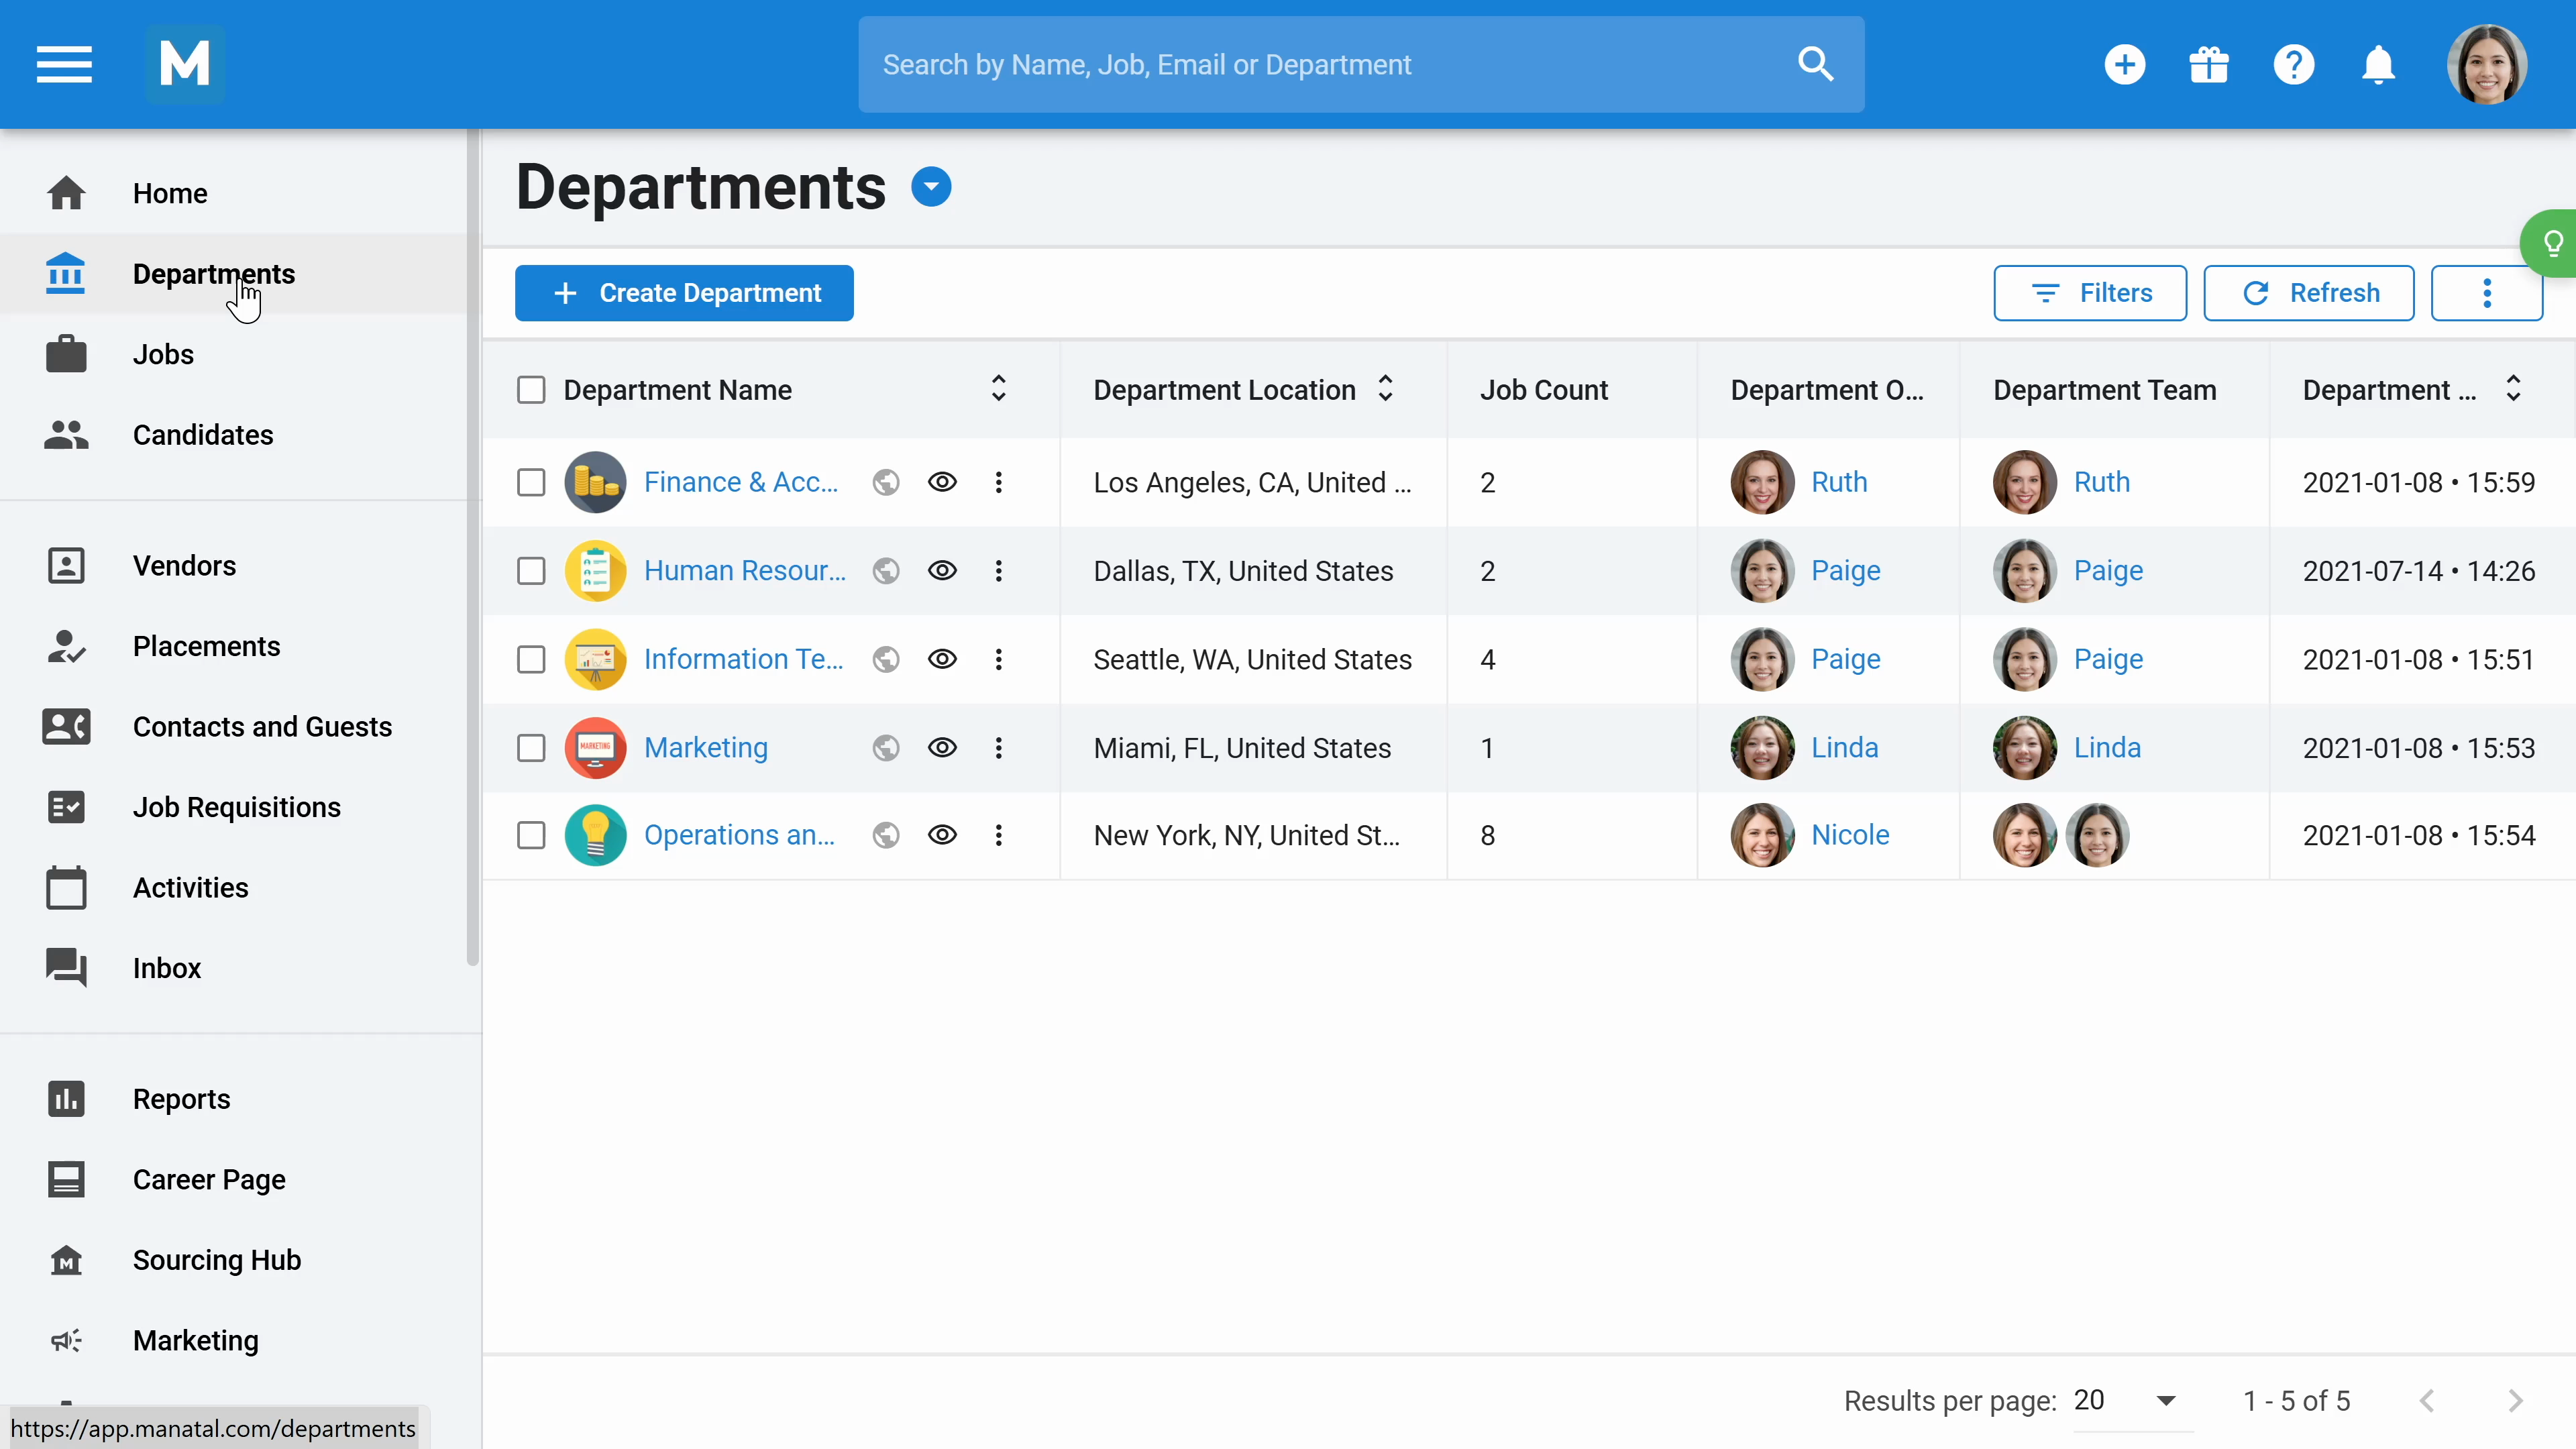
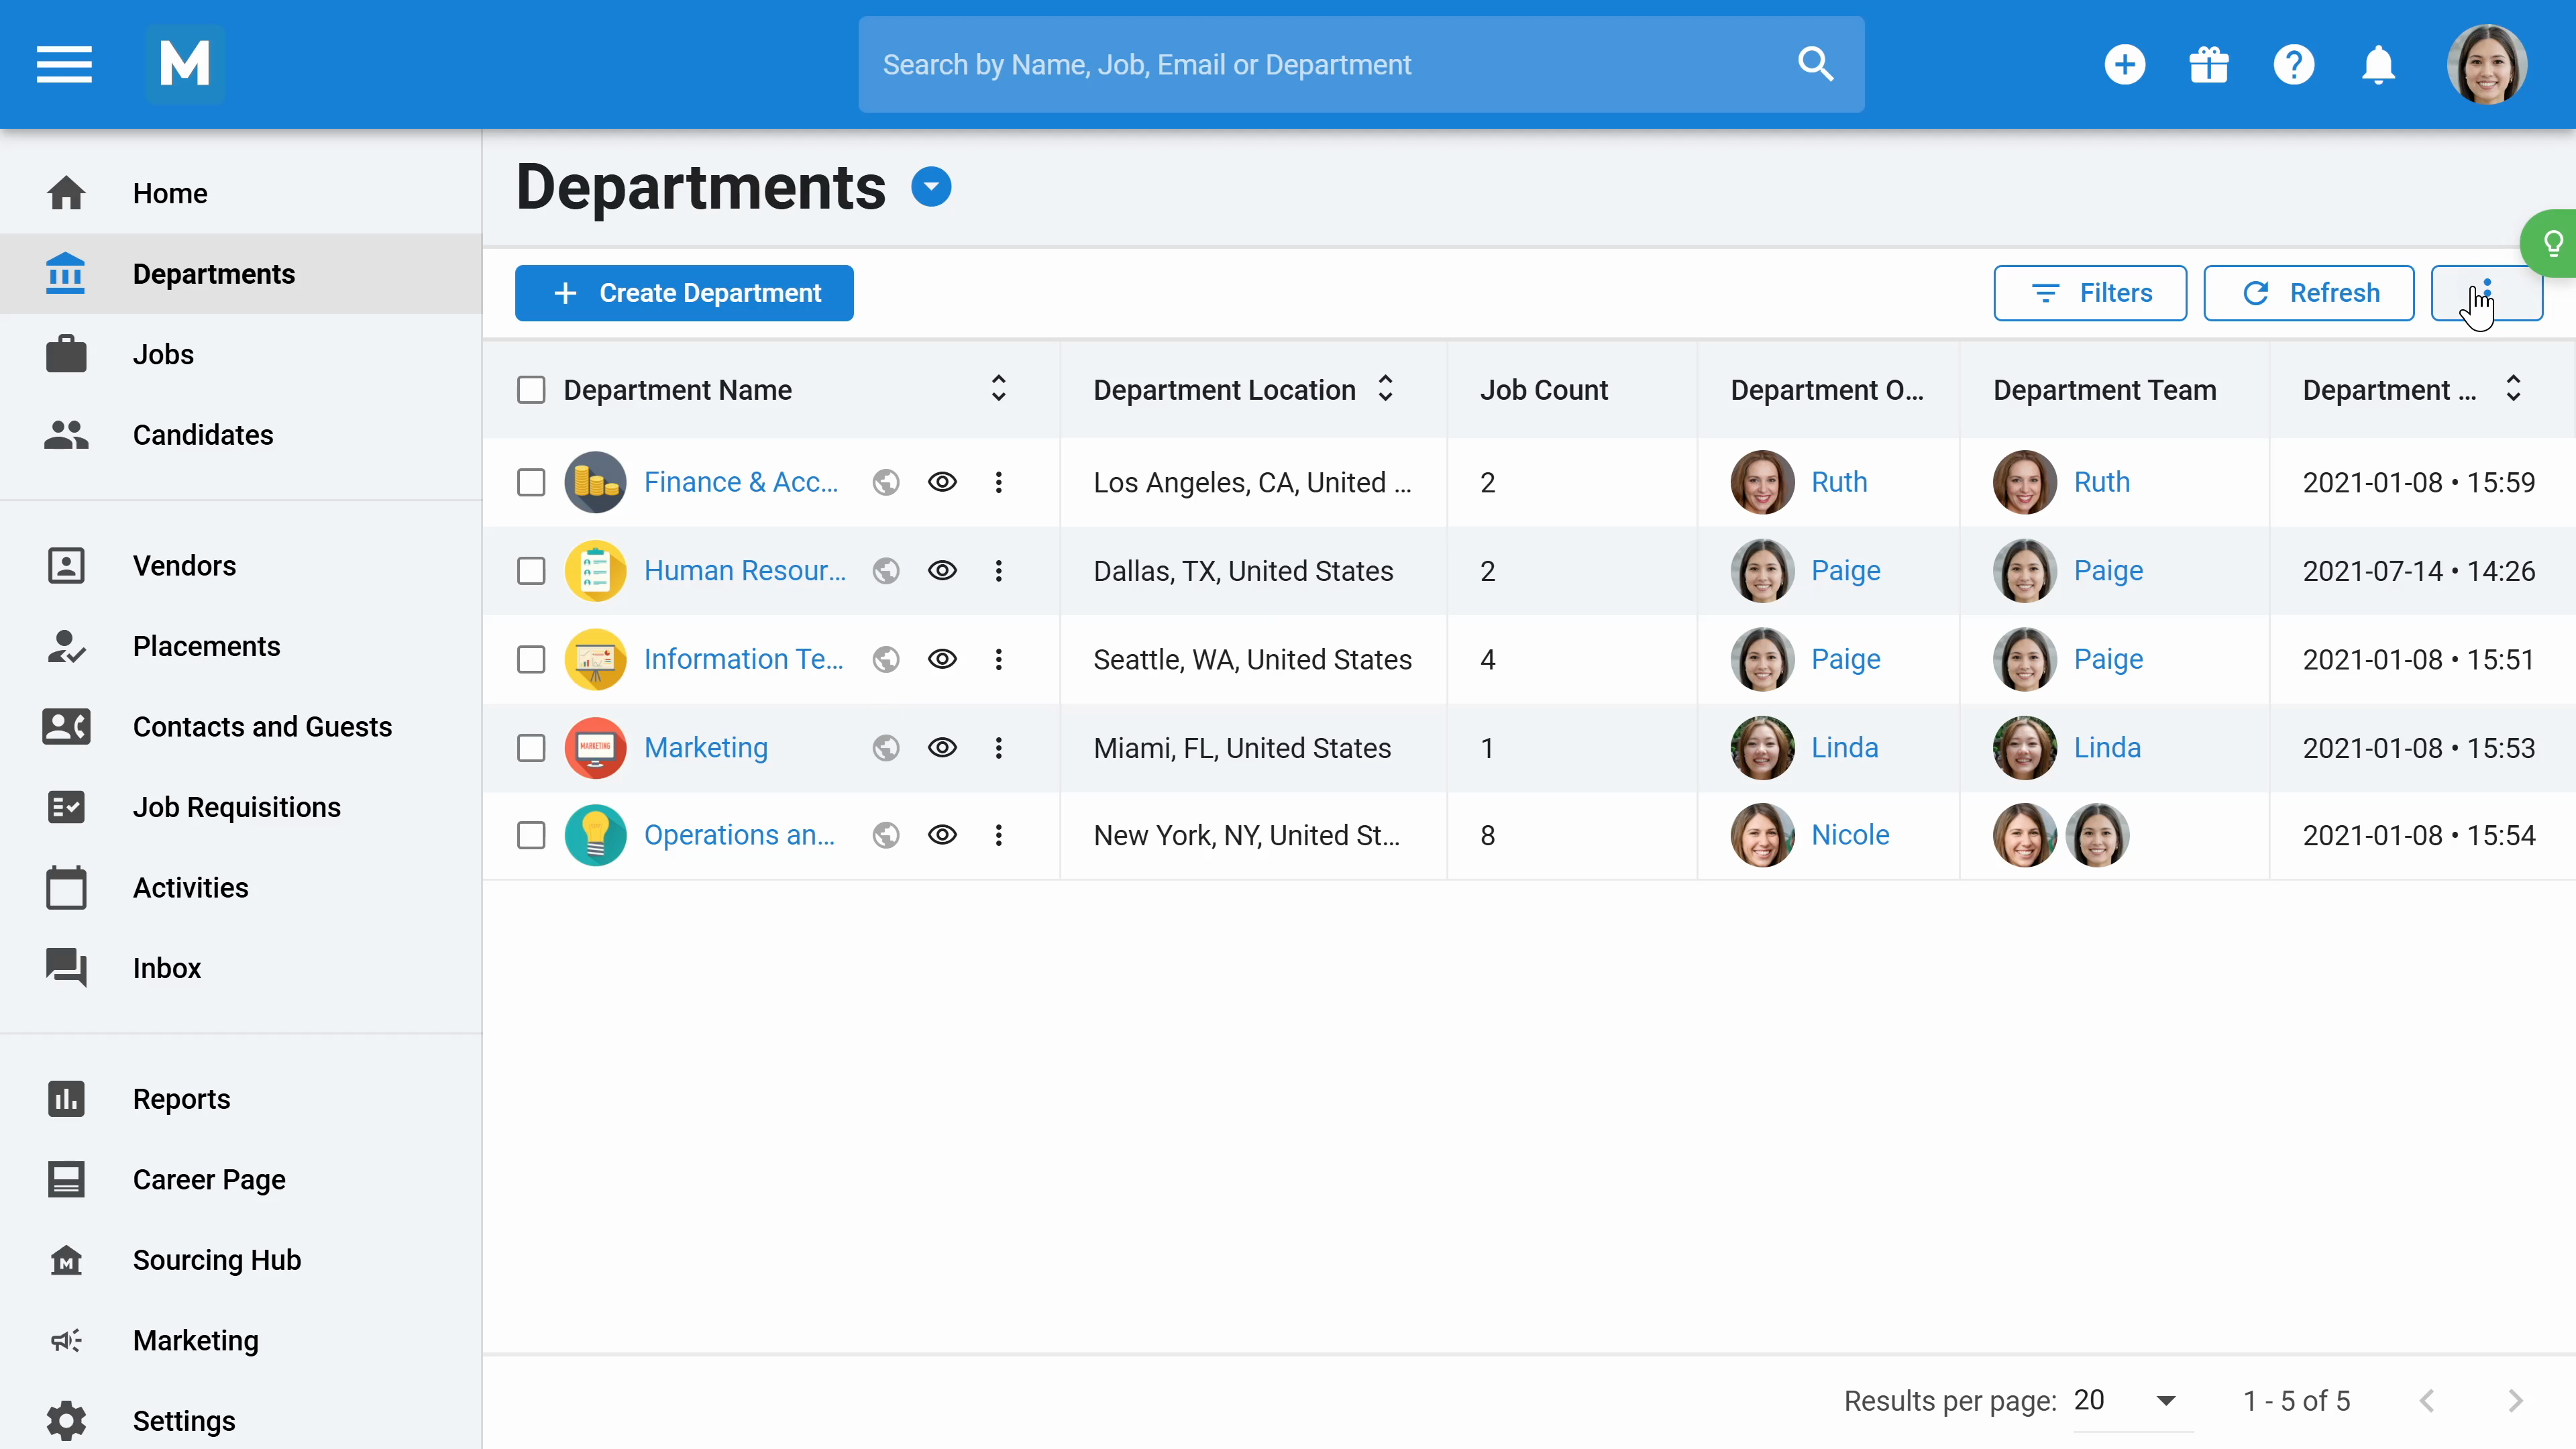
Step 1: Begin by navigating to the Departments section. Here, you'll see a list of all the departments you've created.
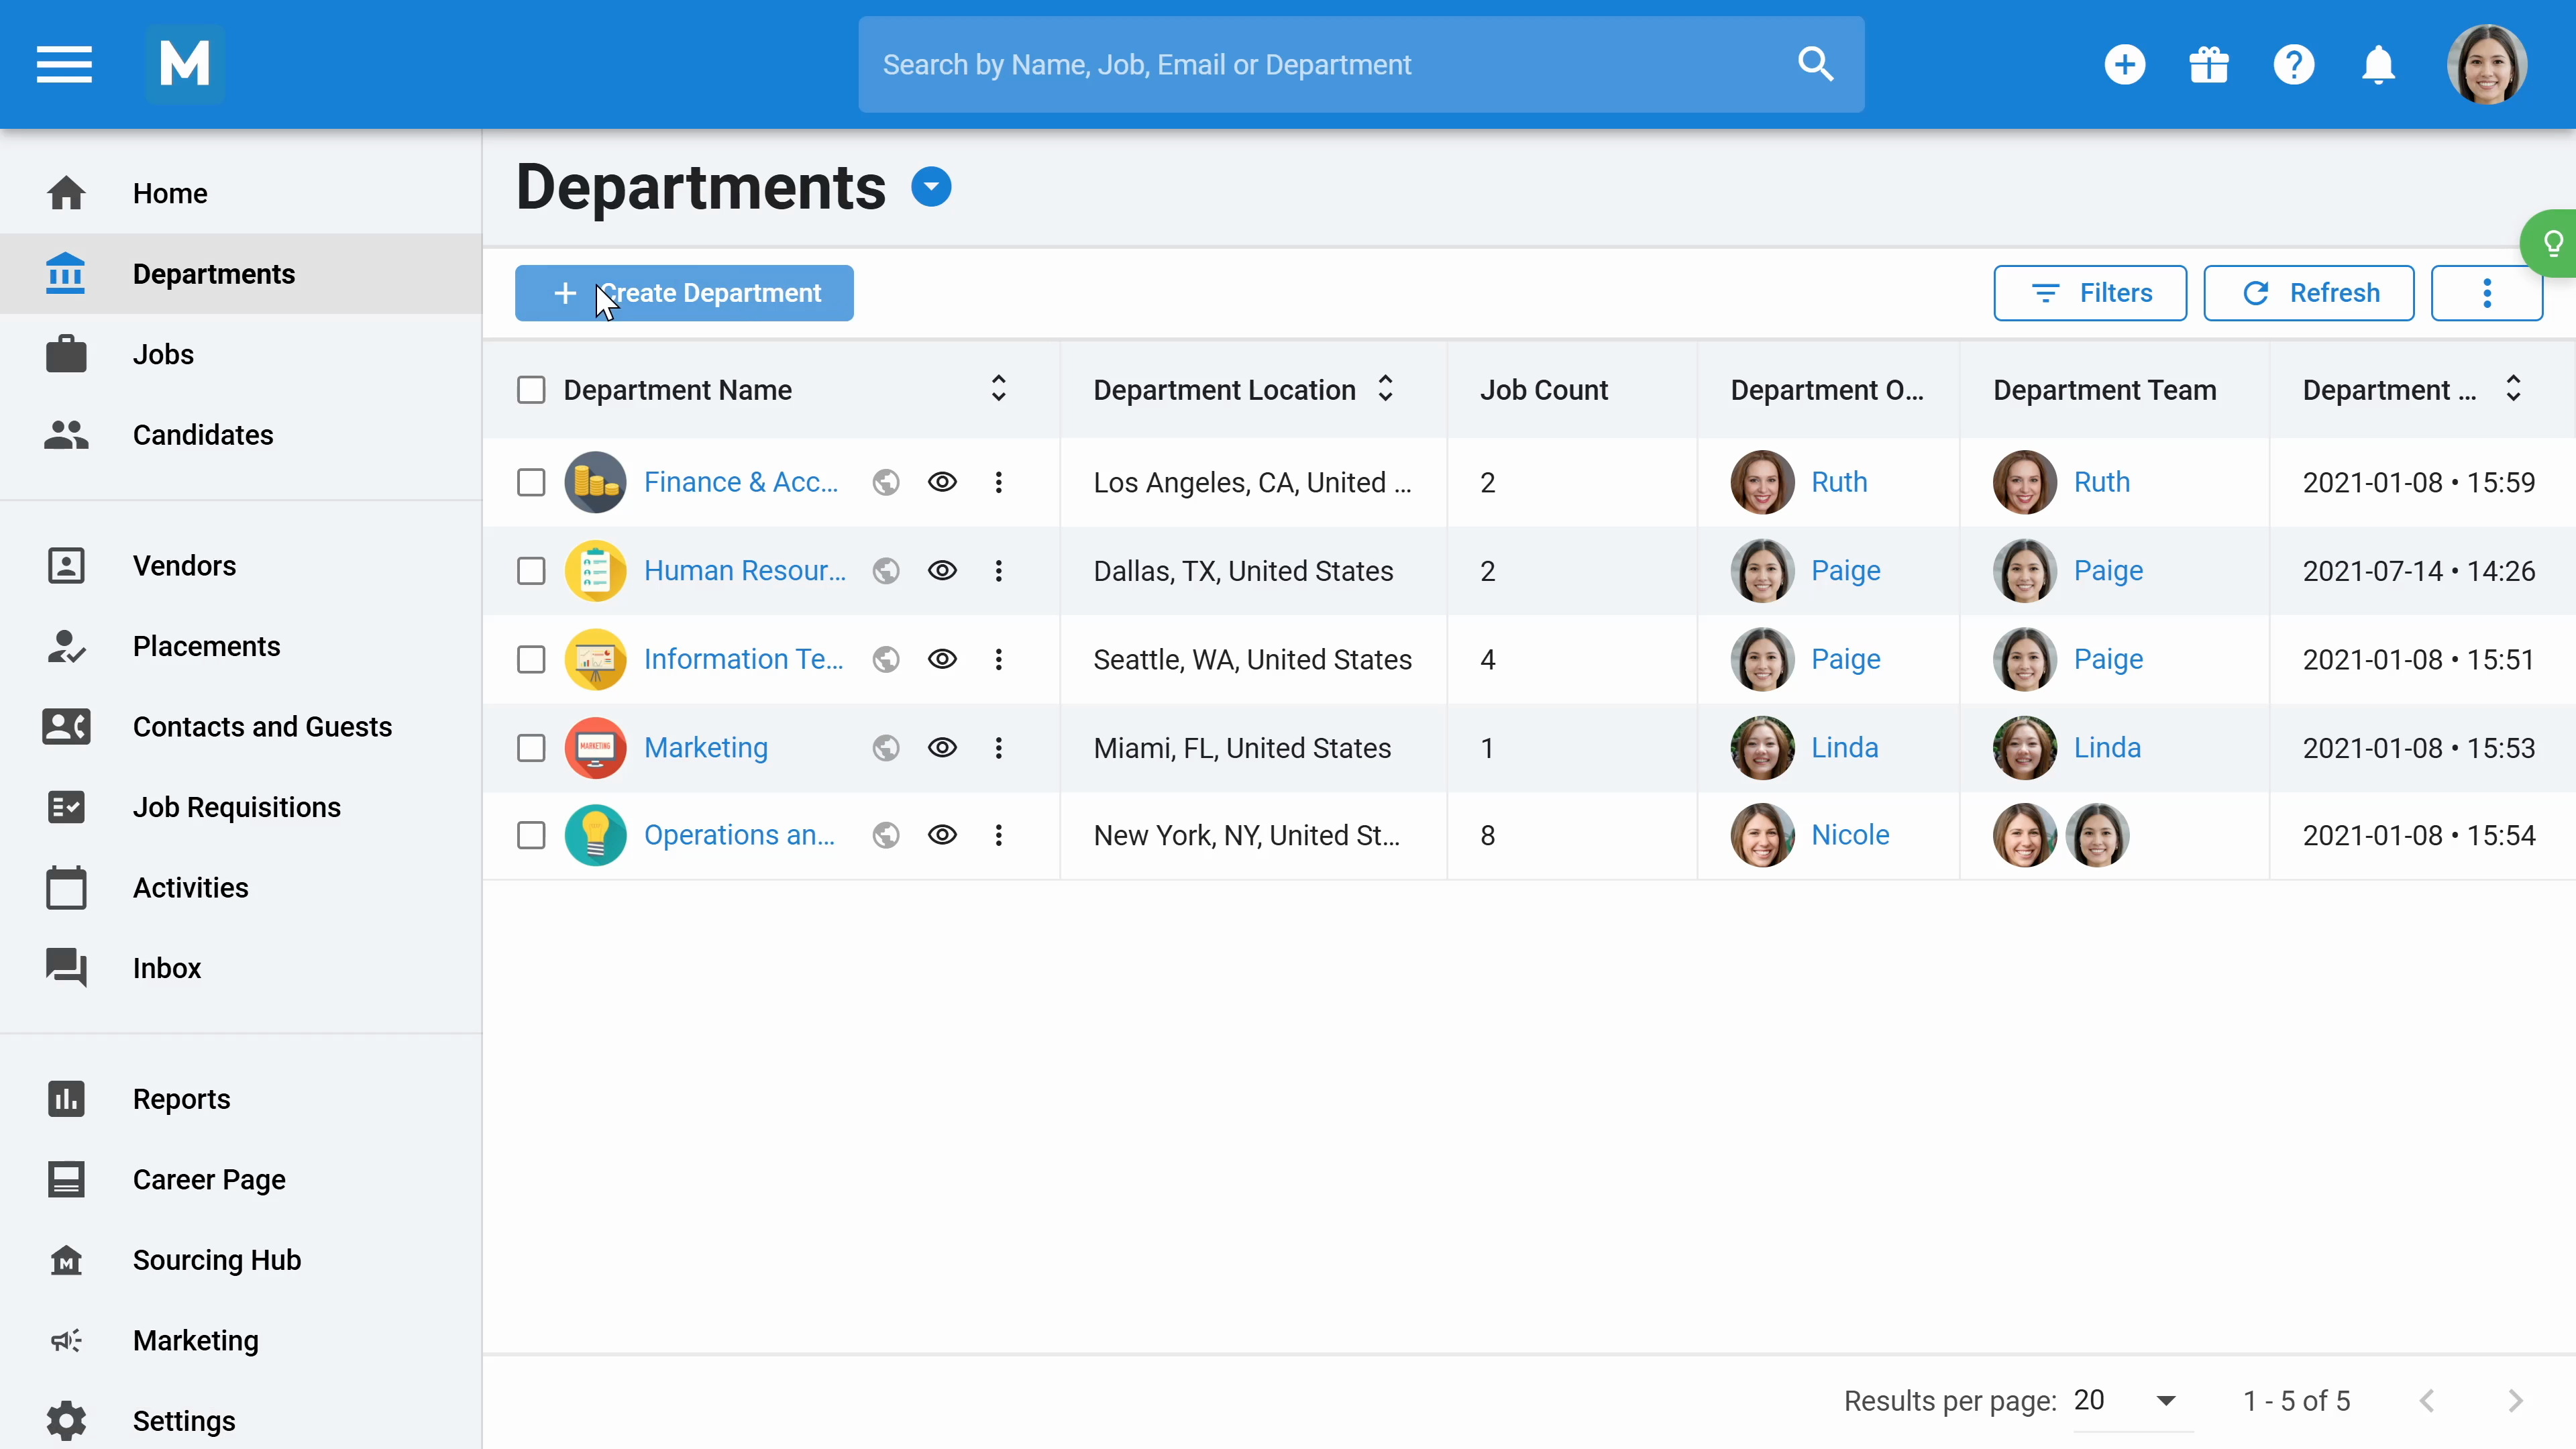
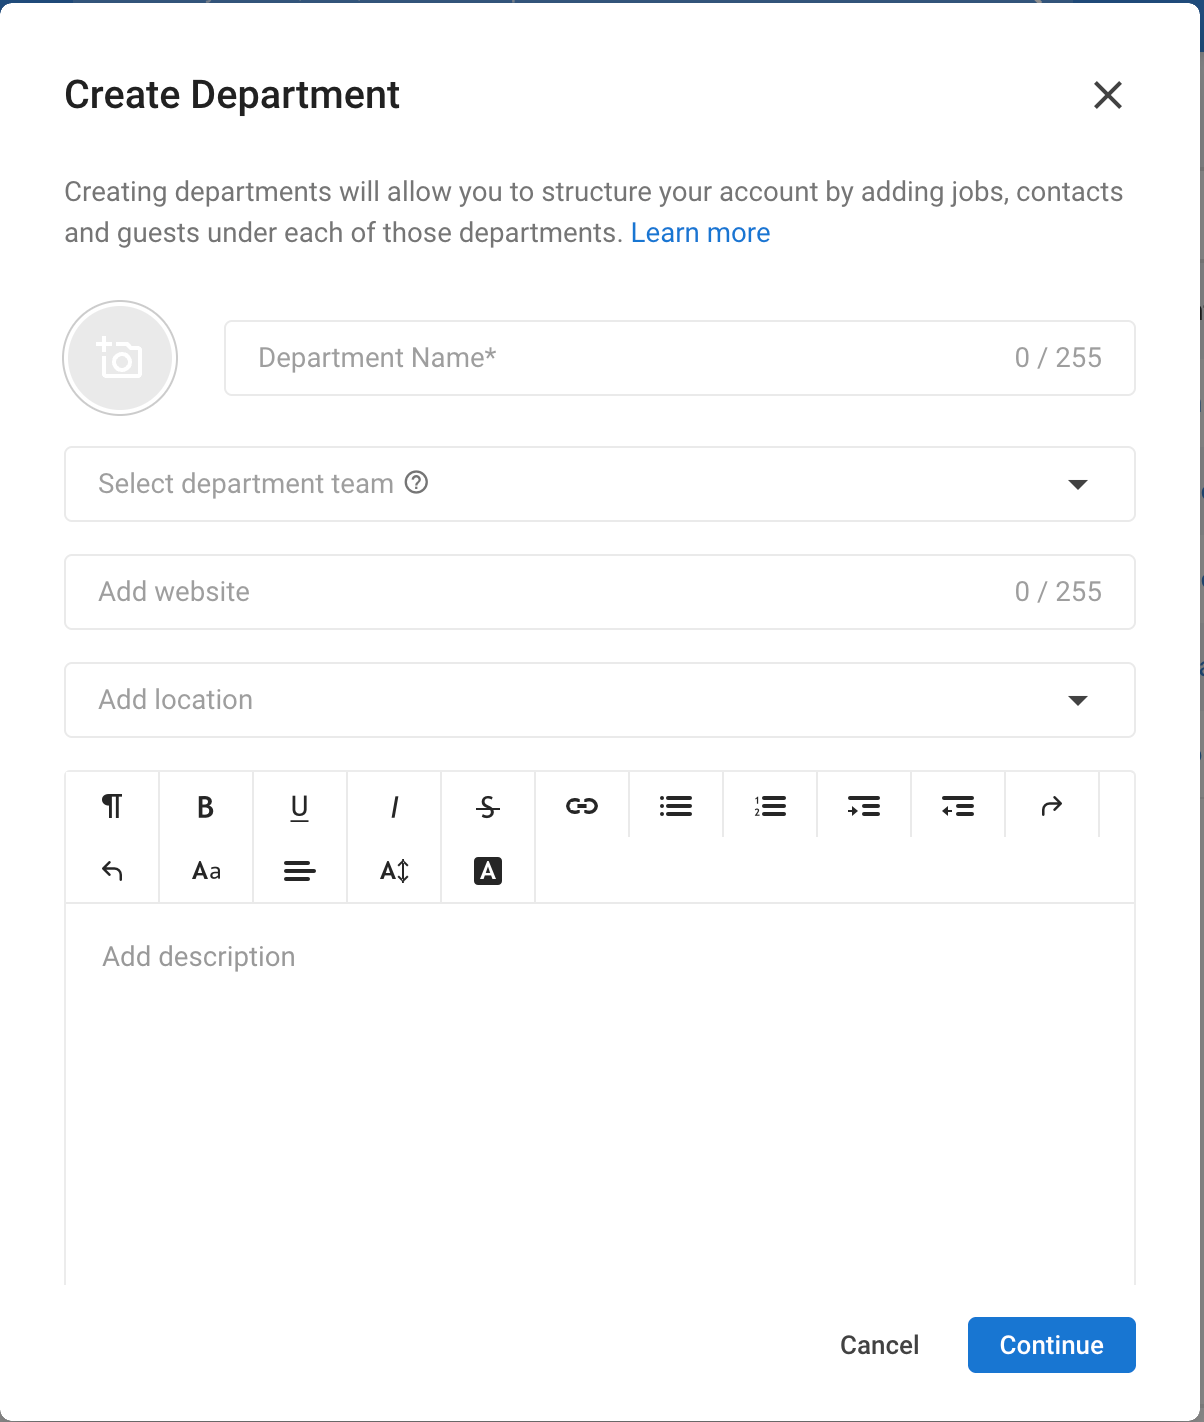
Step 2: To create a new department, click the Create Department button and enter the department's name, which is the only mandatory field.
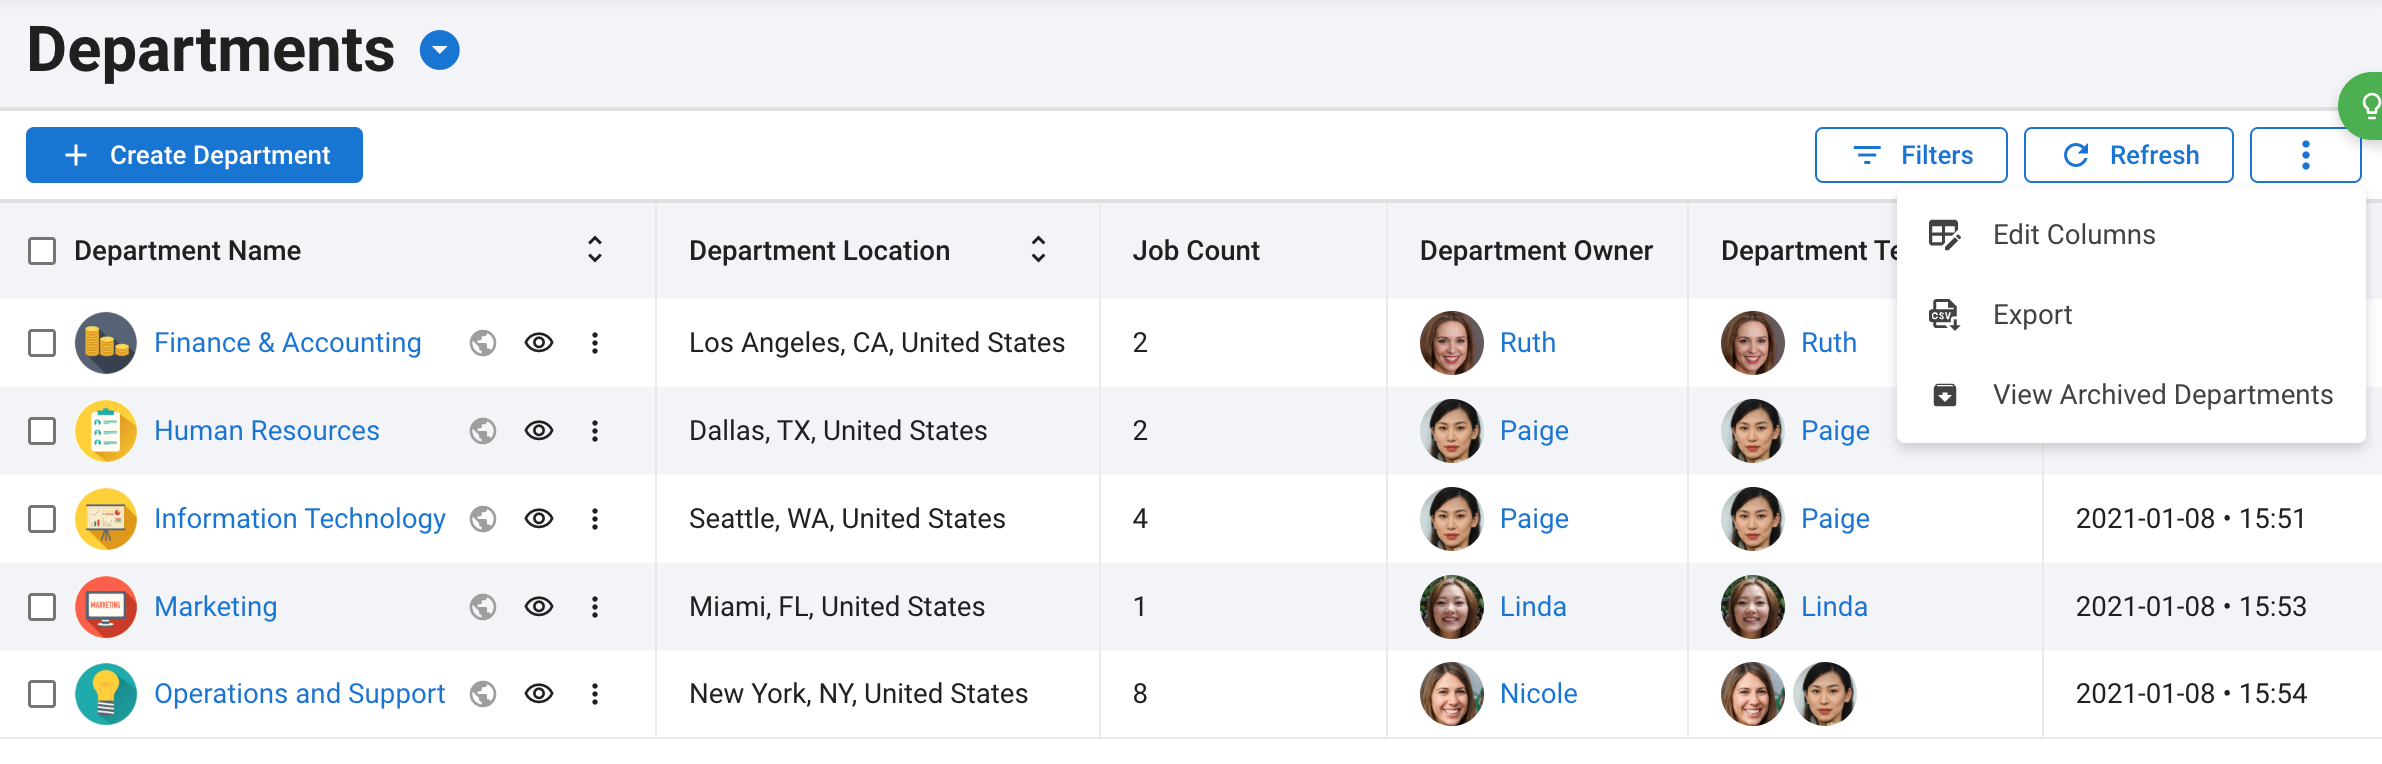
Step 3: Modify the department's dashboard by clicking the three dots and selecting Edit Columns. Here, you're free to select, reorder, and create new columns.
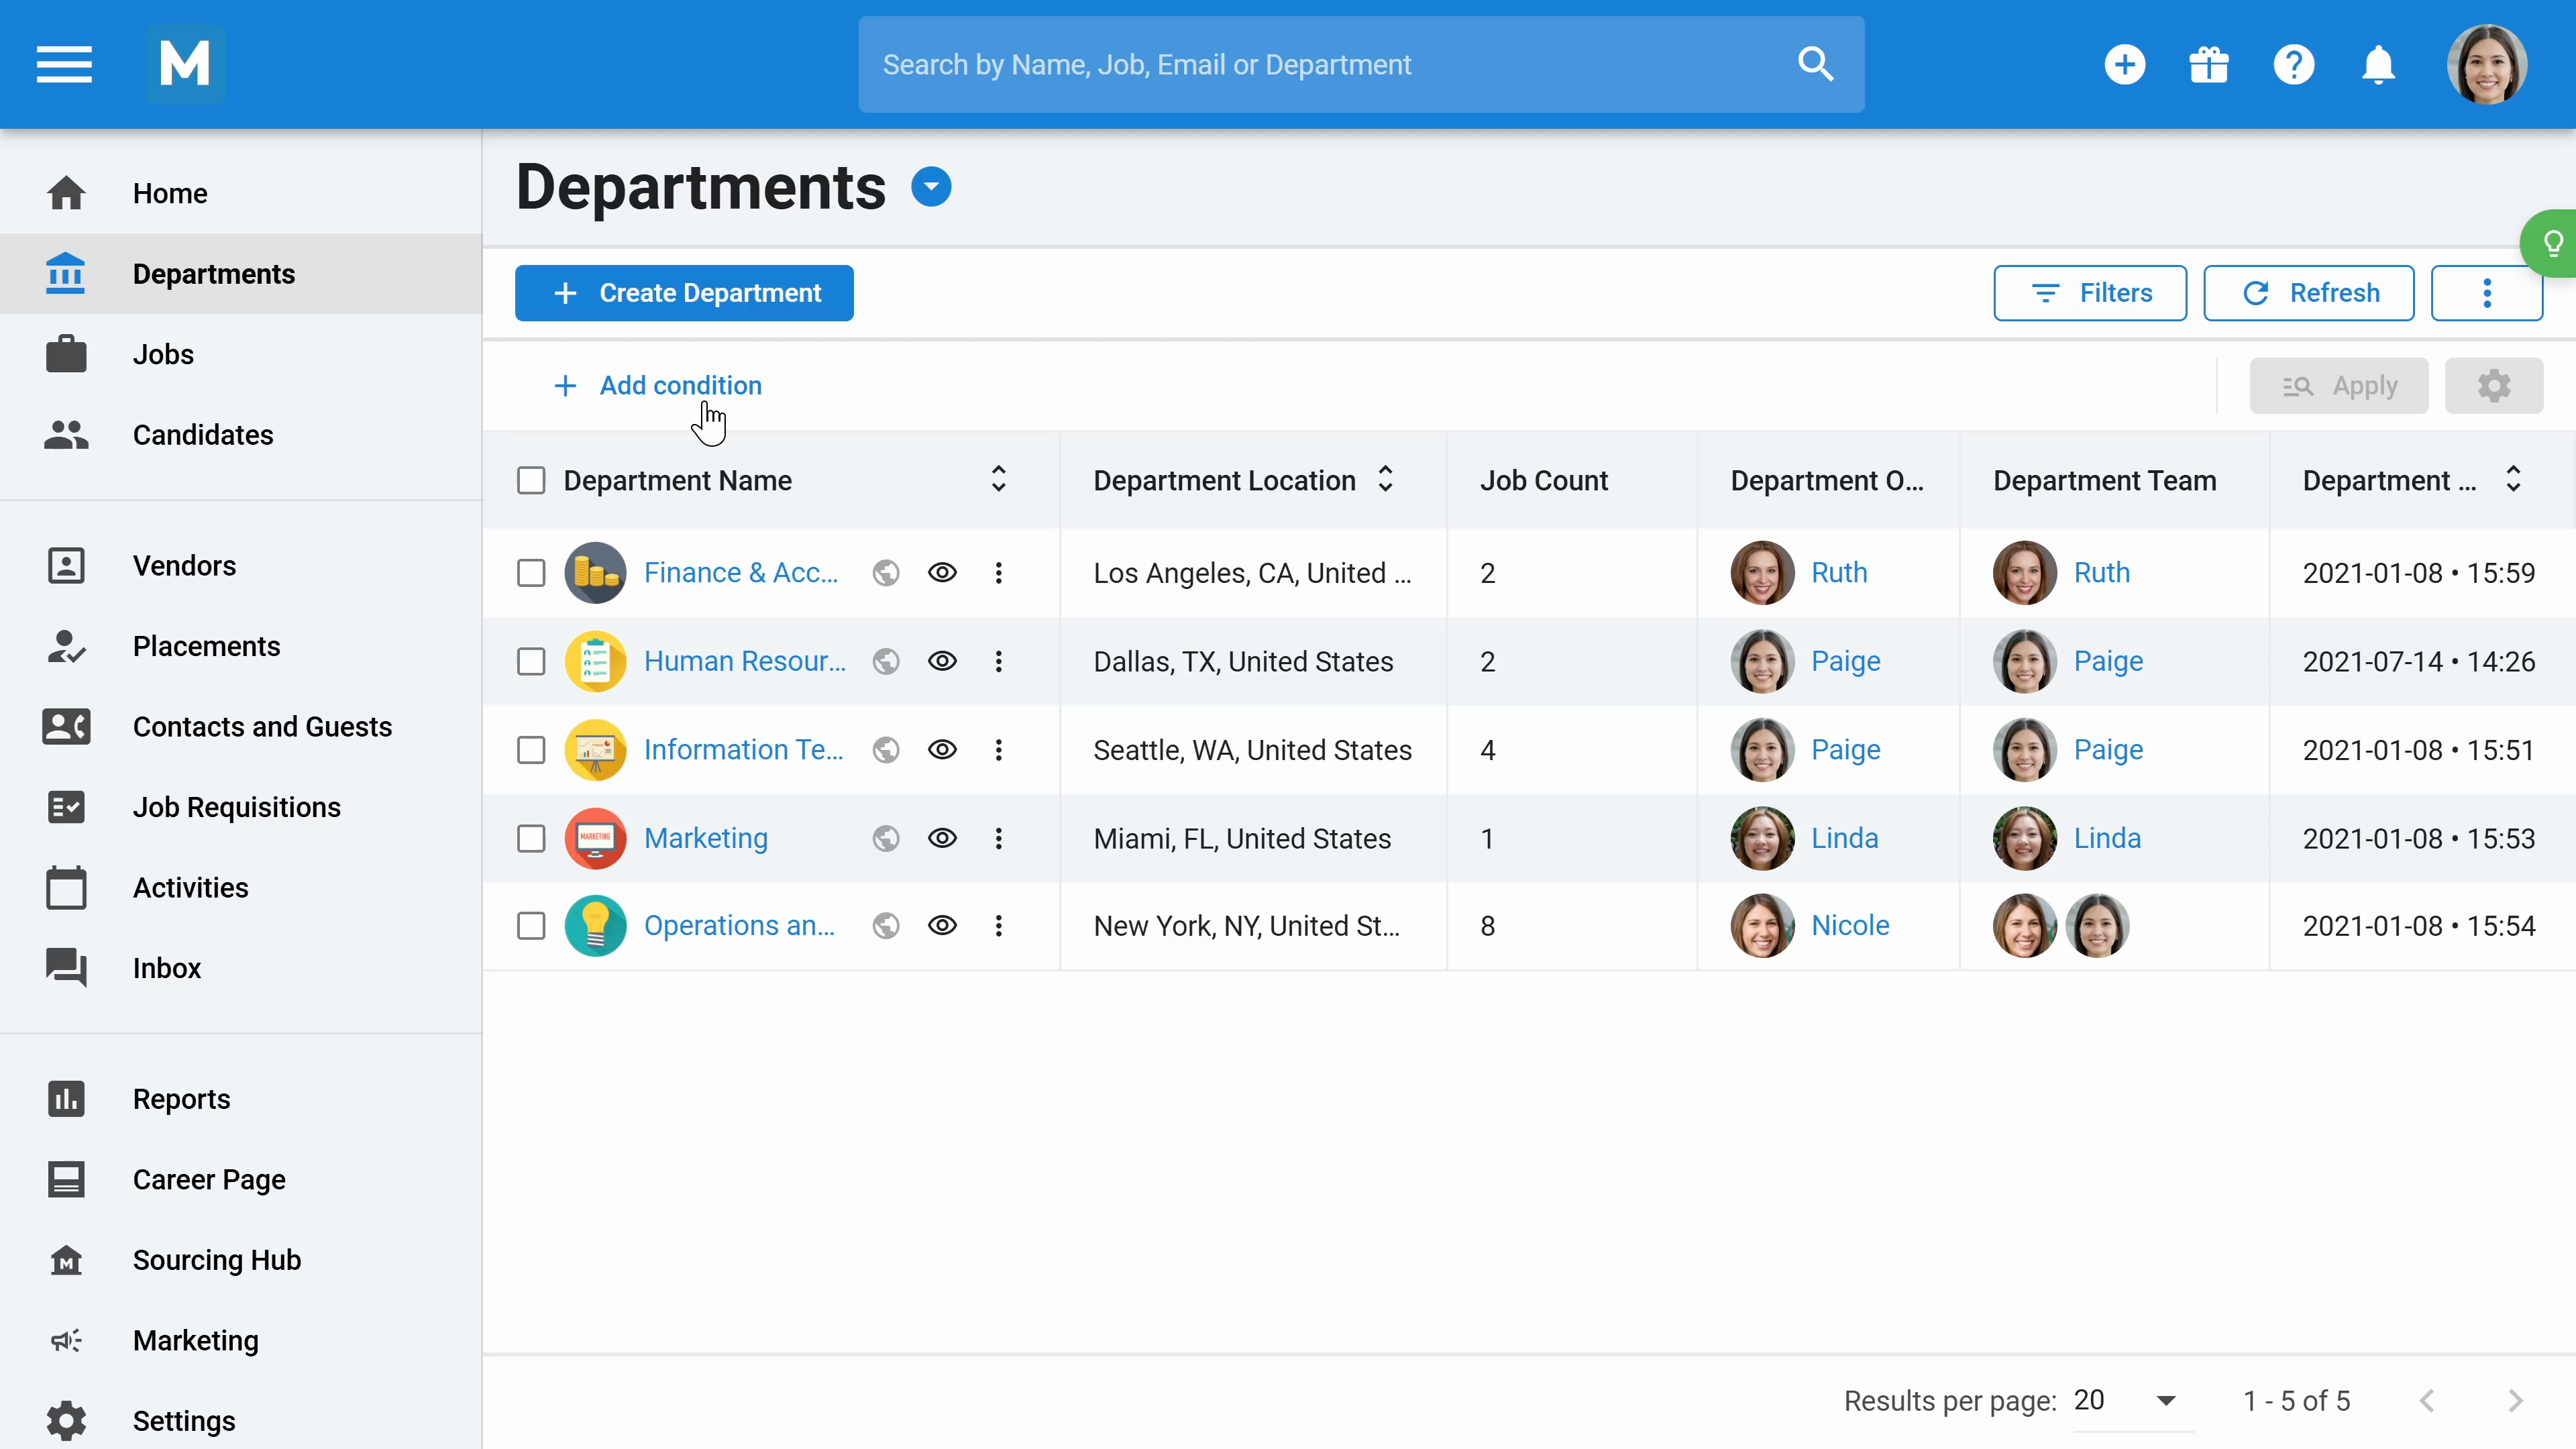
Step 4: Filter the dashboard by various criteria by clicking Filters button and Add Condition.
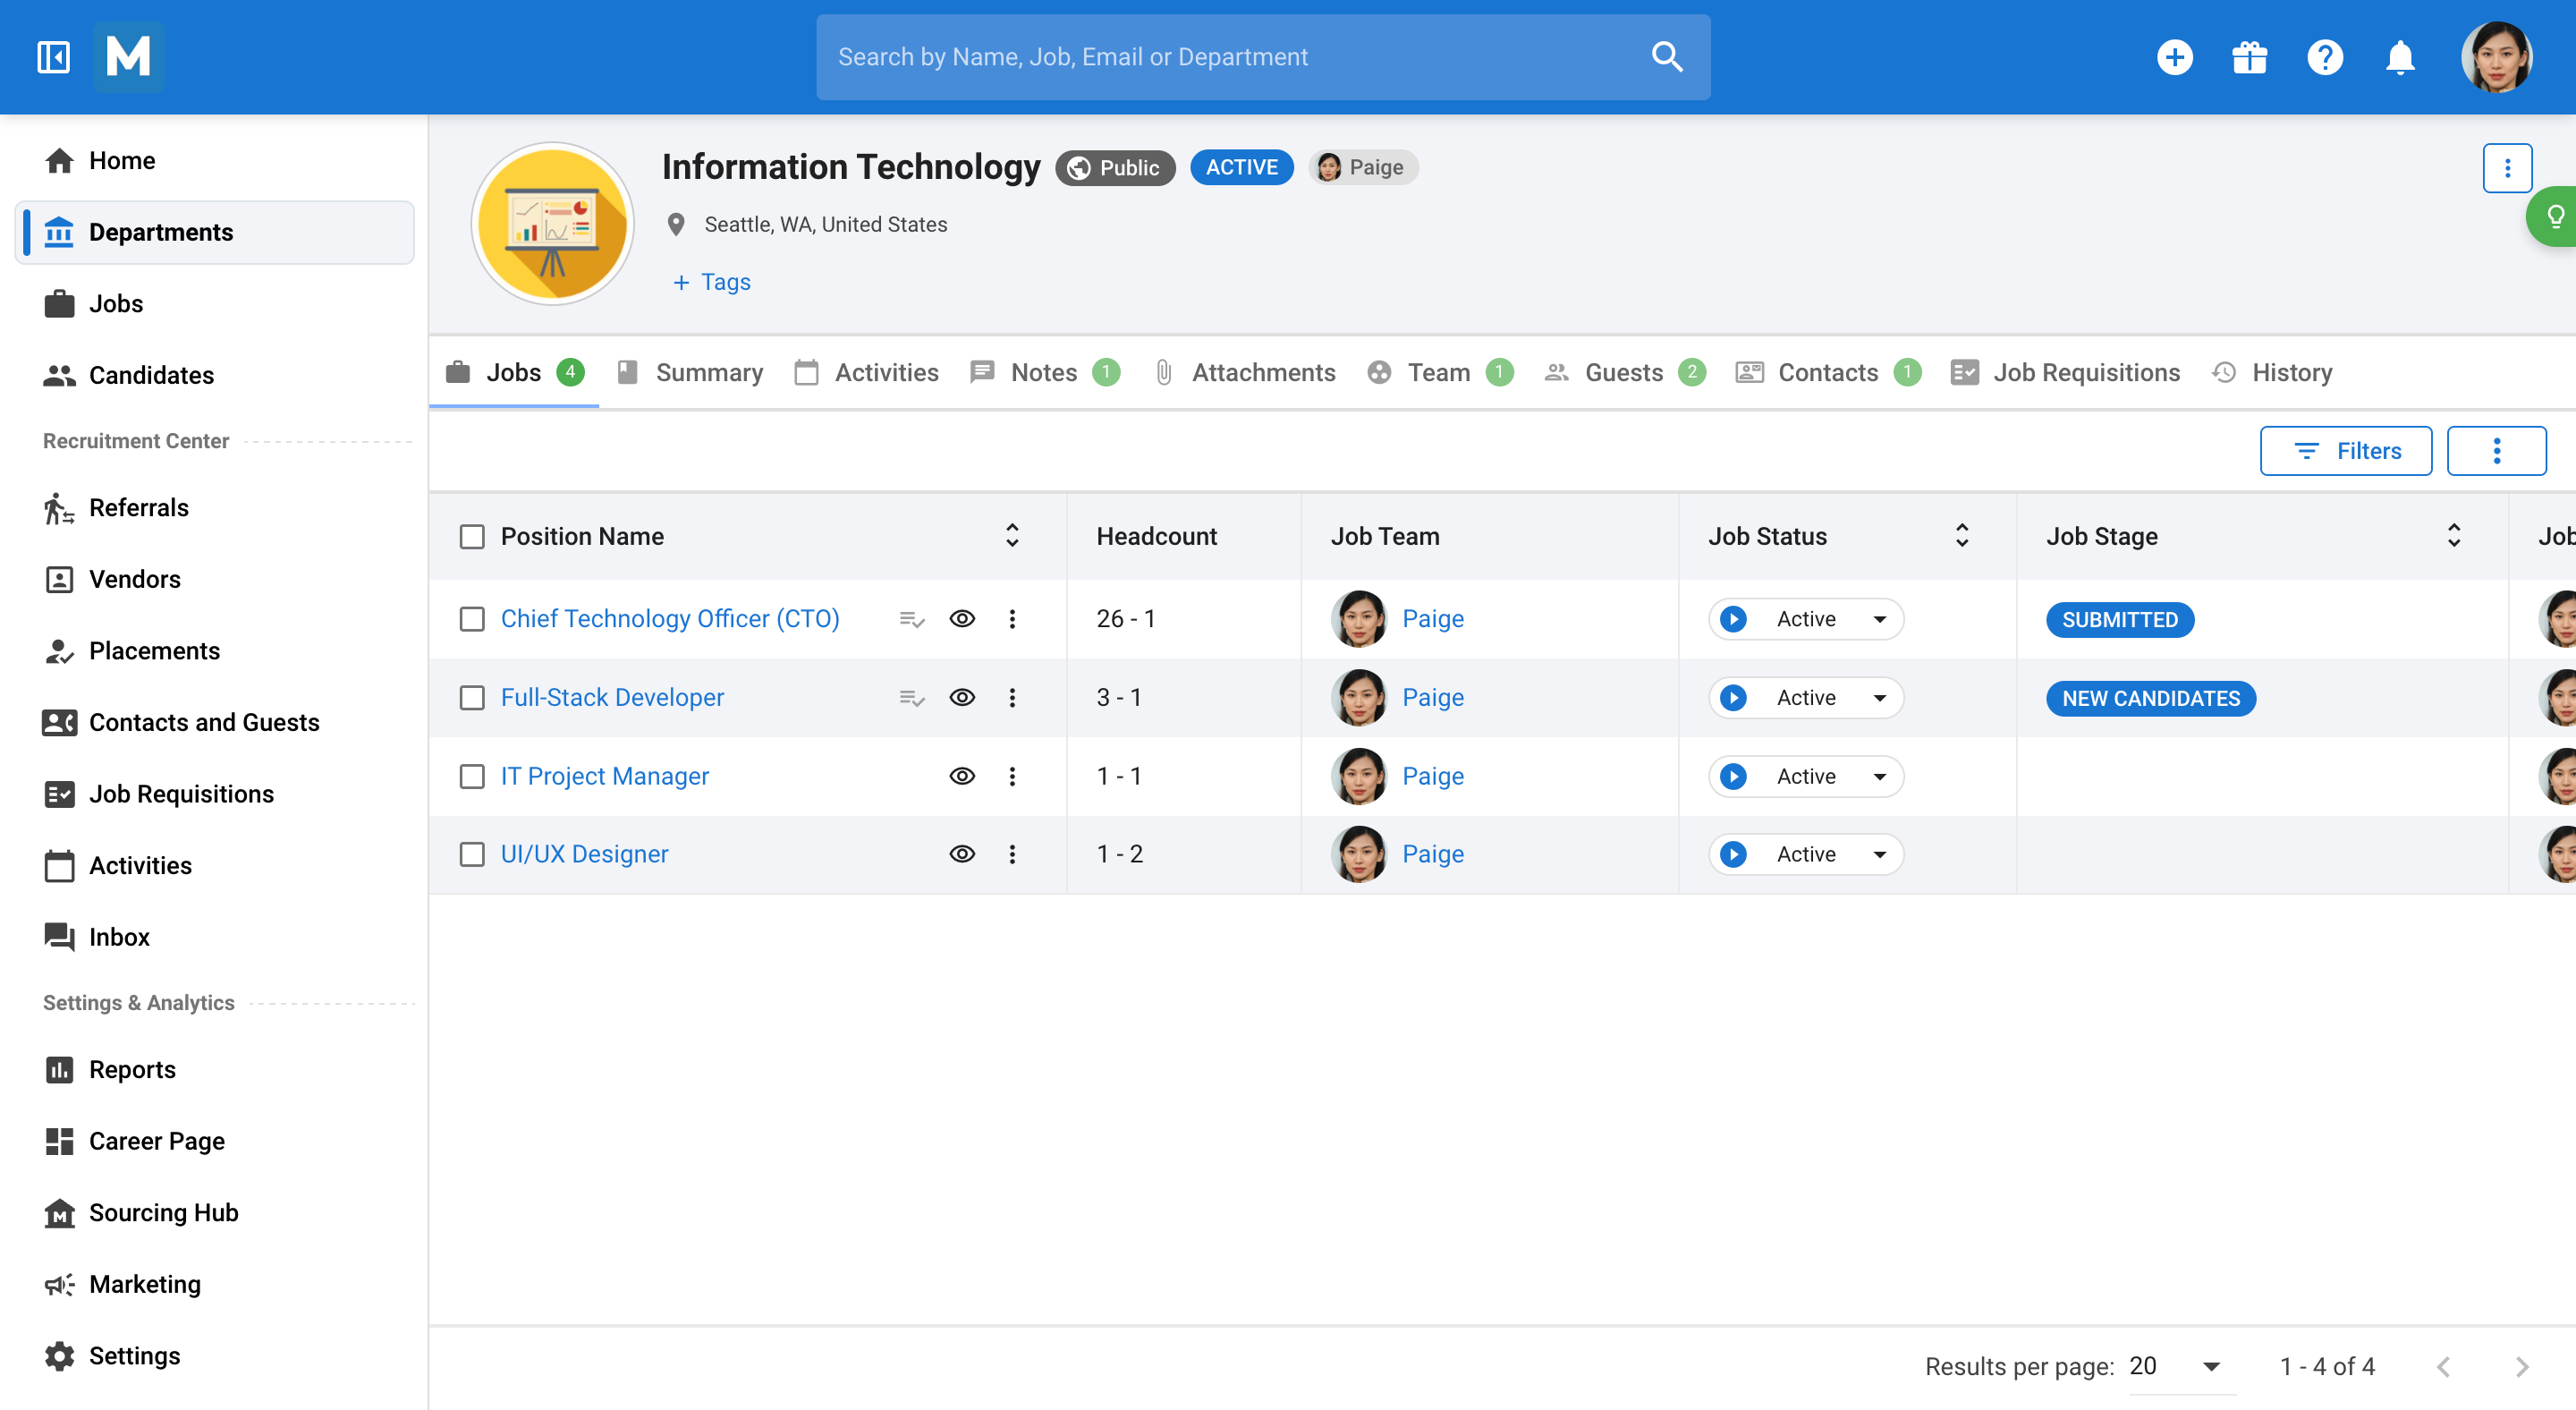
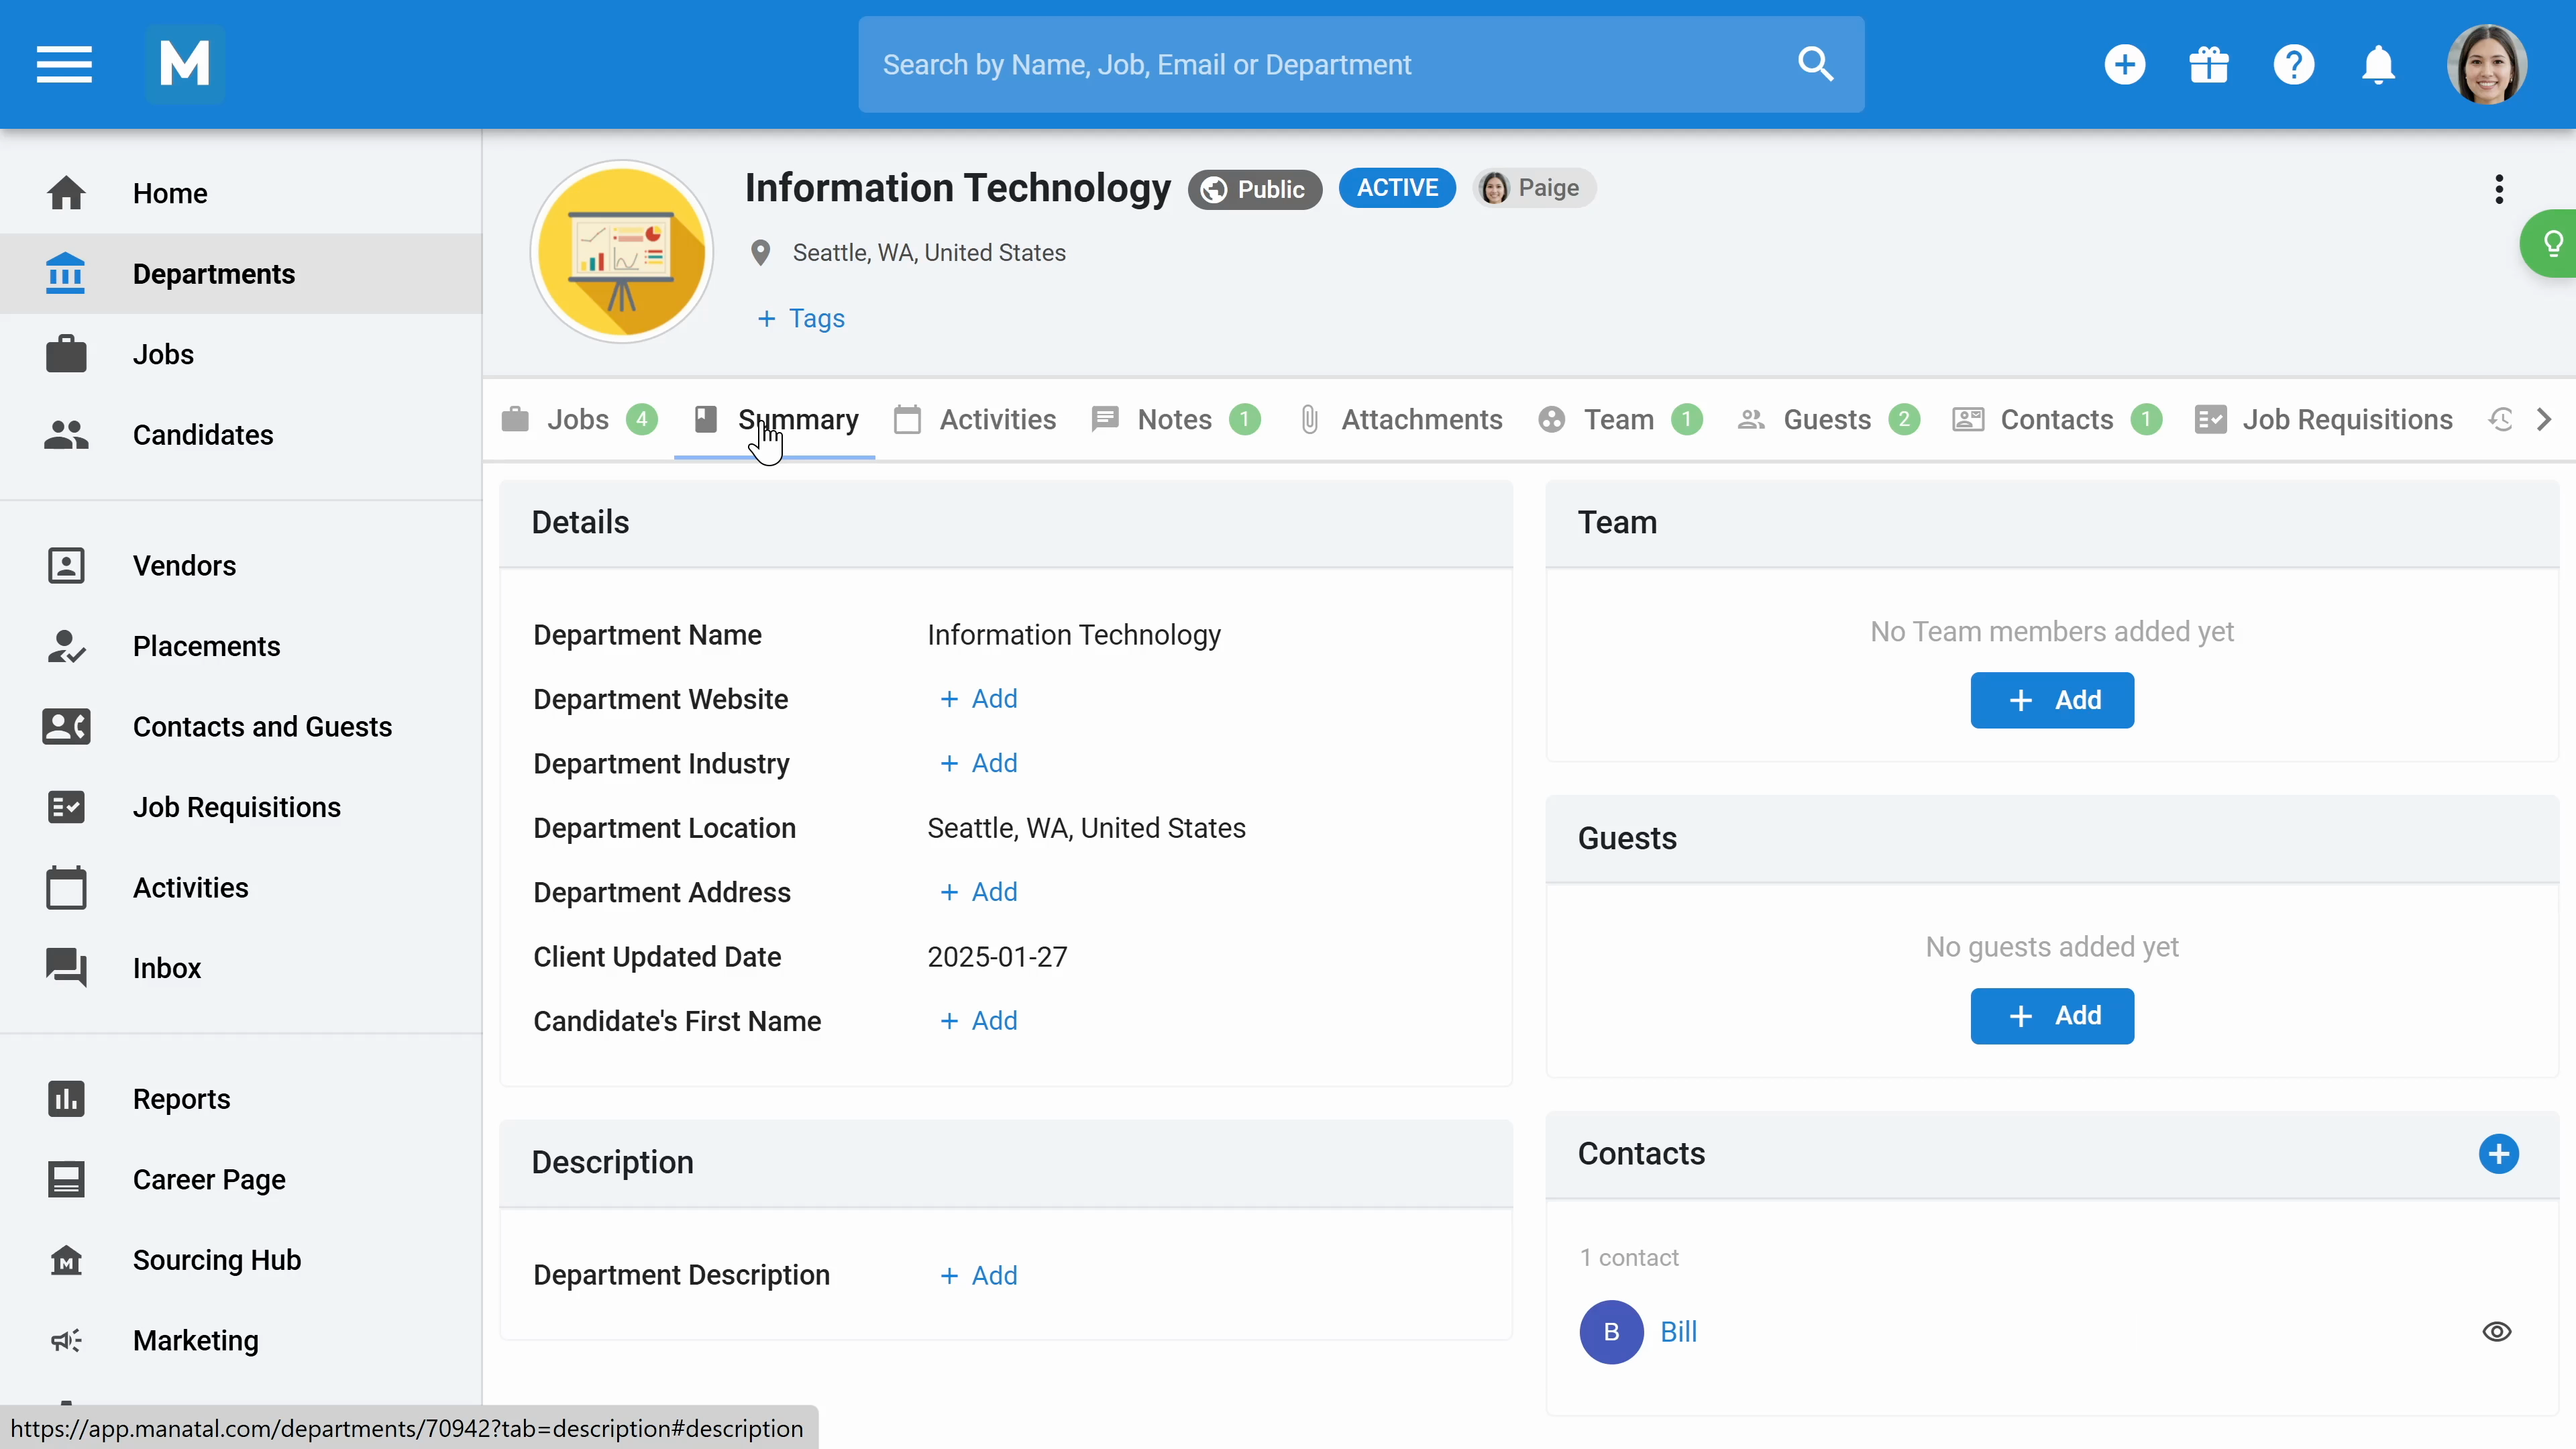
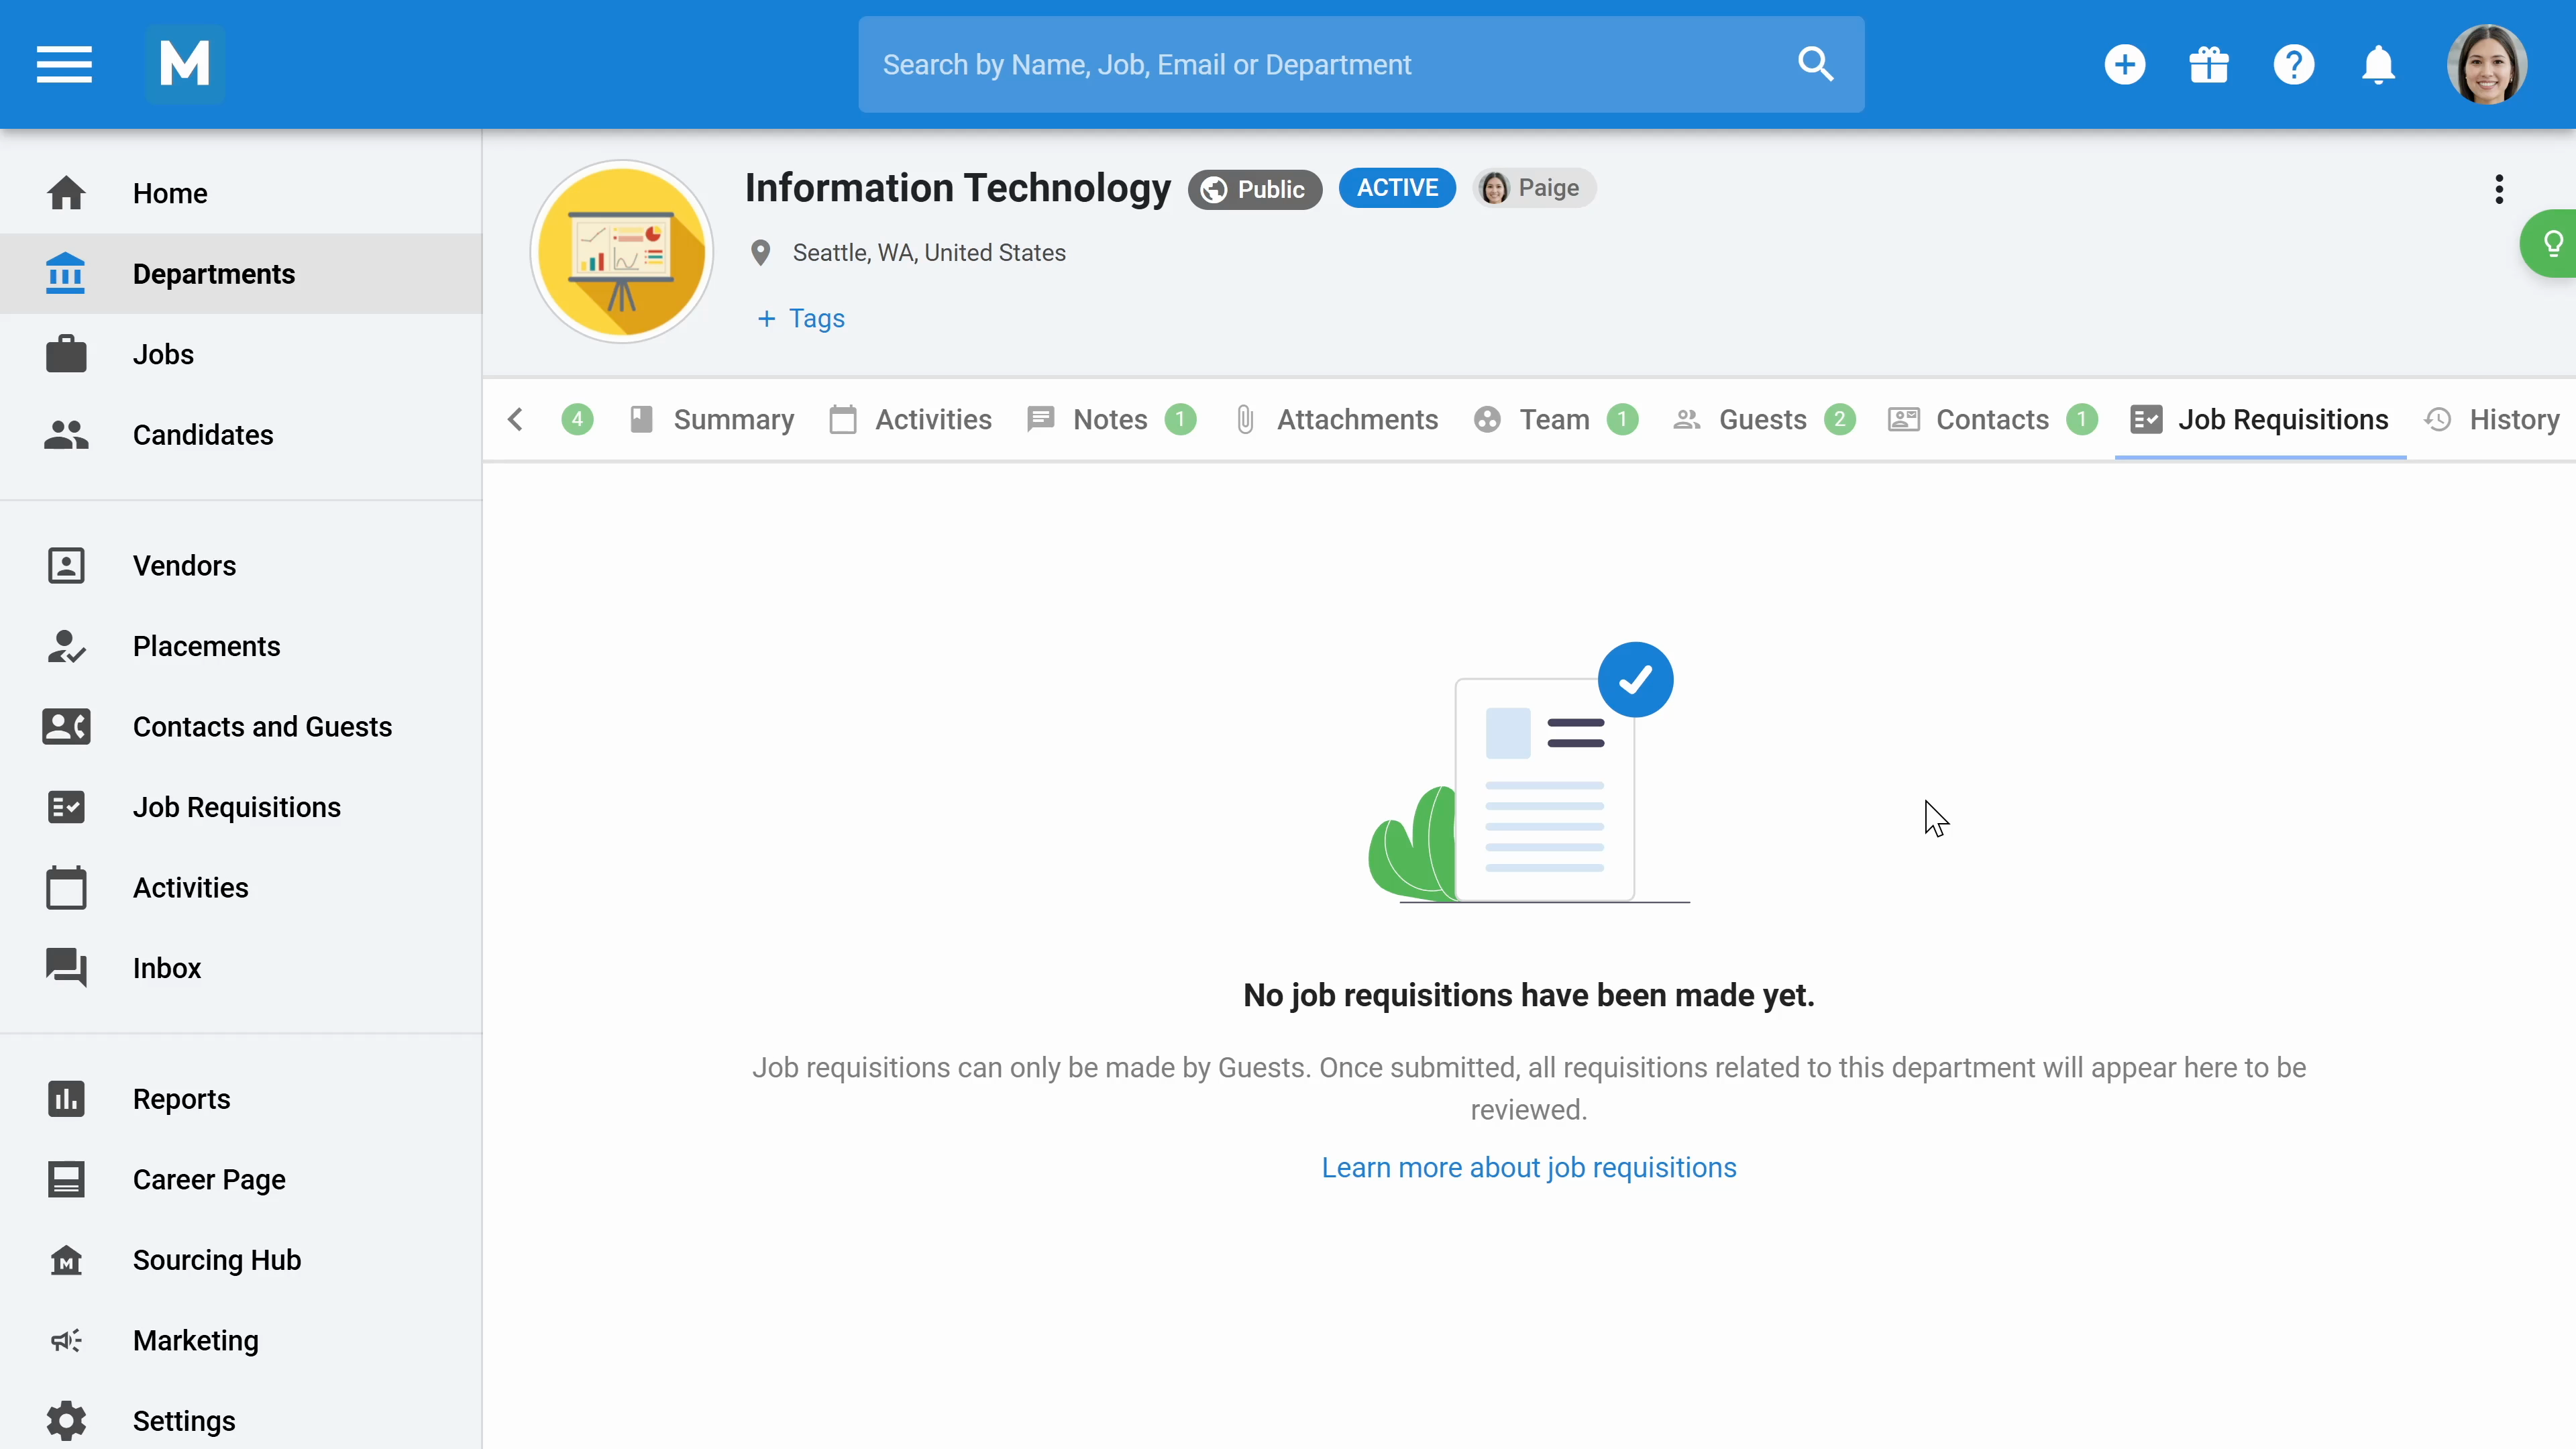
Step 5: Open a specific department, like Information Technology, to view its details, including the number of jobs assigned to it. In the summary section, add department information.
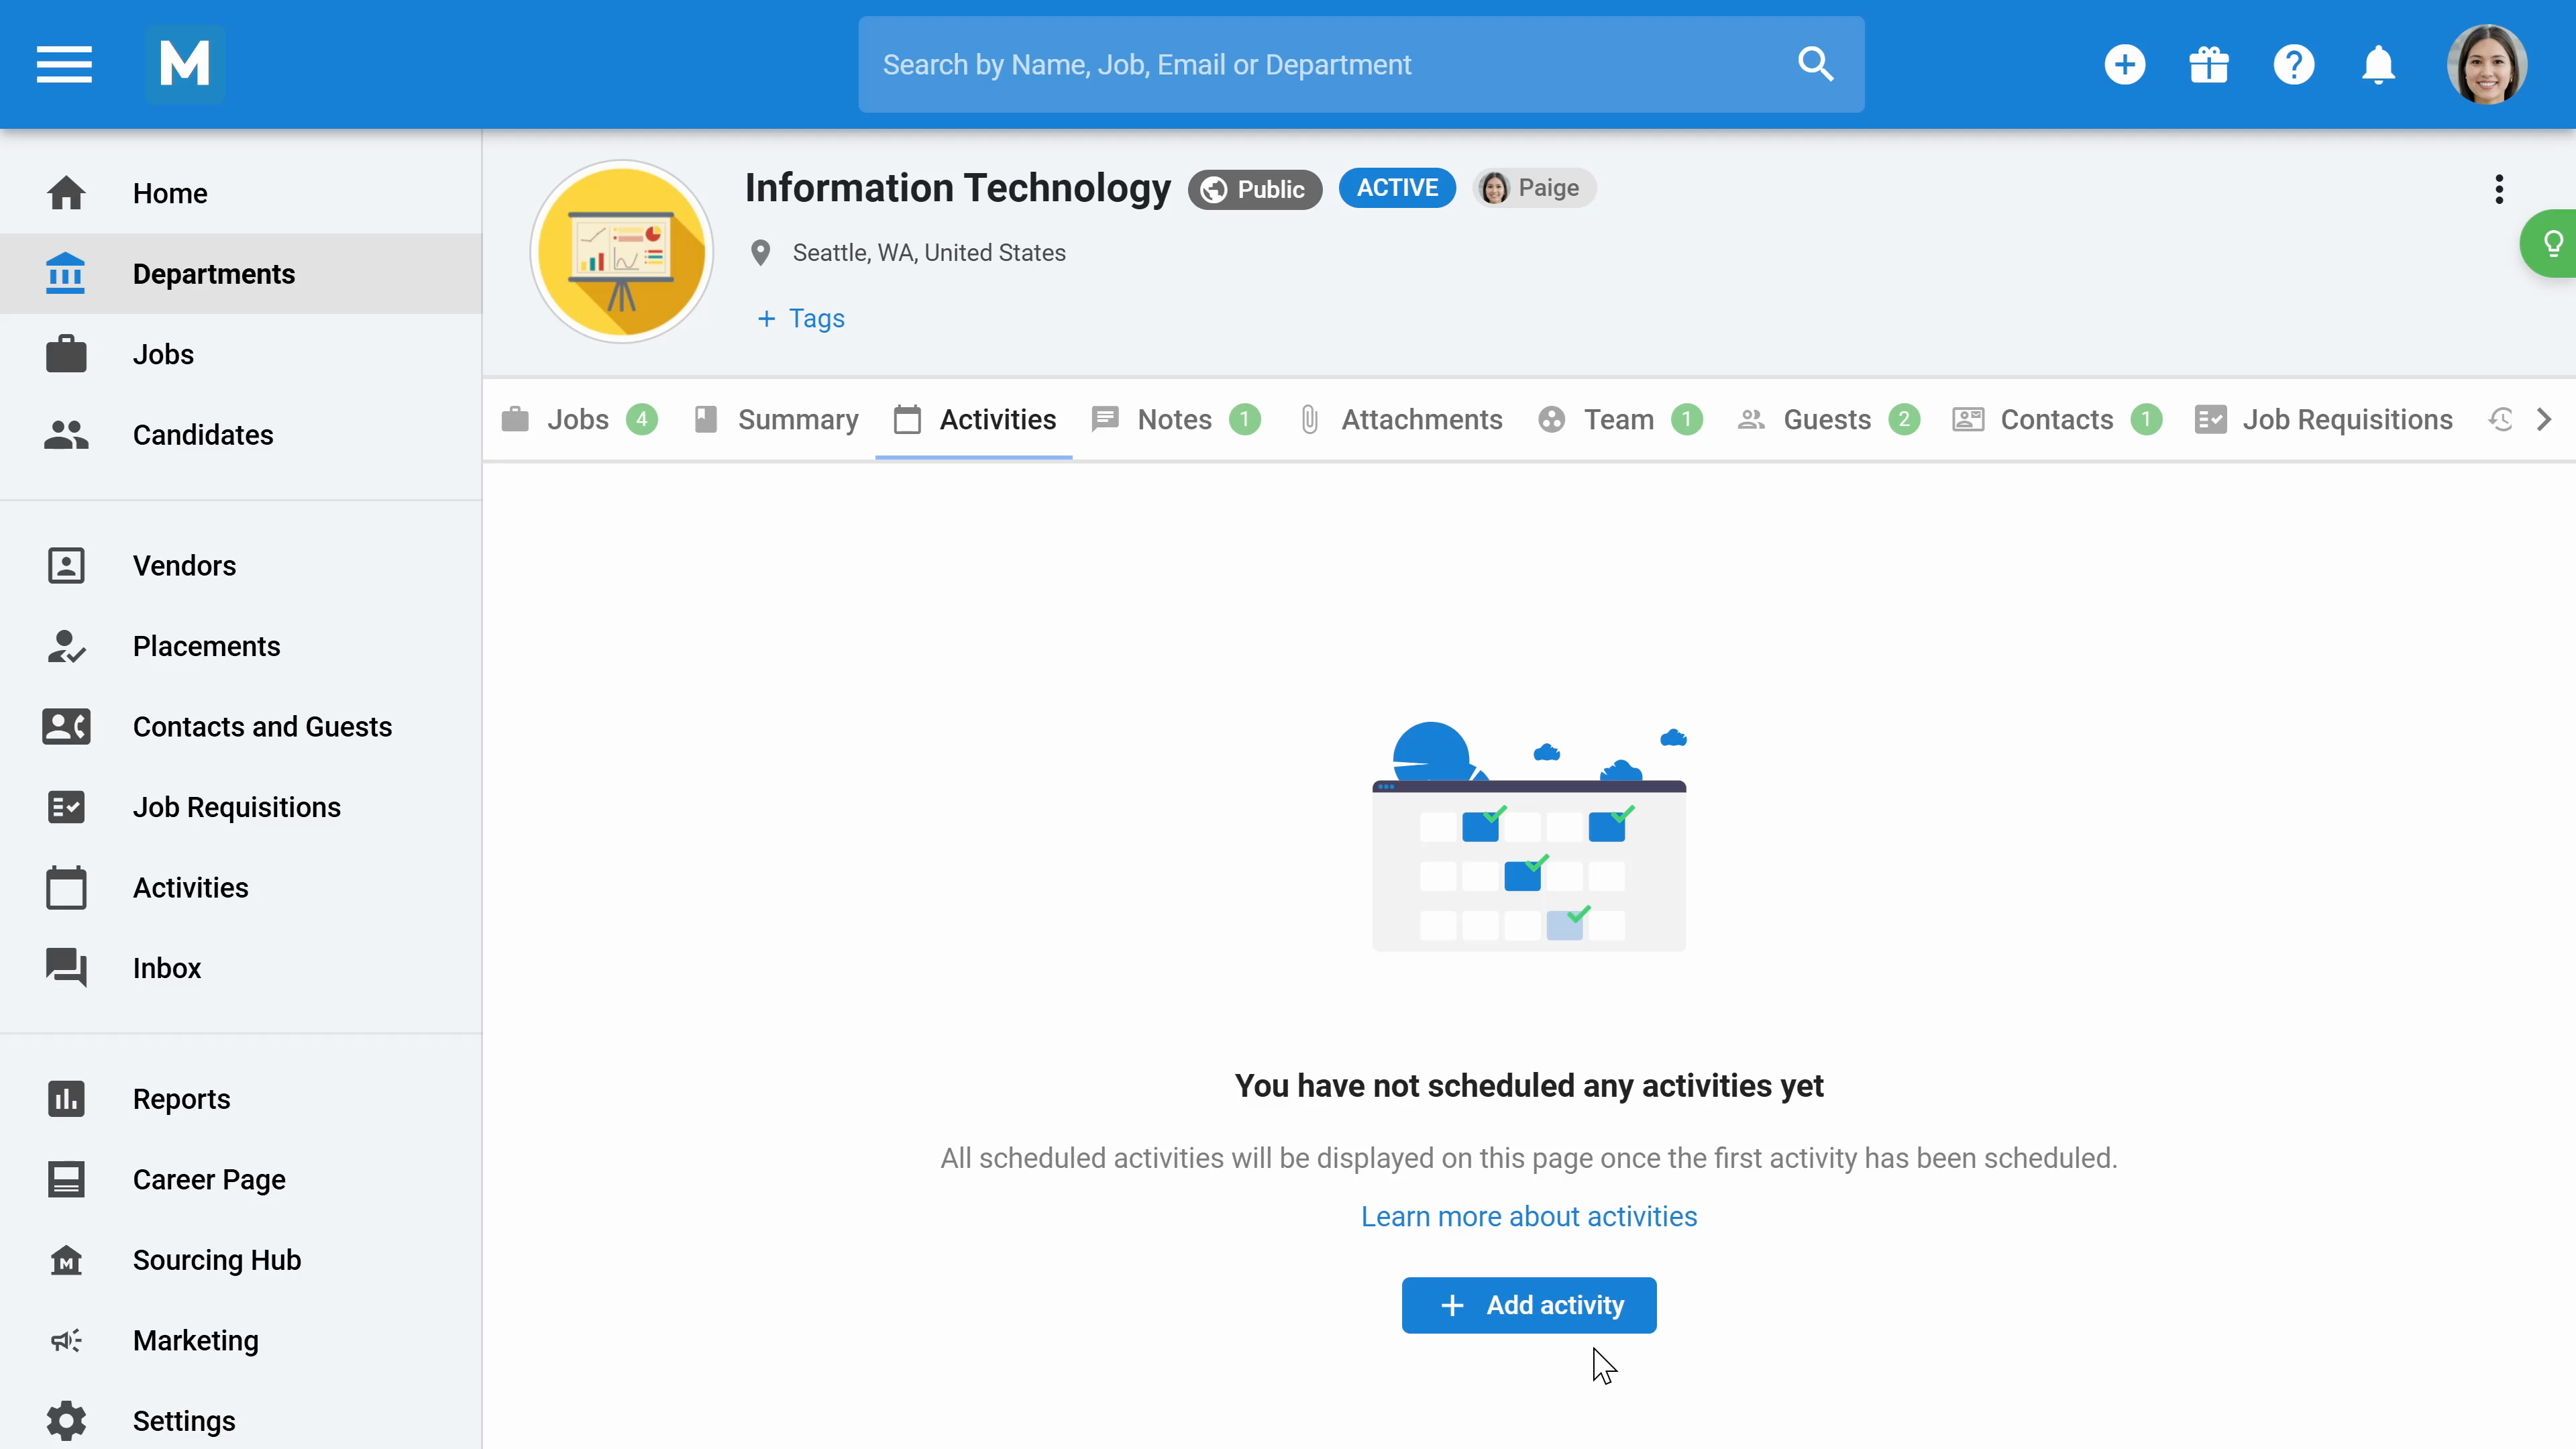
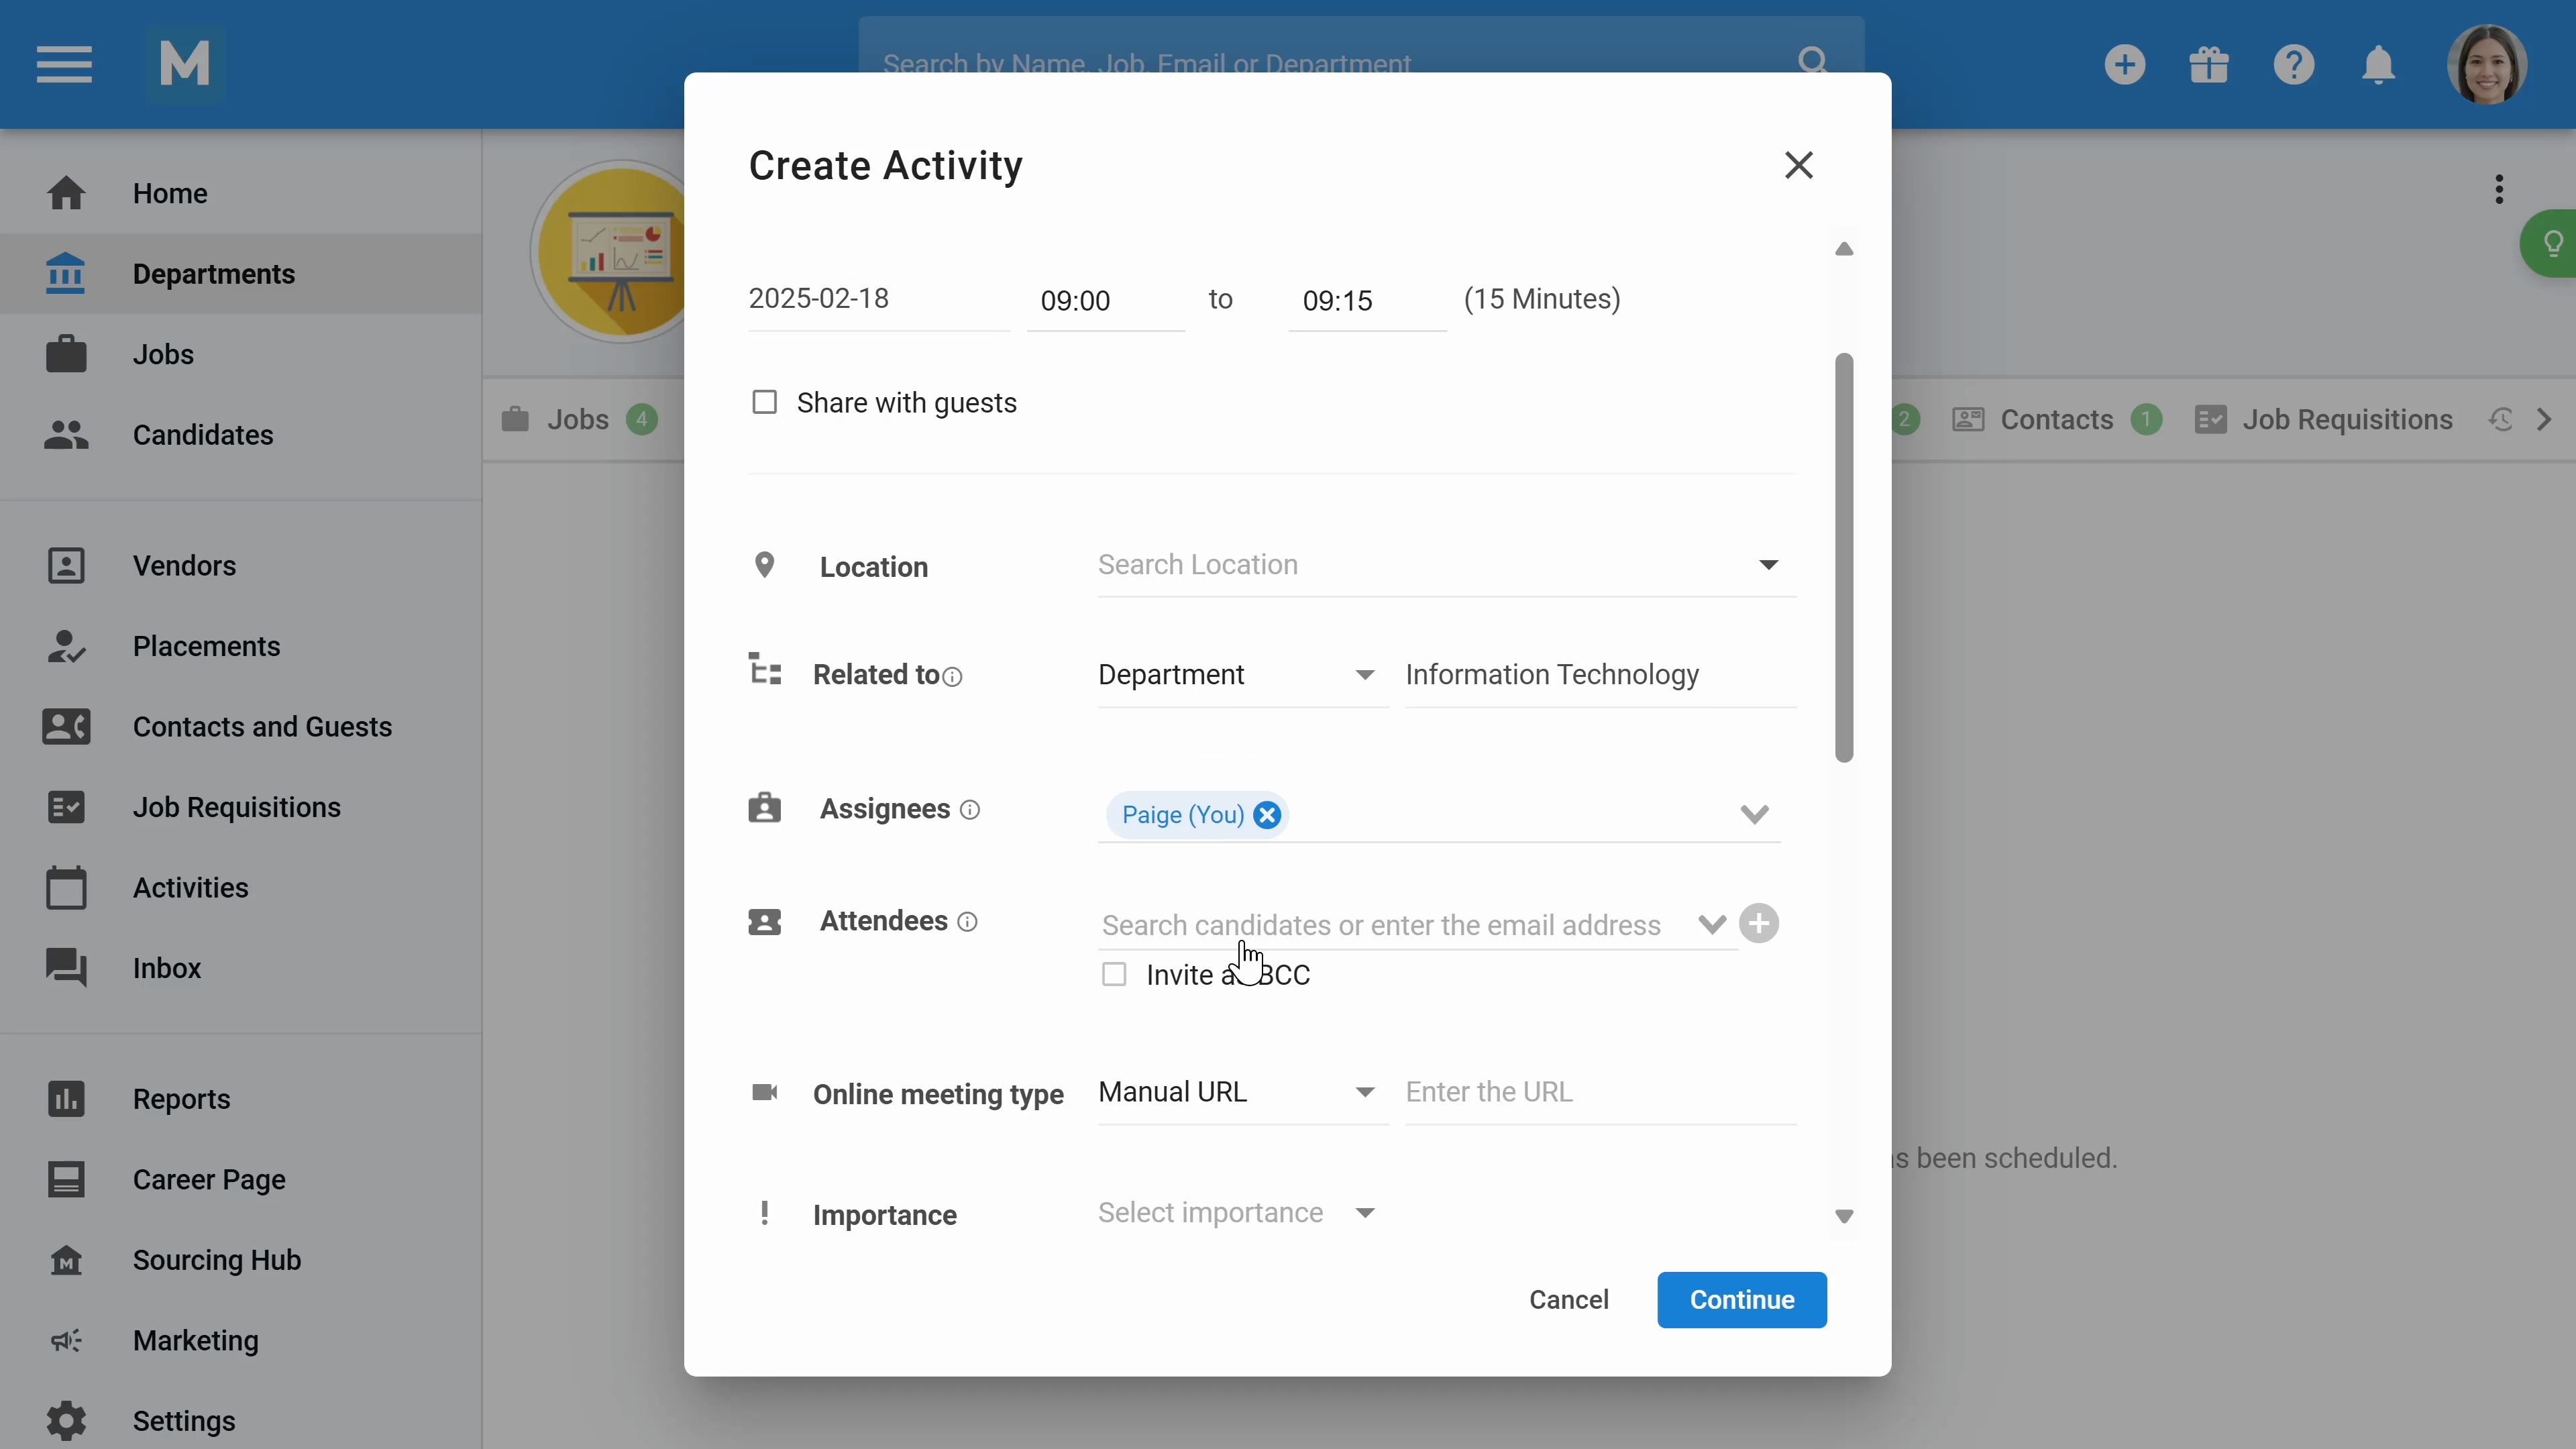
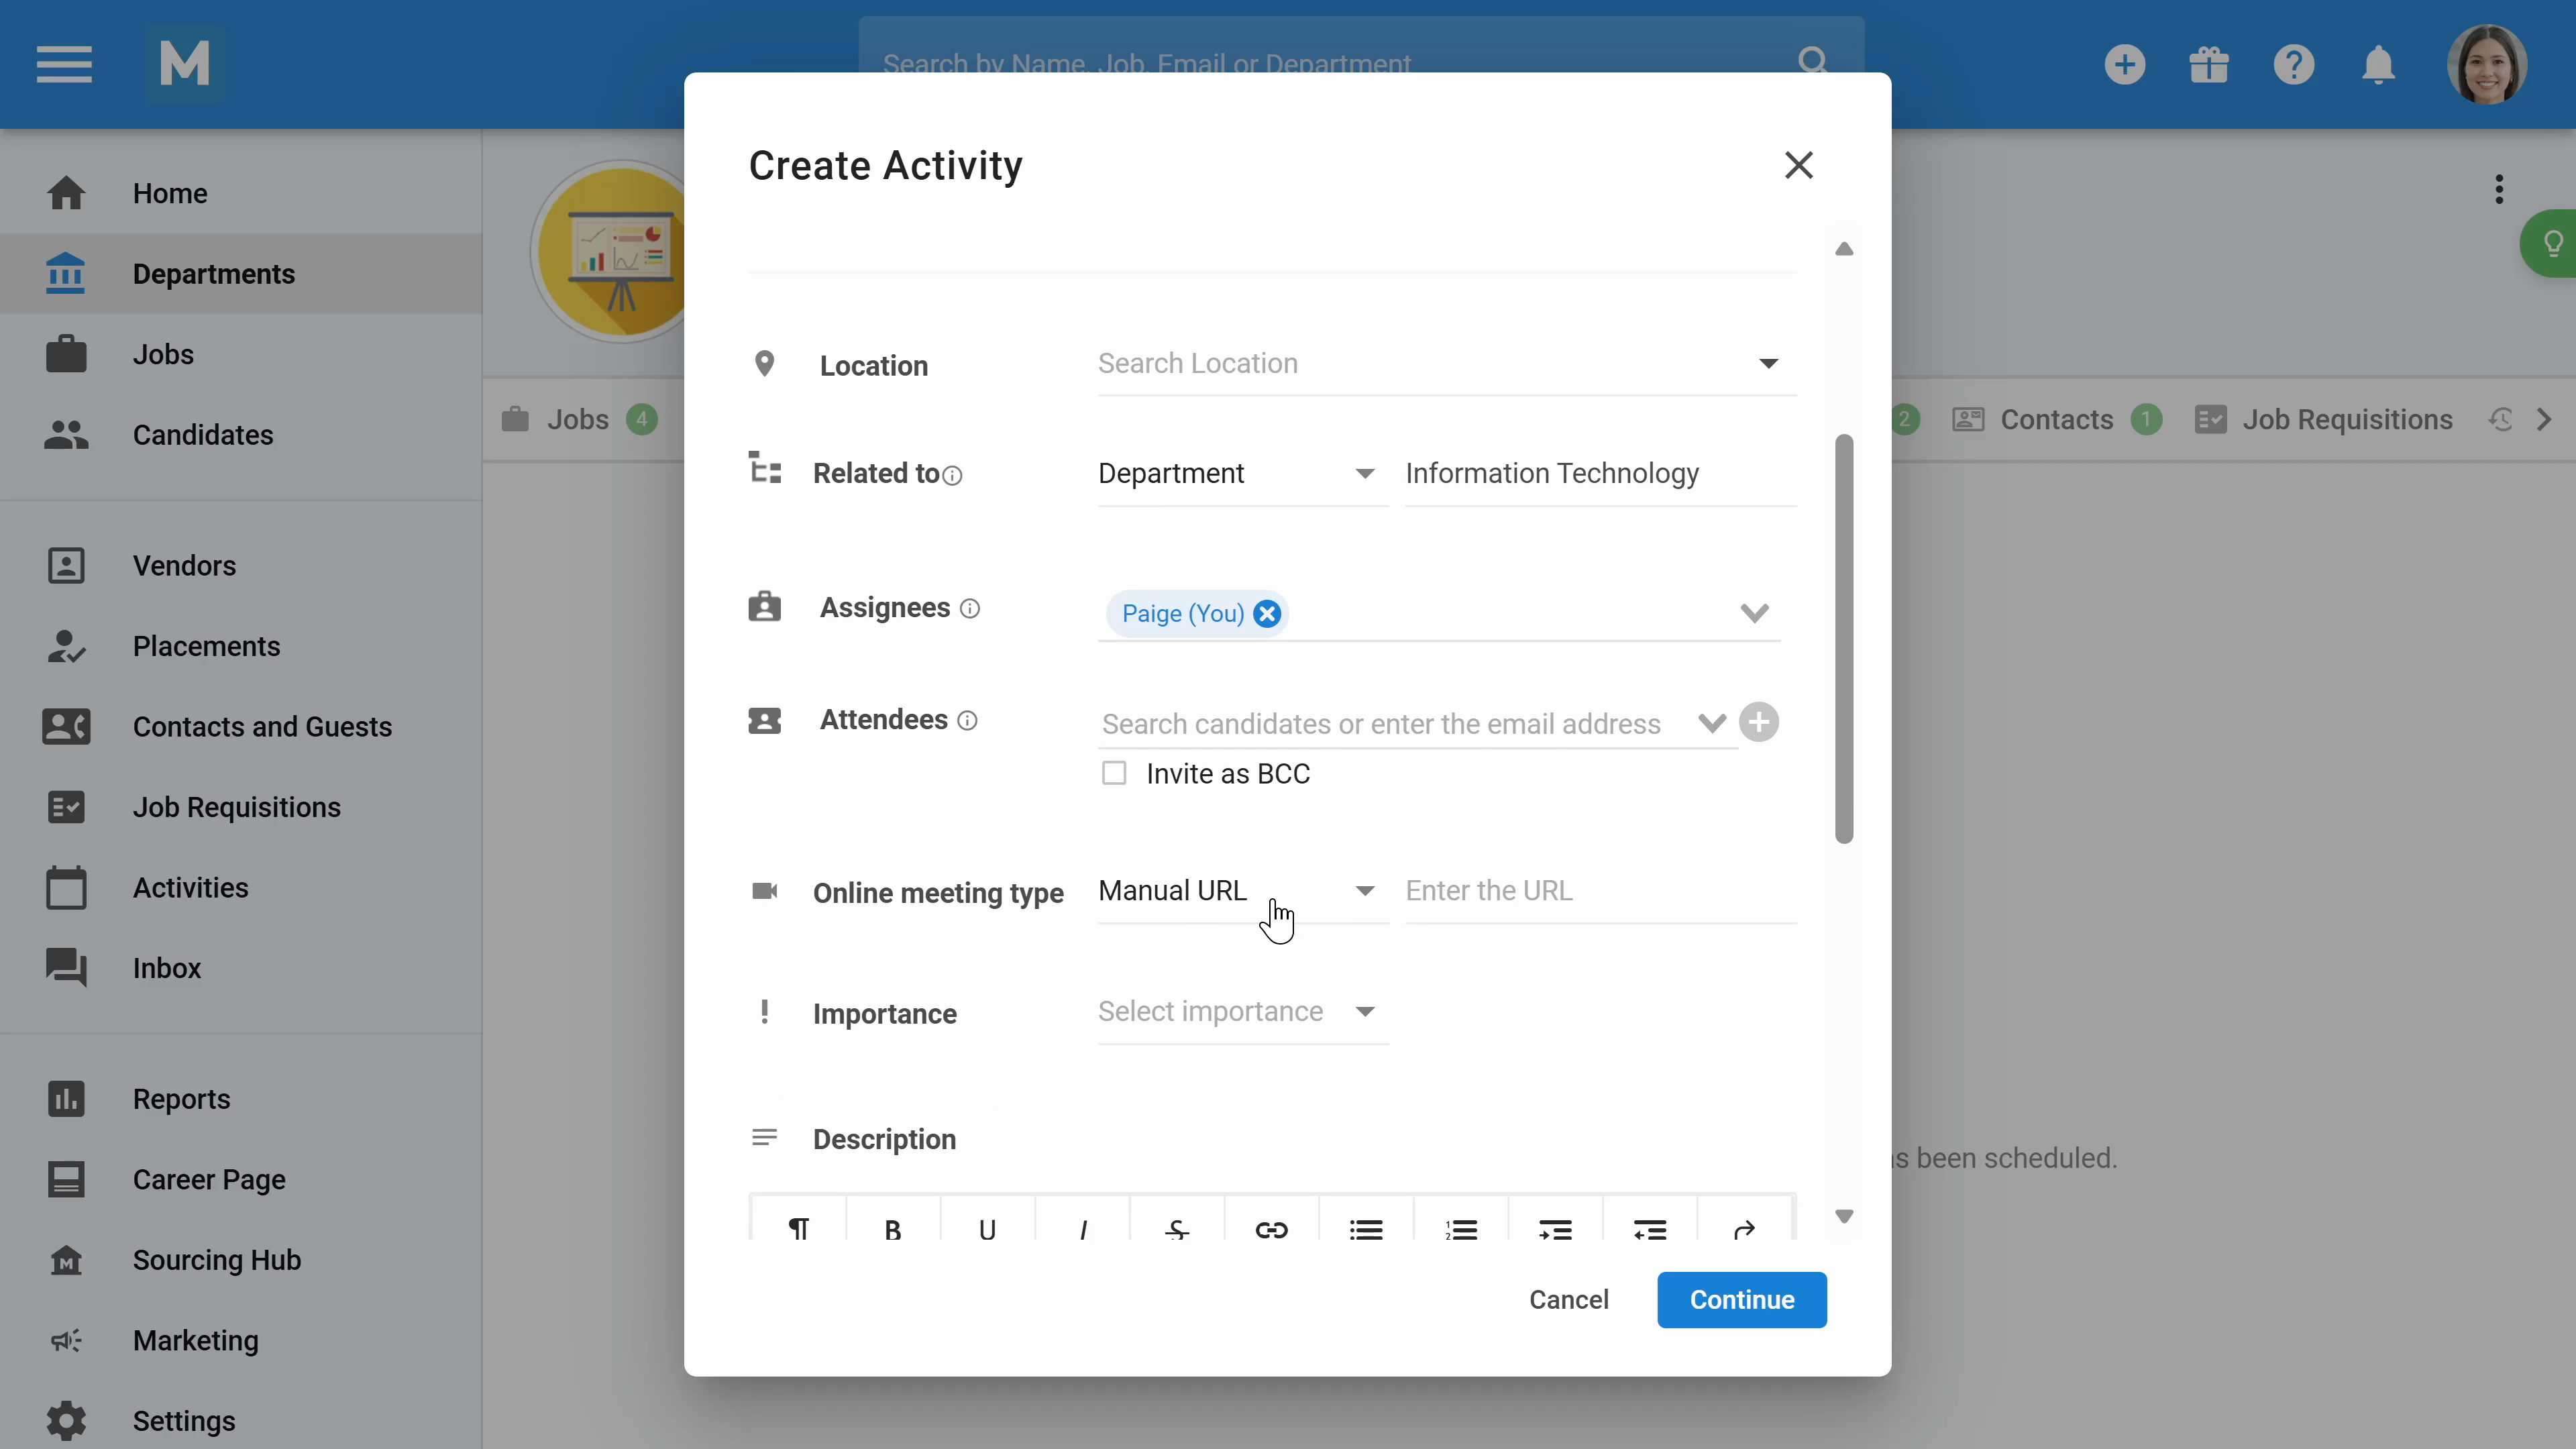
Step 6: In the Activities section, create new tasks or meetings with the department's hiring manager. Add the email address, select Google Meets or Microsoft Team, and the meeting will appear on your calendar and the hiring manager's.
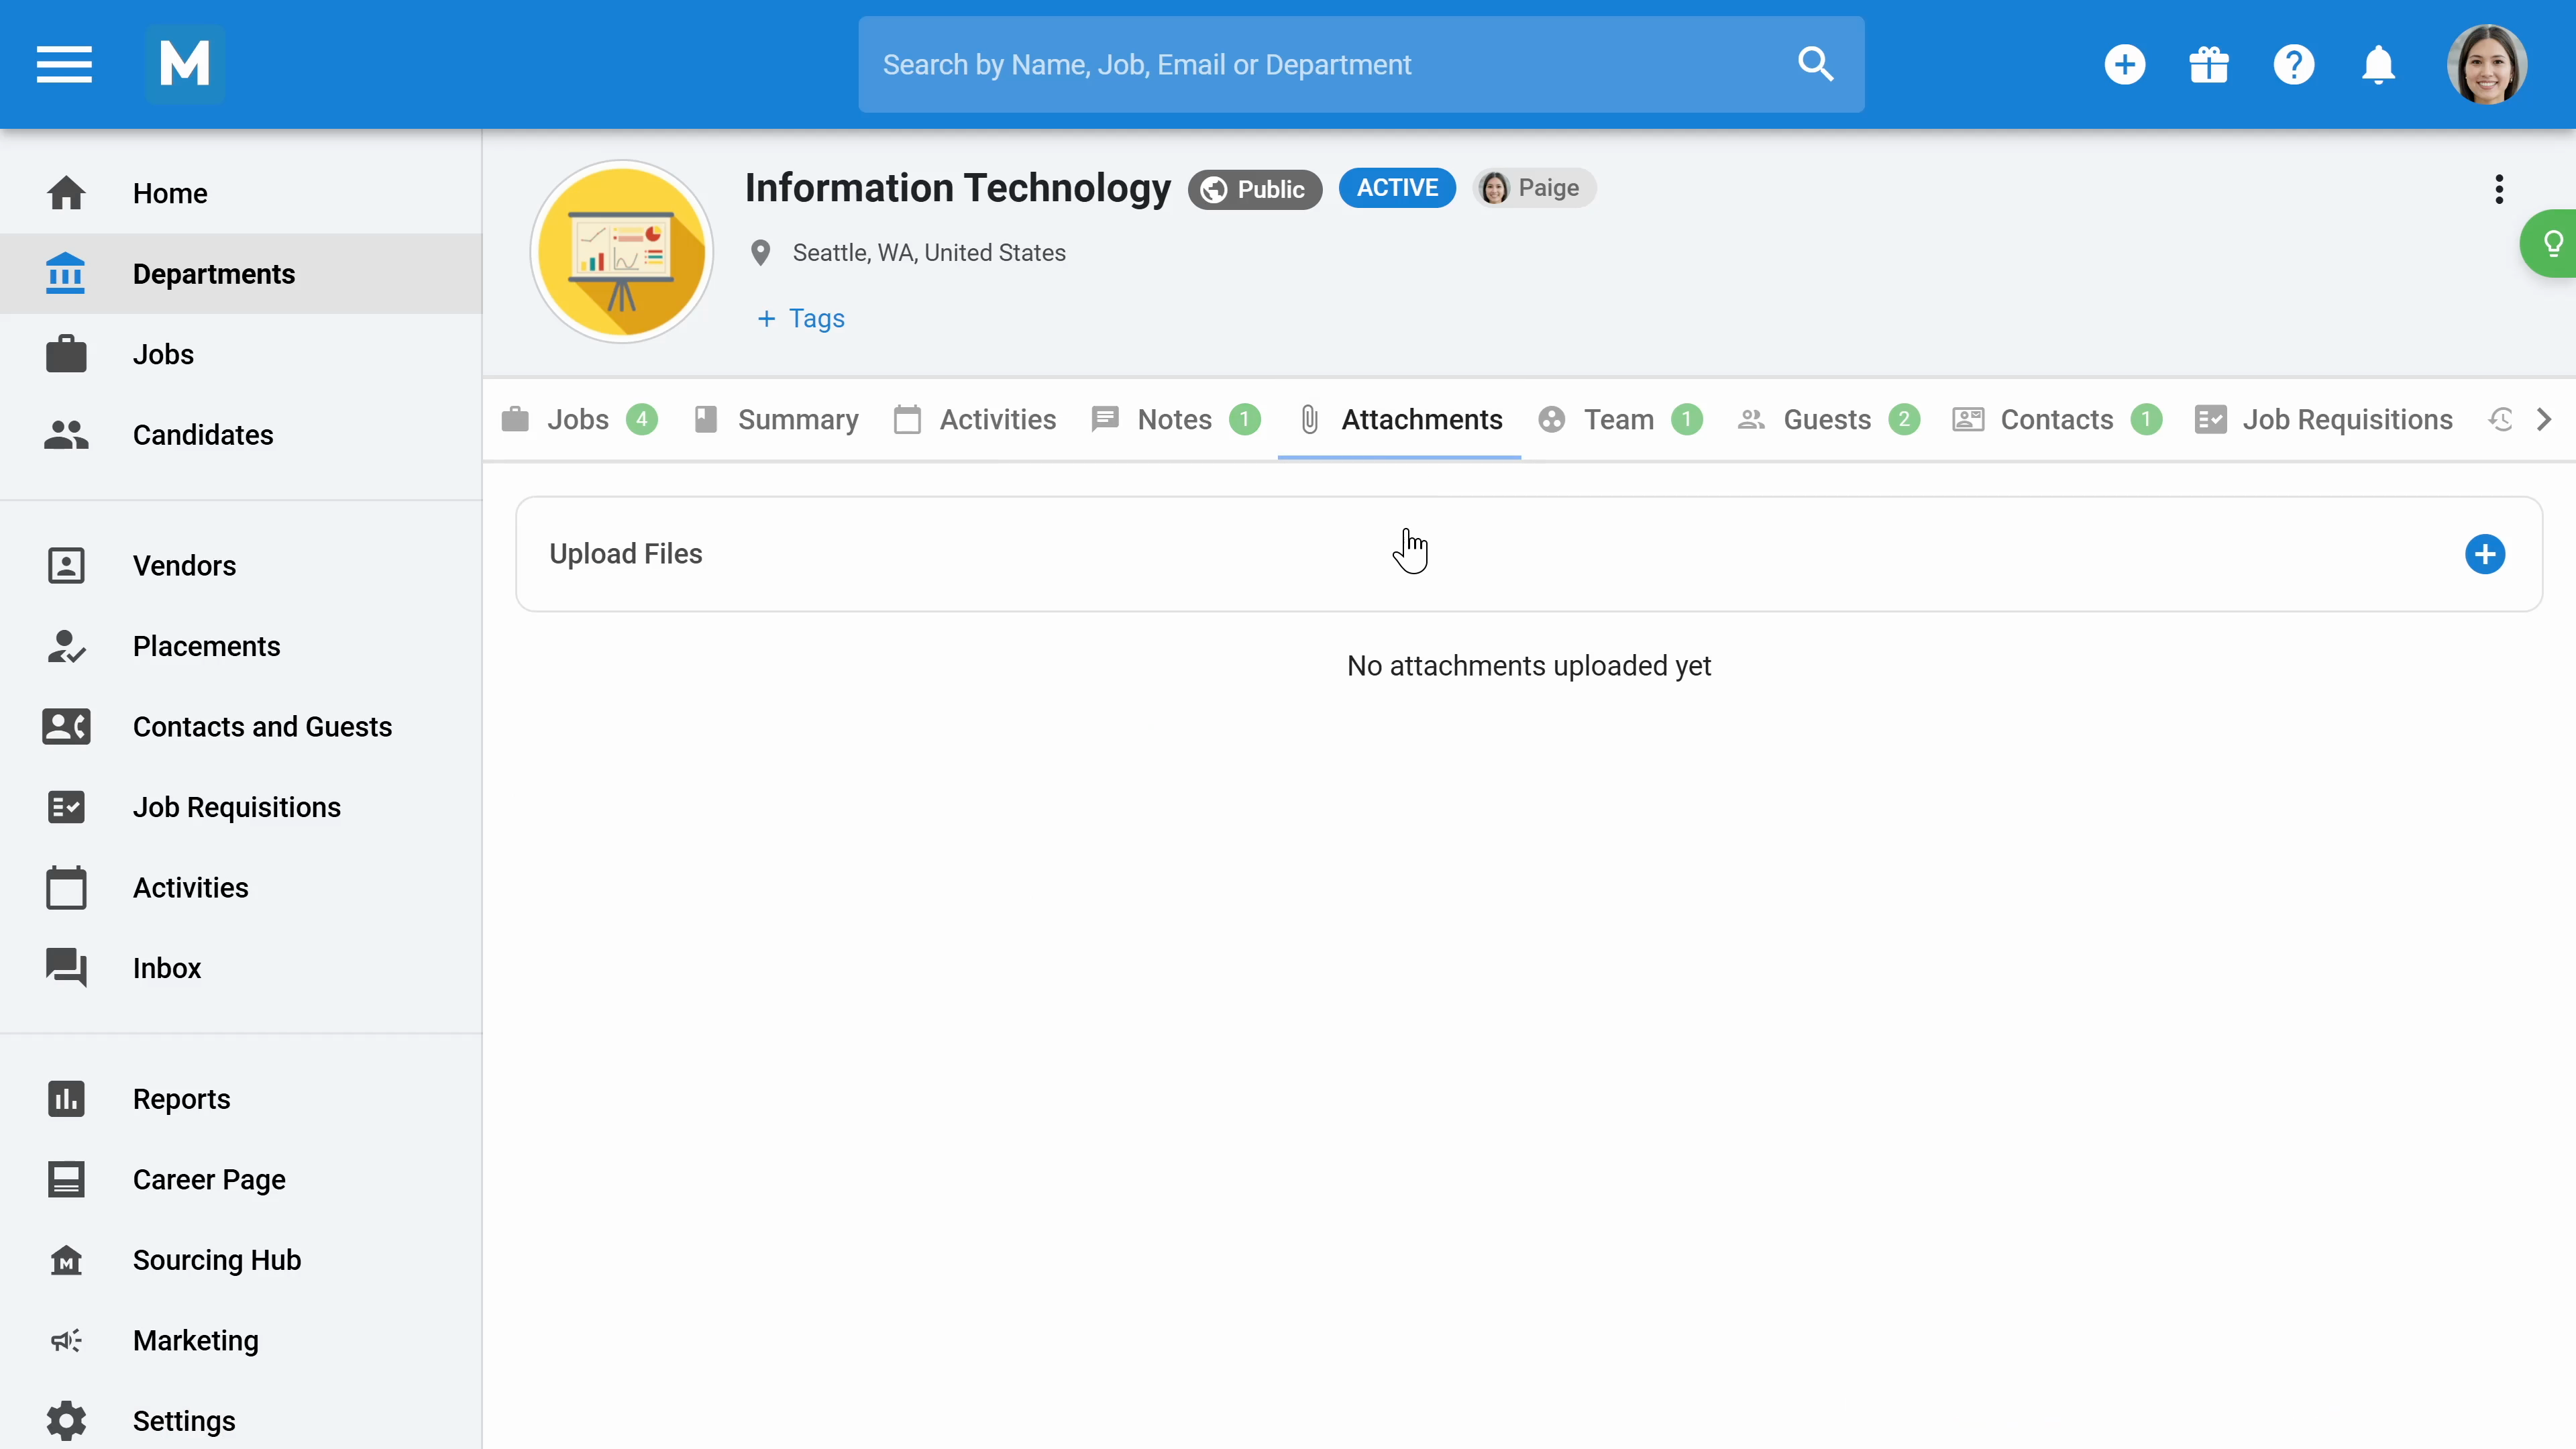
Step 7: Use the notes section to add feedback comments and communicate with your team. In the attachments section, upload files related to the department, like job descriptions or reports.

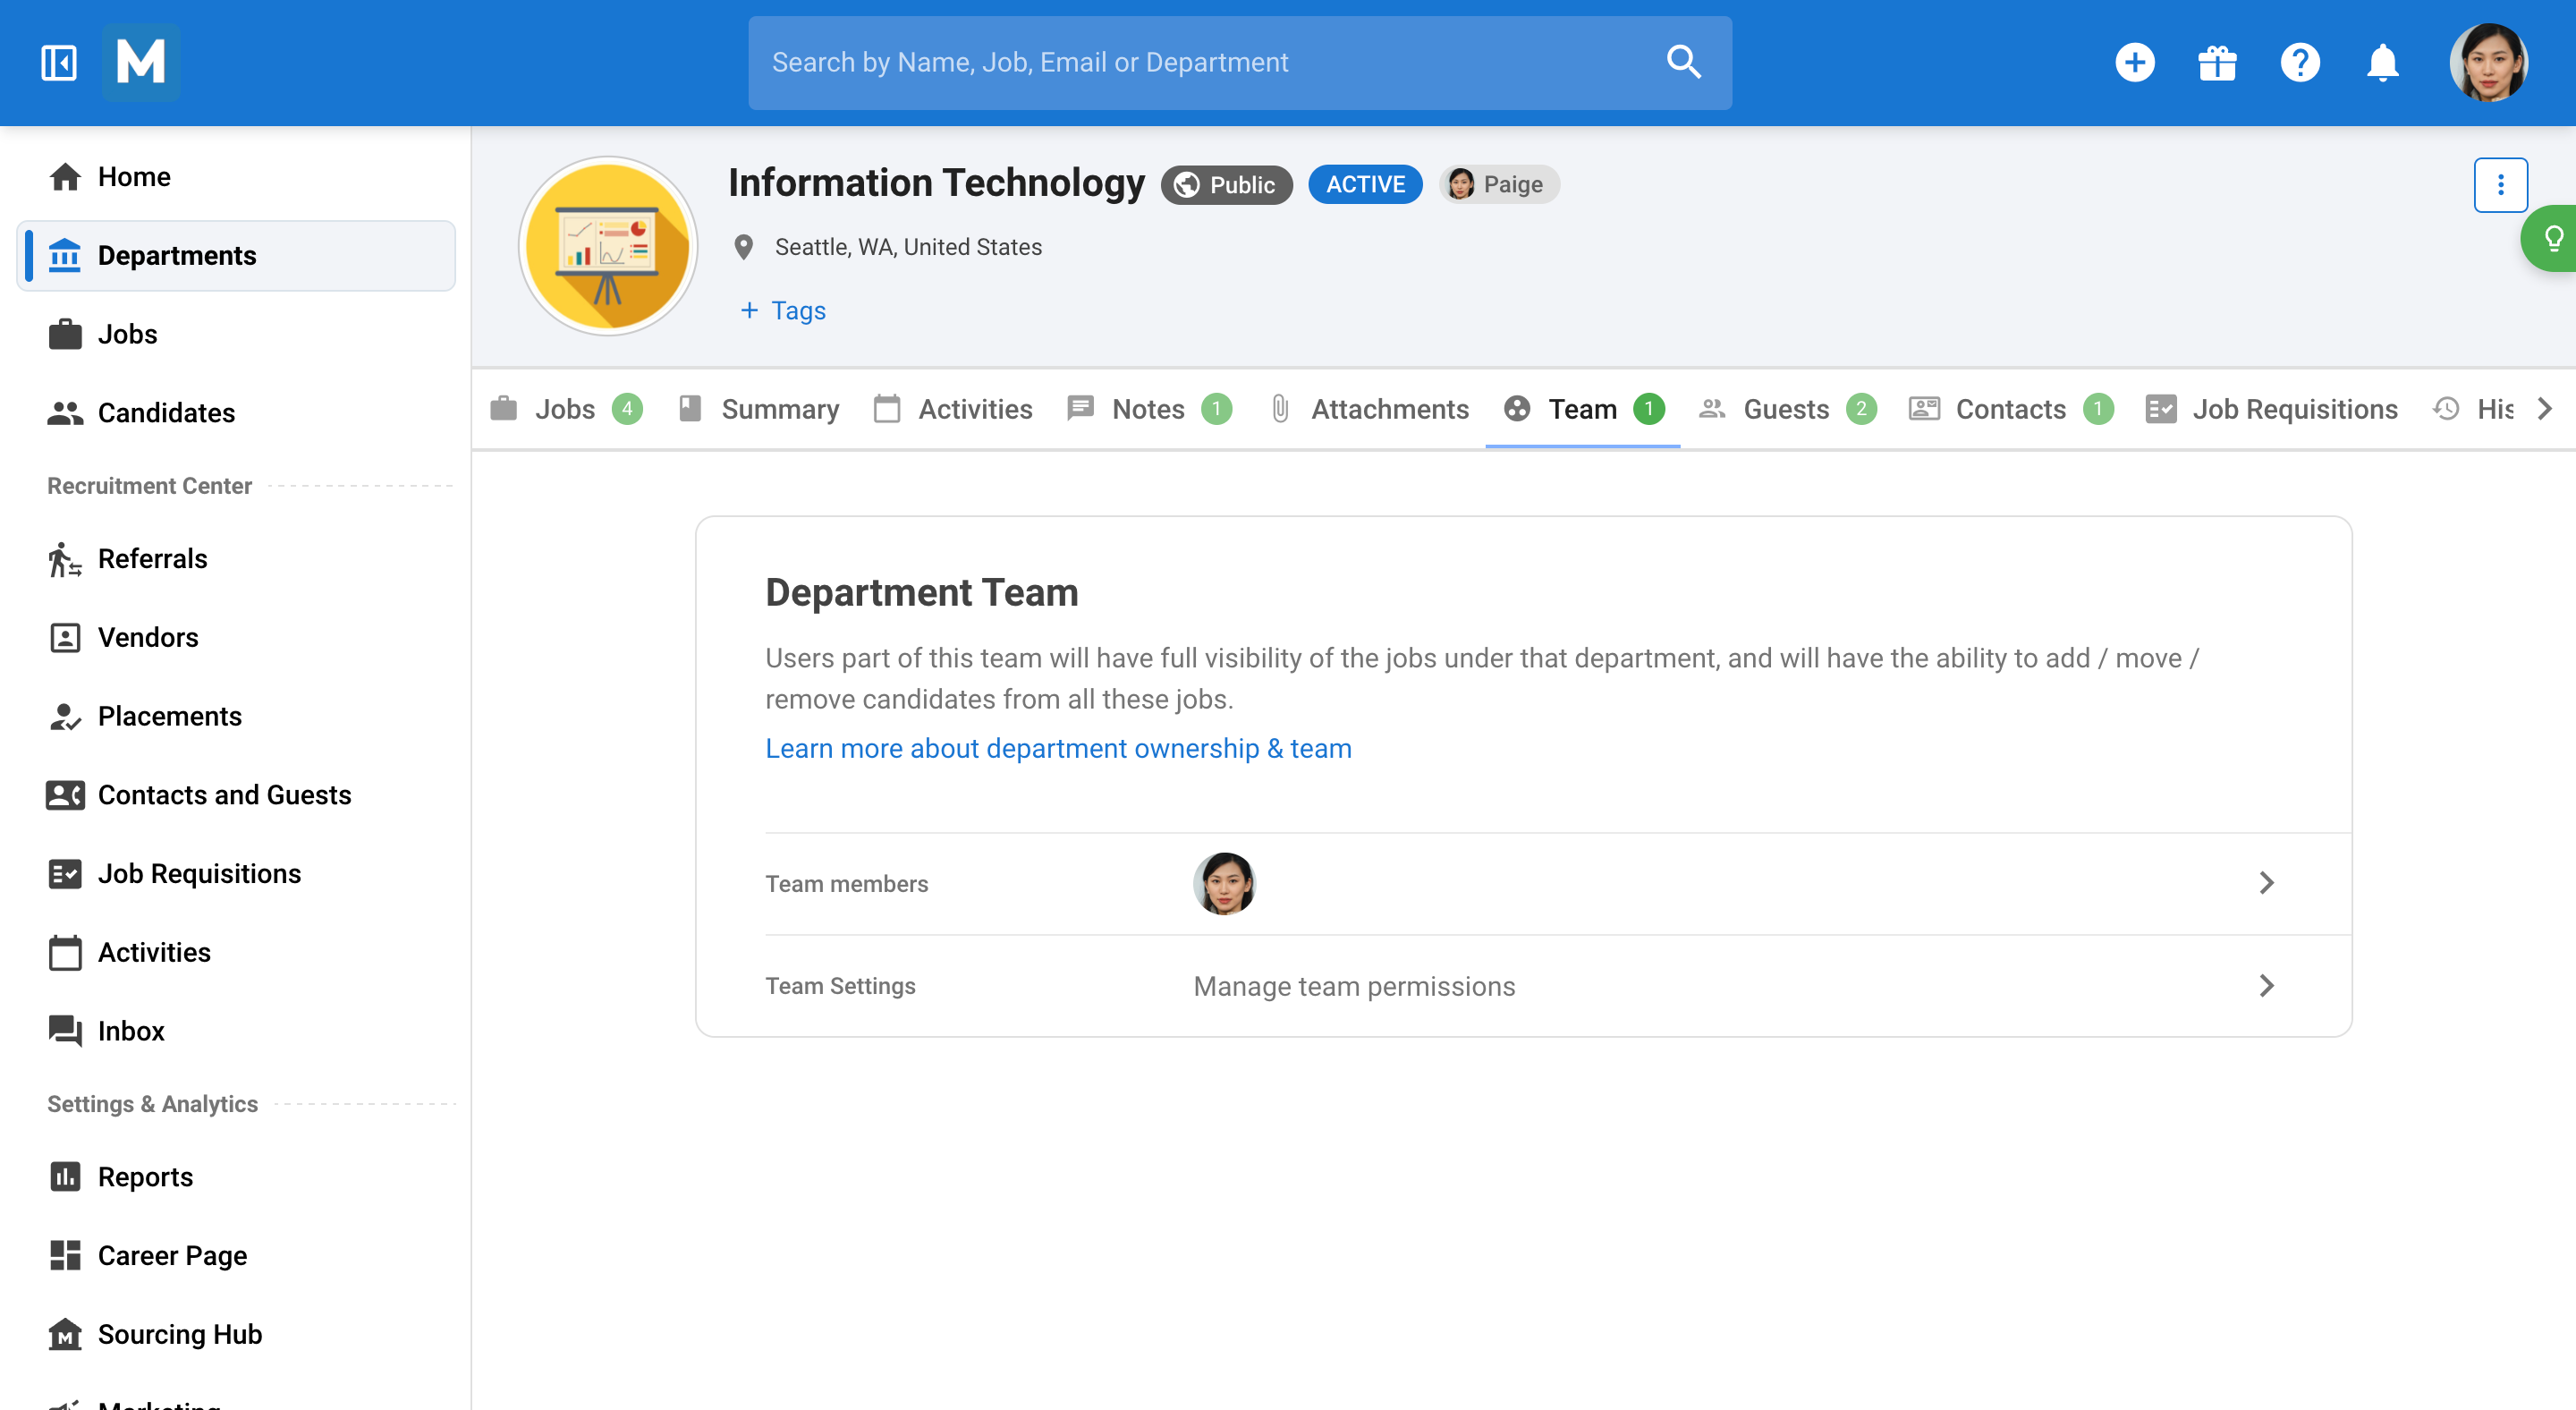
Step 8: In the Team section, define which recruiter will work on this department and adjust the department's visibility. If set to private or confidential, only admin users and team members will have access. You can also give access to hiring managers as guests.
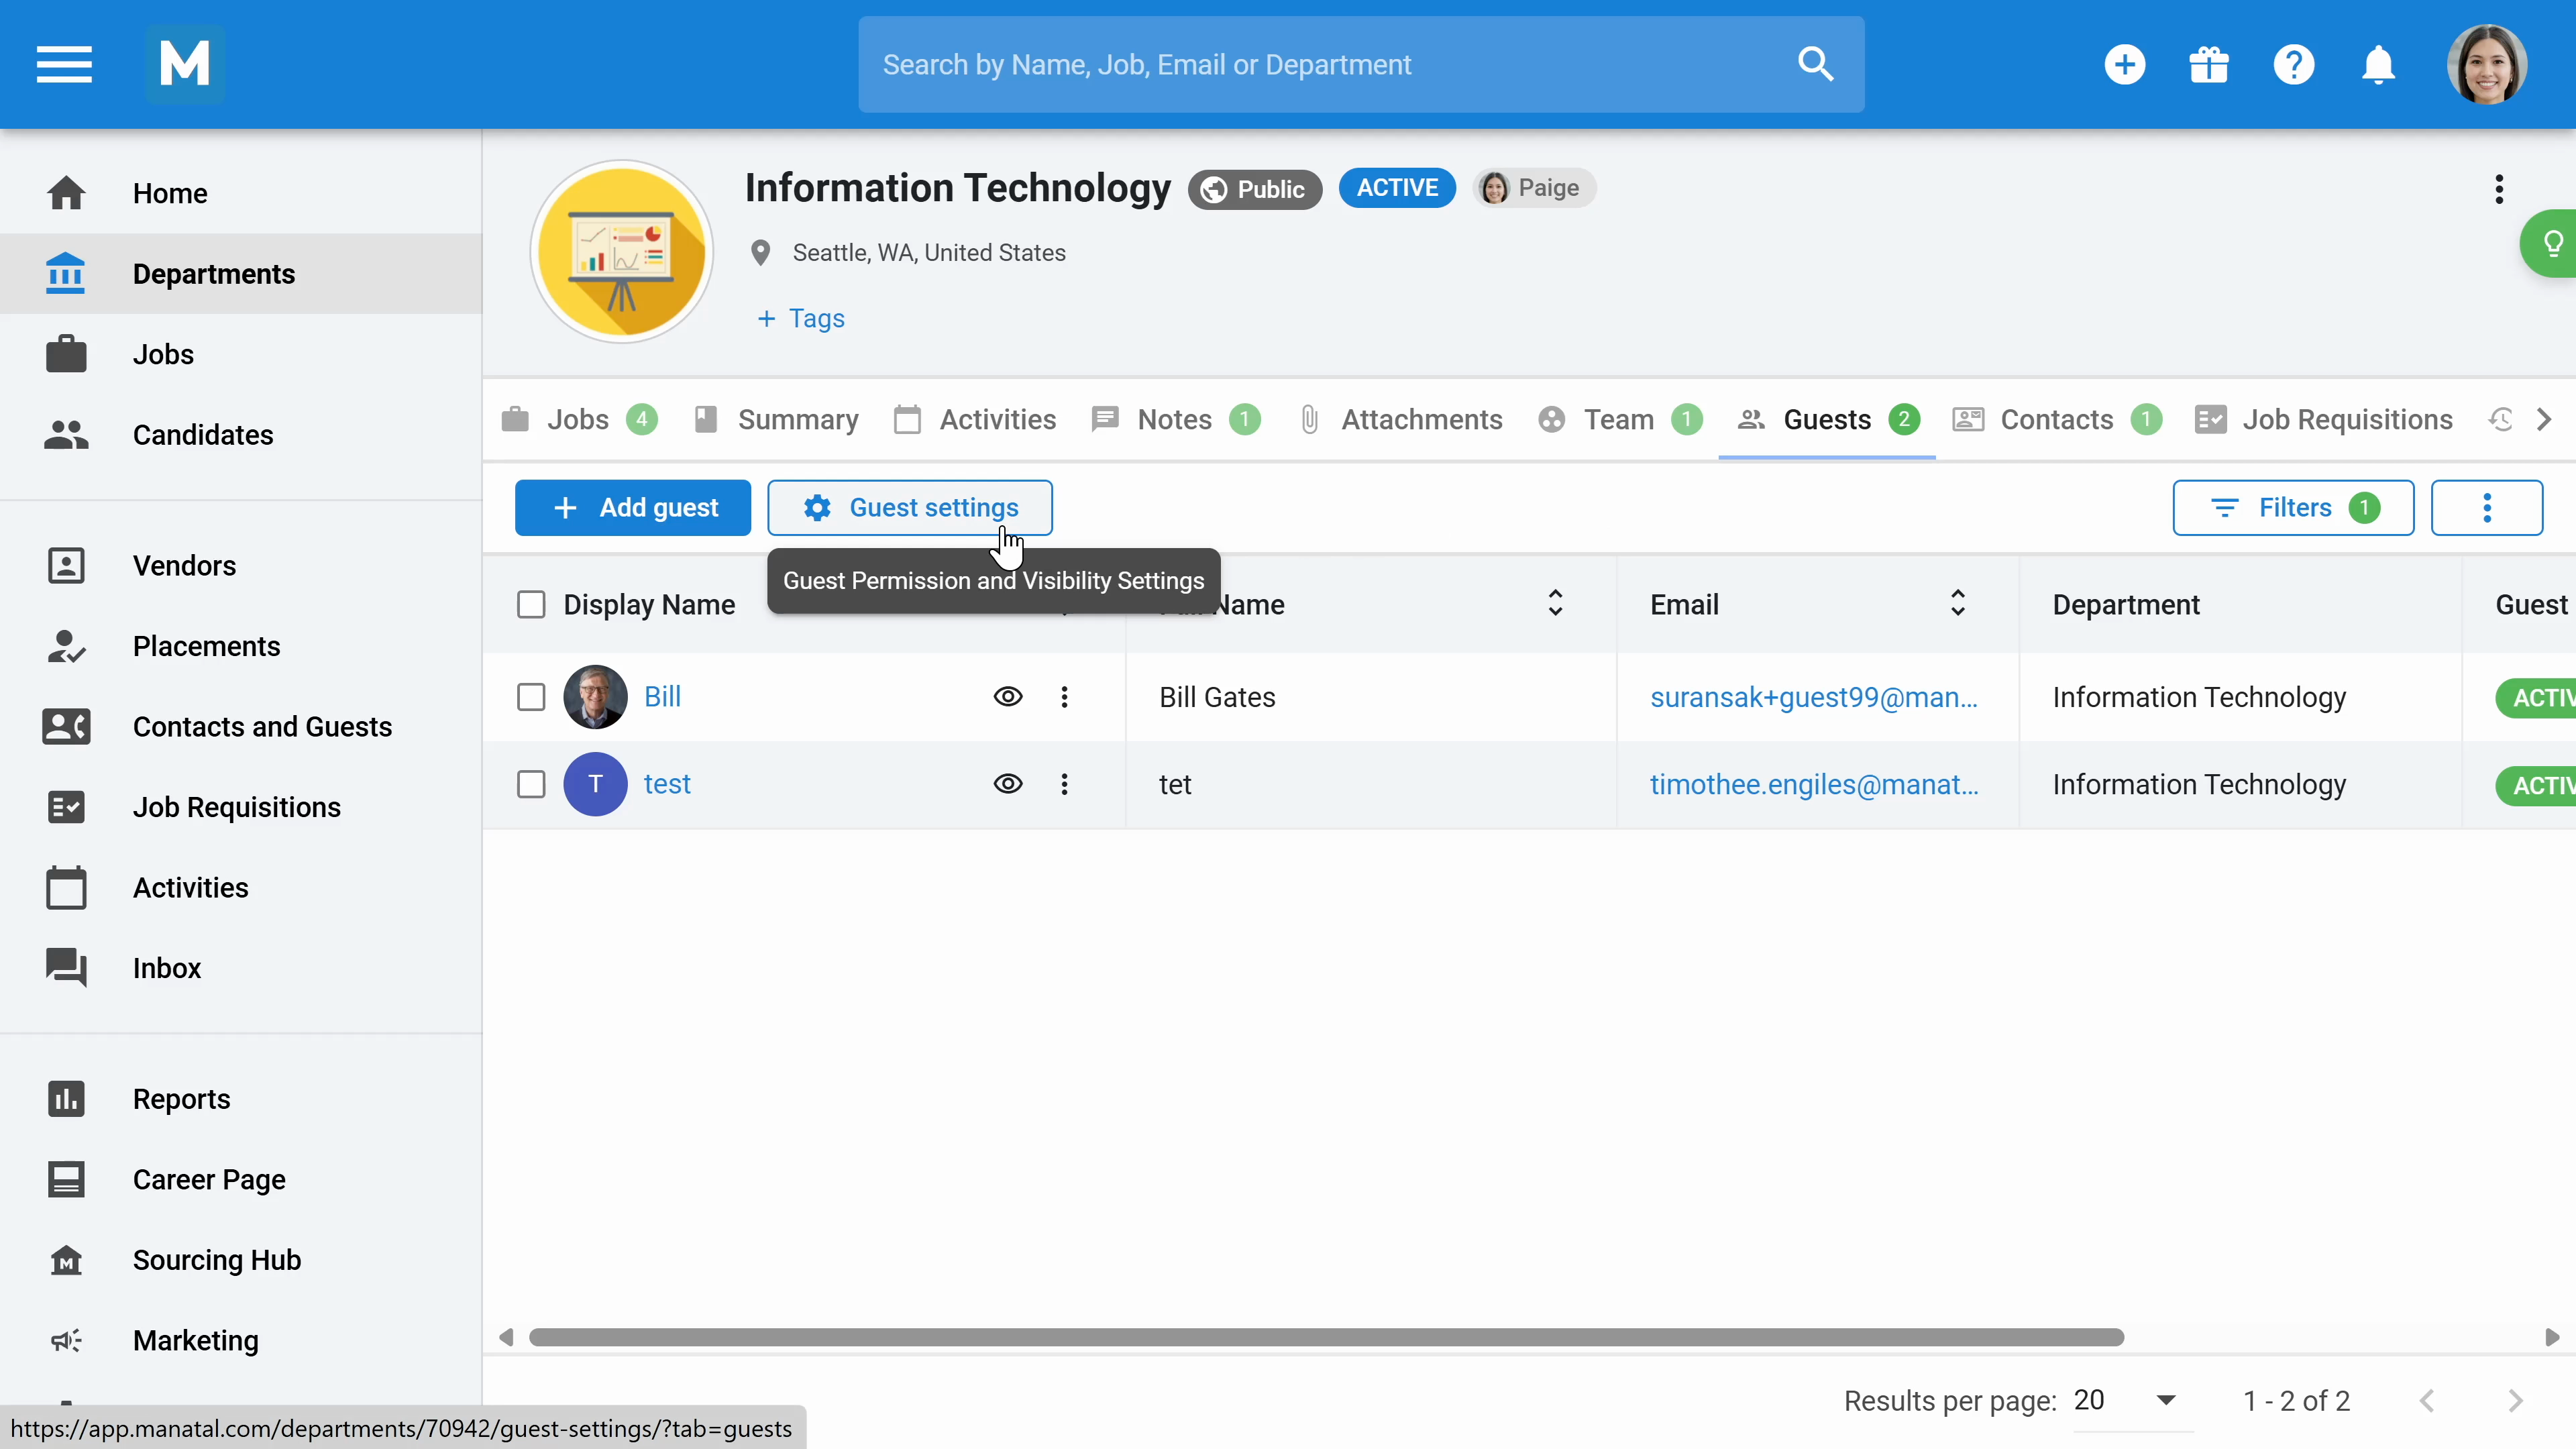
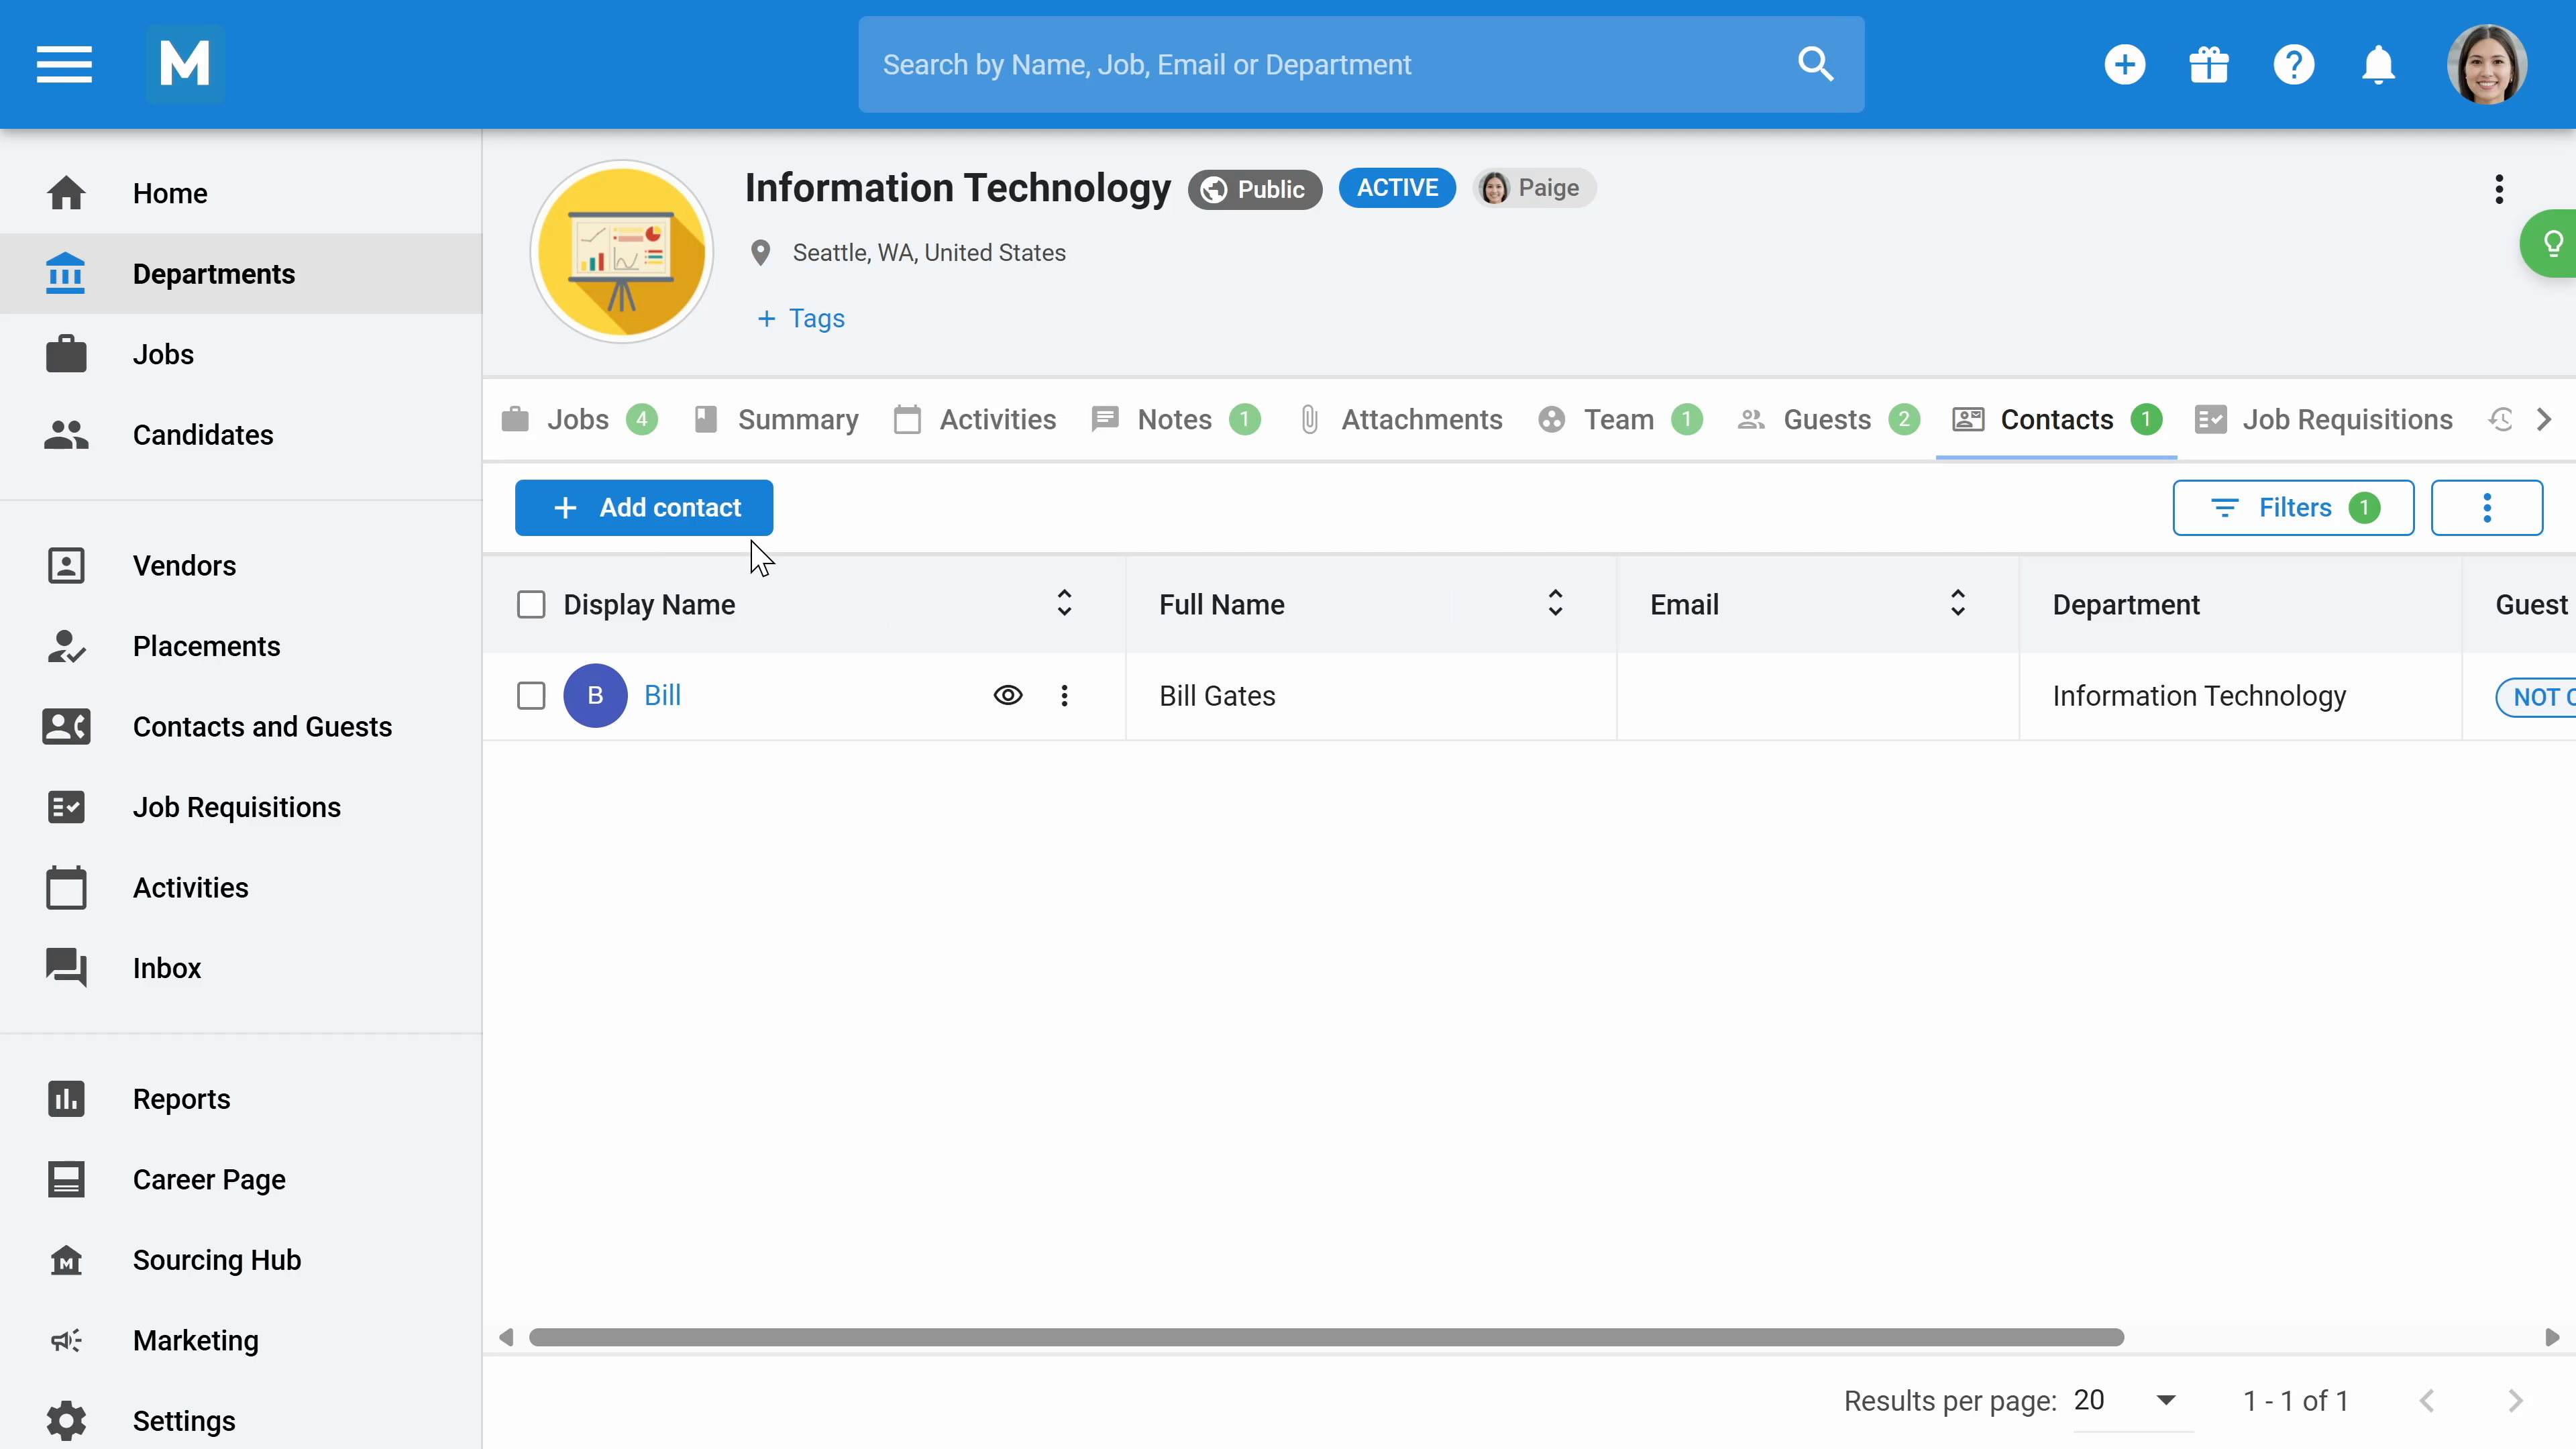
Step 9: Click Guest Settings to define what guests can do and review. In the Contacts section, add the contacts assosicated with the department.
Step 10: Navigate to the Job Requisitions section to see a list of all job requisitions.
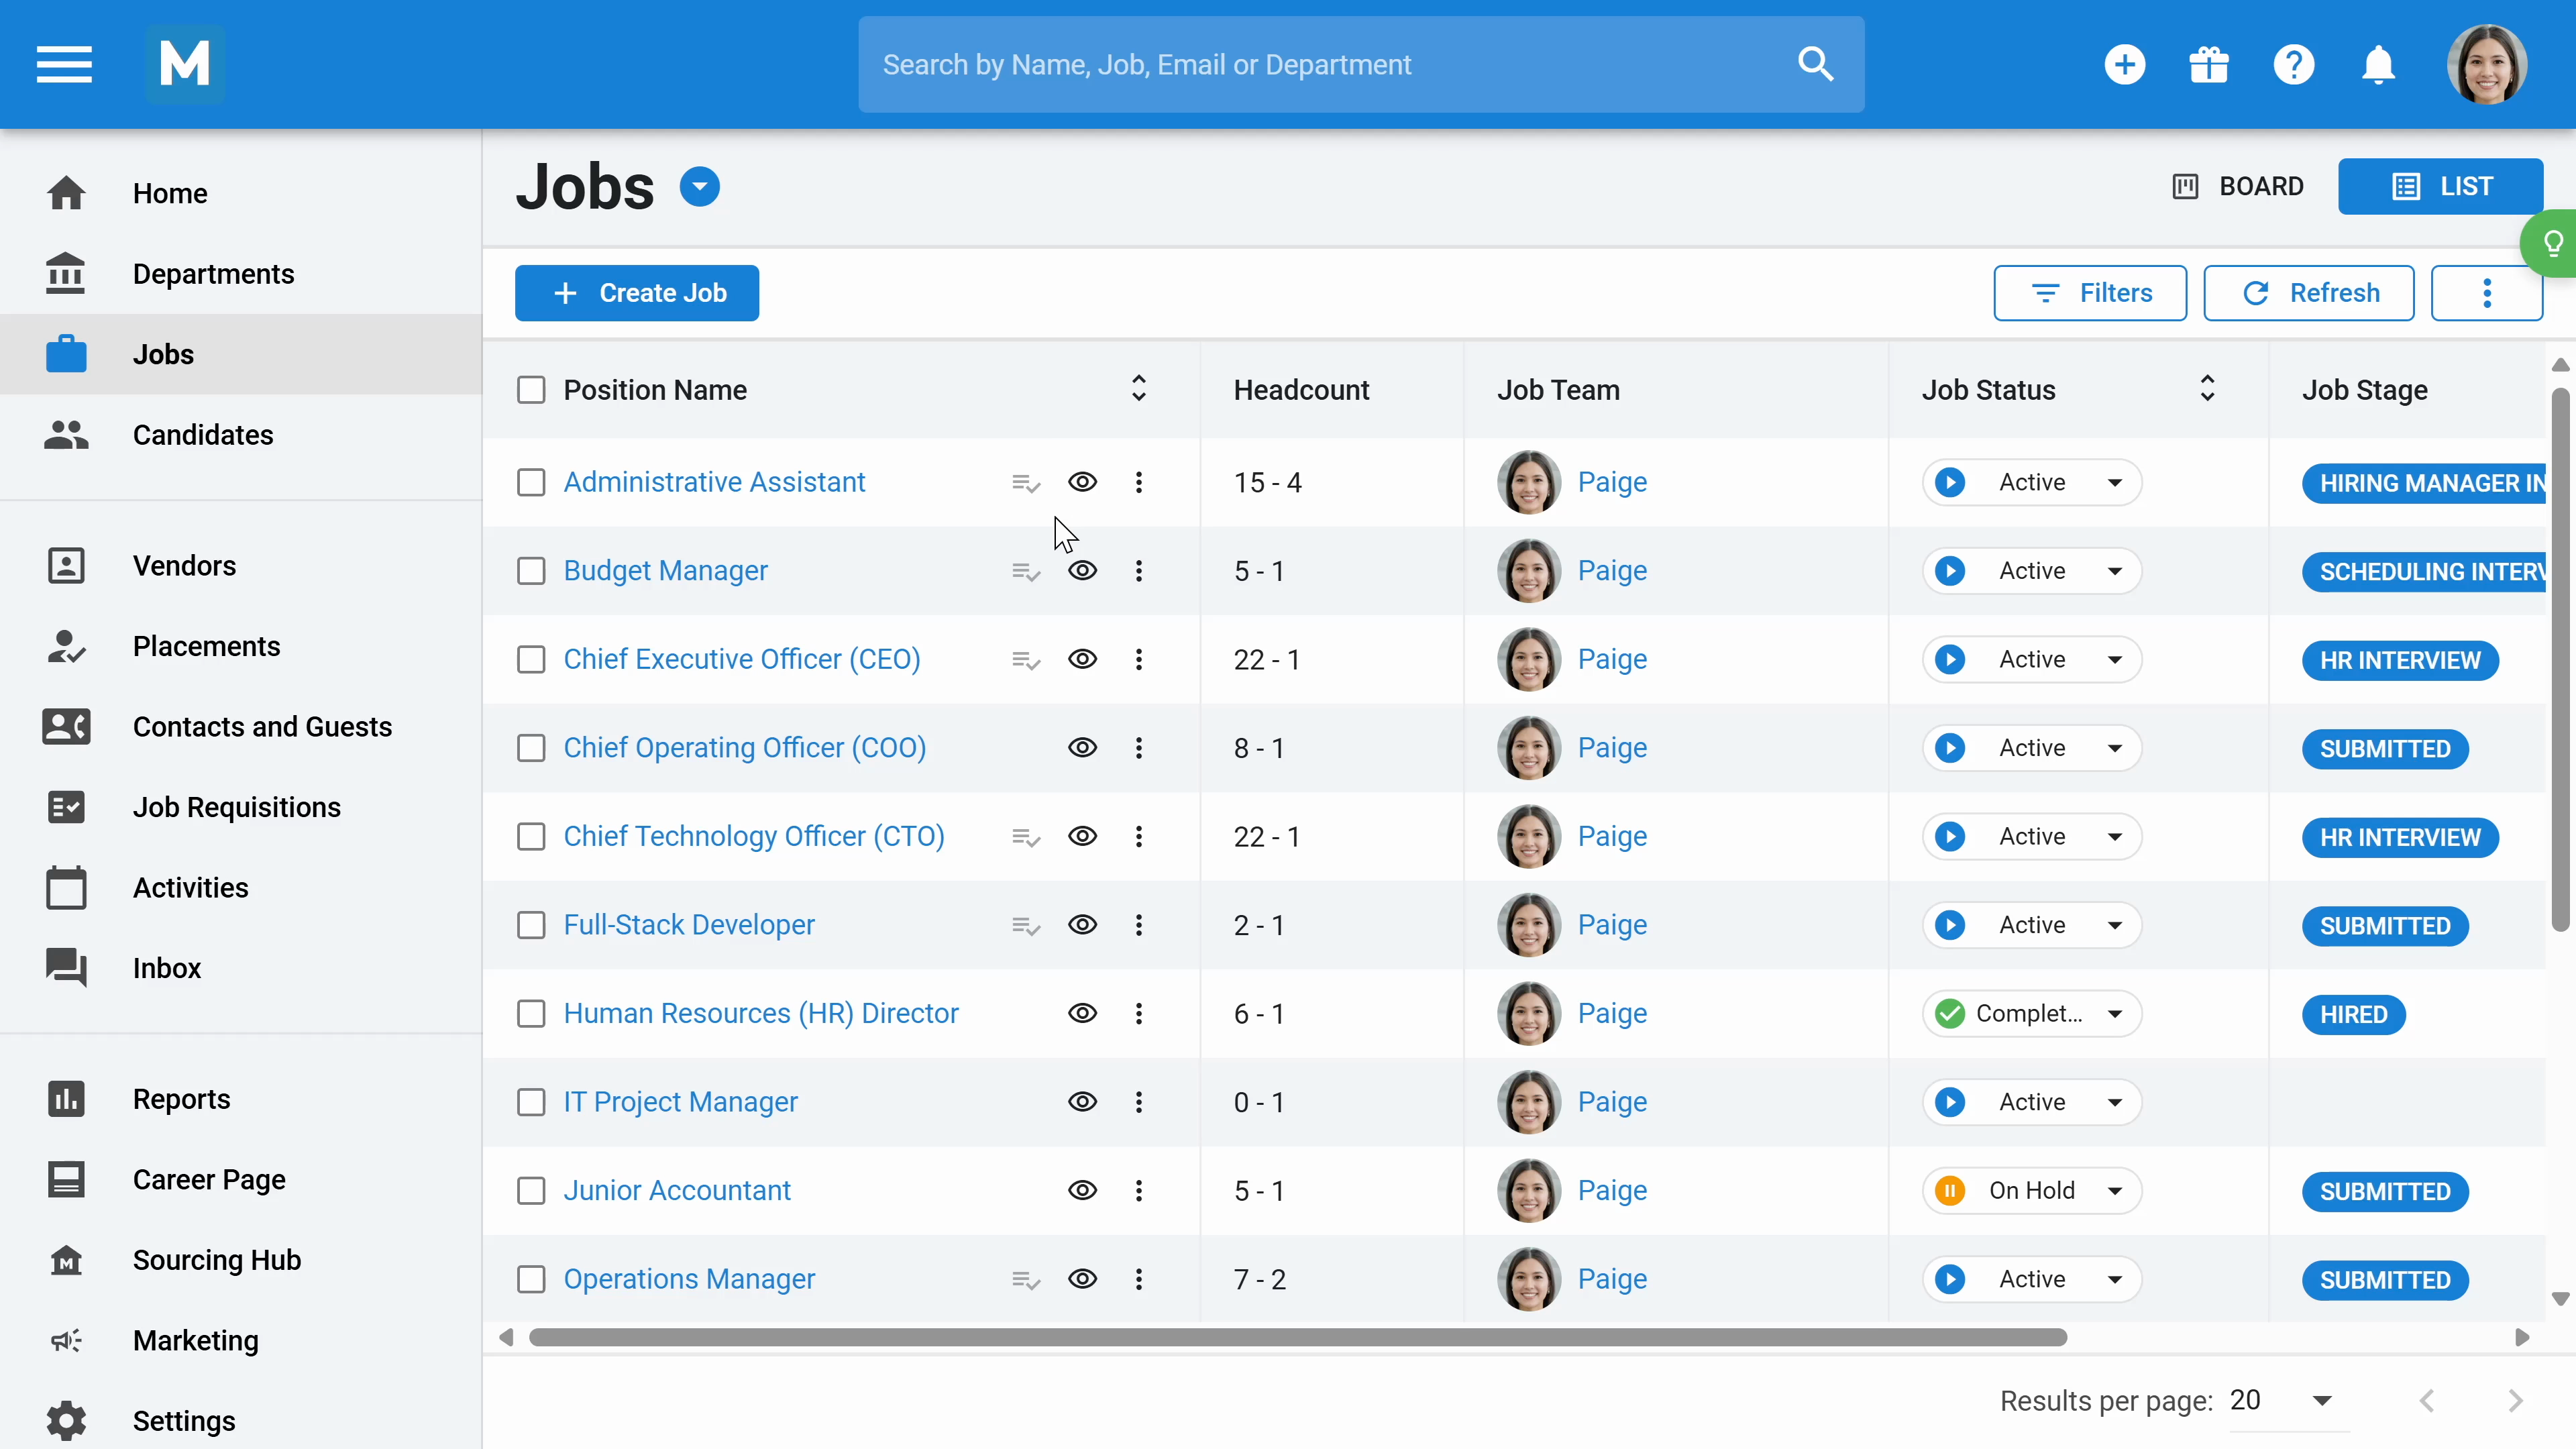
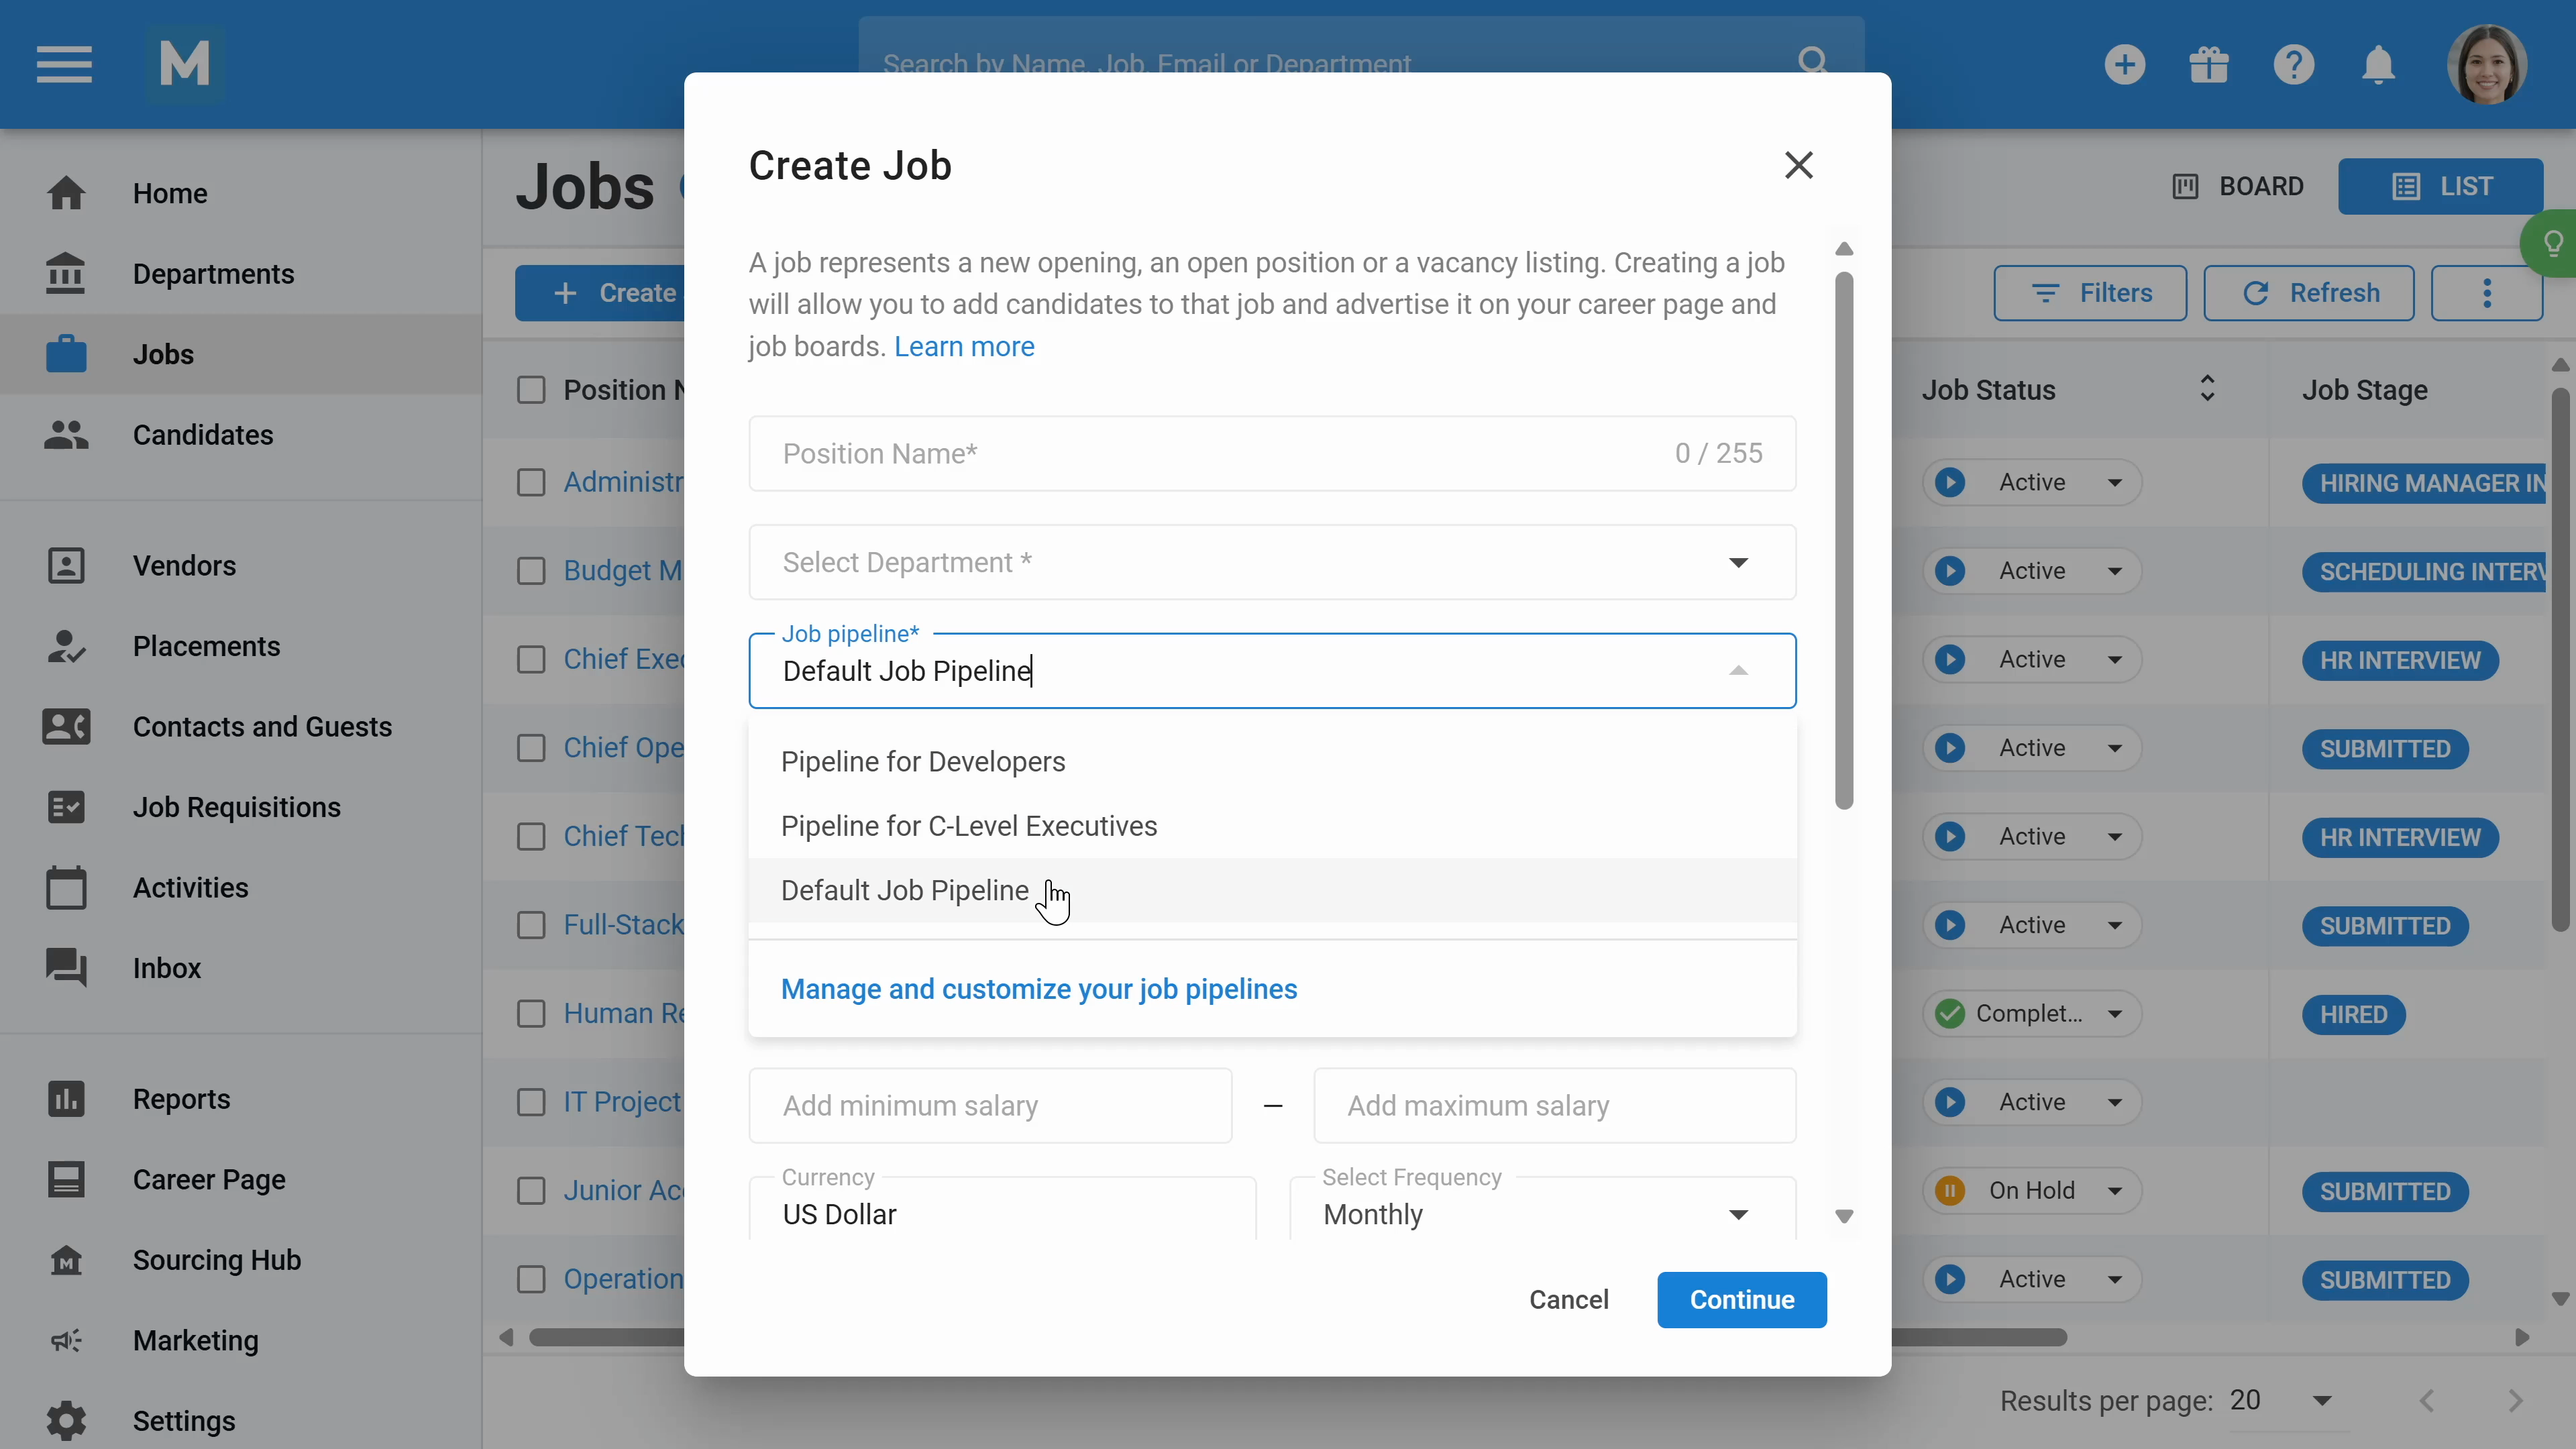
Step 11: To create a new job, go to the Jobs section in the left menu and click the Create Job button and enter the position name and department's name.
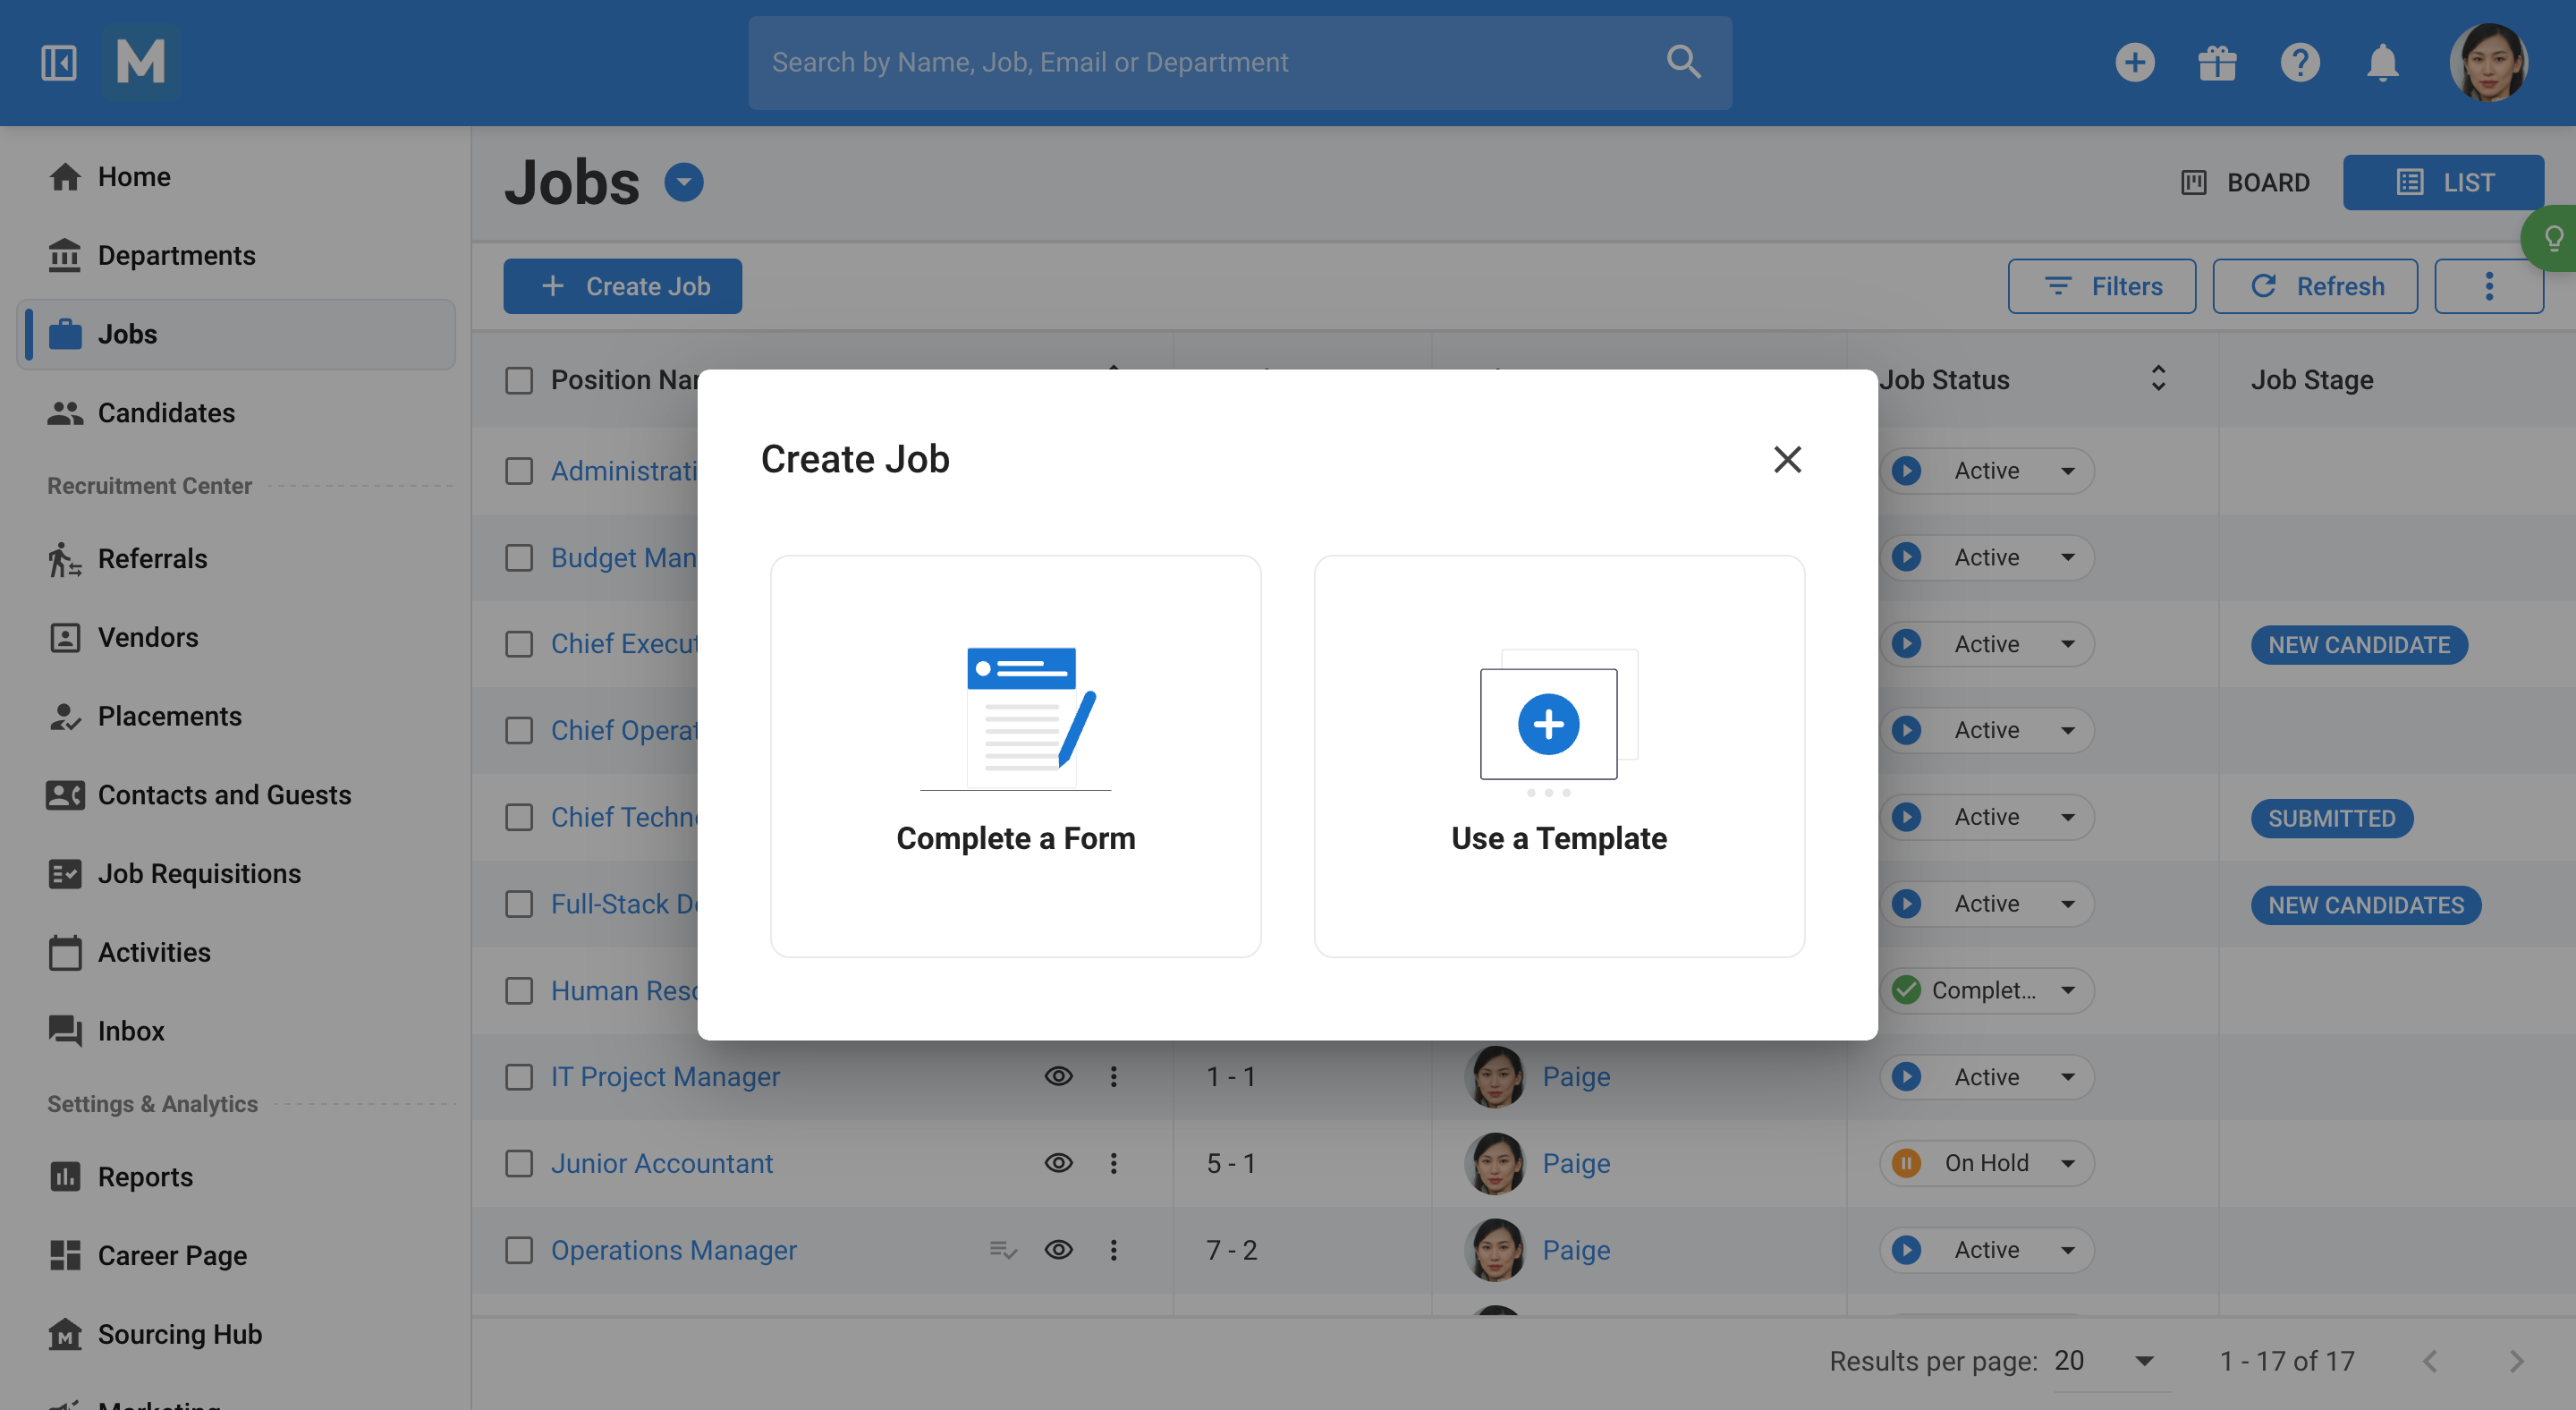
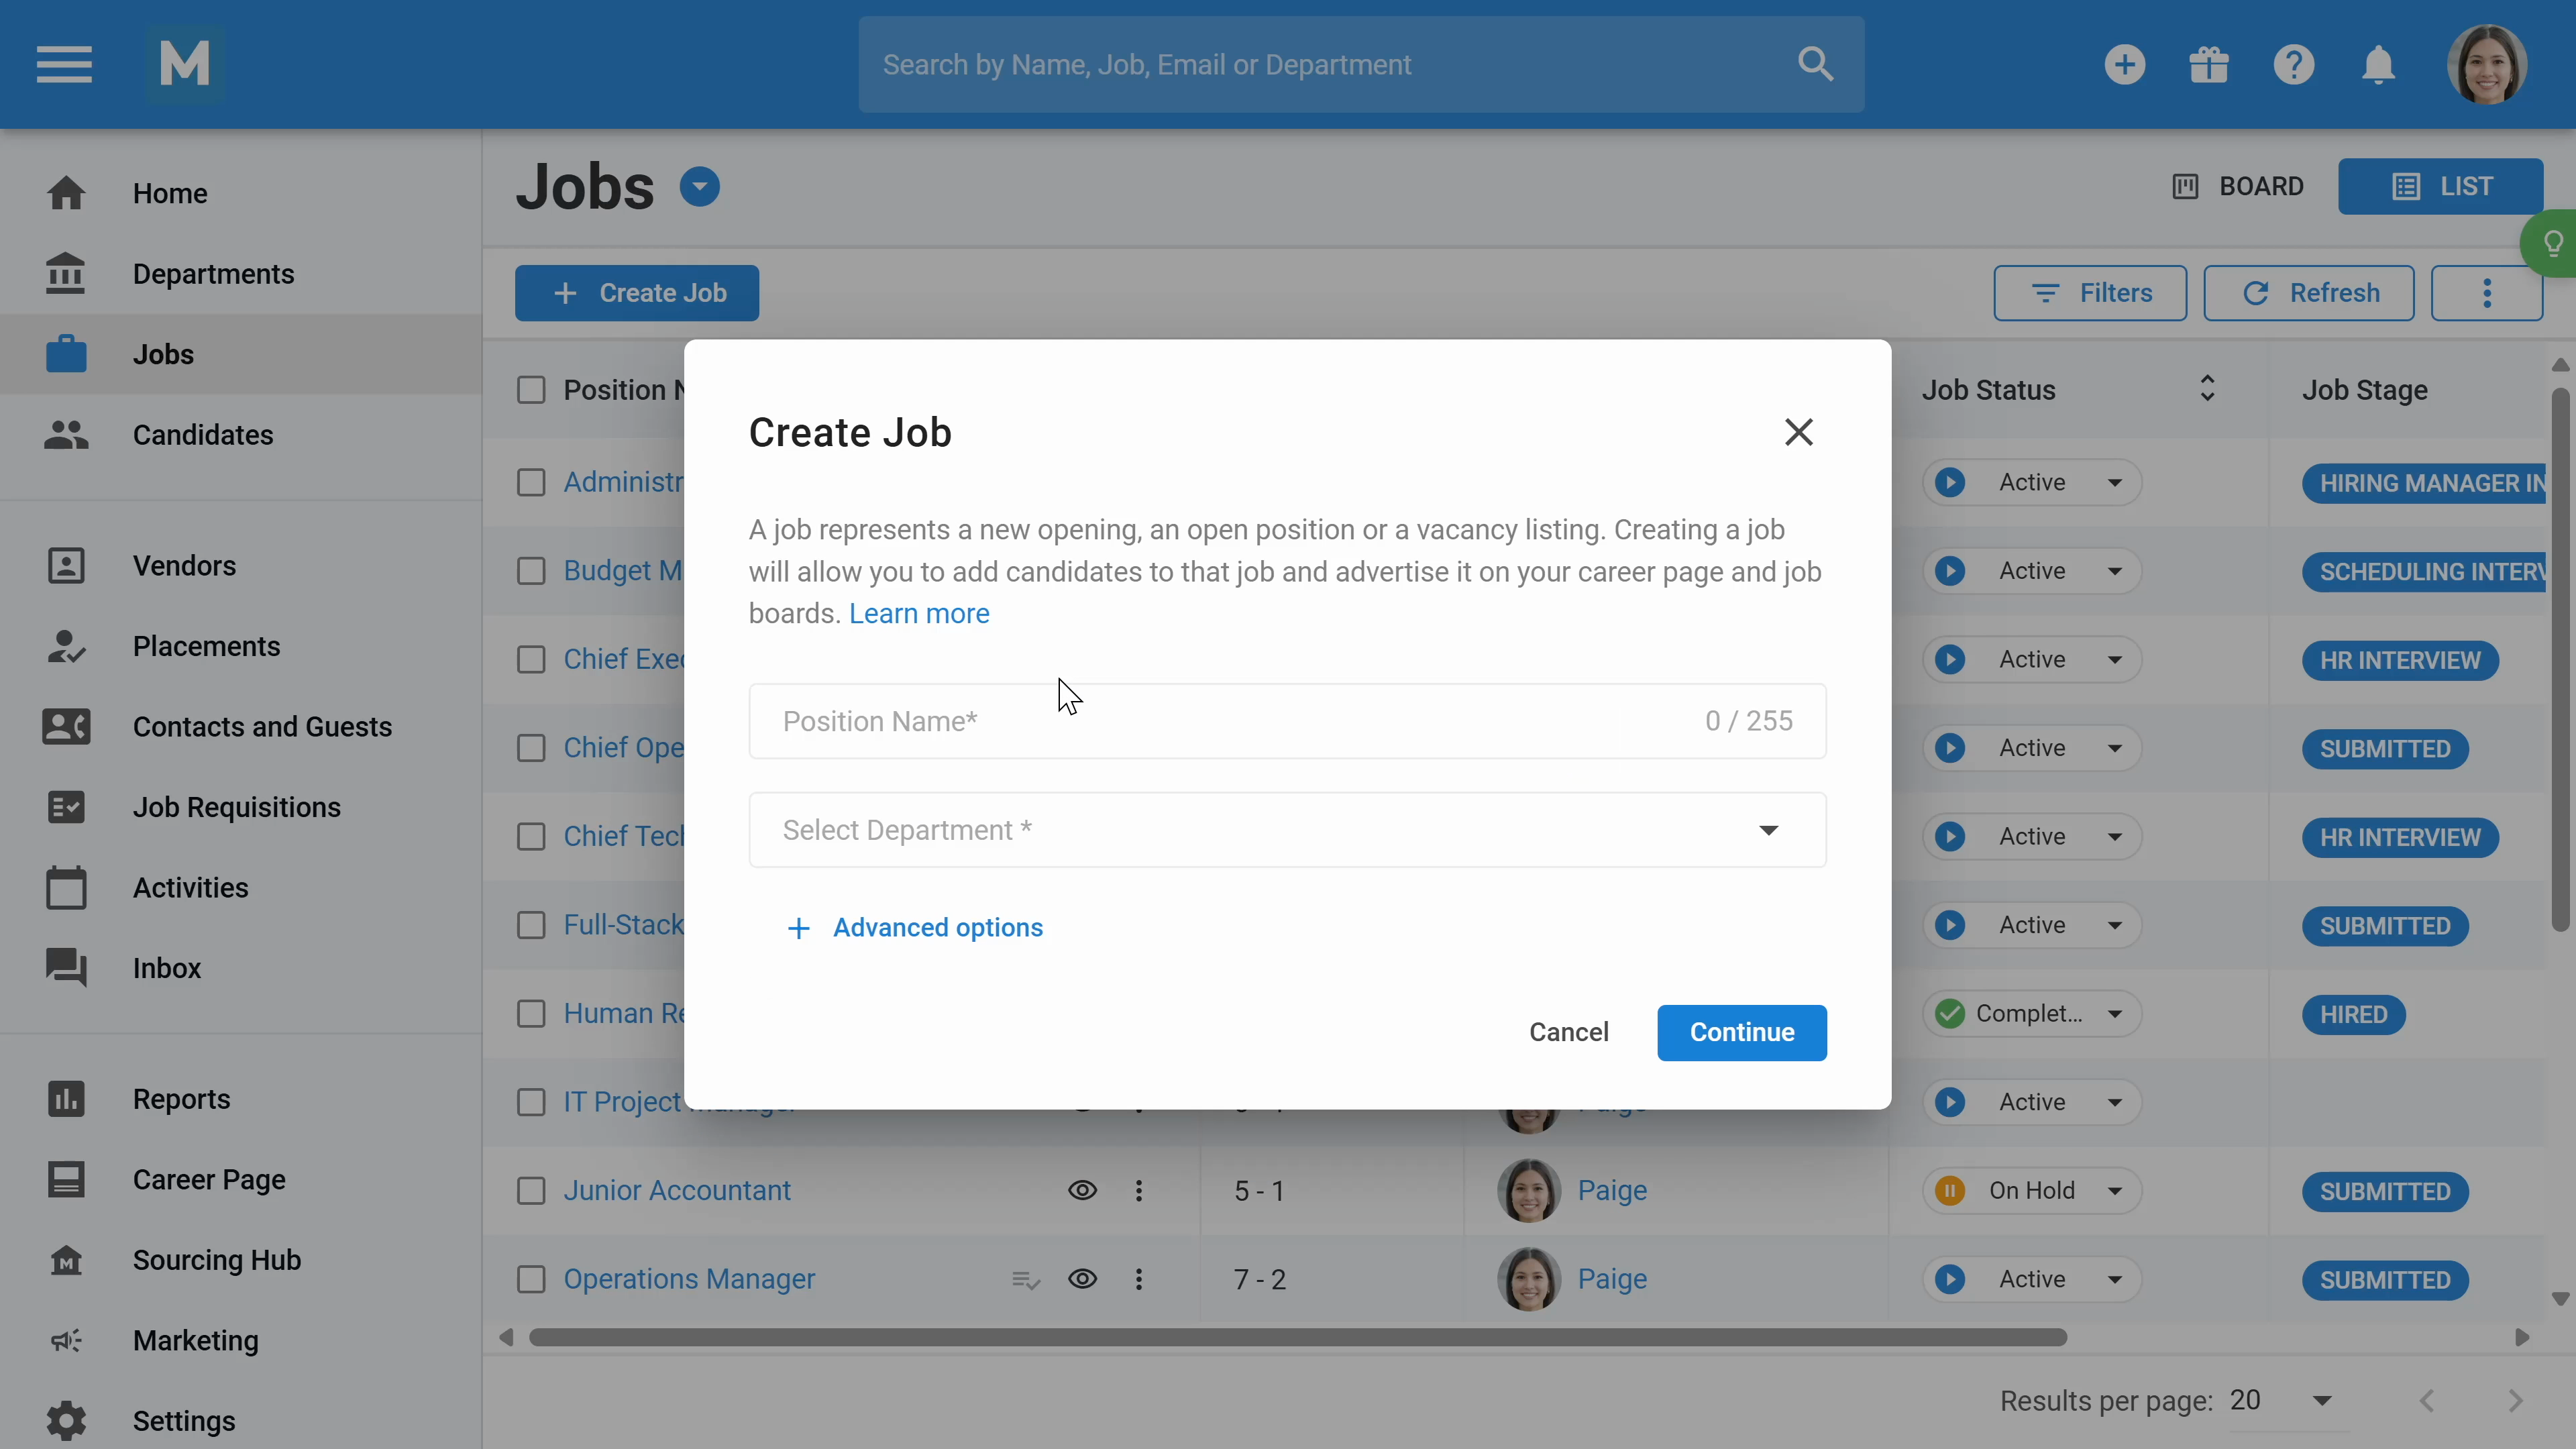
Step 12: Define the pipeline to use customized job pipeline stages. Add the job description manually or let AI generate it. You can also create a job using a template.

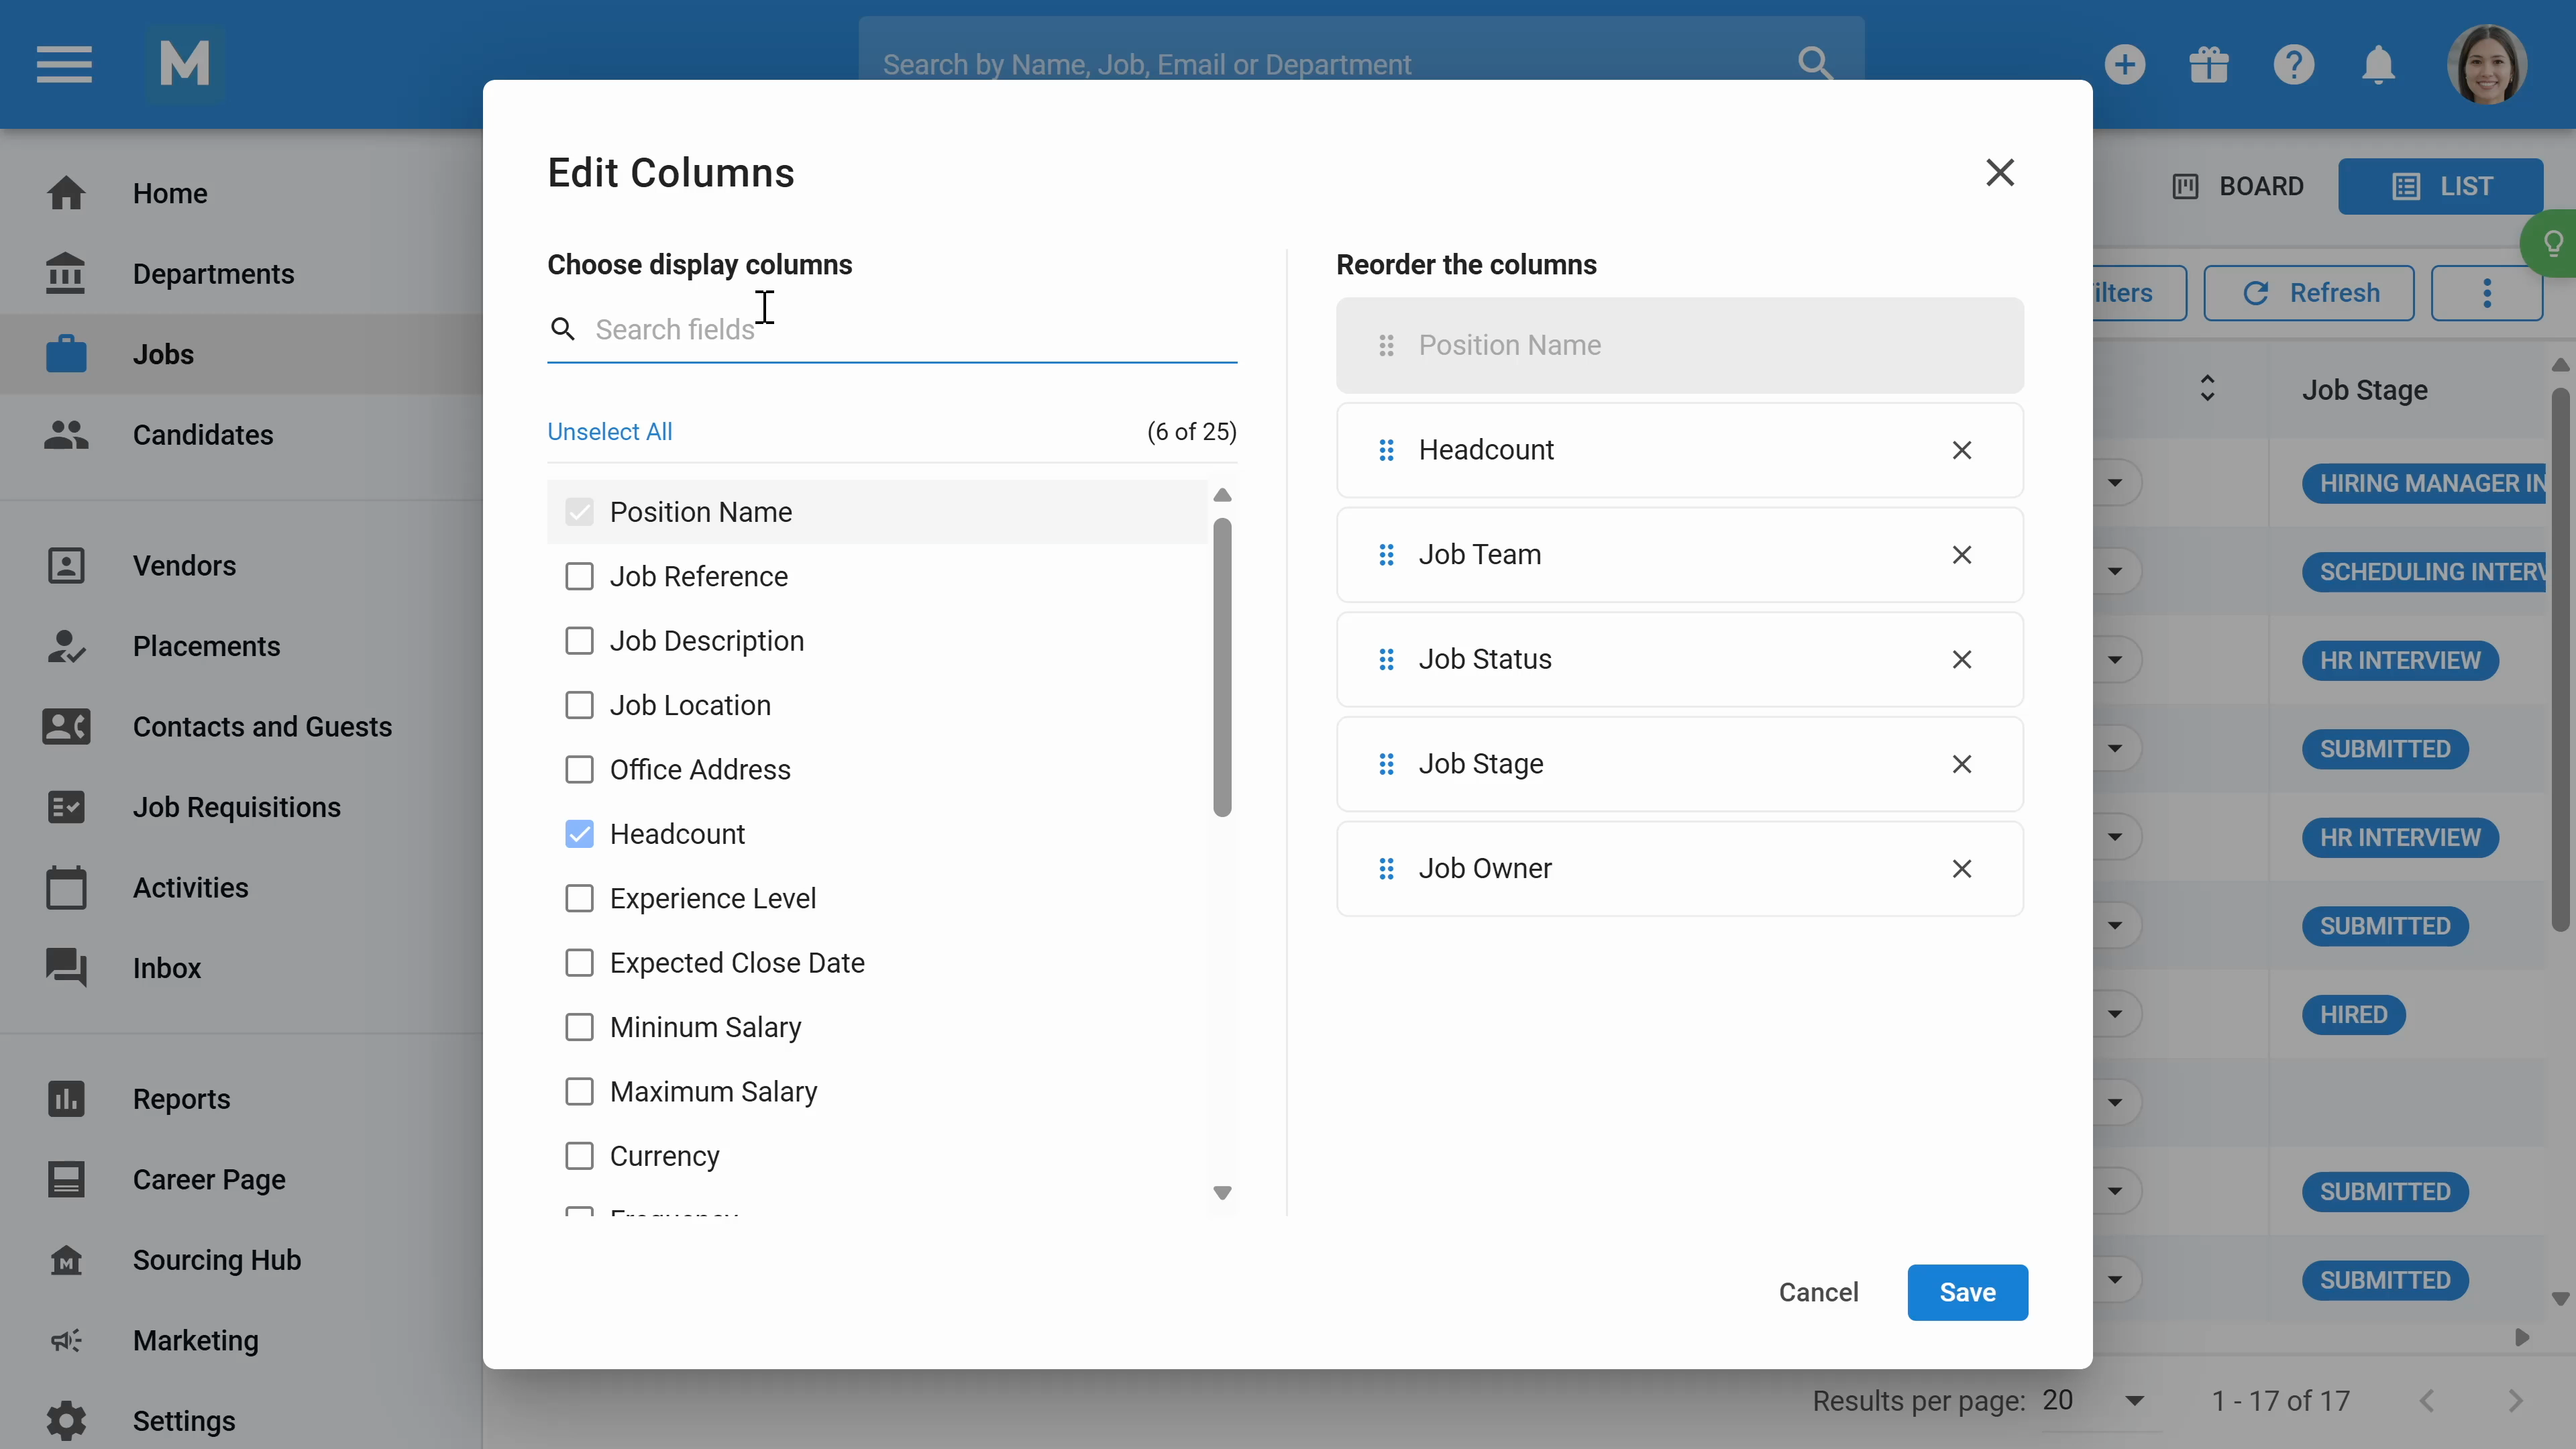
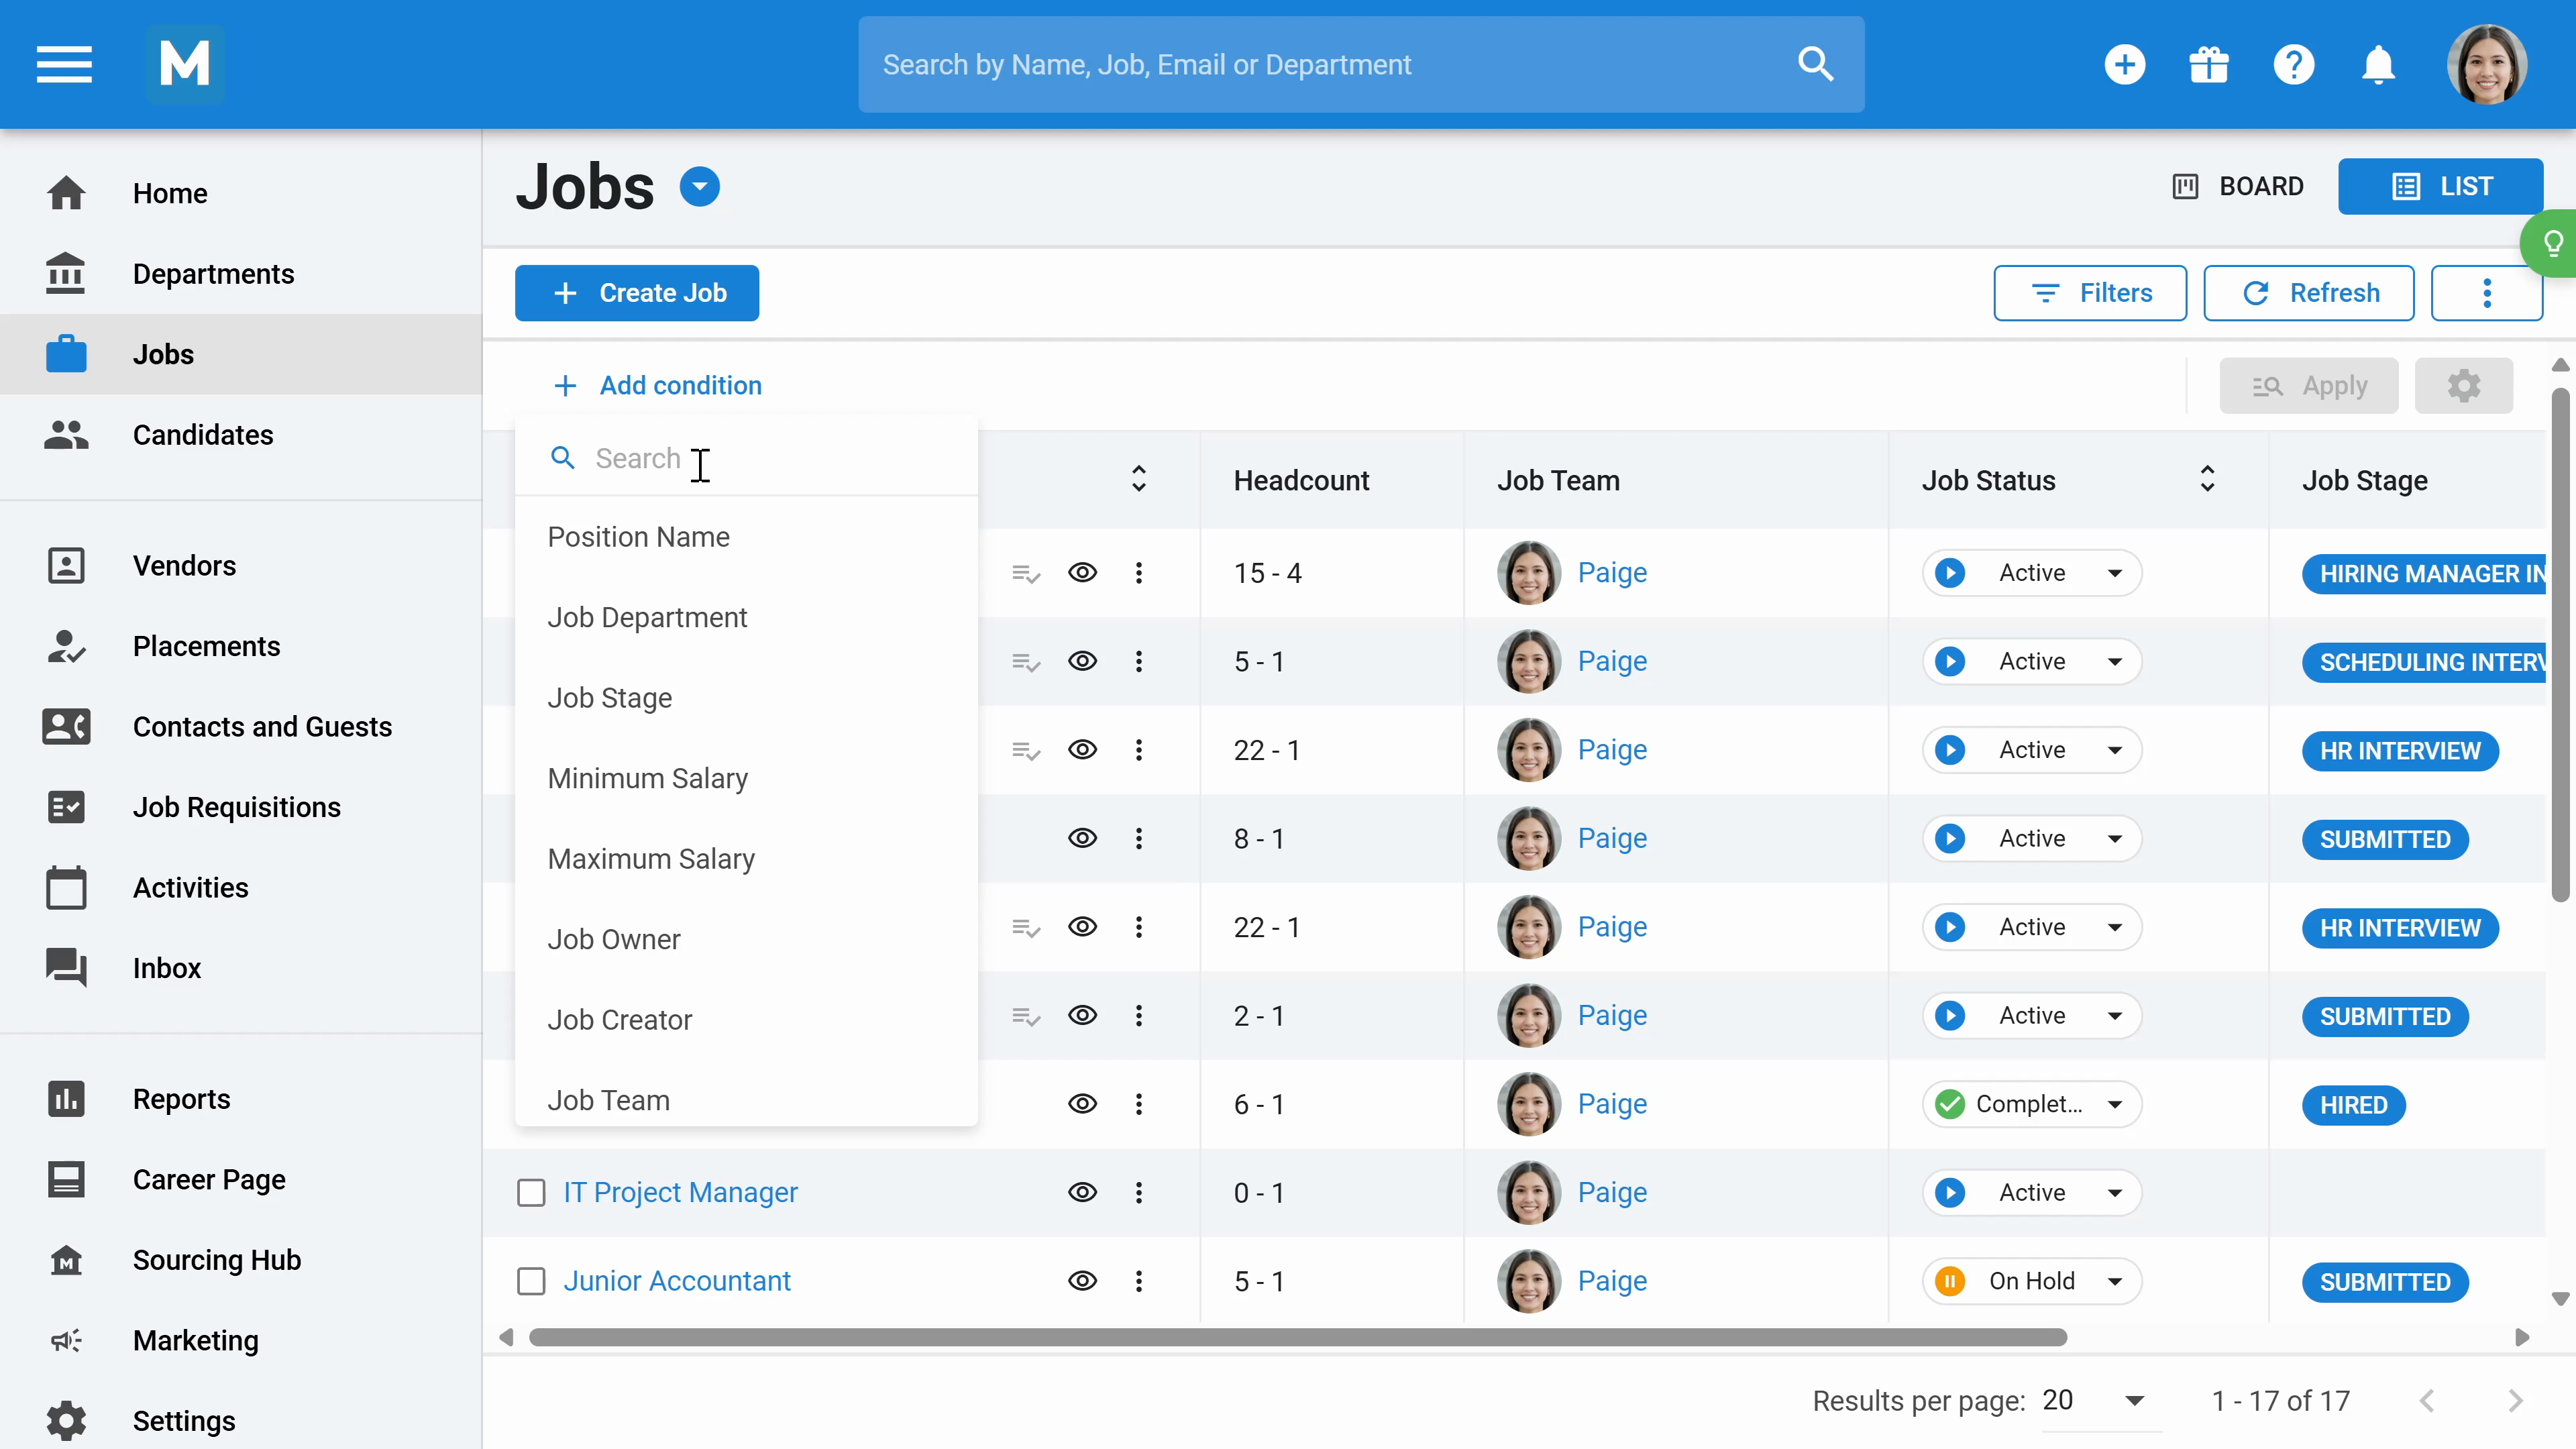
Step 13: Modify the jobs dashboard by clicking the three dots and selecting Edit Columns. You can create new columns and reorder them. In addition, with the filters, you can filter the jobs dashboard.

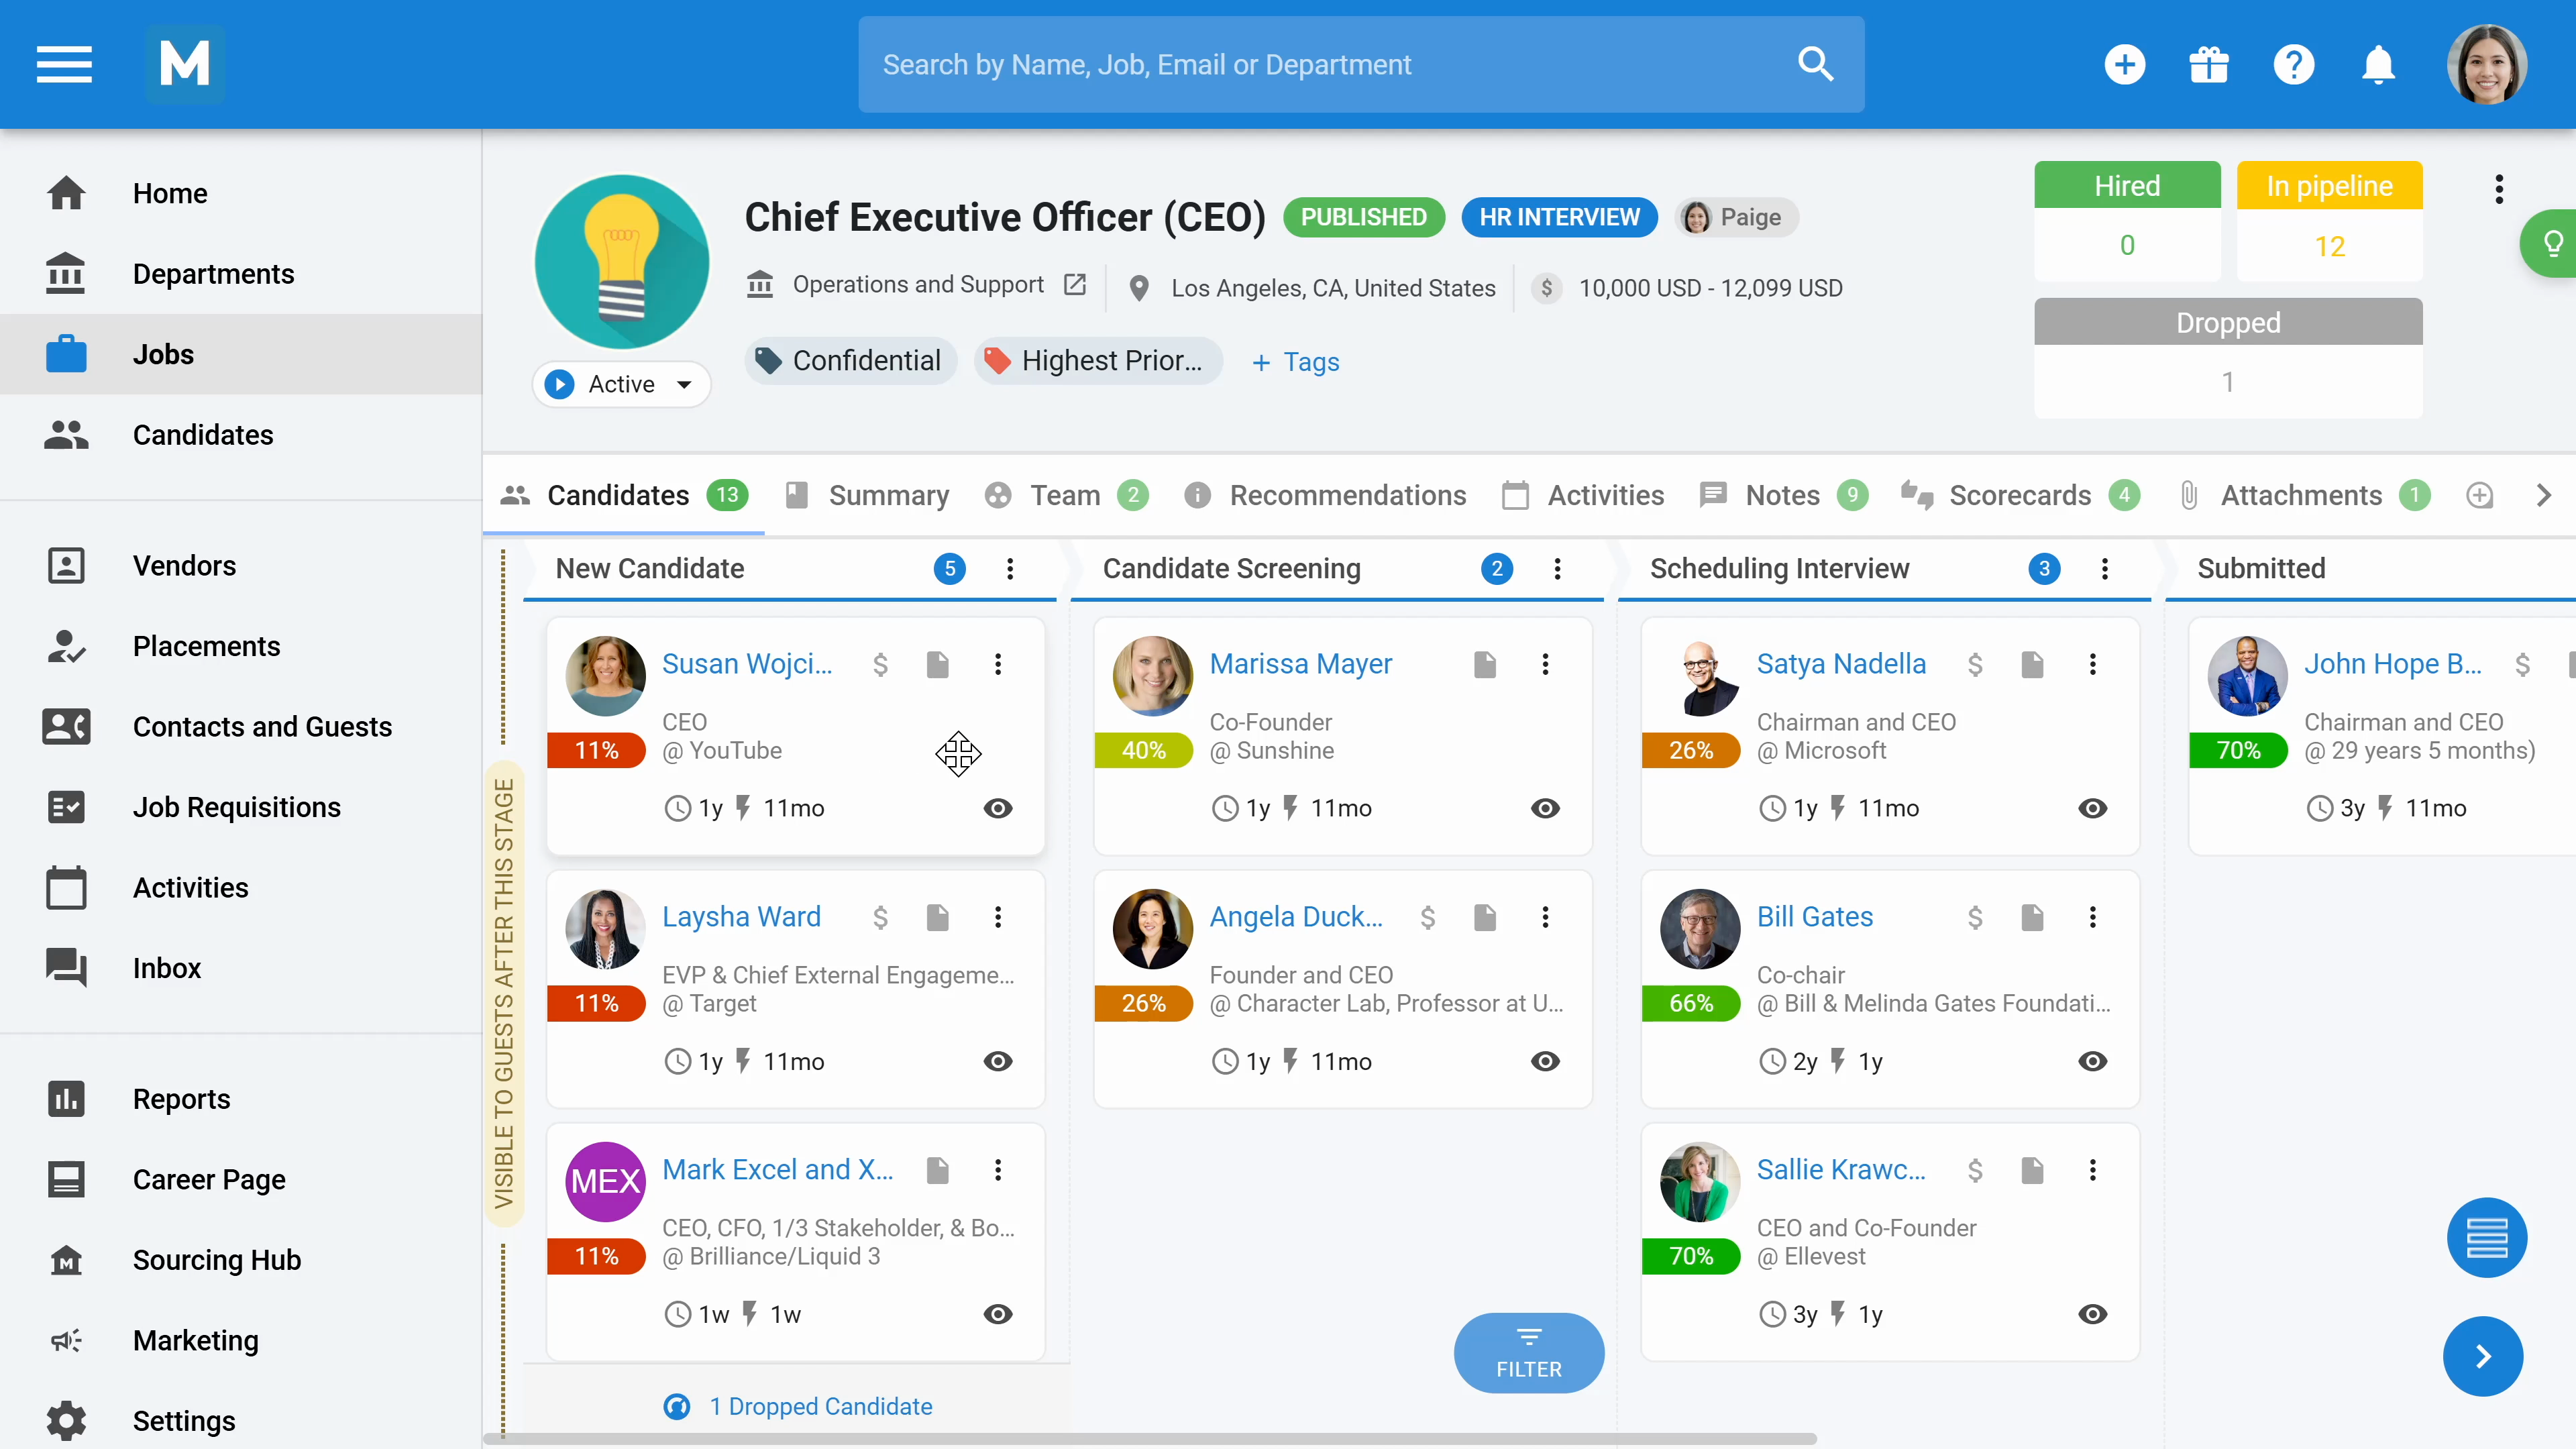
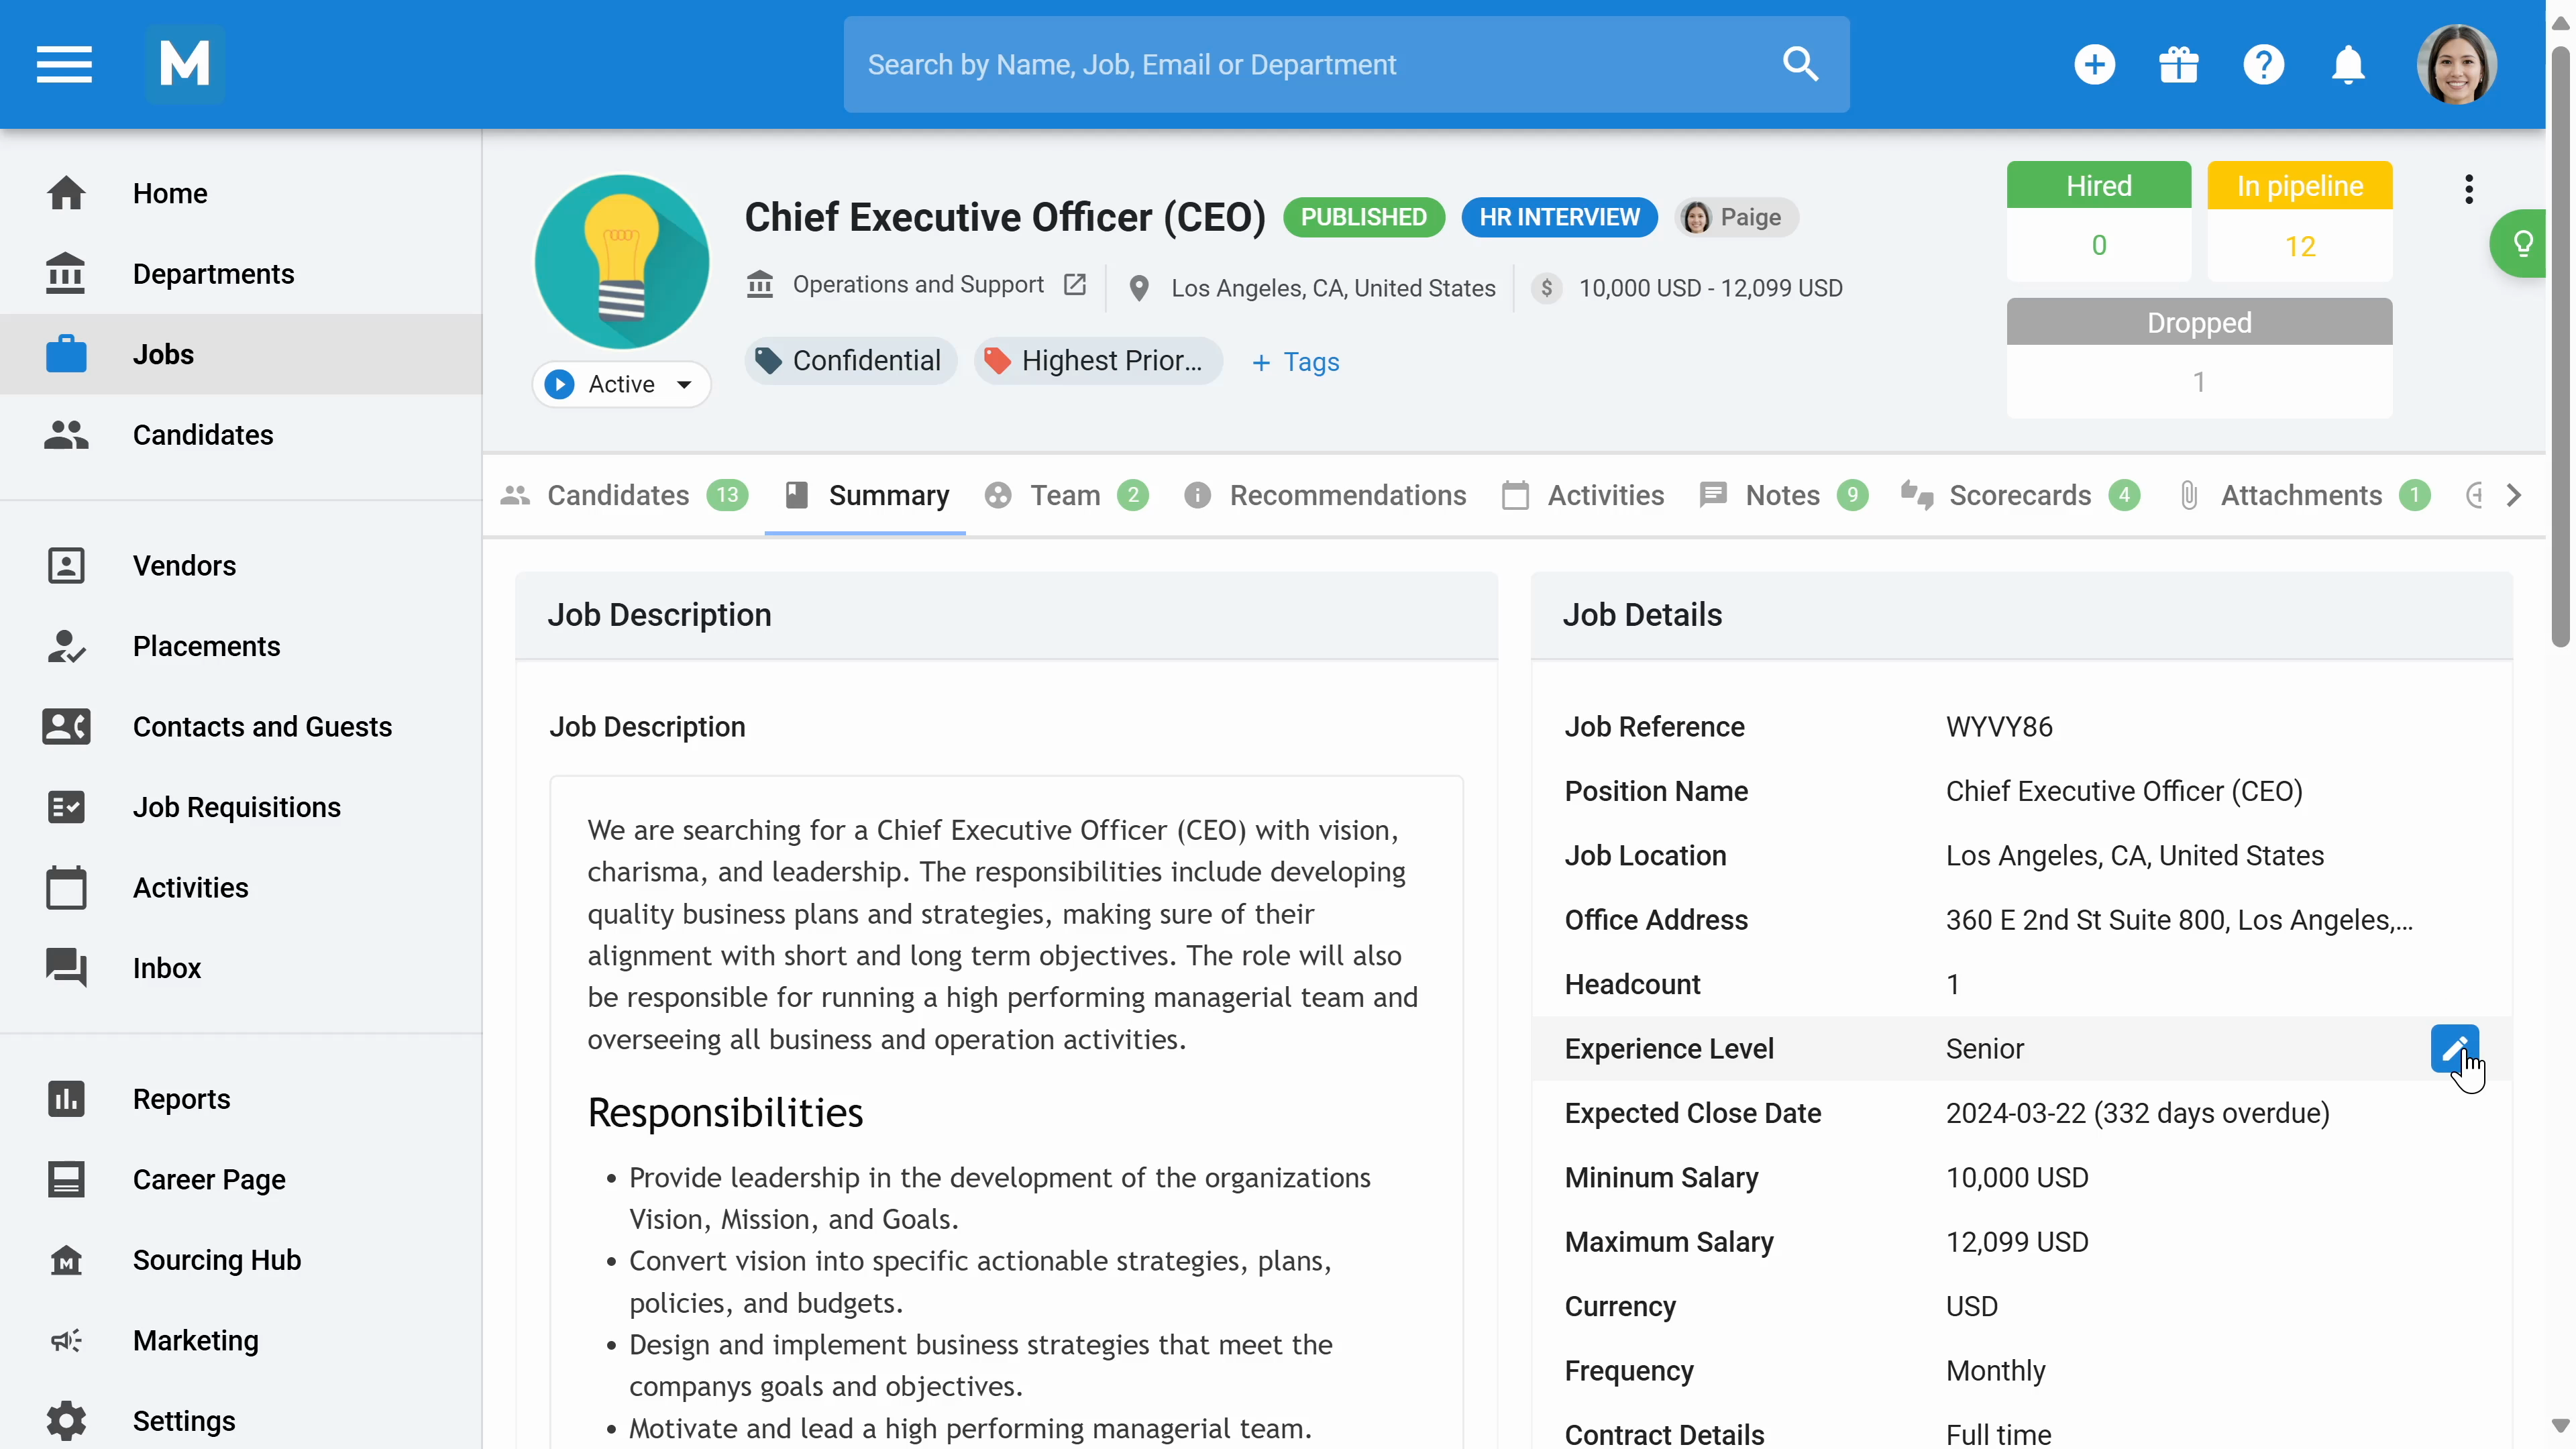
Step 14: Open a specific job to view its information. Here, you can review candidate profiles and modify job descriptions and details.
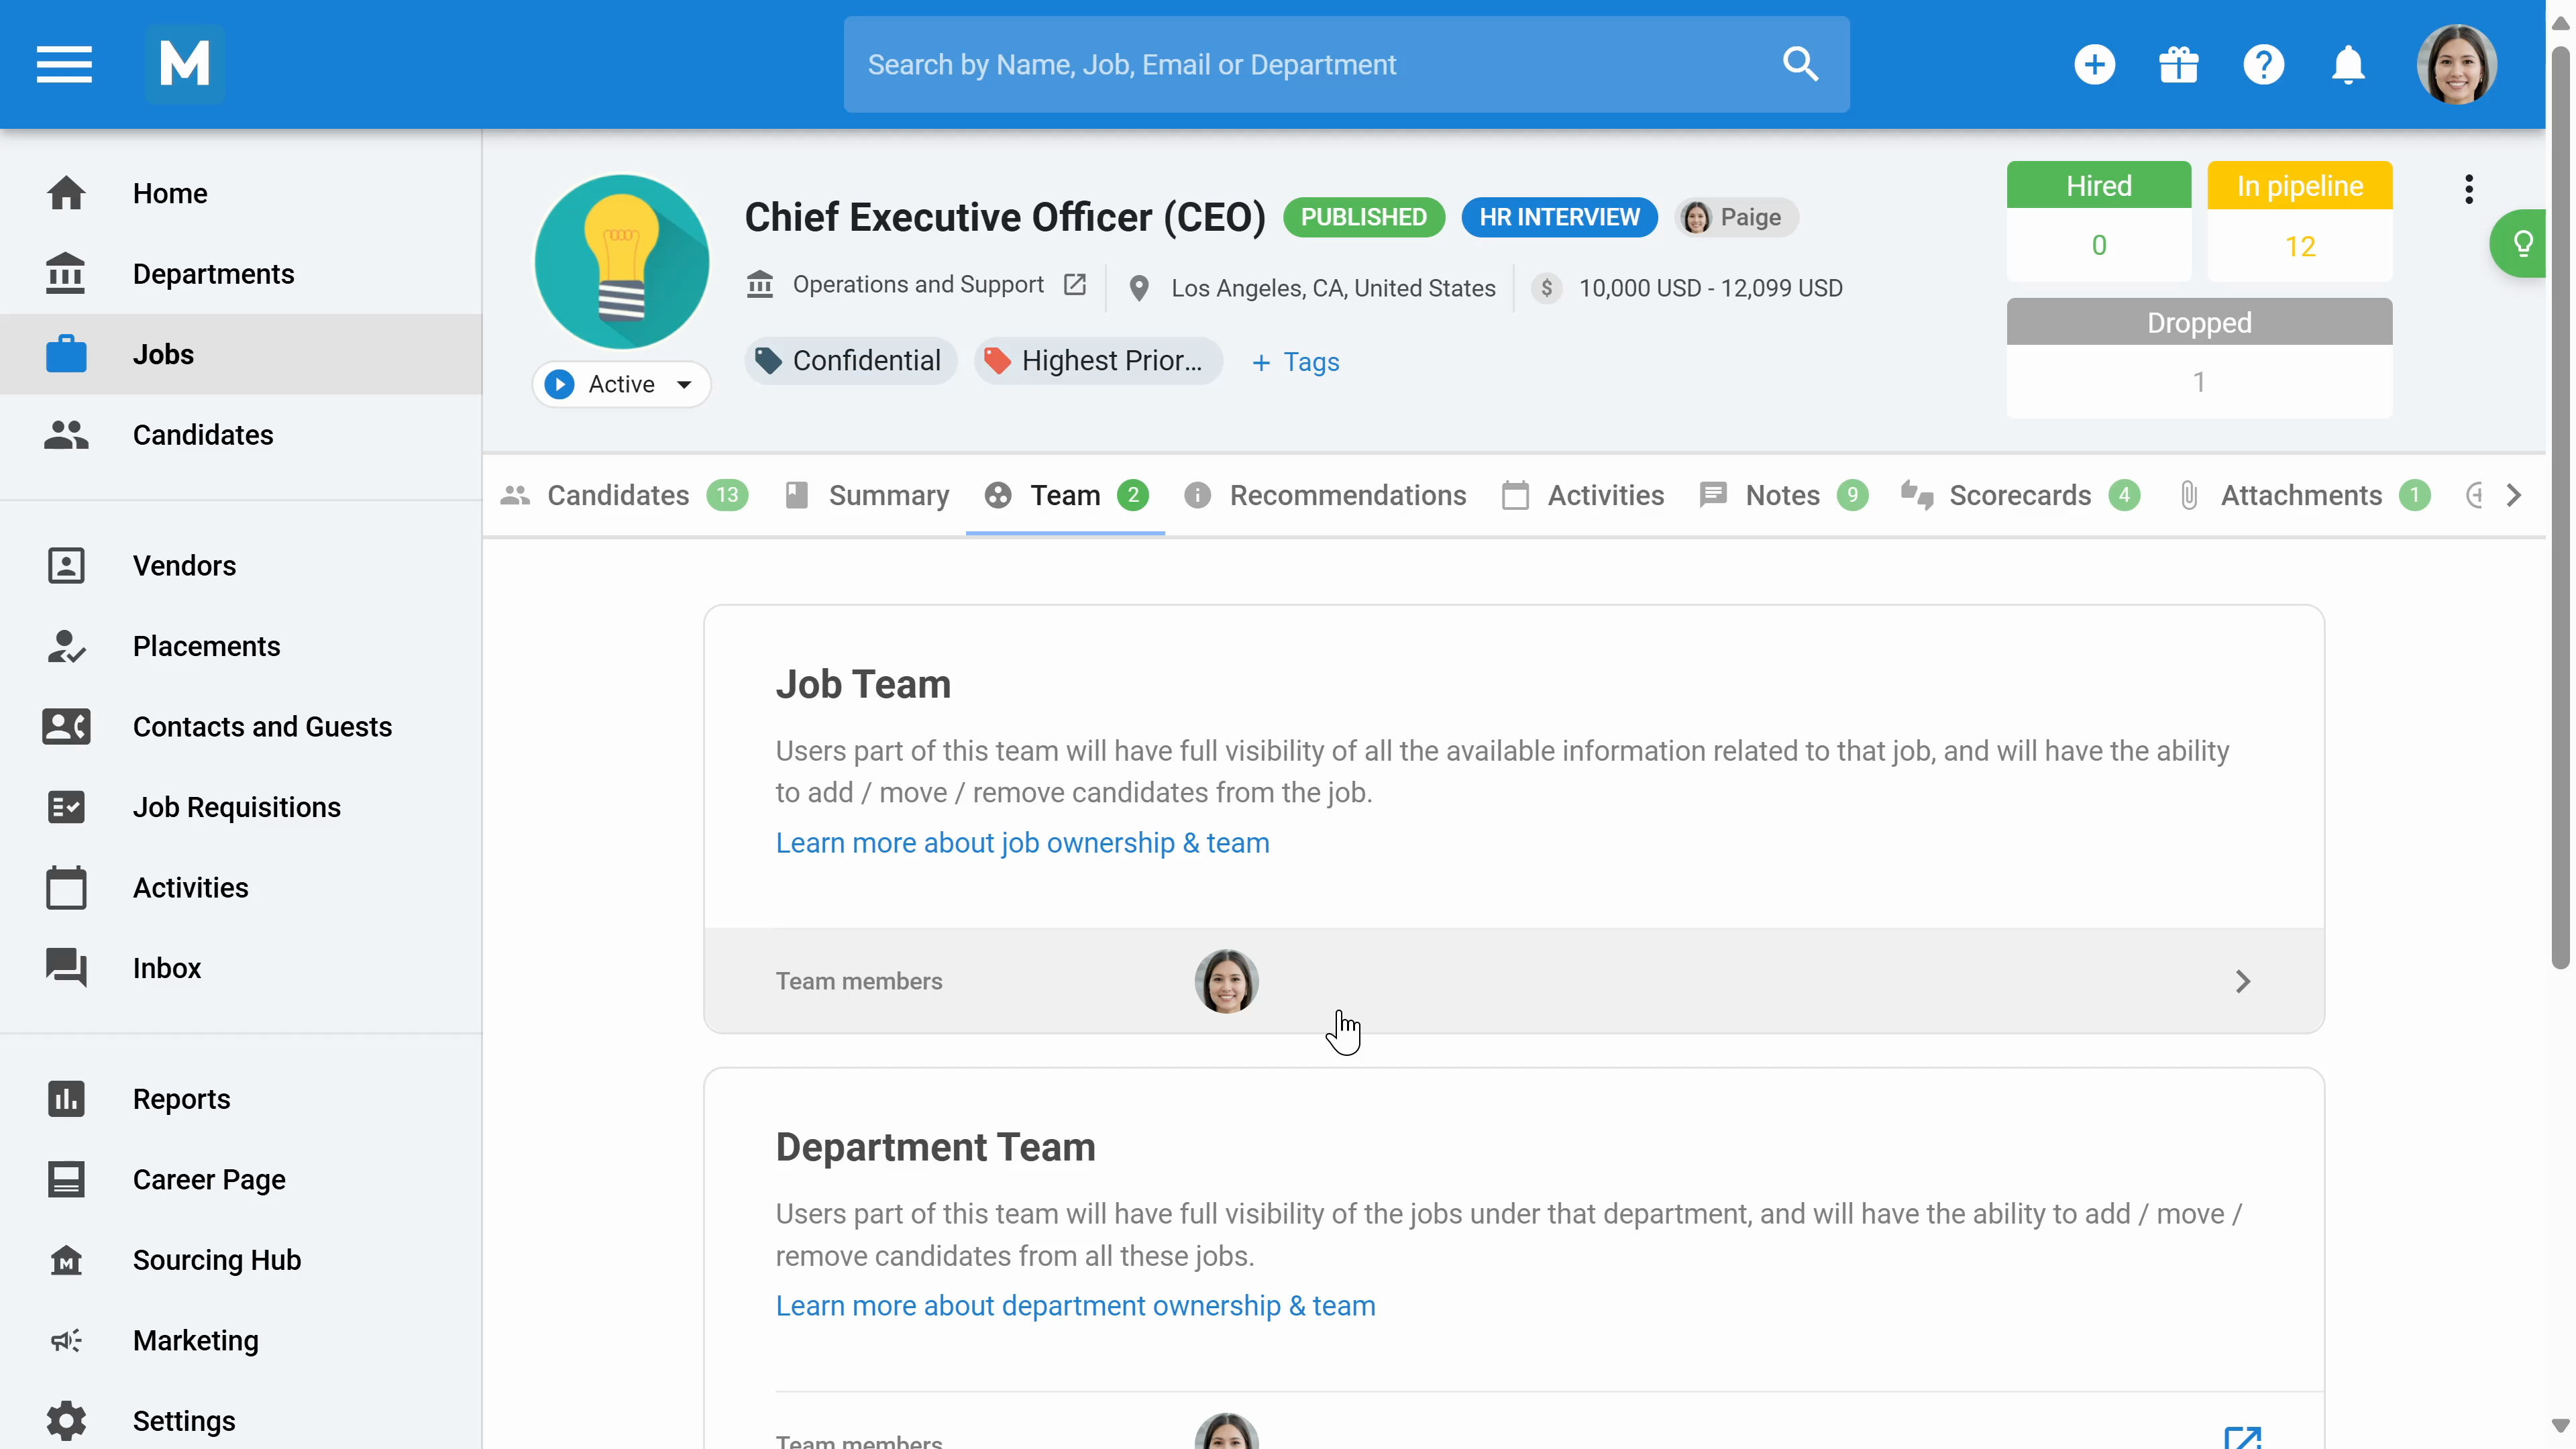
Step 15: In the Teams section, define which recruiters are in charge of the job.
Step 16: In the recommendations section, the system uses AI to recommend suitable candidates. Modify the criteria to adjust the AI's recommendations.

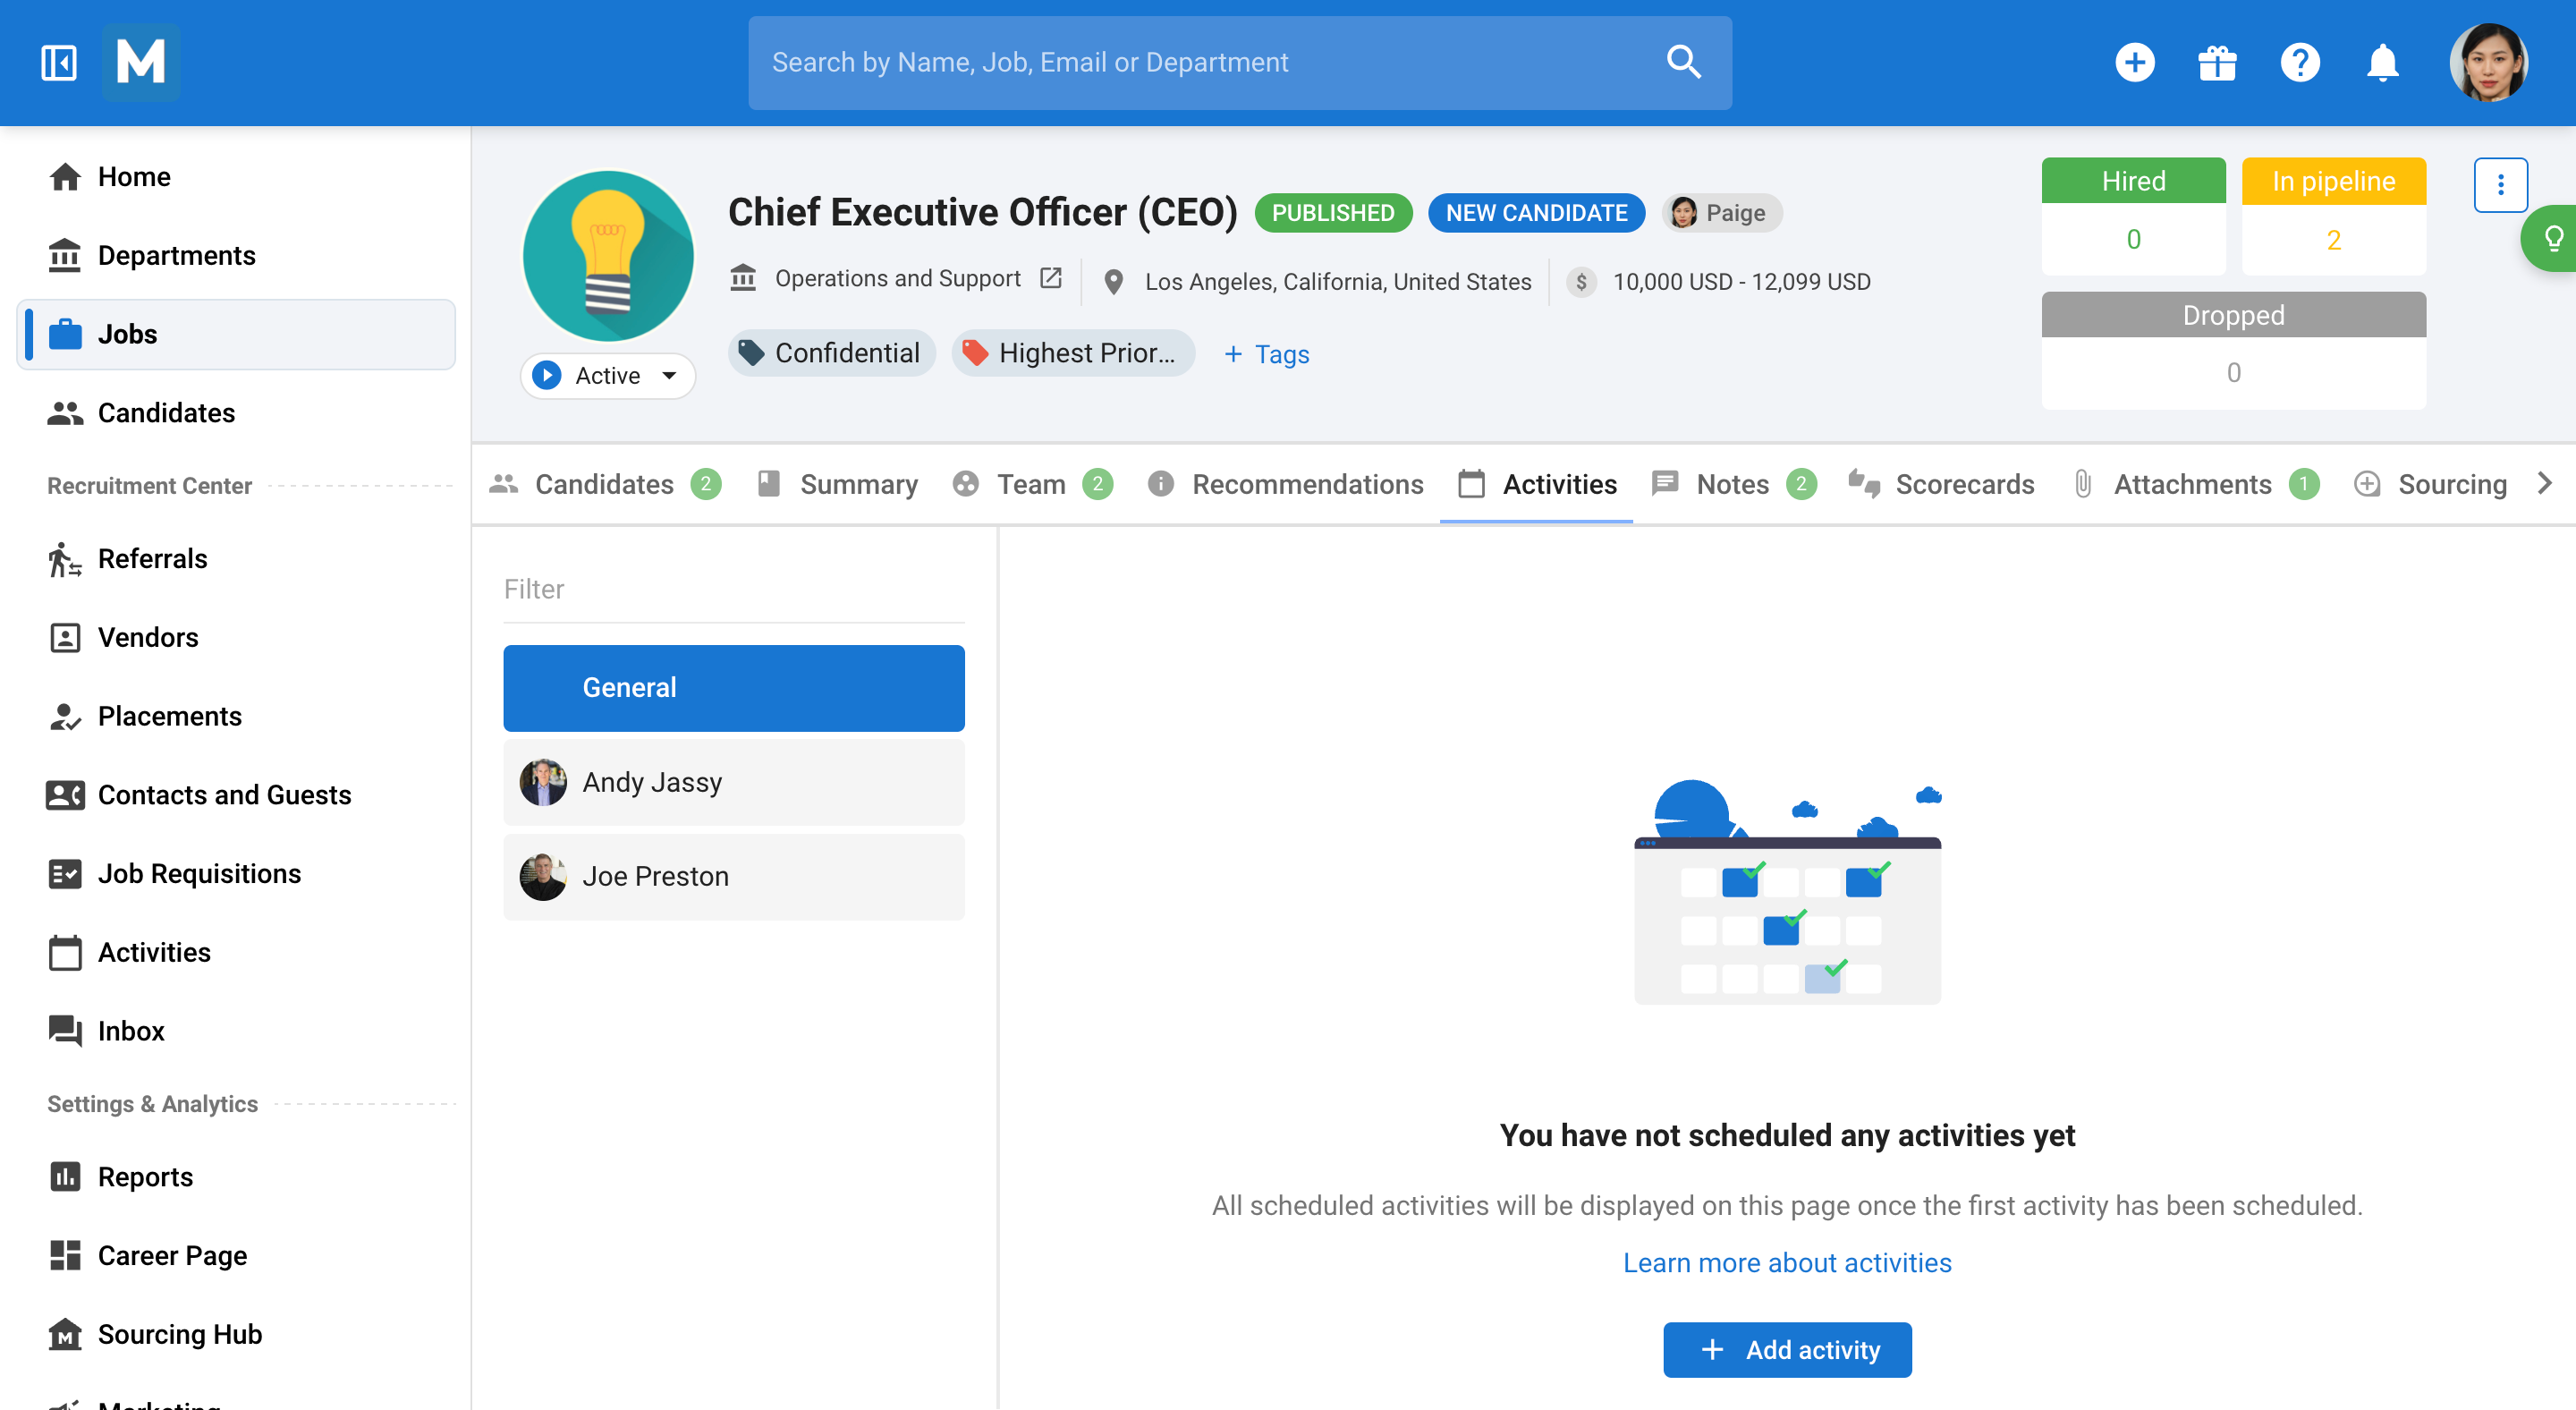
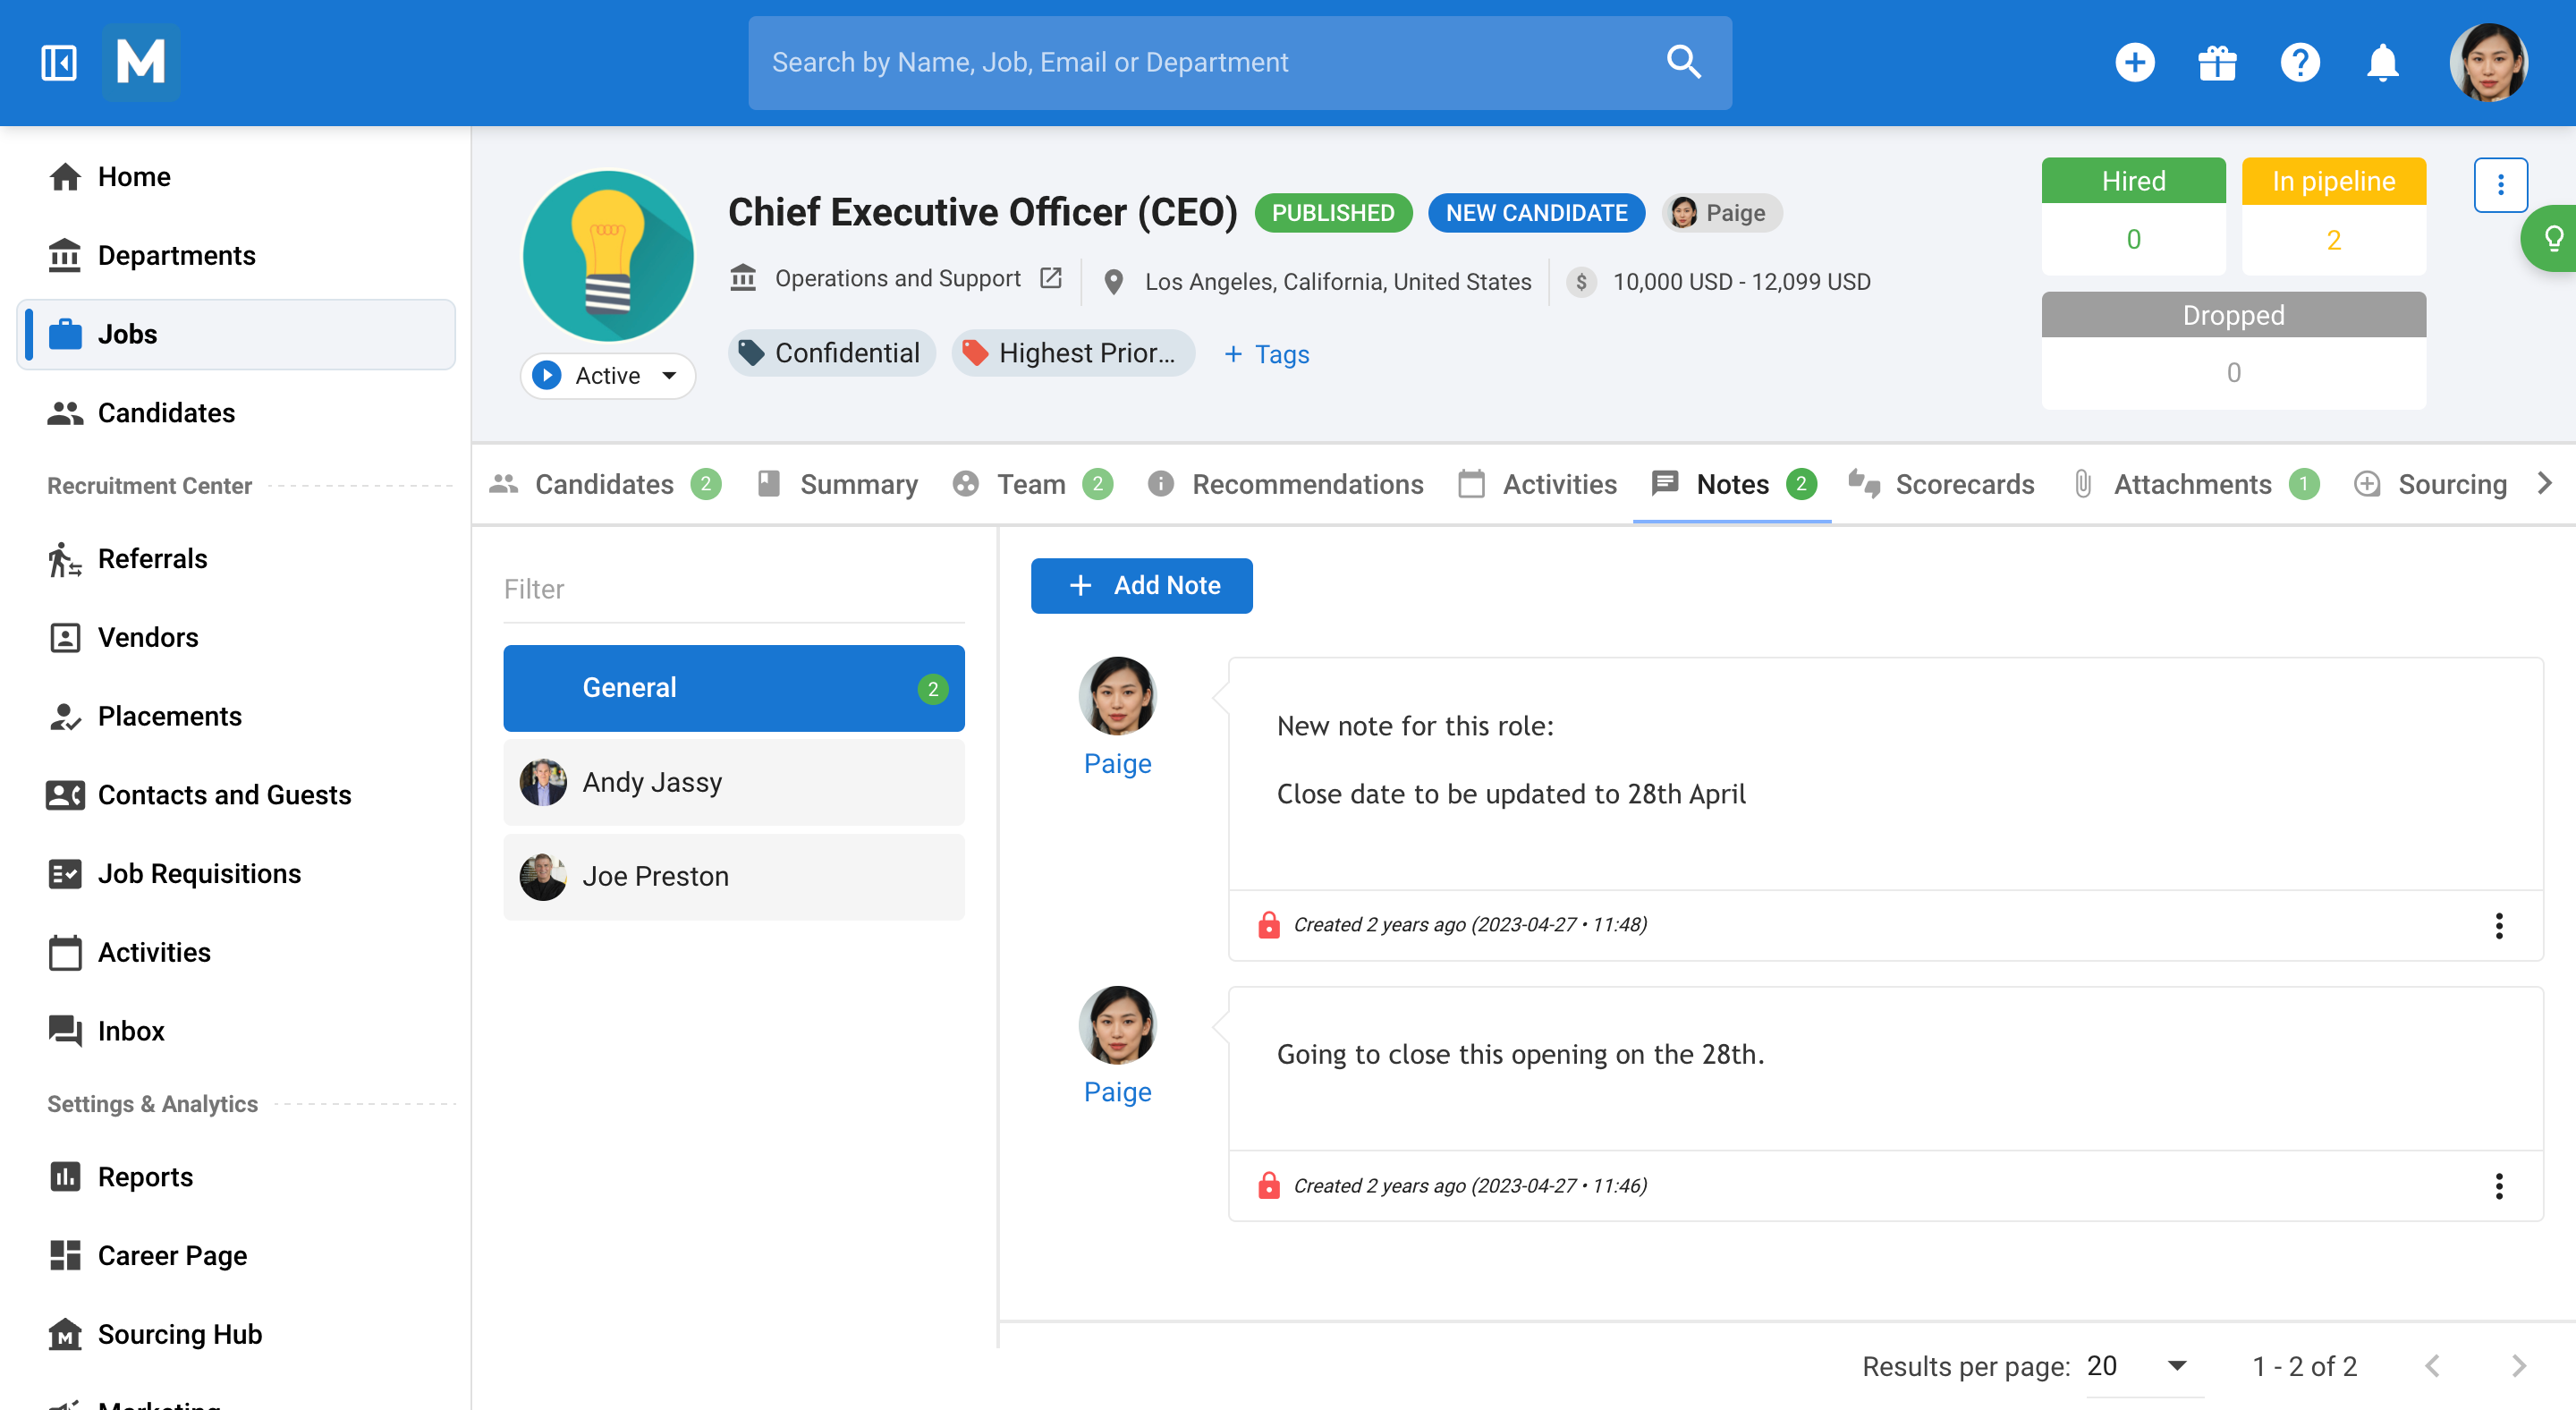
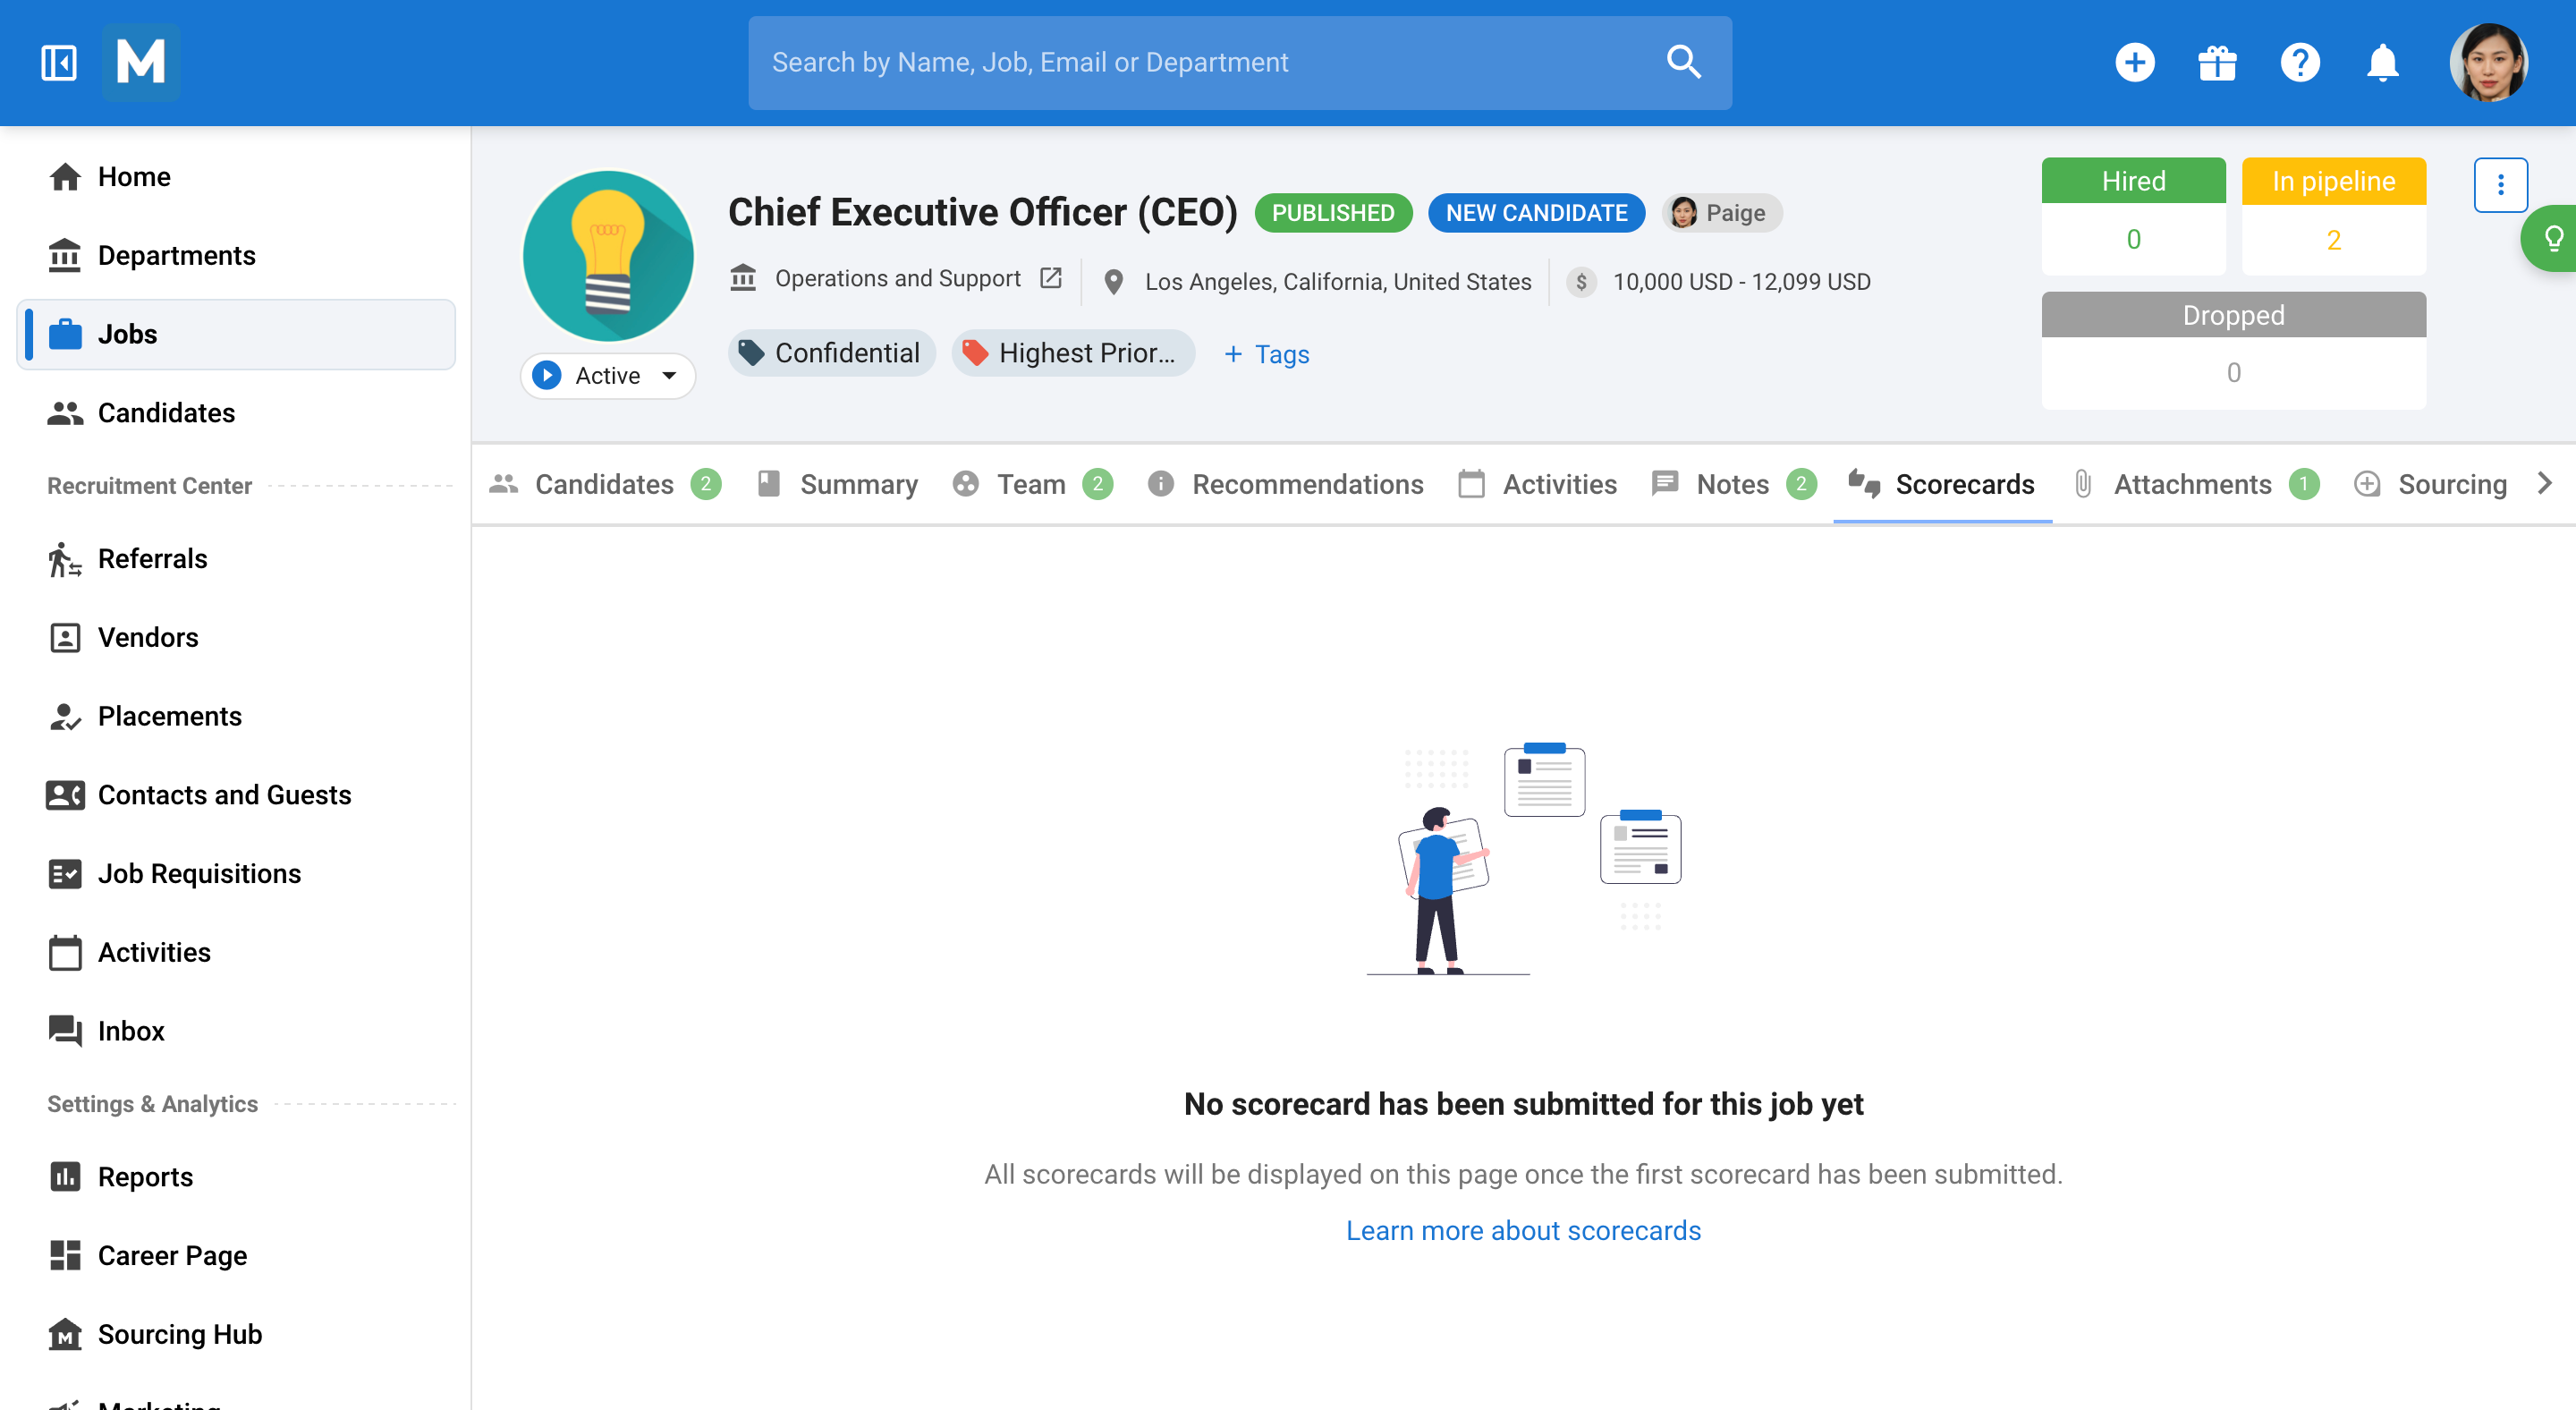
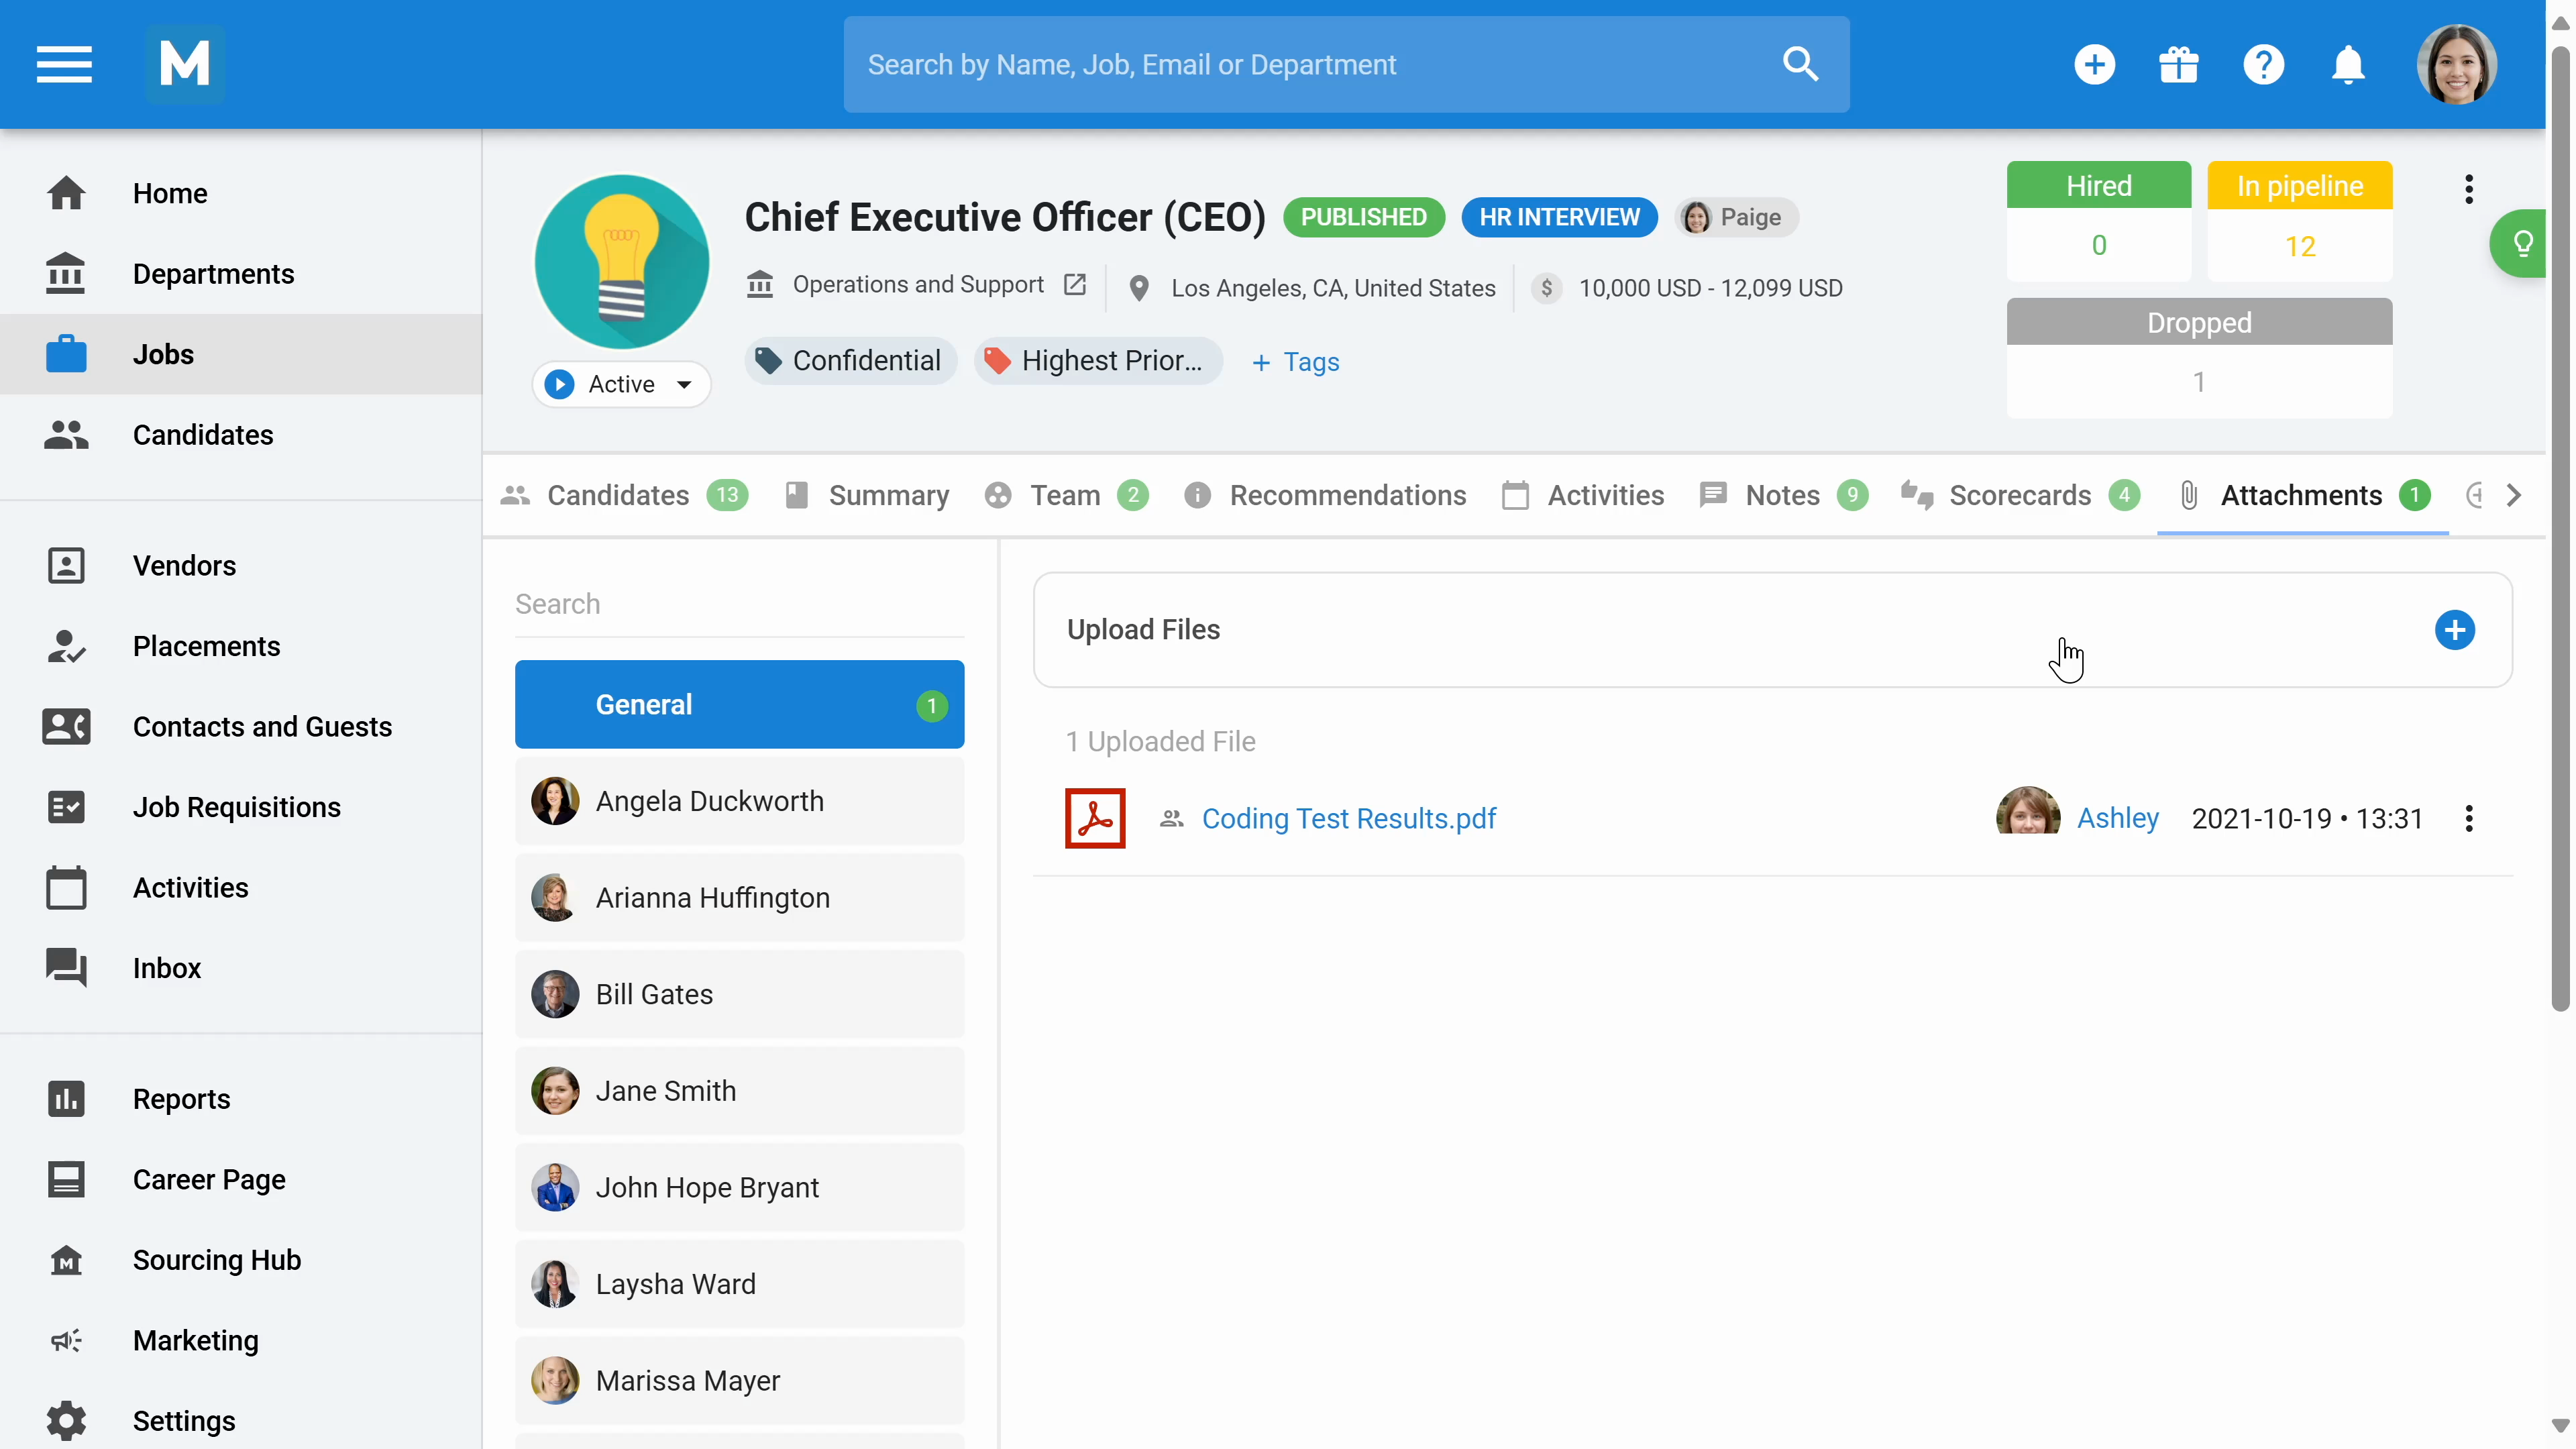
Step 17: Review all activities, notes, scorecards, and attachments related to the job in their respective sections.
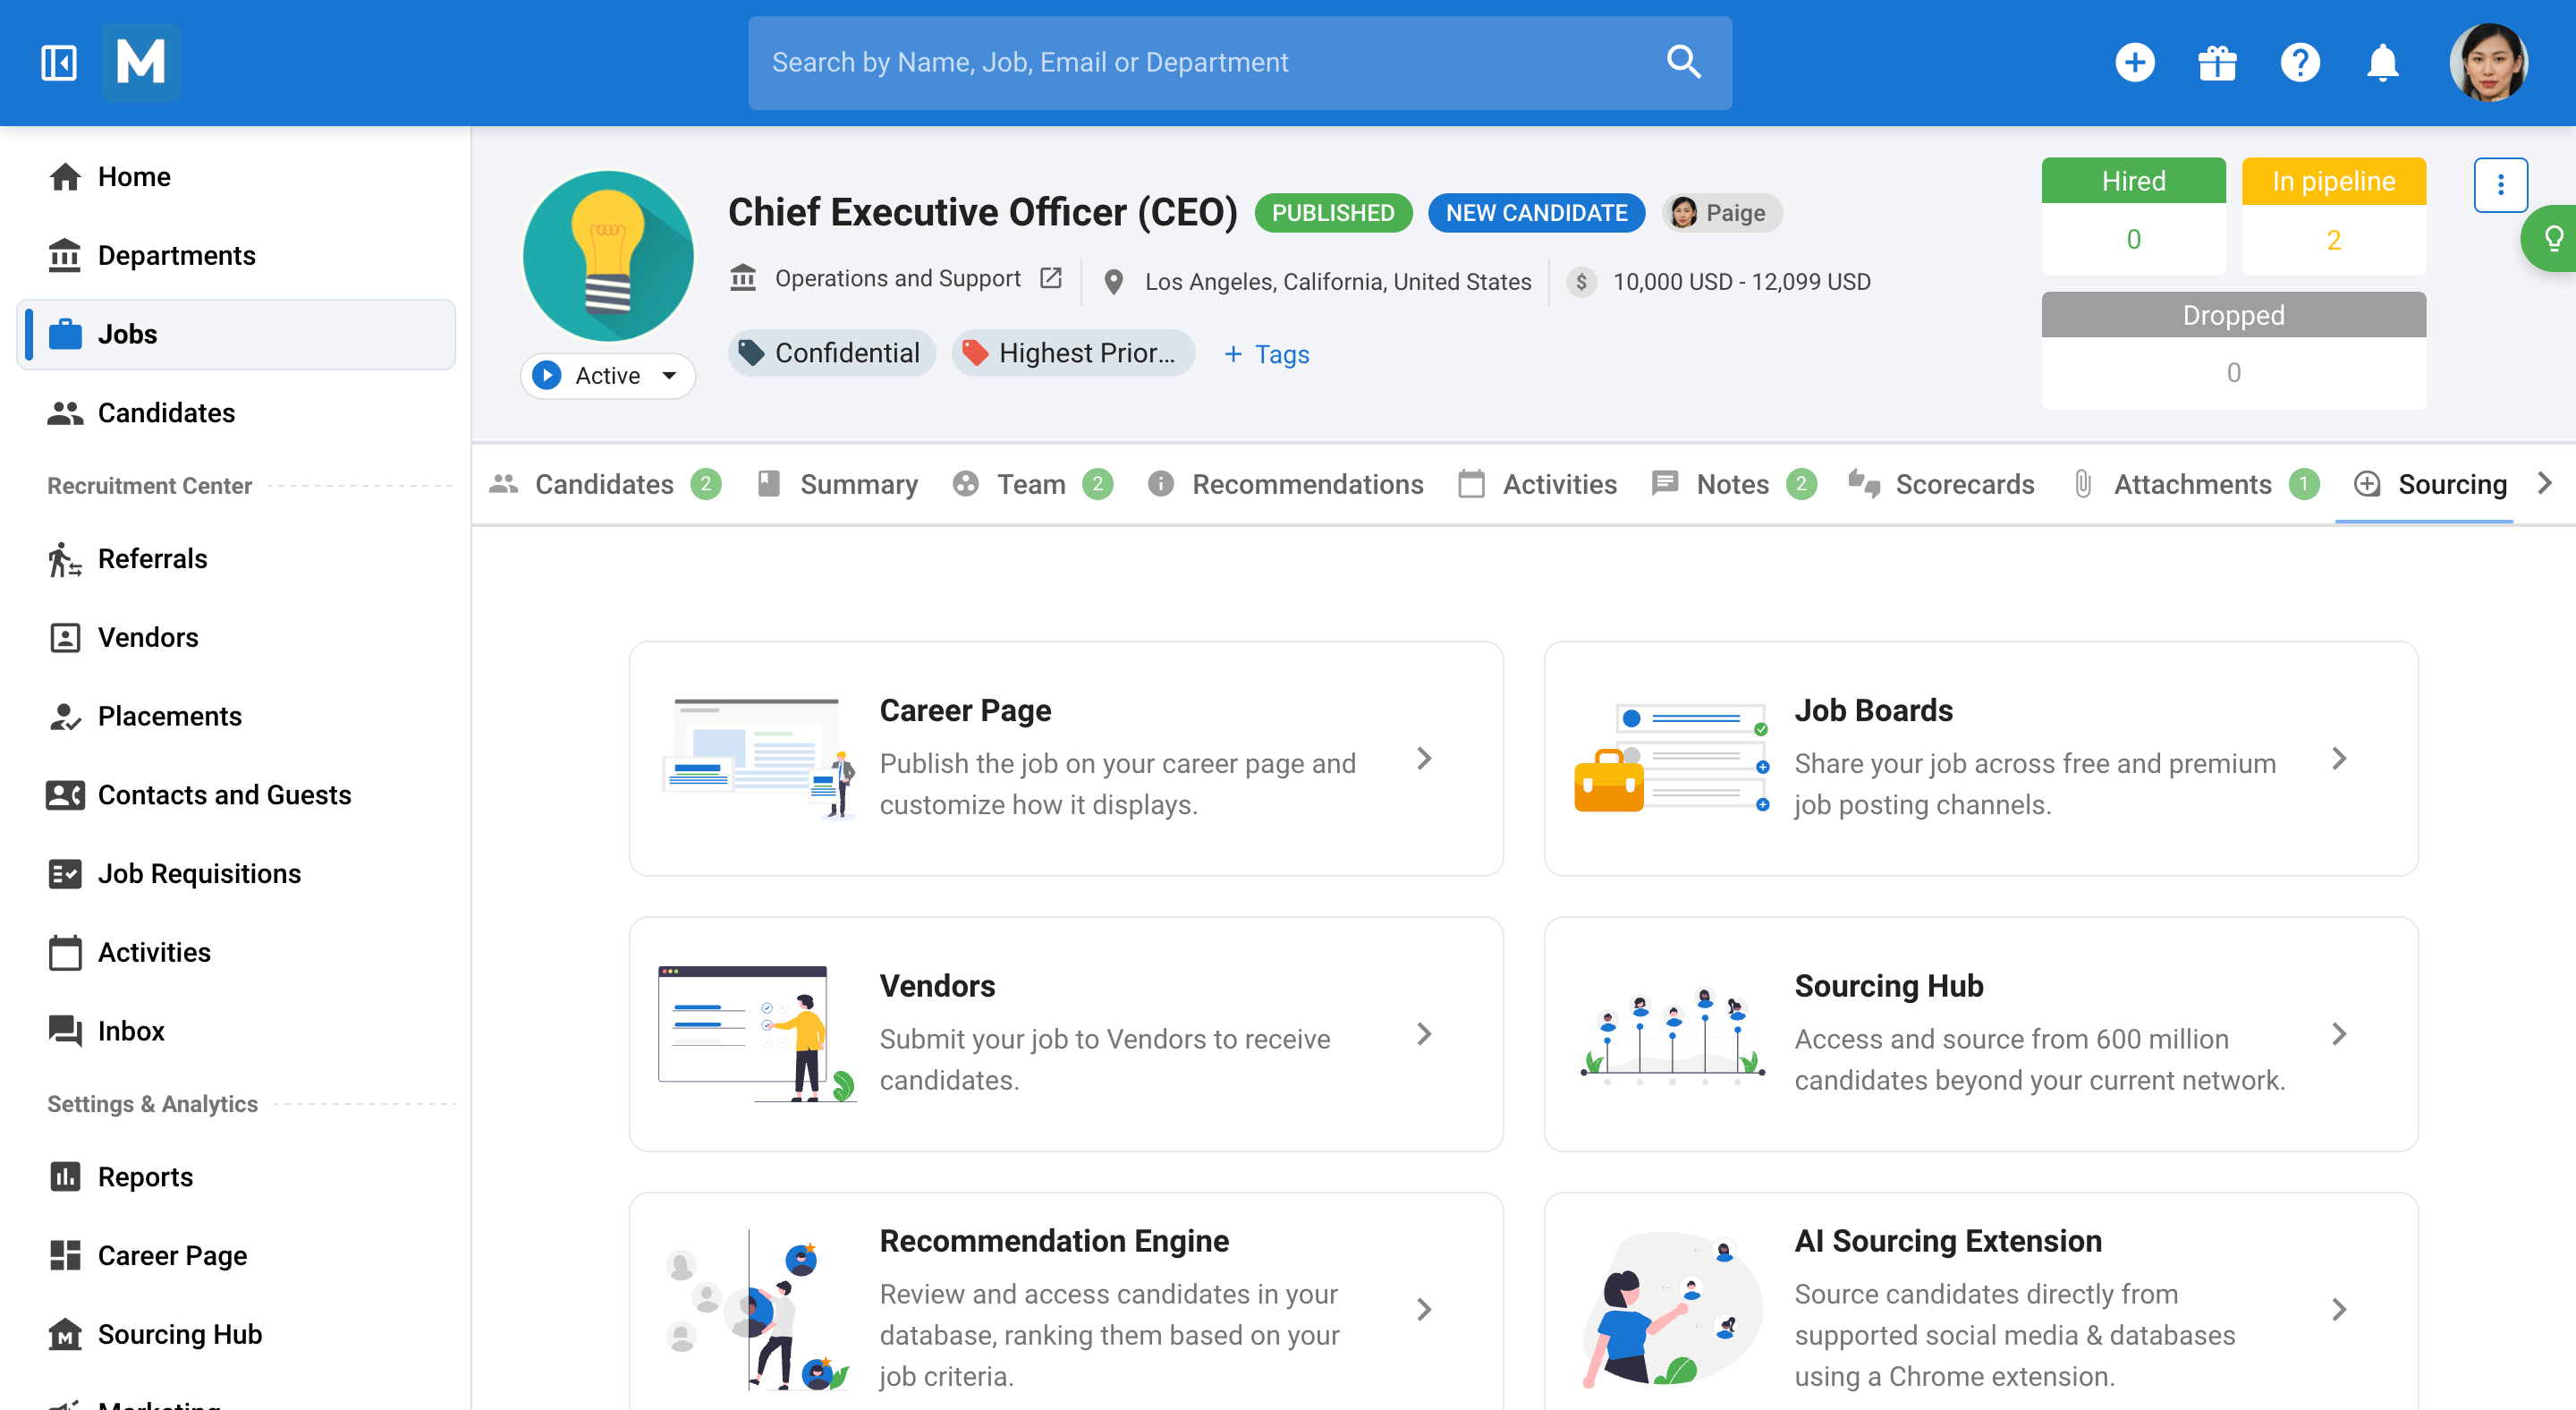
Step 18: In the sourcing section, find candidates for the job using various options like career page, job boards, vendors, social media, sourcing hub, and recommendation engine.
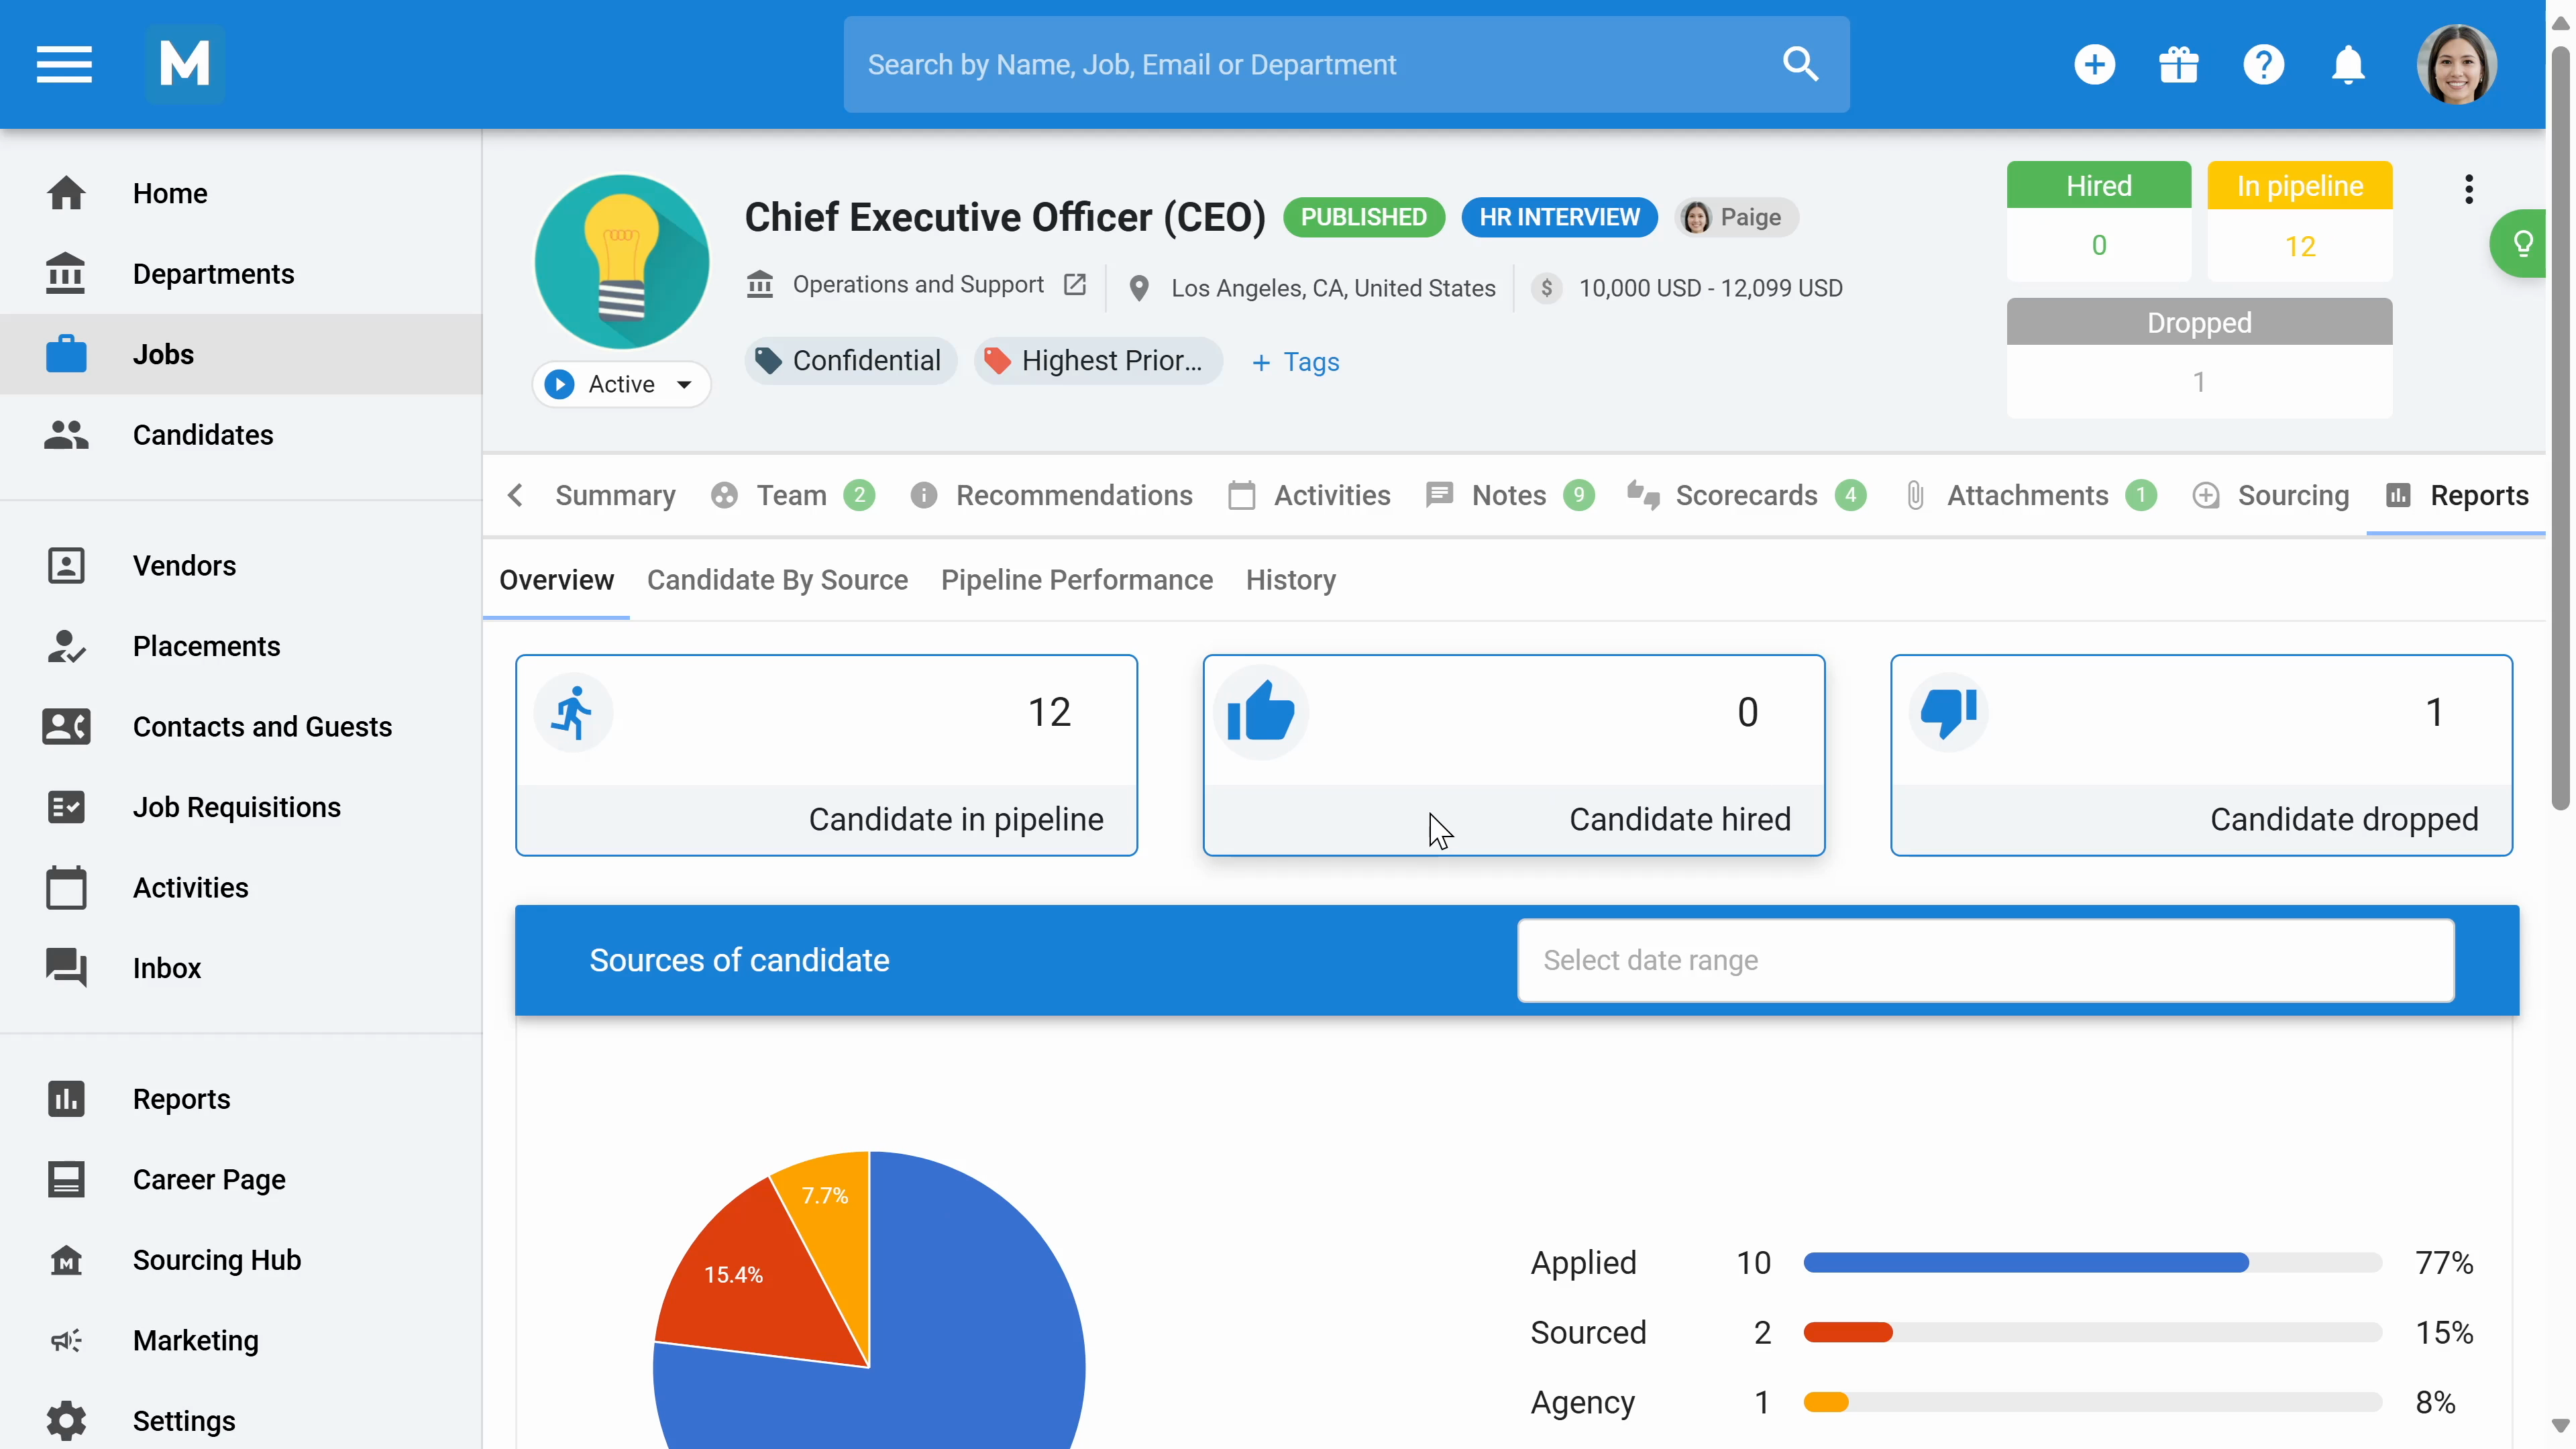
Step 19: Review the performance of each job in its own reports section, where you'll find analytics related to the job.